Showing posts with label Window card. Show all posts

Friday, November 24, 2023

Home December Journal Tutorial

Hello friends! It is time to share one of my favorite projects each year. My December journal, inspired by Ali Edwards concept of documenting the month of December. I have been doing this since 2012, making this my twelfth December daily journal.

Please note: this post has affiliate links, for which I receive a small percentage of sales generated by the link, at no extra cost to you.


Layers of ink - December Daily Journal Tutorial by Anna-Karin Evaldsson.

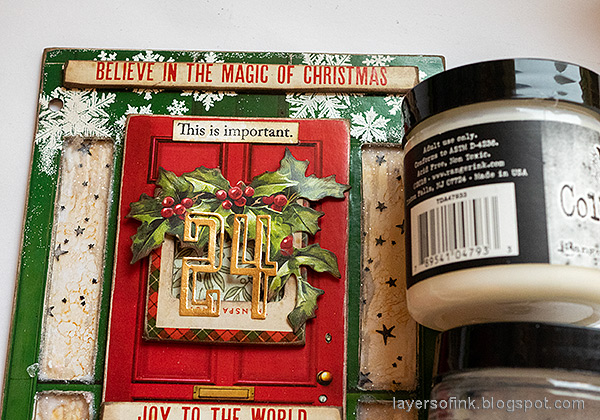
This year I made a journal celebrating Christmas at home and using traditional Christmas colors. The book is about 6.5 x 5 in and my December Countdown Tags (which I will share soon) will also go into it. The cover is a window from Tim Holtz idea-ology Baseboards and Transparencies, with an added red door on top. 

Layers of ink - December Daily Journal Tutorial by Anna-Karin Evaldsson. Use ideaology and Sizzix mat board.

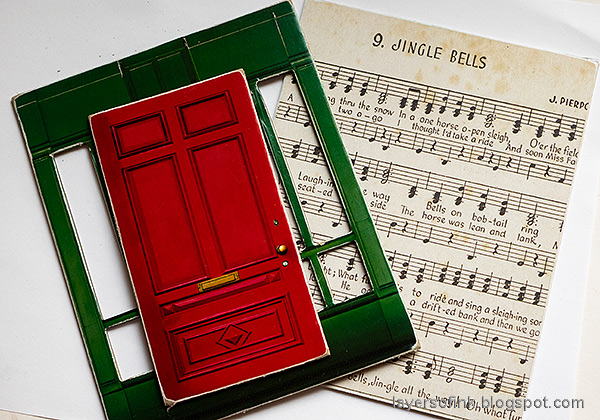
These are the pieces used for the cover. The back is a Sizzix Little Sizzles Mat Board cut into the same size as the green window.

Layers of ink - December Daily Journal Tutorial by Anna-Karin Evaldsson.

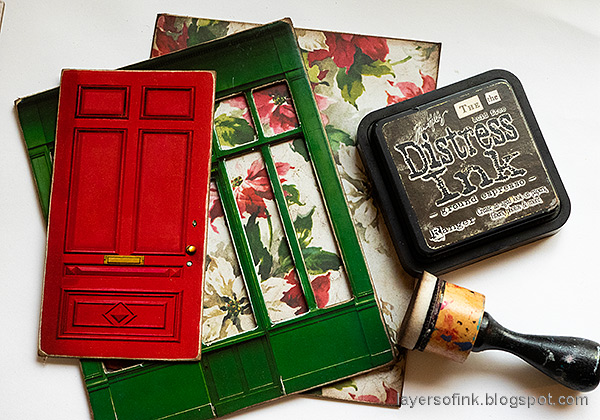
The mat board was covered with Tim Holtz Christmas Backdrops paper. Sand the edges.

Layers of ink - December Daily Journal Tutorial by Anna-Karin Evaldsson. Ink with Ground Espresso.

Ink the edges with brown ink.

Layers of ink - December Daily Journal Tutorial by Anna-Karin Evaldsson. Emboss with white powder.

White emboss snowflakes at the top of the door. As you can see, I turned the baseboard piece around because I wanted the larger windows at the top.

Layers of ink - December Daily Journal Tutorial by Anna-Karin Evaldsson. color with alcohol ink.

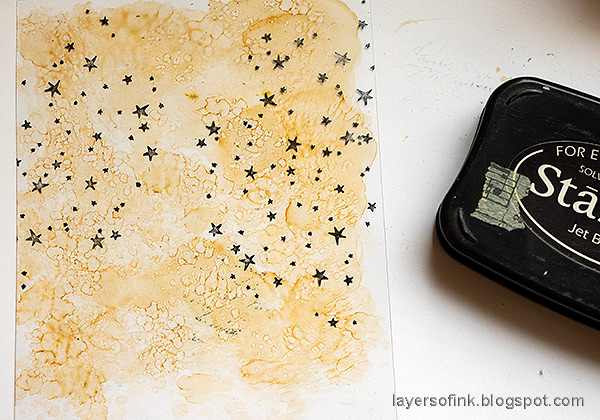
Color Simon Says Stamp Acetate with alcohol ink.

Layers of ink - December Daily Journal Tutorial by Anna-Karin Evaldsson.

Stamp stars from Jolly Holiday with black Stazon ink.

Layers of ink - December Daily Journal Tutorial by Anna-Karin Evaldsson.

Sand and ink the edges of various ephemera and baseboard pieces. I also stamped sentiments and cut into strips. The gold letters were die cut with Tim Holtz Emporium dies from gold kraft stock paper. 

Layers of ink - December Daily Journal Tutorial by Anna-Karin Evaldsson.

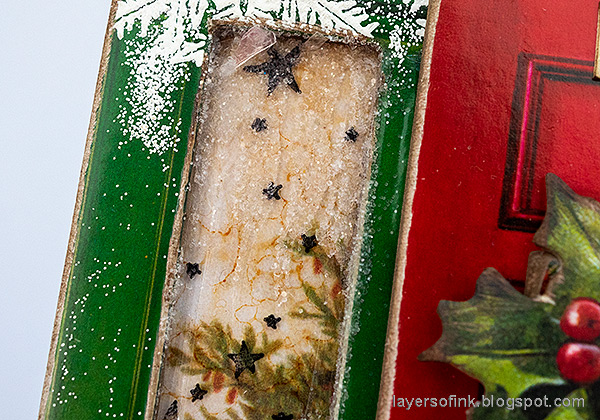
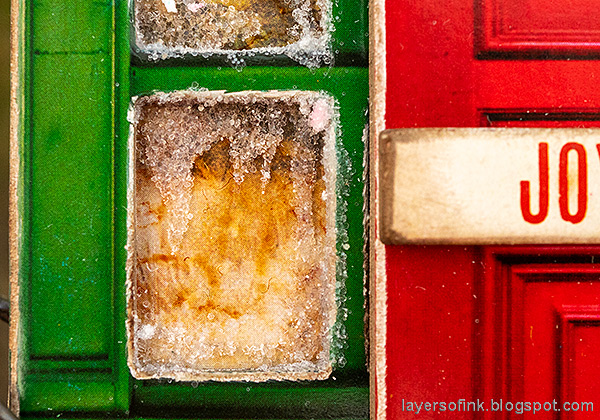
Glue the door to the background with matte medium. Apply some matte medium to the windows and sprinkle Rock Candy glitter on top, to create frost.

Layers of ink - December Daily Journal Tutorial by Anna-Karin Evaldsson. Stamp with Simon Says Stamp Ledger Paper.

I used a mix of my favorite papers and stamped some of them with Simon Says Stamp Ledger Paper Background and Red Geranium ink.

Layers of ink - December Daily Journal Tutorial by Anna-Karin Evaldsson.

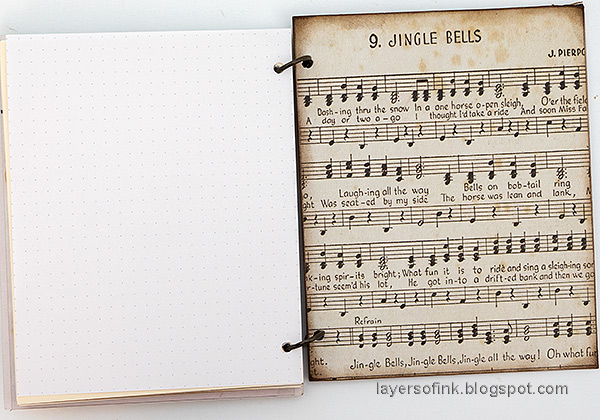
Punch holes with a Crop-a-dile and bind with rings.

Layers of ink - December Daily Journal Tutorial by Anna-Karin Evaldsson.

I sanded the edges of quote strips from Tim's Christmas Baseboards & Transparencies. Ink and glue to the background.

Layers of ink - December Daily Journal Tutorial by Anna-Karin Evaldsson.

Glue ephemera here and there.

Layers of ink - December Daily Journal Tutorial by Anna-Karin Evaldsson.

I used 24 as a number instead of 25, since the main family celebration during Christmas in Sweden takes place on Christmas Eve.

Layers of ink - December Daily Journal Tutorial by Anna-Karin Evaldsson.

Apply glue to the candy sticks and cover with Rock Candy glitter. Apply Texture Paste to the base of the book as snow, sprinkle with Rock Candy.

Layers of ink - December Daily Journal Tutorial by Anna-Karin Evaldsson.

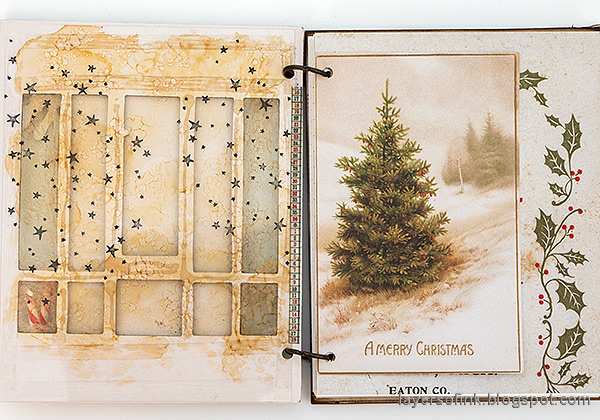
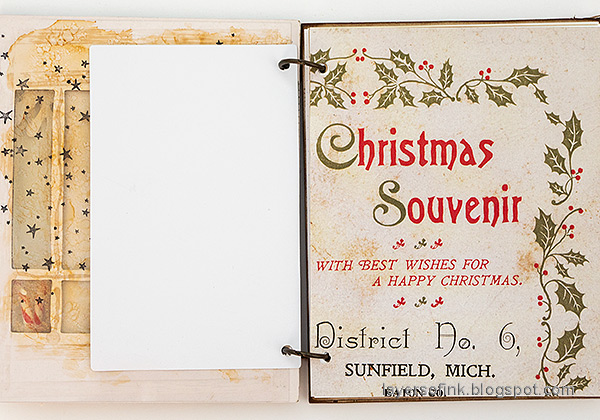
The first page in the journal is a card from Christmas ephemera and the second page is a piece of Christmas Backdrops. I wanted the tree and the holly to show through the windows.

Layers of ink - December Daily Journal Tutorial by Anna-Karin Evaldsson. Add ice to the windows with glitter.

Here you can see that the tree is visible through the window to the left. 

Layers of ink - December Daily Journal Tutorial by Anna-Karin Evaldsson.

I will add a photo to the panel to the right.

Layers of ink - December Daily Journal Tutorial by Anna-Karin Evaldsson.

Using a mix of papers adds interest and I am also planning to write with different types of pens. My December Countdown tags will be added to the pages, and some photos too, although I do not use that many photos in my December Journals. The focus is on the text.

Layers of ink - December Daily Journal Tutorial by Anna-Karin Evaldsson.

Matte medium and Rock Candy is a fun way of adding frost to windows.

Layers of ink - December Daily Journal Tutorial by Anna-Karin Evaldsson.

I might add more pages to the journal if needed and in that case it is possible to change to bigger binder rings. These are Tim Holtz Mini Book Rings.

Layers of ink - December Daily Journal Tutorial by Anna-Karin Evaldsson.

I am looking forward to filling my journal with Christmas memories.

You can find my previous Christmas Daily journals here:


Thank you for visiting my blog! 

Happy crafting!

Anna-Karin

Supplies:

* Please note: the links are affiliate links, for which I receive a small percentage of sales generated by the link, at no extra cost to you.


Monday, January 11, 2021

Forest Shaker Card Tutorial

Hi friends! I hope you are well and that you had a good weekend. We got quite a bit of snow and the boys are happy. Today I have a shaker card to share with you.


We have a Shake It Up theme at the Simon Says Stamp Monday Challenge Blog this week. I am looking forward to seeing all the projects. Don't miss the fun shaker project by January guest designer Anita Rao


Layers of ink - Forest Shaker Card Tutorial by Anna-Karin Evaldsson.

One of the first cards that I made was a shaker card and I still love making them. This  week, I made a forest themed shaker. By changing the colors you can easily change it into a winter scene instead, but I felt like using shades of green today. Shaker cards are such fun and will always bring a smile to the recipient. 

Layers of ink - Forest Shaker Card Tutorial by Anna-Karin Evaldsson. Die cut the pine tree collage.


Layers of ink - Forest Shaker Card Tutorial by Anna-Karin Evaldsson.

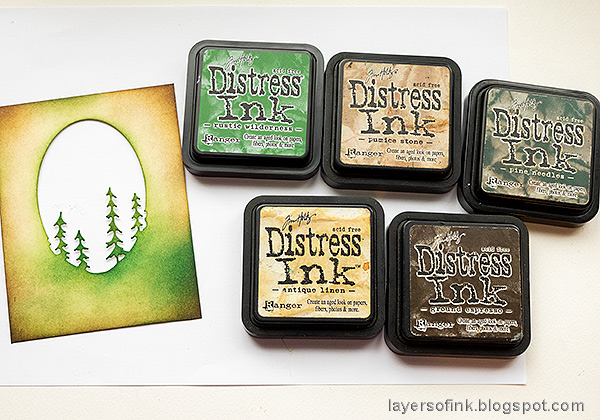
Ink the paper with Distress Inks using an ink-blending tool.

Layers of ink - Forest Shaker Card Tutorial by Anna-Karin Evaldsson.

Die cut six pine trees with the Poppy Stamp Evergreen Trio set and ink with Rustic Wilderness and Pine Needles.

Layers of ink - Forest Shaker Card Tutorial by Anna-Karin Evaldsson. Stamp with Simon Says Stamp Old Letter Background.

Stamp the background with the SSS Old Letter Background stamp and Green Leaf ink. This gives a nice texture to the background.

Layers of ink - Forest Shaker Card Tutorial by Anna-Karin Evaldsson. Fill the shaker.

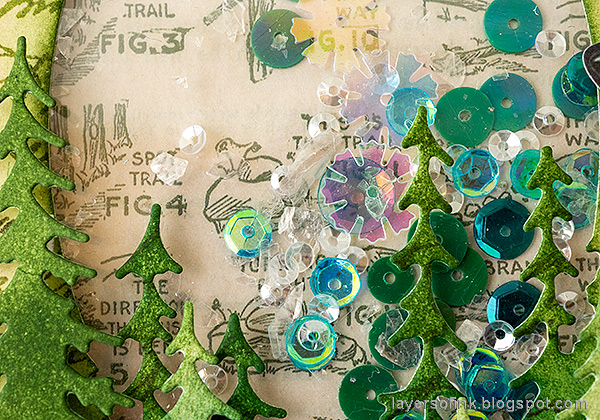
Create a shaker with two layers of Clearly For Art Modeling film and foam tape and fill it with sequins and some mica flakes

Layers of ink - Forest Shaker Card Tutorial by Anna-Karin Evaldsson.

The main sentiment is a Theories Quote Chip which was inked with Rustic Wilderness and coated with a layer of Glossy Accents.

Layers of ink - Forest Shaker Card Tutorial by Anna-Karin Evaldsson.

The second sentiment was stamped with one of the stamps from Anna's Flowers and the Green Leaf ink.

Layers of ink - Forest Shaker Card Tutorial by Anna-Karin Evaldsson.

I also used two butterflies from Tim Holtz Field Notes Snippets.

Layers of ink - Forest Shaker Card Tutorial by Anna-Karin Evaldsson. Tim Holtz Field Notes ephemera.

The shaker was backed with a paper from Tim's Field Notes Ephemera pack, which had wood themed illustrations.

Layers of ink - Forest Shaker Card Tutorial by Anna-Karin Evaldsson.

I like the combination of Rustic Wilderness and Pine Tree Distress Ink. Mount two of the trees with foam tape.

Layers of ink - Forest Shaker Card Tutorial by Anna-Karin Evaldsson.

Shaker cards are a little hard to photograph because of all the moving and shiny parts. There are a couple of snowflake sequins in the mix, but they might also be flowers.

Layers of ink - Forest Shaker Card Tutorial by Anna-Karin Evaldsson.

I like adding mica flakes to shakers and since they are usually smaller than sequins, they mix well together.

Layers of ink - Forest Shaker Card Tutorial by Anna-Karin Evaldsson.


I hope you will join us this week in our Shake It Up challenge. You have a chance to win a $25 gift voucher to do some fun shopping at Simon Says Stamp. You have until Monday 8am Ohio time. 1pm UK time, 2 pm CET to join in.

Don't forget to follow Simon Says Stamp on Instagram, they post great stuff daily. 


Do you use Instagram? If so please add #sssmchallenge so we can see your entries there too.


Thank you so much for taking the time to stop by here today! 

Happy crafting!

Anna-Karin

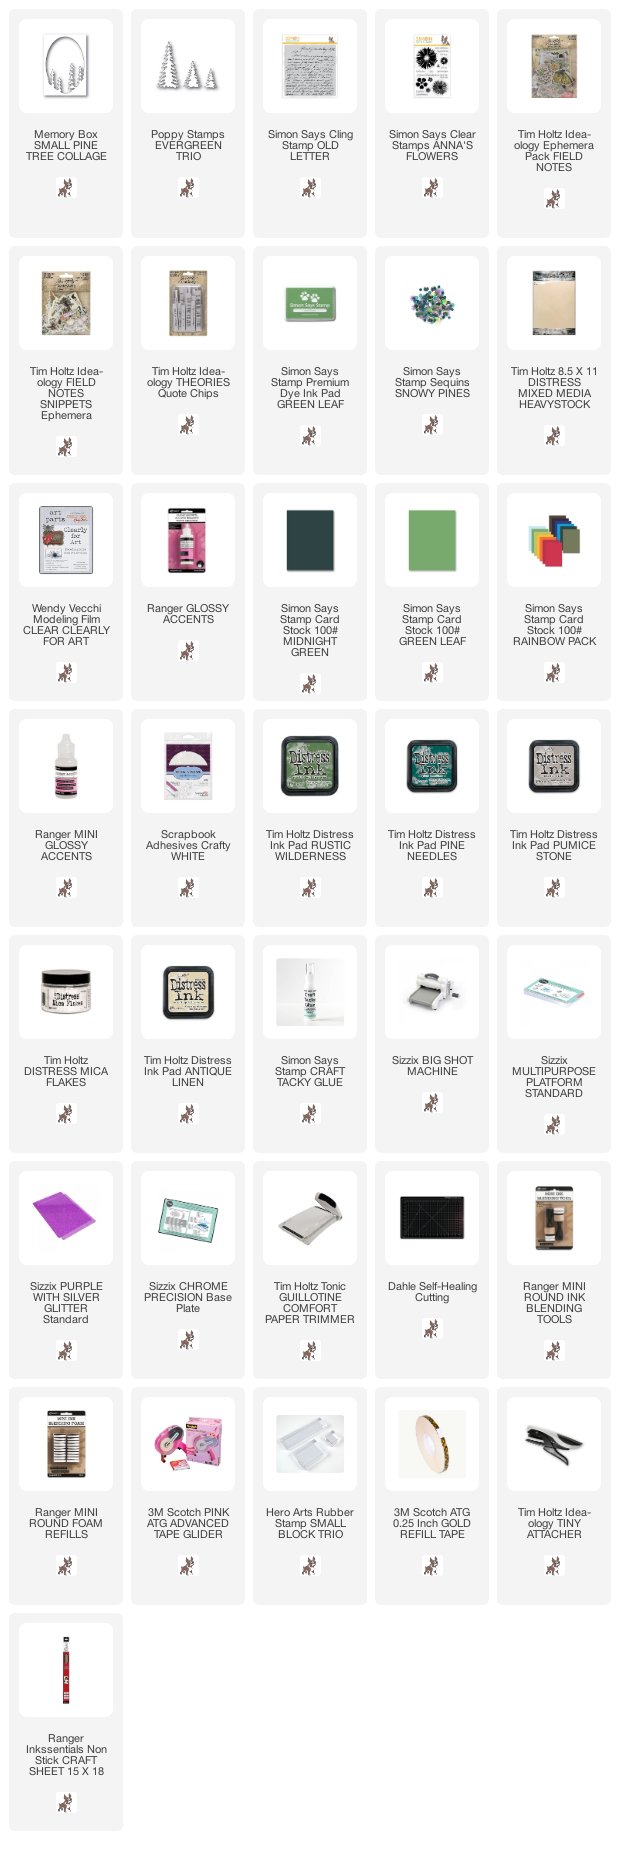
Supplies:

* Please note: the links are affiliate links, for which I receive a small percentage of sales generated by the link, at no extra cost to you.

Monday, November 16, 2020

Winter House Easel Card Tutorial

Hello friends! I hope you had a good weekend! Today I have a winter house easel card to share with you, which also doubles as Christmas decor, even though it folds flat. 


At the Simon Says Stamp Monday Challenge Blog we have a Happy Holidays theme. Perfect for this time of the year. I think I did my last autumn project this weekend and will now move on to more wintery projects. Don't miss our November guest designer's beautiful project, at Laura Cassina aka elaborando on instagram.

Layers of ink - Winter House Easel Card Tutorial by Anna-Karin Evaldsson.

I love interactive and dimensional cards and this winter house easel pop up was so fun to make. Another thing which is a favorite of mine is to create snow in different ways and here I used glitter paper, glitter gel, sequins and texture paste. The base for the house is the wonderful Poppy Stamps Winter House Pop Up Easel set.


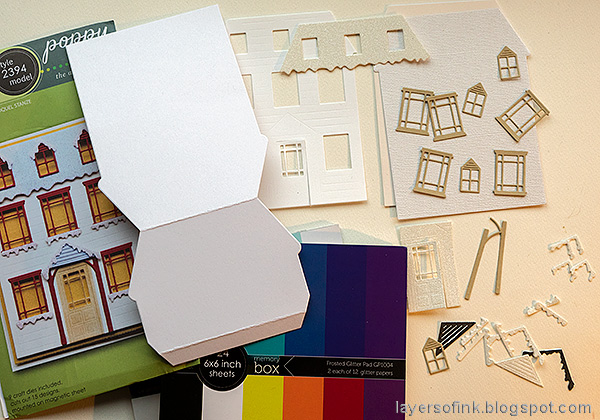
Layers of ink - Winter House Easel Card Tutorial by Anna-Karin Evaldsson. Die cut the Poppy Stamp Winter Easel Pop Up Card.

The Winter House Pop Up Easel die set has 15 designs and the dies come on a magnetic sheet, making them easy to store and keep together. I die cut the base from heavy white paper, the main house from Neenah cardstock and the solid house from SSS glimmery cardstock and cream cardstock. The roof, door and snow was die cut from Memory Box Frosted Glitter pad and the windows from SSS khaki cardstock. If you have a Sizzix Big Shot or Vagabond, you need to use the Extended Multipurpose Platform and Extended Cutting Pad to die the base, since it is slightly taller than the ordinary Multipurpose Platform.

Layers of ink - Winter House Easel Card Tutorial by Anna-Karin Evaldsson. Stamp with SSS Wood Planks background stamp.

The house was stamped with the SSS Wood Planks Background Stamp and Distress Oxide Antique Linen ink.

Layers of ink - Winter House Easel Card Tutorial by Anna-Karin Evaldsson.

I placed the house back into the die and an embossing ball tool to define and increase the dry embossed pattern. I did the same on the larger window. The windows were very lightly inked around the edges.

Layers of ink - Winter House Easel Card Tutorial by Anna-Karin Evaldsson.

I wanted a warm welcoming light in some of the windows and cut a piece of modeling film. It was colored with Butterscotch and Latte alcohol ink.


Layers of ink - Winter House Easel Card Tutorial by Anna-Karin Evaldsson.

Die cut three trees with the Evergreen Trio die, from white Frosted Glitter Paper. Add a tiny bit of Texture Paste to the branches, for more snow.


Layers of ink - Winter House Easel Card Tutorial by Anna-Karin Evaldsson.

Die cut the Snowy Merry Christmas and the three snowmen from the Snowmen Snowglobe from the white Frosted Glitter Paper. Die cut hats for the snowmen from the brown paper. Add a litte texture paste to the word and the hats and Moon Dust Stickles to the hats.

Layers of ink - Winter House Easel Card Tutorial by Anna-Karin Evaldsson.

Add a little Moon Dust Stickles to the window frames and texture paste to the roof and the small roof above the door.

Layers of ink - Winter House Easel Card Tutorial by Anna-Karin Evaldsson.

Glue all the details to the house and then adhere the modeling film to the back. Adhere with foam tape to the glimmery cardstock solid house, which had already been taped to the cream solid house, for stability. The roof was adhered with another layer of foam tape and so were the snowmen and the small roof above the door. The door is left slightly ajar.

Layers of ink - Winter House Easel Card Tutorial by Anna-Karin Evaldsson.

Add double-sided tape (I used Scor-Tape) to the flap of the base piece and then adhere the house to the flap, so that it can fold up as you see here. 

Layers of ink - Winter House Easel Card Tutorial by Anna-Karin Evaldsson.

The sentiment was glued to a piece of the brown cardstock, with glimmery white paper underneath. It functions as a stopper for the easel, to hold it open.

Layers of ink - Winter House Easel Card Tutorial by Anna-Karin Evaldsson.

This is the way the card looks open and there is space for a handwritten message too.

Layers of ink - Winter House Easel Card by Anna-Karin Evaldsson.

The card folds flat and you can make it even flatter if you want too, by skipping the foam tape.

Layers of ink - Winter House Easel Card Tutorial by Anna-Karin Evaldsson. Glittery snow.

The colored dots you see here come from the Moon Dust Stickles. I added some of it to the glitter paper. The combination of glitter paper, Stickles, shiny sequins and the matte texture paste is nice and adds interest. You don't need to stick to one way of creating snow.

Layers of ink - Winter House Easel Card Tutorial by Anna-Karin Evaldsson.

If light comes from the side of the house, the windows look like they shine.


Layers of ink - Winter House Easel Card Tutorial by Anna-Karin Evaldsson.

I thought there was a little too much Latte ink on some of the windows and removed it with Alcohol Blending Solution.


Layers of ink - Winter House Easel Card Tutorial by Anna-Karin Evaldsson.

The Frosted Glitter Paper is beautiful and perfect for winter projects. It die cuts beautiful and doesn't shed any glitter at all. I saw that the snowman's nose fell off while I photographed the card. I will give him a new one.

Layers of ink - Winter House Easel Card Tutorial by Anna-Karin Evaldsson.


The door is left ajar to give a friendly and inviting look to the house.

Layers of ink - Winter House Easel Card Tutorial by Anna-Karin Evaldsson. Glittery snowmen.

I added tiny dots with a pen to the eyes of the snowmen, to make them look like the little pebbles we usually use as eyes. There is a left-over snow piece from the windows at the top of the hat.


Layers of ink - Winter House Easel Card Tutorial by Anna-Karin Evaldsson. Snowy entrance.

I like the little details, like the plank lines on the roof die cut. The number comes from a Clippings Sticker book.


Layers of ink - Winter House Easel Card Tutorial by Anna-Karin Evaldsson.

The little hearts were left-over from die cutting with the SSS Slimline Borders and Edges die.


Layers of ink - Winter House Easel Card Tutorial by Anna-Karin Evaldsson.

I hope you will join us this week in our Happy Holidays challenge. You have a chance to win a $25 gift voucher to do some fun shopping at Simon Says Stamp. You have until next Monday 8am Ohio time. 1pm UK time, 2 pm CET to join in.

Don't forget to follow Simon Says Stamp on Instagram, they post great stuff daily. 


Do you use Instagram? If so please add #sssmchallenge so we can see your entries there too.


Thank you so much for stopping by here today! 

Happy crafting!

Anna-Karin

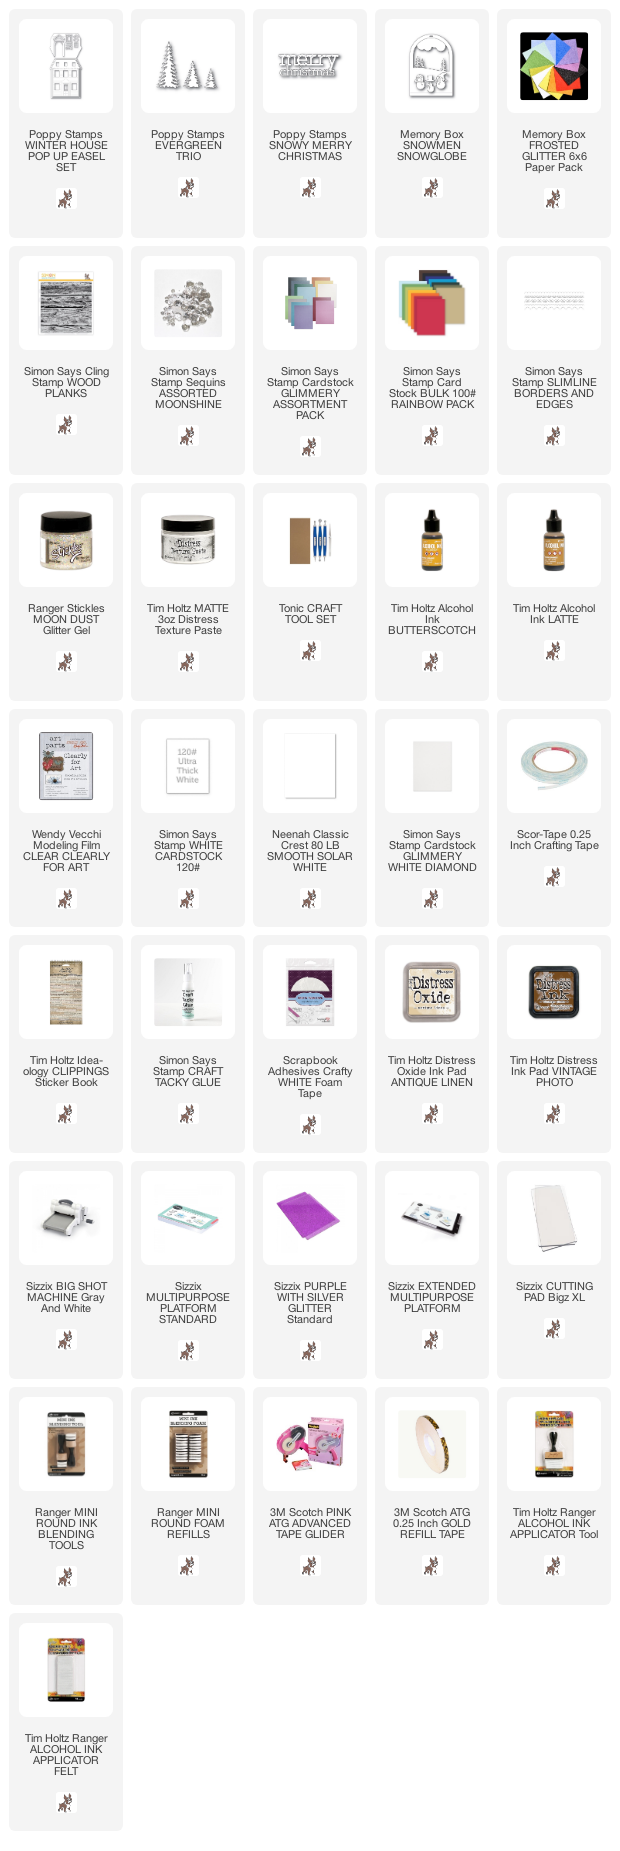
Supplies:

* Please note: the links are affiliate links, for which I receive a small percentage of sales generated by the link, at no extra cost to you.