Showing posts with label Faber-Castell. Show all posts

Thursday, April 27, 2023

Crocus in Pencil Tutorial

Hi friends! The spring flowers are flowering in the garden and we have some lovely purple crocus, which inspired this tag.

Please note: this post has affiliate links, for which I receive a small percentage of sales generated by the link, at no extra cost to you.

Layers of ink - Crocus in Pencil Tutorial by Anna-Karin Evaldsson.

My youngest son's favorite crocuses are the purple ones with bits of white and I tried to color these in a similar way. The flowers were colored with colored pencils, which acts as a resist when you color the rest of the tag with Distress Ink and Distress Oxide Ink.

Layers of ink - Crocus in Pencil Tutorial by Anna-Karin Evaldsson.

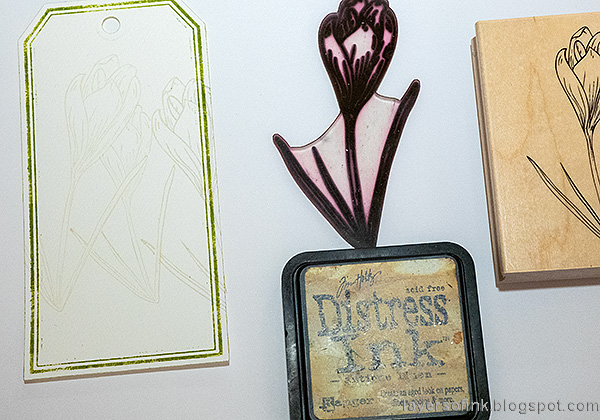
Die cut the tag from watercolor paper with Tim Holtz Framed Tags. Apply green Archival Ink to the die before die cutting, to get the frame.

Layers of ink - Crocus in Pencil Tutorial by Anna-Karin Evaldsson. Stamp with Simon Says Stamp Thoughtful Flowers.

Stamp the crocus from Simon Says Stamp Thoughtful Flowers with Antique Linen ink. Stamp it again on masking paper, cut out and place on the stamped flower. Stamp the smaller flower at the back with the Thoughtful Flower woodmounted stamp. Stamp the larger crocus one more time, to the right.

Layers of ink - Crocus in Pencil Tutorial by Anna-Karin Evaldsson.

Color the flowers with colored pencils. I used Faber-Castell Polychromos pencils. Add some grass. Blend with the white pencil and be sure to apply the white pencil to all the areas which you want to remain white. 

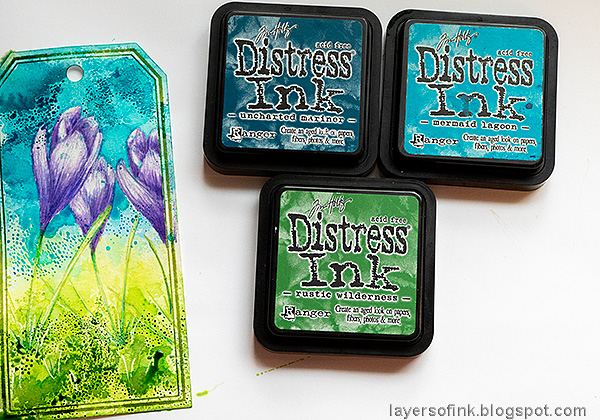
Layers of ink - Crocus in Pencil Tutorial by Anna-Karin Evaldsson. Color with Distress Ink.

Smear Distress Ink on a non-stick craft sheet and mist with water. Press the tag into the ink. The pencil will resist the ink.

Layers of ink - Crocus in Pencil Tutorial by Anna-Karin Evaldsson.

When the tag is dry, repeat the process, using darker ink. Repeat again until you are happy with the look.

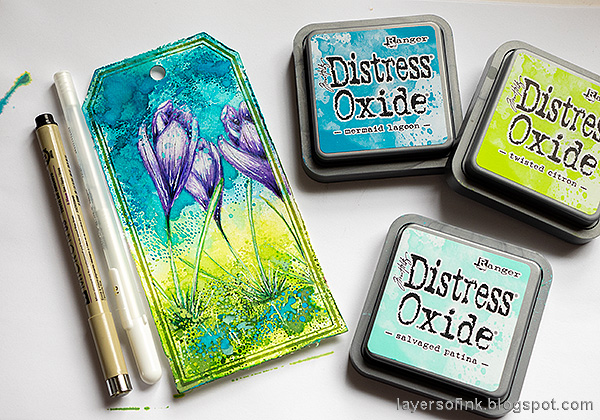
Layers of ink - Crocus in Pencil Tutorial by Anna-Karin Evaldsson. Color with Distress Oxide.

I added white highlights and lines to the flowers with a white gel pen and a few lines with a black pen. Next, I applied Distress Oxide Inks to the craft sheet and misted with water. Very lightly touch the paper to the ink to get Oxide Ink splotches here and there.

Layers of ink - Crocus in Pencil Tutorial by Anna-Karin Evaldsson.

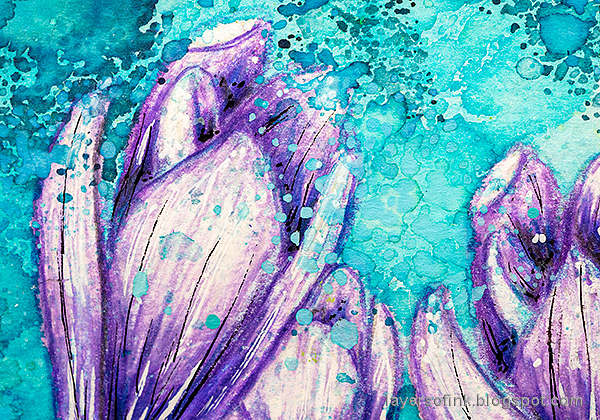
The Oxide Ink will remain on top of the flowers, adding these lovely splotches of blue.

Layers of ink - Crocus in Pencil Tutorial by Anna-Karin Evaldsson.

The white and black pen work adds interest to the flowers, but you can skip this step if you want to.

Layers of ink - Crocus in Pencil Tutorial by Anna-Karin Evaldsson.

Layers of ink - Crocus in Pencil Tutorial by Anna-Karin Evaldsson.

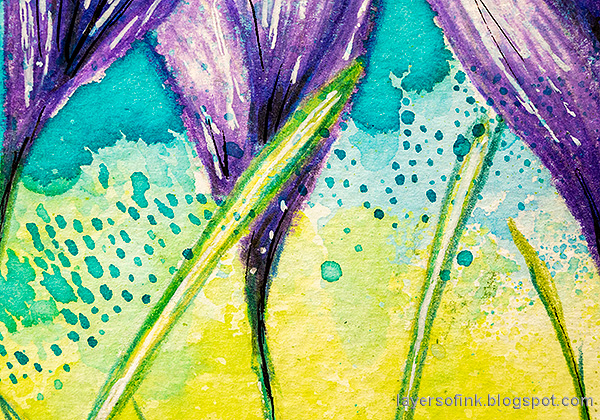
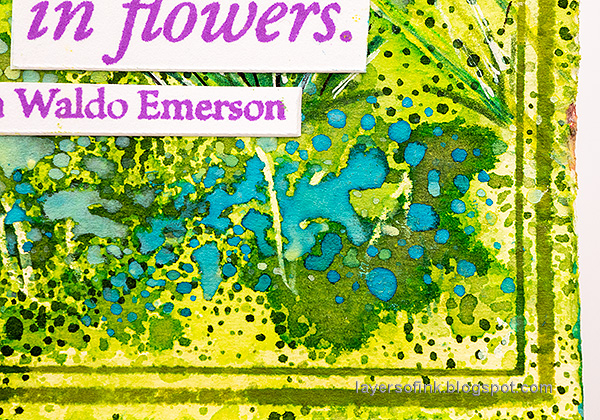
I hadn't planned to add blue to the grass area at first, but this ended up being my favorite part of the background. 

Layers of ink - Crocus in Pencil Tutorial by Anna-Karin Evaldsson.

The sentiment comes from Simon Says Stamp Laugh in flowers and was stamped with Simon Says Stamp Saturated Ink Amethyst ink.

Layers of ink - Crocus in Pencil Tutorial by Anna-Karin Evaldsson.

The May Arts Wrinkled Faux Silk Ribbon was dyed with Distress Ink. I hope you enjoyed this tutorial. You can of course use the same technique with different flowers or images. 


Thank you for taking the time to visit my blog today!

Happy stamping!

Anna-Karin


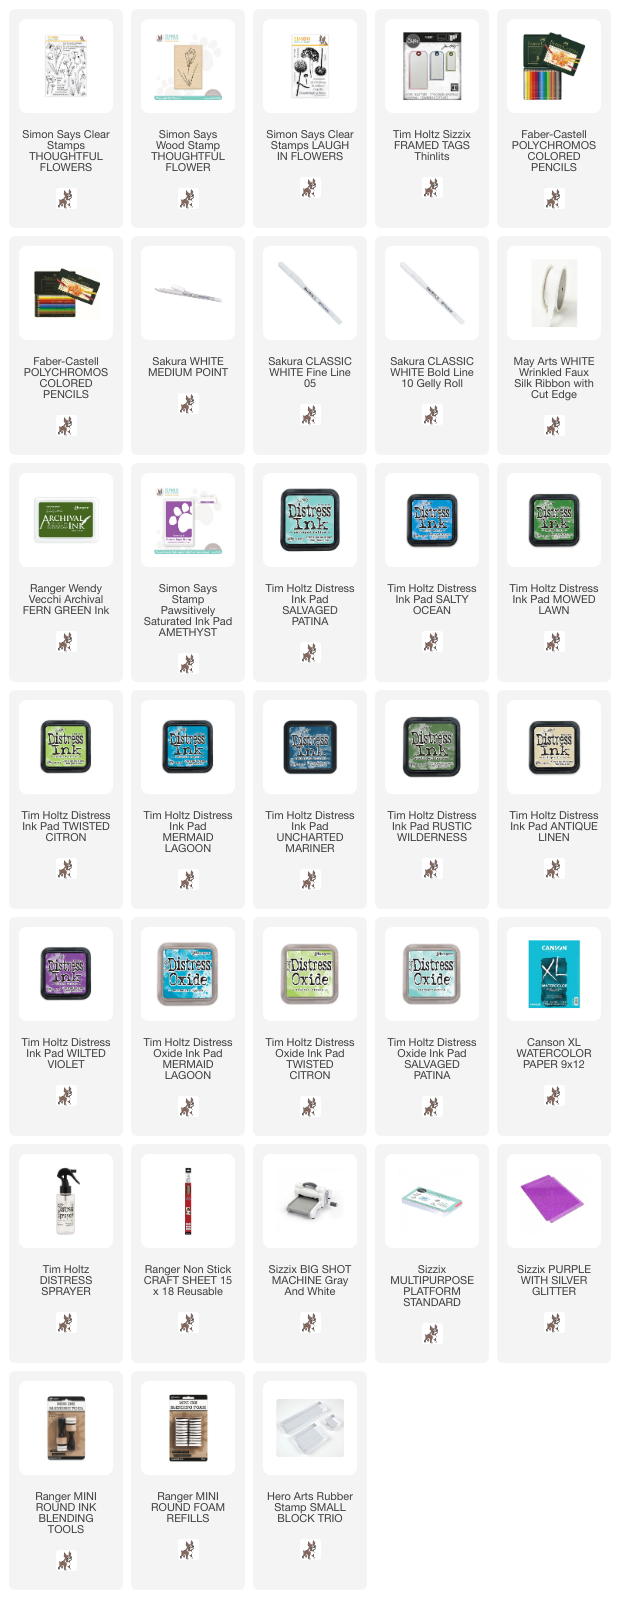
Supplies:

* Please note: the links are affiliate links, for which I receive a small percentage of sales generated by the link, at no extra cost to you.

Monday, September 5, 2022

Pencil Shaker Card Tutorial

Hi friends! I hope you had a good weekend! Today I have a fun shaker card to share. 

Please note: this post has affiliate links, for which I receive a small percentage of sales generated by the link, at no extra cost to you.


During this month, STAMPtember® is celebrated at Simon Says Stamp - a whole month dedicated to stamps and stamping, with so much inspiration and many surprises. Our theme this week at the Simon Says Stamp Monday Challenge Blog is 'Stamp It'.

Since it is the first Monday of a new month, the team is showcasing products from a specific company/designer and this week it is Simon Says Stamp exclusive products. You can find the fantastic range of stamps, dies, stencils, paper products, inks and tools here. There is also a new huge STAMPtember® release.


Don't miss the project by our September guest designer Anita Rao aka Beads, Charms and Wire. I hope you will stop by her blog to see what she has created.

Layers of ink - Pencil Shaker Card Tutorial by Anna-Karin Evaldsson.

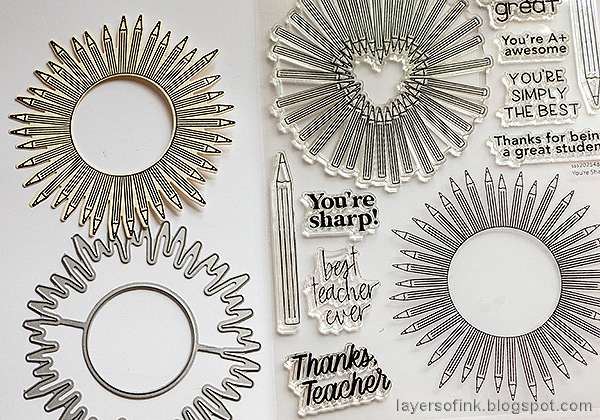
Shaker cards are always fun and here I made one from a circle of pencils, stamped and die cut with the new STAMPtember® You're Sharp set. I also made some dimensional borders and a label. The pencils were colored to form a color wheel.

Layers of ink - Pencil Shaker Card Tutorial by Anna-Karin Evaldsson. Stamp Simon Says Stamp You're sharp.

Start by stamping the circle of pencils with black ink on heavystock cardstock and die cut with the coordinating You're Sharp die. I like using the Simon Says Stamp Very Very Low Tack tape to hold the die in place when die cutting.

Layers of ink - Pencil Shaker Card Tutorial by Anna-Karin Evaldsson.

Color with pencils. I forgot to color the wood part and the tips here and did that after having taken the photo. 

Layers of ink - Pencil Shaker Card Tutorial by Anna-Karin Evaldsson.

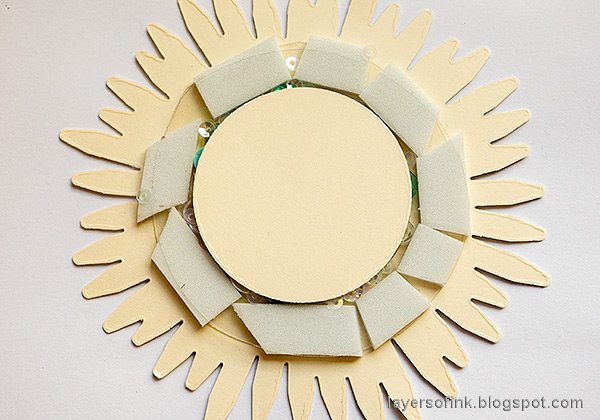
Stamp a sentiment on Clearly For Art Modeling Film. Cut into a circle and glue to the back of the design. Add Simon Says Stamp Pawsitively Foam Tape and fill with sequins. Add a second circle of modeling film on top.

Layers of ink - Pencil Shaker Card Tutorial by Anna-Karin Evaldsson.

The background was a little distracting through the shaker so I glued the die cut circle to the back.

Layers of ink - Pencil Shaker Card Tutorial by Anna-Karin Evaldsson.

I wanted the look of an old notebook for the background. Smear Distress Ink on a non-stick craft sheet, mist with water and press heavystock paper into the ink. Let dry and repeat.

Layers of ink - Pencil Shaker Card Tutorial by Anna-Karin Evaldsson. Stamp with Simon Says Stamp Ledger Background.

Stamp with Simon Says Stamp Ledger Paper Background.

Layers of ink - Pencil Shaker Card Tutorial by Anna-Karin Evaldsson. Ink through Simon Says Stamp Mix and Match Circles.

For a warm look, ink with yellow inks through the Simon Says Stamp Mix and Match Circles stencil.

Layers of ink - Pencil Shaker Card Tutorial by Anna-Karin Evaldsson.

Ink the edges brown.

Layers of ink - Pencil Shaker Card Tutorial by Anna-Karin Evaldsson.

Inspired by wooden rules, I created dimensional borders. Adhere a ruler from Tim Holtz Memoir ephemera to Sizzix Little Sizzles Mat Board. Cut and ink the edges. 

Layers of ink - Pencil Shaker Card Tutorial by Anna-Karin Evaldsson.

The label from Simon Says Stamp Mixed Labels was stamped with Marine Pawsitively Saturated ink on the margin of an old book page. Cut and glue to mat board. Cut again and ink the edges. The sentiment comes from Simon Says Stamp Printmaking Birds.

Layers of ink - Pencil Shaker Card Tutorial by Anna-Karin Evaldsson.

Fold and ink a corner for added interest.

Layers of ink - Pencil Shaker Card Tutorial by Anna-Karin Evaldsson.

The alphabet strip was created with Design Tape Trims and mat board. 

Layers of ink - Pencil Shaker Card Tutorial by Anna-Karin Evaldsson.

Shaker cards are always fun to make and receive. 

I hope you will join us this week in our Stamp It challenge. You have a chance to win a $25 gift voucher to do some fun shopping at Simon Says Stamp. You have until Monday 8am Ohio time. 1pm UK time, 2 pm CET to join in.


Do you use Instagram? If so please add #sssmchallenge so we can see your entries there too.


Thank you so much for stopping by here today! 

Happy crafting!

Anna-Karin

Supplies:

* Please note: the links are affiliate links, for which I receive a small percentage of sales generated by the link, at no extra cost to you.

Tuesday, August 16, 2022

Folded Tag Book Tutorial

Hi crafters! I have a fun tag mini book to share today. The inside pages were folded from a single piece of paper, without using any adhesive.

Please note: this post has affiliate links, for which I receive a small percentage of sales generated by the link, at no extra cost to you.
Layers of ink - Folded Tag Book Tutorial by Anna-Karin Evaldsson.

I had fun looking through some older magazines and found an article about a folded book in one of my South African papercraft magazines. The magazine is called Creative Reflections, but no longer exists. The basic fold of the inside pages comes from that magazine (issue no 15, 2007), but I changed it a bit and made a different type of cover.

Layers of ink - Folded Tag Book Tutorial by Anna-Karin Evaldsson.

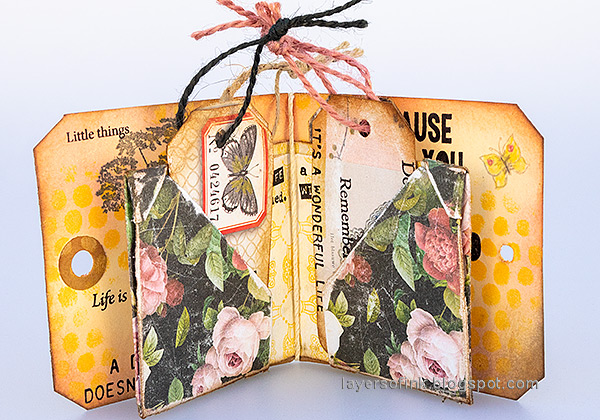
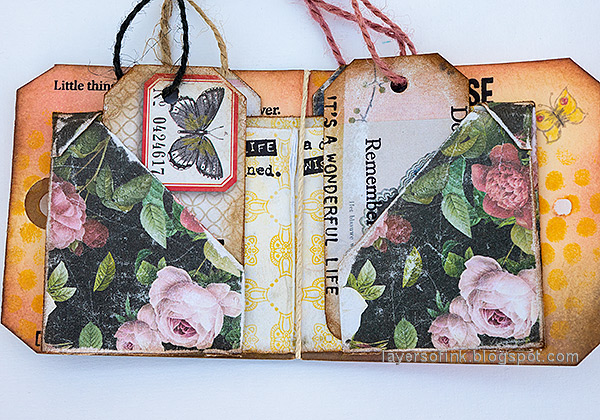
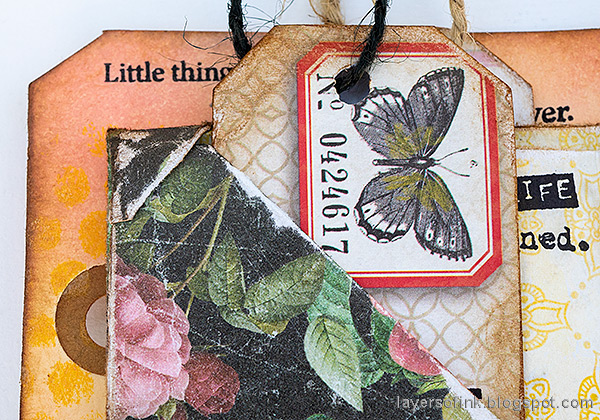
The inside looks like this and there is space for tags or little notes in the four folded pockets. You can also fold more than one paper to get more pages. 

Layers of ink - Folded Tag Book Tutorial by Anna-Karin Evaldsson.

I used a mix of stamped and printed papers, but you can also stick to just one of them.

Layers of ink - Folded Tag Book Tutorial by Anna-Karin Evaldsson. Fold a Tim Holtz Backdrops paper

I tested the fold on scrap paper first and then decided to use a Tim Holtz Backdrops paper. This paper comes from Backdrops vol. 2. Different sized paper will give a differently sized booklet. The backdrops paper is slightly too thick, but with the help of a bone folder, you can make it work.

Fold once in the middle, unfold.

Layers of ink - Folded Tag Book Tutorial by Anna-Karin Evaldsson.

Fold the edges towards the center, leaving a small space of about 3 millimeters (1/8 in) in the center. I used a bone folder for all the folds.

Layers of ink - Folded Tag Book Tutorial by Anna-Karin Evaldsson.

Fold the outer edges inwards, about 10-12 millimeters (3/8 in).

Layers of ink - Folded Tag Book Tutorial by Anna-Karin Evaldsson.

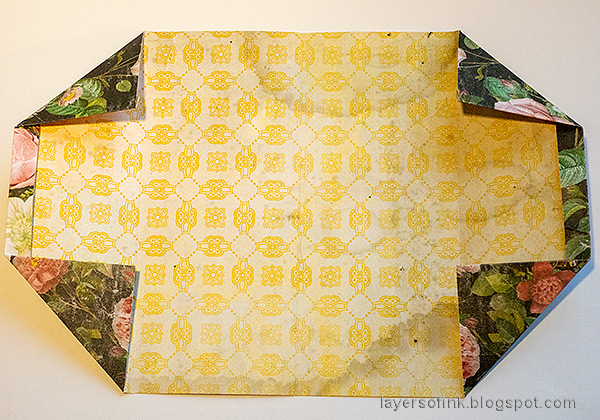
Fold the corners inwards to the first fold.

Layers of ink - Folded Tag Book Tutorial by Anna-Karin Evaldsson.

Fold the outer section towards the center.

Layers of ink - Folded Tag Book Tutorial by Anna-Karin Evaldsson.

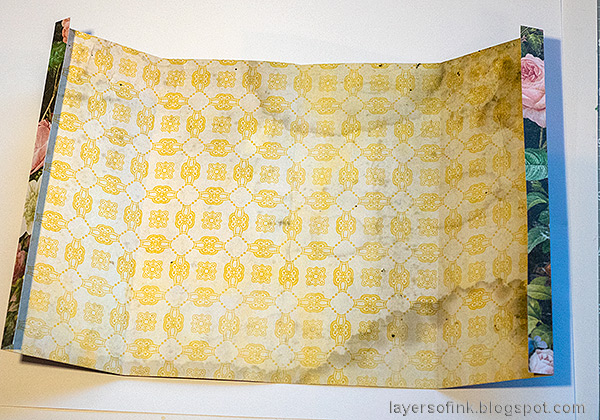
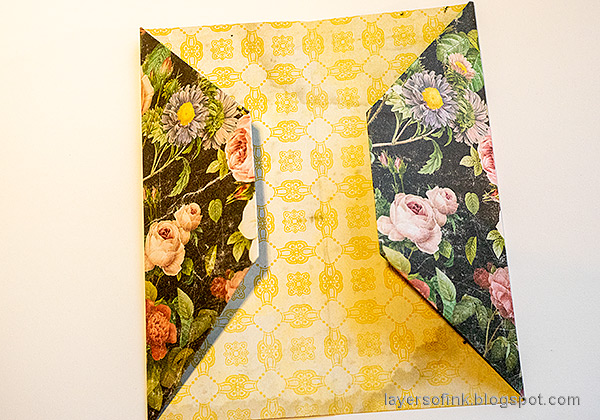
Turn the paper around and fold the edges as shown, about 10-12 millimeters (3/8 in), or a little more.

Layers of ink - Folded Tag Book Tutorial by Anna-Karin Evaldsson.

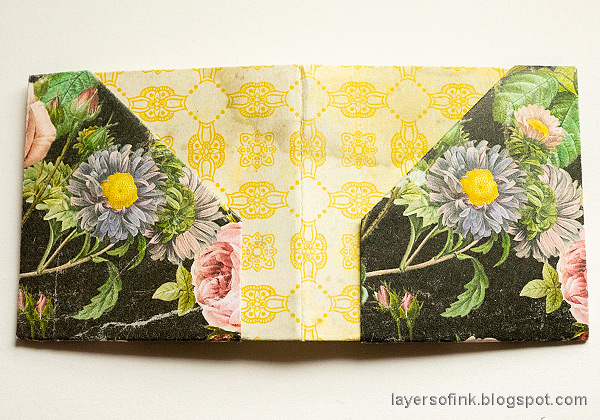
Fold the bottom half up and tuck the corners into the triangles. Because of the thickness of my paper, I left a small edge at the top, not folding quite at the center, so that it would be possible to tuck the corners in. Press all folds again with a bone folder.

Layers of ink - Folded Tag Book Tutorial by Anna-Karin Evaldsson.

On the other side it will not look like this and you will have four pockets for tags or little notes.

Layers of ink - Folded Tag Book Tutorial by Anna-Karin Evaldsson.

I cut tags from Tim Holtz Journal Cards, using an We R Memory Keepers Angle Corner Chomper for the angles, my Crop-a-dile for the holes and a rounded Corner Chomper for two of the tags.

Layers of ink - Folded Tag Book Tutorial by Anna-Karin Evaldsson.

Sand all edges and then ink.

Layers of ink - Folded Tag Book Tutorial by Anna-Karin Evaldsson.

I stamped sentiments from Tim Holtz Odds & Ends on all the four pages.

Layers of ink - Folded Tag Book Tutorial by Anna-Karin Evaldsson.

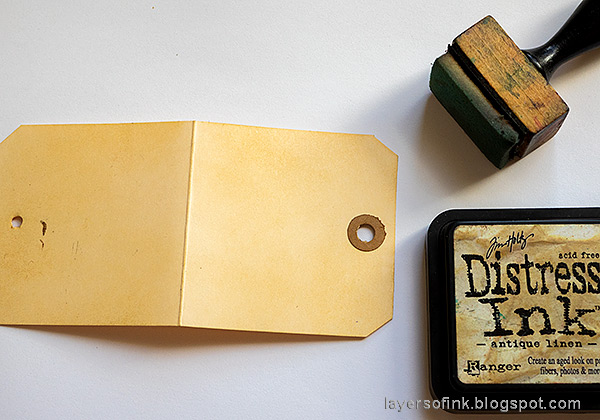
I used a tag for the cover, cutting the bottom corners with the Angle Corner Chomper. Ink with Antique Linen.

Layers of ink - Folded Tag Book Tutorial by Anna-Karin Evaldsson. Stamp Simon Says Stamp Thoughtful Flowers.

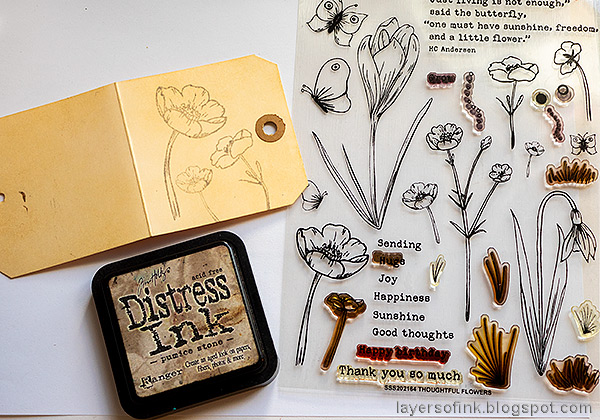
Stamp with flowers from Simon Says Stamp Thoughtful Flowers using Pumice Stone ink. If you want the outline to be more invisible, use Antique Linen instead.

Layers of ink - Folded Tag Book Tutorial by Anna-Karin Evaldsson.

Color with pencils.

Layers of ink - Folded Tag Book Tutorial by Anna-Karin Evaldsson.

Add shading and then add highlights and some lines with a white gel pen and a black pen.

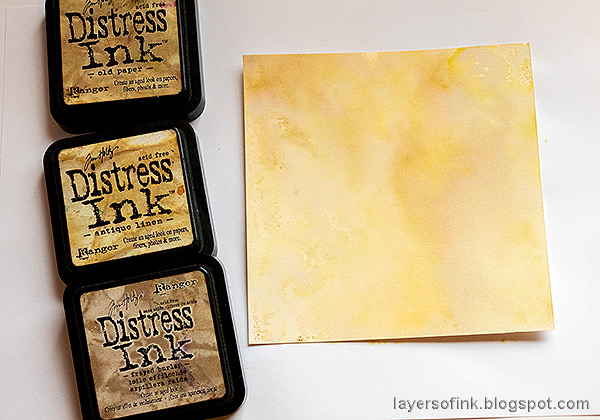
Layers of ink - Folded Tag Book Tutorial by Anna-Karin Evaldsson. Ink with Distress Ink.

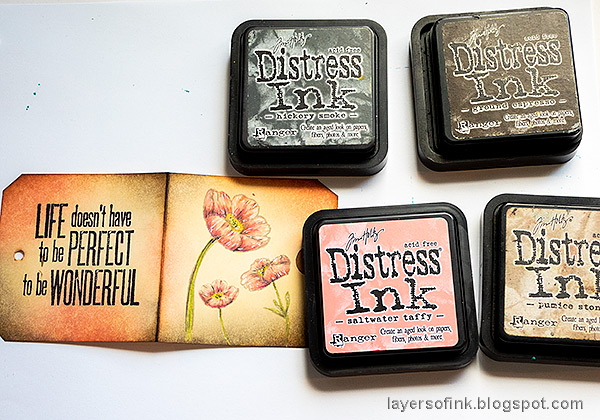
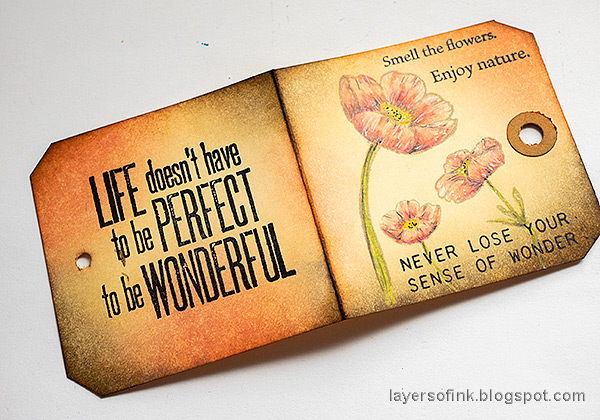
Ink with Distress Inks and stamp a sentiment on the back cover. 

Layers of ink - Folded Tag Book Tutorial by Anna-Karin Evaldsson.

Add more sentiments, from Tim Holtz Nature's Wonder and Simon Says Stamp Anna's Flowers.

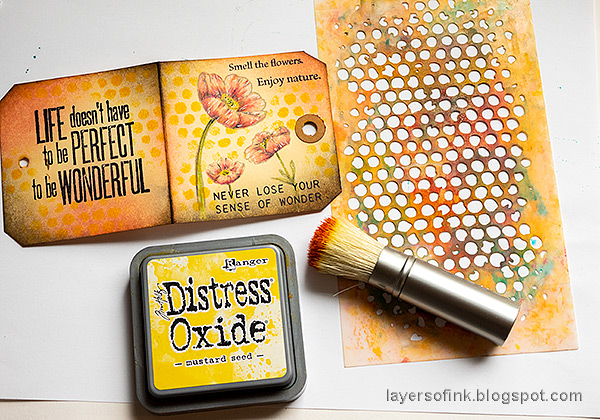
Layers of ink - Folded Tag Book Tutorial by Anna-Karin Evaldsson. Ink through Tim Holtz Bubble stencil.

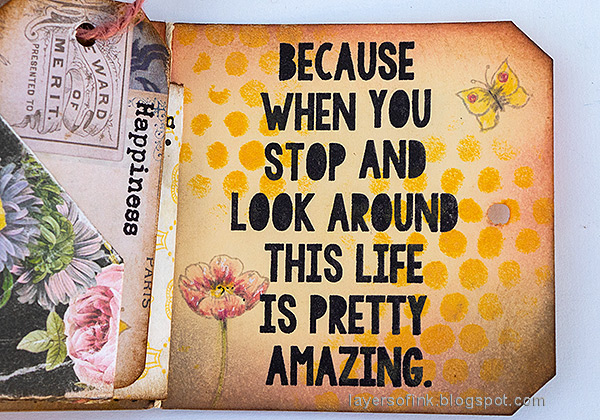
Apply Mustard Seed Distress Oxide through Tim's Bubble stencil.

Layers of ink - Folded Tag Book Tutorial by Anna-Karin Evaldsson.

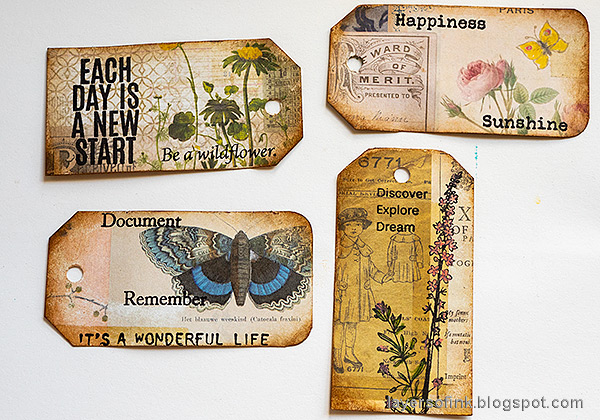
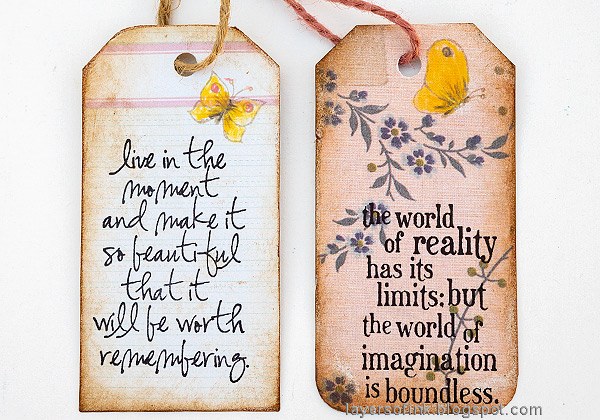
Stamp the tags with various sentiments and images.

Layers of ink - Folded Tag Book Tutorial by Anna-Karin Evaldsson.

The inside covers were inked, stamped and stenciled too. The large flower stamp comes from Simon Says Stamp Laugh In Flowers.

Layers of ink - Folded Tag Book Tutorial by Anna-Karin Evaldsson.

Tie the inside pages with twine and tuck the tags into the pockets. 

Layers of ink - Folded Tag Book Tutorial by Anna-Karin Evaldsson.

Experiment with different papers and sizes to see what booklets you can come up with.

Layers of ink - Folded Tag Book Tutorial by Anna-Karin Evaldsson.

The fold is fun to do and I like the little triangles in the corners.

Layers of ink - Folded Tag Book Tutorial by Anna-Karin Evaldsson.

Double-sided papers work great for the inside pages.

Layers of ink - Folded Tag Book Tutorial by Anna-Karin Evaldsson.

This sentiment comes from Tim Holtz Life Quotes.

Layers of ink - Folded Tag Book Tutorial by Anna-Karin Evaldsson.

You can use double-sided paper for the covers too, but I wanted to include some stamping.

Layers of ink - Folded Tag Book Tutorial by Anna-Karin Evaldsson.

I added some Tim Holtz idea-ology ephemera to the tags, but mostly just stamped sentiments and a few images. The flowers comes from Tim's Flower Jar and were colored with pencils. The sentiment comes from Simon Says Stamp All Seasons Tree.

Layers of ink - Folded Tag Book Tutorial by Anna-Karin Evaldsson.

Stamping and mixing sentiments is one of my favorite things to do. The larger sentiment is from Simon Says Stamp Beautiful Butterflies.

Layers of ink - Folded Tag Book Tutorial by Anna-Karin Evaldsson.

I stamped a couple of butterflies from Simon Says Stamp Thoughtful Flowers and colored them with pencils.

Layers of ink - Folded Tag Book Tutorial by Anna-Karin Evaldsson.

These sentiments come from Tim's Urban Chic and Warehouse District.

Layers of ink - Folded Tag Book Tutorial by Anna-Karin Evaldsson.

I enjoy using colored pencils on slightly inked or tinted papers and here it gives a warm glow to the cover.

Layers of ink - Folded Tag Book Tutorial by Anna-Karin Evaldsson.

You could leave the cover plain, but I wanted one more sentiment. This one comes from Tim's Way With Words.

Layers of ink - Folded Tag Book Tutorial by Anna-Karin Evaldsson.

Tie the booklet with twine to close. 


Thank you so much for taking the time to visit my blog today! 

Happy crafting!

Anna-Karin

Supplies:

* Please note: the links are affiliate links, for which I receive a small percentage of sales generated by the link, at no extra cost to you.