Showing posts with label Overstamping. Show all posts

Monday, January 8, 2024

Road Trip Card Tutorial

Hi friends! It is a new week and it is beautiful and very cold outdoors. 

Please note: this post has affiliate links, for which I receive a small percentage of sales generated by the link, at no extra cost to you.

We are back with a new Simon Says Stamp Monday Challenge. This week our theme is Things With Wheels. I hope you will join us! Don't miss the project by our guest designer Rox.

Layers of ink - Roadtrip Card Tutorial by Anna-Karin Evaldsson.

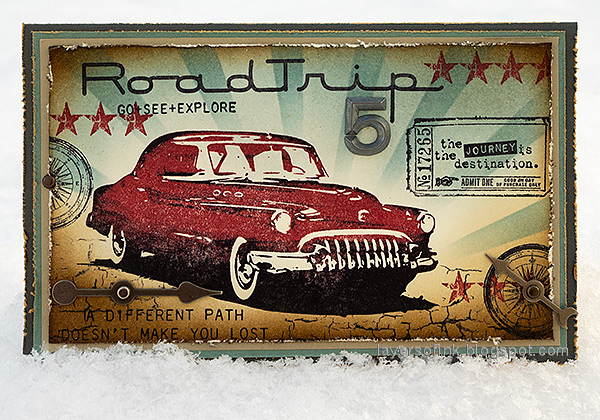
I made a card with a red vintage car going on a road trip, using stamps, ink and a stencil, with just a few metallic elements. And sentiments of course. The car stamp that I used has a lot of solid areas and a large solid shadow under the car which can make it a challenge when you want a car in a bright color. The shadow would look weird if it was the same red as the rest of the car. One of my favorite techniques solves this, namely overstamping. 

Layers of ink - Road Trip Card Tutorial by Anna-Karin Evaldsson. Stamp the car with Tim Holtz Road Trip.

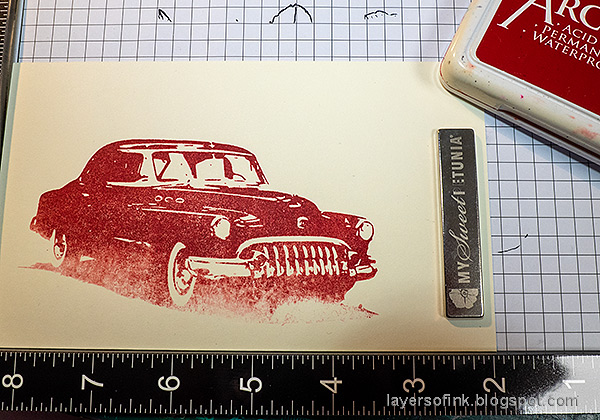
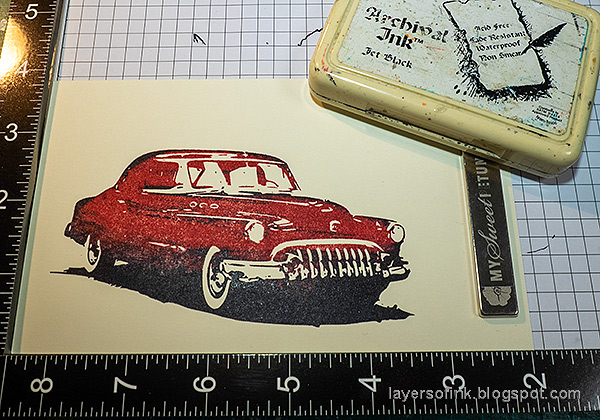
I used the MISTI to help align the stamped impressions, but you can also use an ordinary stamp positioner. Start by stamping the car from Tim's Road Trips set with Red Geranium Archival Ink. I wiped some of the ink off from the shadow area. I worked on Ranger's Heavystock cardstock.

Layers of ink - Roadtrip Card Tutorial by Anna-Karin Evaldsson. Stamp again, using a MISTI.

Next, wipe the stamp to remove most of the the red ink. Ink the shadow area and the outline of the car with Jet Black ink. No need for perfection. Stamp and repeat until you are happy with the look. 

Layers of ink - Roadtrip Card Tutorial by Anna-Karin Evaldsson. Ink with various Distress Inks.

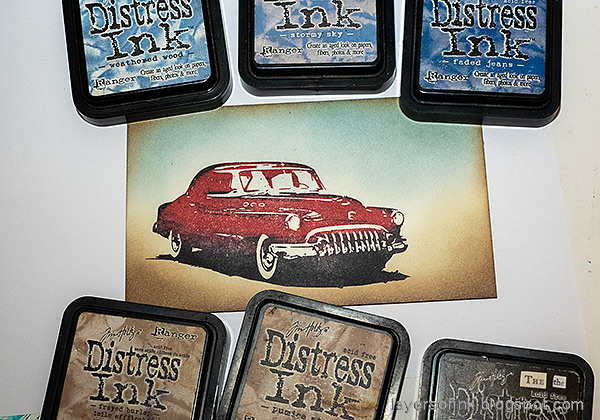
Ink the background with Distress Ink using an ink-blending tool. Make it darker towards the edges.

Layers of ink - Roadtrip Card Tutorial by Anna-Karin Evaldsson. Ink through the Rays stencil.

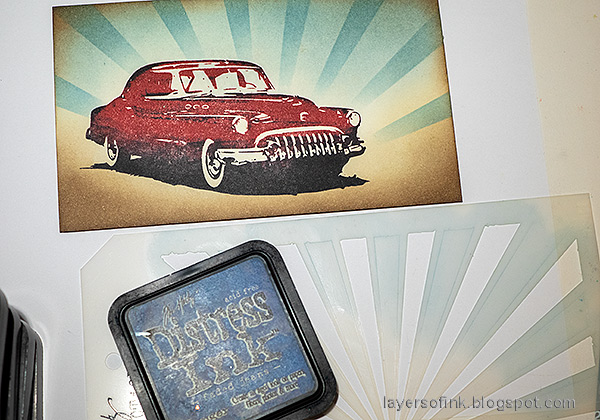
Add rays with Tim's Shifter Rays stencil and Faded Jeans ink.

Layers of ink - Roadtrip Card Tutorial by Anna-Karin Evaldsson. Stamp with Simon Says Stamp Crackle Background.

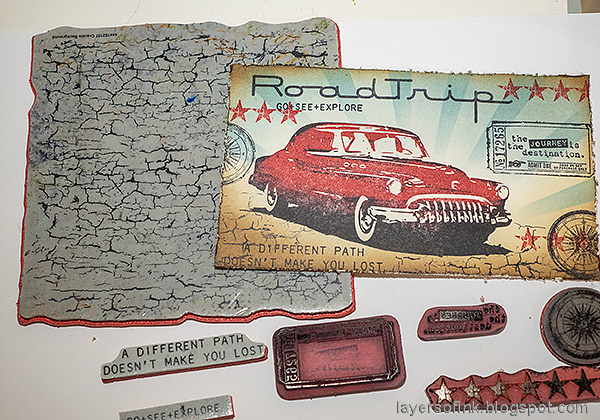
Stamp Simon Says Stamp Crackle Background on the ground, for texture. Stamp a title, sentiment, ticket and the sentiment inside the ticket with black ink. Stamp stars with Red Geranium ink and a compass with black ink. Distress the edges.

Layers of ink - Roadtrip Card Tutorial by Anna-Karin Evaldsson. Stamp with Tim Holtz Odds & Ends.

Mat the panel on fawn cardstock and then on two shades of blue-grey cardstock, with the darker one being the folded card. Distress the edges. Tim's Odds & Ends set is an old favorite of mine. It has tickets and sentiments. There is an empty ticket in which the sentiments fit. The number is an idea-ology Numeric number.

Layers of ink - Roadtrip Card Tutorial by Anna-Karin Evaldsson. Stamp red stars.

The rays add a subtle pattern to the background and doesn't distract from the stamping on top.

Layers of ink - Roadtrip Card Tutorial by Anna-Karin Evaldsson. Red vintage car stamping.

You can of course make your car into any color. This car stamp also comes in a smaller version, on Tim's Travel Ways set.

Layers of ink - Roadtrip Card Tutorial by Anna-Karin Evaldsson.

I added a Game Spinner to this compass.

Layers of ink - Roadtrip Card Tutorial by Anna-Karin Evaldsson. Add game spinners.

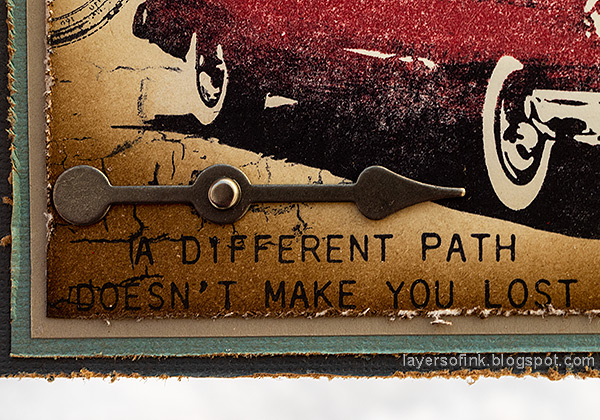
There is another Game Spinner under the car, showing its direction. The sentiment comes from Tim's Nature's Wonder set.

I hope you will join us this week in our Things With Wheels challenge. You have a chance to win a $25 gift voucher to do some fun shopping at Simon Says Stamp. You have until Monday 8am Ohio time. 1pm UK time, 2 pm CET to join in.


Do you use Instagram? If so please add #sssmchallenge so we can see your entries there too.


Thank you so much for stopping by here today! 

Happy crafting!

Anna-Karin

Supplies:

* Please note: the links are affiliate links, for which I receive a small percentage of sales generated by the link, at no extra cost to you.

Tuesday, November 21, 2023

Santa Tag Tutorial

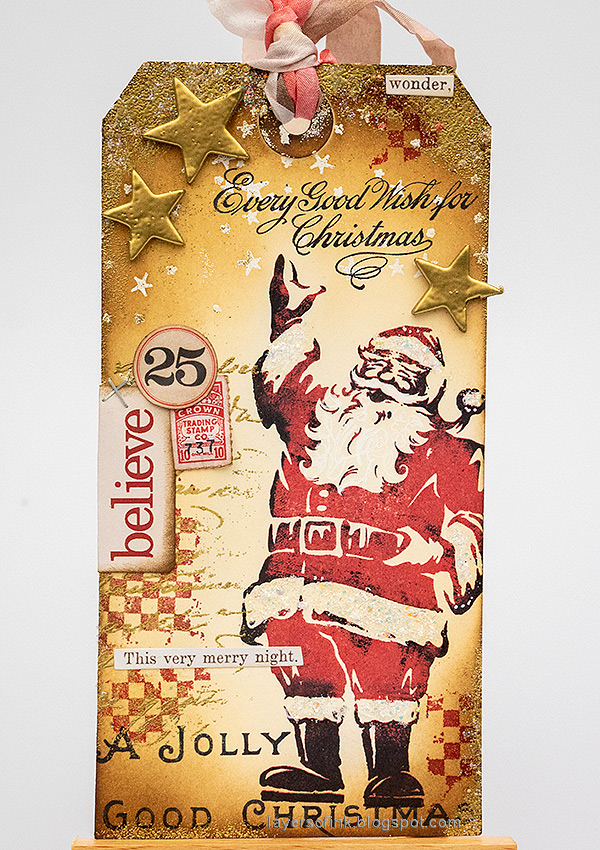
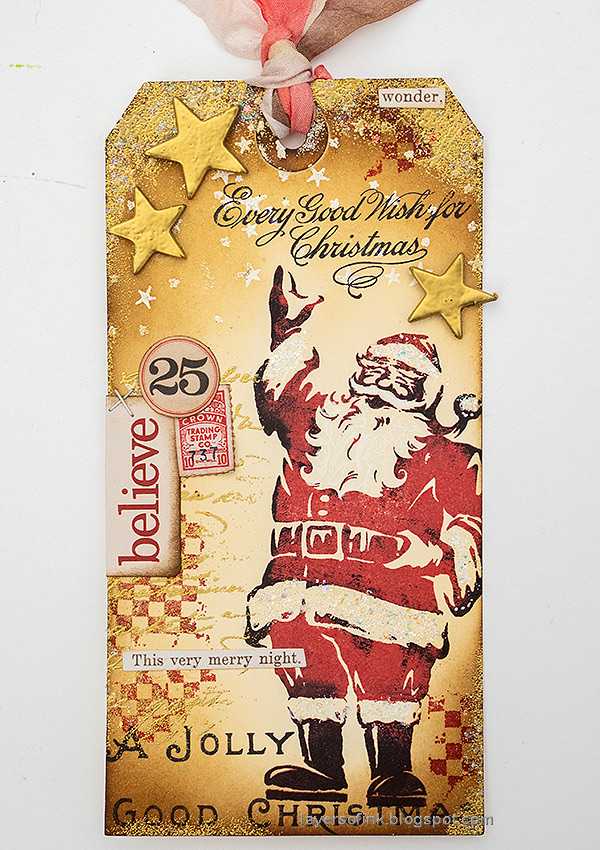
Hello stampers! Today I have a Christmas tag to share, with a fun retro Santa. It can easily be turned into a Christmas card instead.

Please note: this post has affiliate links, for which I receive a small percentage of sales generated by the link, at no extra cost to you. 

Layers of ink - Double-stamped Santa Tag Tutorial by Anna-Karin Evaldsson.

This very jolly retro Santa from Tim Holtz Jolly Holiday set is such a fun image. I thought it would be perfect for some overstamping / double, or triple, stamping. The Santa was combined with glitter, gold, stars and Christmas sentiments.

Layers of ink - Double-stamped Santa Tag Tutorial by Anna-Karin Evaldsson.

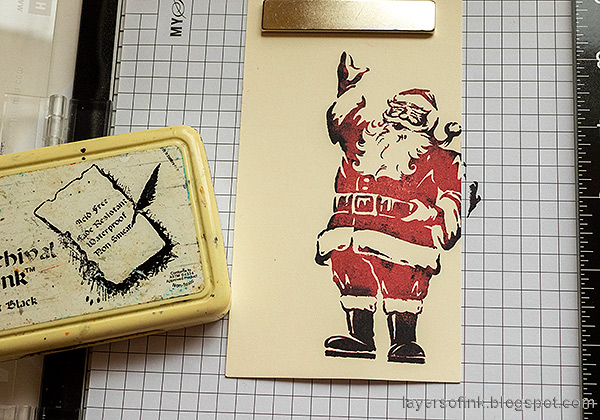
I used the MISTI for this, but you can also use a stamp positioner. I always used to do this technique with an old stamp positioner, but the MISTI works great for it too. Stamp the Santa with Red Geranium ink first. 

Layers of ink - Double-stamped Santa Tag Tutorial by Anna-Karin Evaldsson. Stamp the Tim Holtz santa with red ink.

Wipe off the stamp slightly and then add black ink to parts of the stamp. Stamp again. I repeated the step with the black ink once or twice more to add ink in areas where I thought it was missing. Don't worry about perfection.

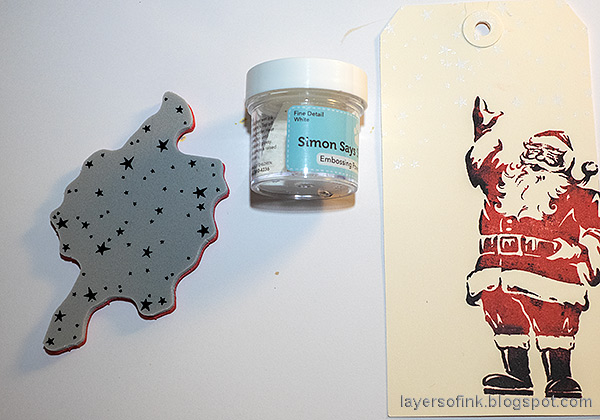
Layers of ink - Double-stamped Santa Tag Tutorial by Anna-Karin Evaldsson. Stamp stars.

White emboss stars on the background.

Layers of ink - Double-stamped Santa Tag Tutorial by Anna-Karin Evaldsson. Ink with Distress Ink.

Ink with Distress Ink.

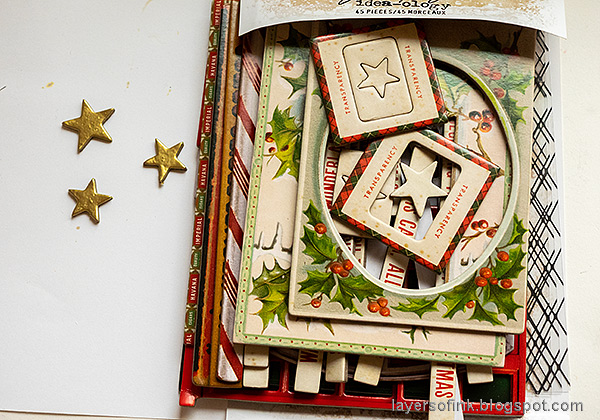
Layers of ink - Double-stamped Santa Tag Tutorial by Anna-Karin Evaldsson. Gold emboss the stars.

I gold embossed three stars from Tim's Christmas Baseboards and Transparencies set. Be very careful when using a heat gun and never touch the melted powder until it has cooled down completely.

Layers of ink - Double-stamped Santa Tag Tutorial by Anna-Karin Evaldsson. Stamp with Simon Says Stamp Old Letter.

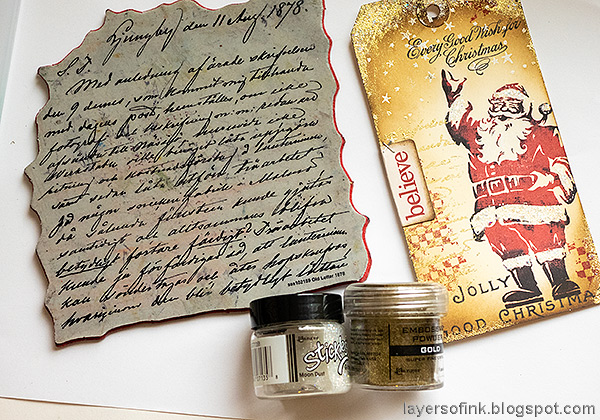
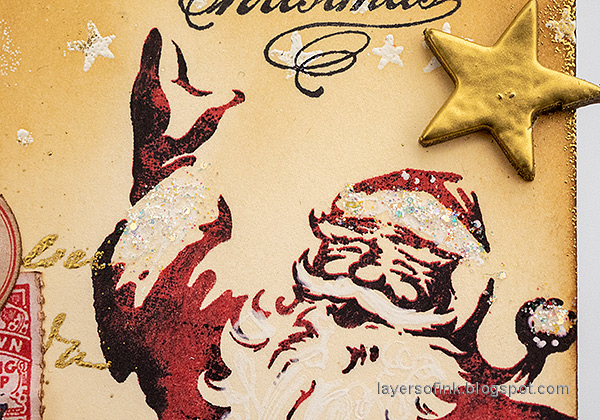
Stamp with a texture stamp from Tim Holtz Ultimate Grunge and red ink. Stamp Simon Says Stamp Old Letter here and there and gold emboss. Add gold embossing powder around the edges. Add Moon Dust Stickles to the jacket, hat, pants and around the edges. 

Layers of ink - Double-stamped Santa Tag Tutorial by Anna-Karin Evaldsson.

Add some white swirls to his beard with a white gel pen.

Layers of ink - Double-stamped Santa Tag Tutorial by Anna-Karin Evaldsson.

Glue the chipboard stars to the tag. Stray gold embossing powder adds a nice texture.

Layers of ink - Double-stamped Santa Tag Tutorial by Anna-Karin Evaldsson.


Layers of ink - Double-stamped Santa Tag Tutorial by Anna-Karin Evaldsson.

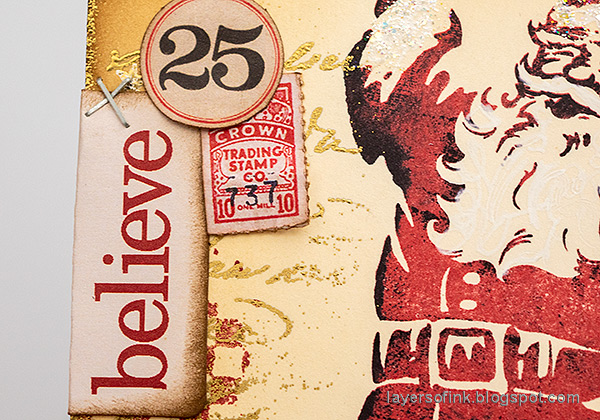
I also added some Christmas Ephemera

Layers of ink - Double-stamped Santa Tag Tutorial by Anna-Karin Evaldsson.

Add another stamped sentiment and a sentiment sticker.

Layers of ink - Double-stamped Santa Tag Tutorial by Anna-Karin Evaldsson.

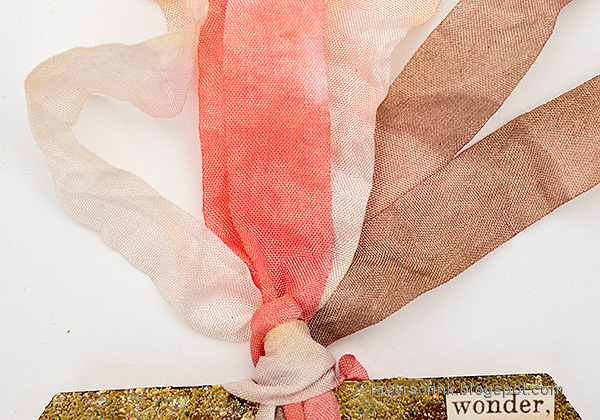
The Faux Silk ribbon was dyed with Distress ink to match the tag.

Layers of ink - Double-stamped Santa Tag Tutorial by Anna-Karin Evaldsson.

Have fun with the overstamping technique! It has so many different uses.


Thank you for visiting my blog! 

Happy crafting!

Anna-Karin

Supplies:

* Please note: the links are affiliate links, for which I receive a small percentage of sales generated by the link, at no extra cost to you.

Wednesday, September 23, 2020

Cling Wrap Watercolor Floral Tutorial

Hello stampers! I hope you are well. Today I have a favorite technique to share, combining watercolors, cling wrap and stamping. It is easy and makes for a wonderful textured background. I hadn't done it in a long time and had fun making a ton of backgrounds today. All you need is watercolor paint, cling wrap (you might call it saran wrap), stamps and some ink.

Layers of ink - Cling Wrap Watercolor Floral Tutorial by Anna-Karin Evaldsson. With Simon Says Stamp Laugh in Flowers stamp set.

The stamps that I designed for the Simon Says Stamp® release arrived here on Tuesday and I have had such fun stamping with them. I wanted to start with a project made with the Laugh in Flowers set, which has some of my favorite flowers and was great for this technique. Any silhouette type stamp will work great for this project and it doesn't have to be floral. 

 Layers of ink - Cling Wrap Watercolor Floral Tutorial by Anna-Karin Evaldsson.

The Queen Anne's Lace flower has a special place in my heart. When I was about six years old, I by mistake drove off the bike path and down a slope. I fell into a field of Queen Anne's Lace and was convinced that they had saved me from falling into the river. I have loved them ever since. For this card, I tried to make the background look like a field of grass and flowers.

Layers of ink - Cling Wrap Watercolor Floral Tutorial by Anna-Karin Evaldsson. With Simon Says Stamp Laugh in Flowers stamp set.

The second card features the dandelion stamps from the Laugh in Flowers set. I also turned the blue-globe thistle into a dandelion here. The boys love to blow on dandelions.

Layers of ink - Cling Wrap Watercolor Floral Tutorial by Anna-Karin Evaldsson. Paint with watercolor paint.

Start by mixing up shades of green and yellow watercolor paint. I experimented with various mixes, but all of them contain Cerulean Blue, which is a granulating watercolor paint, giving extra texture. Before you paint, tear off a piece of cling wrap. Paint on watercolor paper.

Layers of ink - Cling Wrap Watercolor Floral Tutorial by Anna-Karin Evaldsson. With Simon Says Stamp Laugh in Flowers stamp set. Add cling wrap / saran wrap.

Immediately place the cling wrap on top of the paper and press gently. You can shape it both before and after you put it on the paper.

Layers of ink - Cling Wrap Watercolor Floral Tutorial by Anna-Karin Evaldsson. With Simon Says Stamp Laugh in Flowers stamp set.

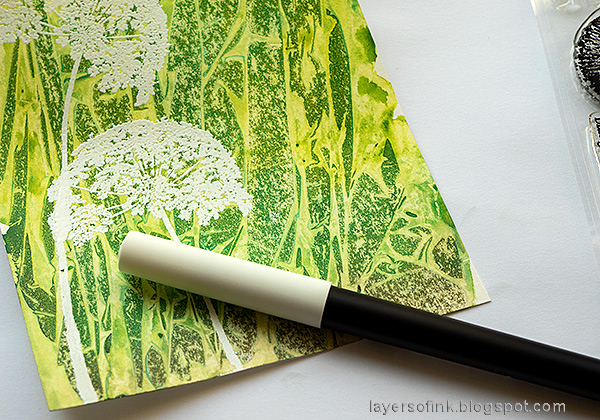
I don't know how well you see the difference here, but by shaping and angling the cling wrap in different ways, you can get various textures and patterns. To the left, the cling wrap is pulled to create mainly vertical lines. To the right the cling wrap was just crumbled up, creating a different pattern. Put aside until the paper is dry. Be patient! Don't peek!

Layers of ink - Cling Wrap Watercolor Floral Tutorial by Anna-Karin Evaldsson. Watercolor texture.

I made a lot of backgrounds. These three have patterns where the cling wrap was pulled vertically. You can angle it too so that the patterns slant towards a side. This creates a great grassy background.

Layers of ink - Cling Wrap Watercolor Floral Tutorial by Anna-Karin Evaldsson. Saran wrap and watercolor paint.

The patterns are so interesting and I love their organic nature and that you can't control the outcome completely.

Layers of ink - Cling Wrap Watercolor Floral Tutorial by Anna-Karin Evaldsson. With Simon Says Stamp Laugh in Flowers stamp set.

Turn it the other way around and you will get a horizontal pattern instead.

Layers of ink - Cling Wrap Watercolor Floral Tutorial by Anna-Karin Evaldsson. With Simon Says Stamp Laugh in Flowers stamp set.

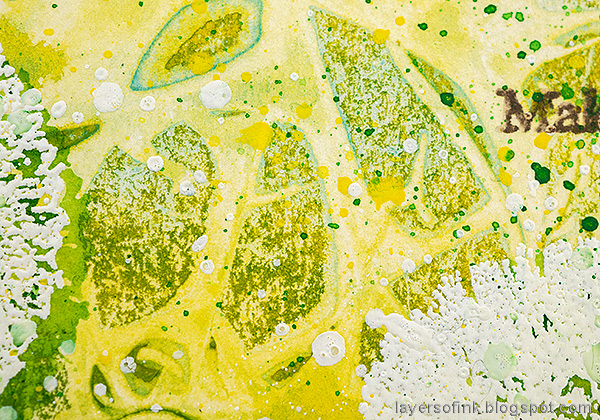
When the cling wrap is crumbled up it creates these gorgeous random formations, looking like rocks or leaves.

Layers of ink - Cling Wrap Watercolor Floral Tutorial by Anna-Karin Evaldsson. With Simon Says Stamp Laugh in Flowers stamp set.

My favorite part of the backgrounds are the areas where you can see a little of the blue paint. I love how it collected along the edges of the shapes.

Layers of ink - Cling Wrap Watercolor Floral Tutorial by Anna-Karin Evaldsson.

These type of patterns would be difficult to achieve by just painting, and they would not look as random.

Layers of ink - Cling Wrap Watercolor Floral Tutorial by Anna-Karin Evaldsson. With Simon Says Stamp Laugh in Flowers stamp set.

When the paper was dry, I white embossed the Queen Anne's Lace from Laugh In Flowers on the background. A great thing with clear stamps is that you can easily angle the stem on the stamping block. Be careful so that you don't burn yourself when heat embossing.

Layers of ink - Cling Wrap Watercolor Floral Tutorial by Anna-Karin Evaldsson.

Stamp one more flower, overlapping slightly. If you need a longer stem to these types of floral stamps, it is easy to fix. When embossing, the best thing is to use an embossing pen. It makes it very easy to extend the stem. I used the Clear Medium Pens by Ranger.

Layers of ink - Cling Wrap Watercolor Floral Tutorial by Anna-Karin Evaldsson. Stamp with grass from SSS Thoughtful Flowers.

Add a third flower and some grass. The grass stamps come from the SSS Thoughtful Flowers set.

Layers of ink - Cling Wrap Watercolor Floral Tutorial by Anna-Karin Evaldsson. With Simon Says Stamp Laugh in Flowers stamp set.

The dandelion card was done in the same way, but using one of the 'crumbled' backgrounds instead. White emboss the flowers and extend the stems if needed. 

Layers of ink - Cling Wrap Watercolor Floral Tutorial by Anna-Karin Evaldsson. With Simon Says Stamp Laugh in Flowers stamp set.

Ink the stamps with green Distress Ink and mist about three times with water. Stamp over the embossed images, off setting the stamp a little. You can use a stamping platform or positioner, but I just eyeballed it. It doesn't have to be perfect. Use a paint brush to add a shadow to the extended stems too.

Layers of ink - Cling Wrap Watercolor Floral Tutorial by Anna-Karin Evaldsson. With Simon Says Stamp Laugh in Flowers stamp set.

Splatter the background with a little green and yellow using Dina Wakley's Scribble Sticks and a little white with Dina's Gloss Acrylic Spray. I imagined the white splatters were seed flying away or flowers in the background.

Layers of ink - Cling Wrap Watercolor Floral Tutorial by Anna-Karin Evaldsson. With Simon Says Stamp Laugh in Flowers stamp set.

The sentiment was stamped with dark brown ink. It is one of my favorite quotes. All the sentiments come from Laugh In Flowers.

Layers of ink - Cling Wrap Watercolor Floral Tutorial by Anna-Karin Evaldsson. Queen Anne's Lace.

The green shadow stamping makes the white flower stand out better from the background and creates dimension by acting as a shadow.

Layers of ink - Cling Wrap Watercolor Floral Tutorial by Anna-Karin Evaldsson.

I also added a few pearls. Leo could not understand their purpose on the card and tried to remove them, as if they had gotten stuck to the card by mistake. 

Layers of ink - Cling Wrap Watercolor Floral Tutorial by Anna-Karin Evaldsson. With Simon Says Stamp Laugh in Flowers stamp set.

If there is stray white embossing powder, don't flick it off, leave it for extra texture. For more inspiration regarding stray embossing powder, check out the Stray Embossing Powder video tutorial I made earlier this week, for Splitcoaststampers.

Layers of ink - Cling Wrap Watercolor Floral Tutorial by Anna-Karin Evaldsson. With Simon Says Stamp Laugh in Flowers stamp set.

The blue-globe thistle acting in disguise as a dandelion.

Layers of ink - Cling Wrap Watercolor Floral Tutorial by Anna-Karin Evaldsson. With Simon Says Stamp Laugh in Flowers stamp set.

Overlapping stamped images when embossing makes the one you stamped first look like it is in front of the others, since there are two layers of embossing powders on the overlapping parts. If you look at the dandelion to the left, it looks like it is underneath the taller one, since the overlapping part of the stem on the taller one got two layers of powder.

Layers of ink - Cling Wrap Watercolor Floral Tutorial by Anna-Karin Evaldsson. With Simon Says Stamp Laugh in Flowers stamp set.

I love how the shapes almost look like leaves.

Layers of ink - Cling Wrap Watercolor Floral Tutorial by Anna-Karin Evaldsson. With Simon Says Stamp Laugh in Flowers stamp set.

Layers of ink - Cling Wrap Watercolor Floral Tutorial by Anna-Karin Evaldsson. With Simon Says Stamp Laugh in Flowers stamp set.

There is still time to join in the STAMPtember® celebrations. Don't miss all the inspiration and surprises.


Thank you so much for stopping by here today! 

Happy crafting!

Anna-Karin

Supplies:

* Please note: the links are affiliate links, for which I receive a small percentage of sales generated by the link, at no extra cost to you.