Today I have a tutorial to share, of a stamped, gessoed and misted layered background and of making fluttering butterflies out of clear modeling film and alcohol ink. It is based on
my layout for CSI:Color, Stories, Inspiration #11, but presented in a smaller cardmaking format. The card is also for this month's
Hero Arts challenge (flower theme).
Supplies:
Ledger paper (I used BasicGrey Basics Manila)
Stamper’s Anonymous
clear Modeling Film
Stamps (I used: Hero Arts: La Letter K5344, Silhouette Burst H5312, Silhouette Spray G5311, Dandelion G4917, Sketch Circle B4343, Be Happy Every Day C2707, Three Artistic Butterflies LP215, Antique Engravings CL383; Darkroom Door Essentials 1 Collection; Crafty Individuals dandelions; Reprint splatter stamp).
Inks: Ranger Archival Ink: Vermillion, Chrome Yellow, French Ultramarine; Stazon Jet Black
Reinkers: Distress Ink: Weathered Wood, Tumbled Glass
Ranger Adirondack
Alcohol ink: Sunshine Yellow, Sailboat Blue, Stonewashed, Citrus, Red Pepper and Raisin
Perfect Pearls (Perfect Pearl colour)
Ranger Seafoam White embossing powder
Baker’s Twine
Glossy Accents
Gesso
Green acrylic paint
Tools: heat gun, old plastic card, mini stapler, ink applicator, mini mister
Here we go:
 Step 1
. White emboss different flowers at the bottom of ledger paper (I forgot to take a photo of this first step). Stamp random letters using Ranger Archival Ink Vermillion, and circles with Chrome Yellow. Restamp some of the letters and circles without reinking (second generation stamping). It is important to use a waterproof ink for this step, so that the ink doesn’t bleed in the following steps. Let dry.
Step 2. Smear gesso over the upper part of the paper using an old plastic card. Aim for a relatively uneven look and let some of the gesso overlap the flowers (but not too much). Don’t cover the stamped letters and circles completely. Let dry.
Step 3. Smear green paint at the bottom of the paper, as grass. Use the plastic card as before. Also, ‘chop’ it down on the paper at different angles to create strands of grass. Let dry. Before it is completely dry, you can carefully wipe off some of the paint from the embossed stems.
Step 4. Put half a dropper of Tumbled Glass and Weathered Wood reinkers in a mini-mister, add a few ice-cream scoops of Perfect Pearls. Fill the mister with water almost all the way, shake. You can also use ready-made glimmer mist. Mist the lower part of the paper pretty heavily, and add a little bit of mist on the upper part. The embossed flowers resist the mist. Let dry (you can help it along with a heat gun, but be careful not to burn the embossing powder). Wipe off the mist that sits on top of the embossing.
Step 5. Stamp the circle repeatedly with Archival Ink French Ultramarine, using both first and second generation stamping. Stamp splatters with the Chrome Yellow ink. Stamp the sentiment with Stazon Jet Black. I also stamped a script stamp, using third generation stamping (i.e. stamping it off twice on scrap paper first), with Stazon ink.
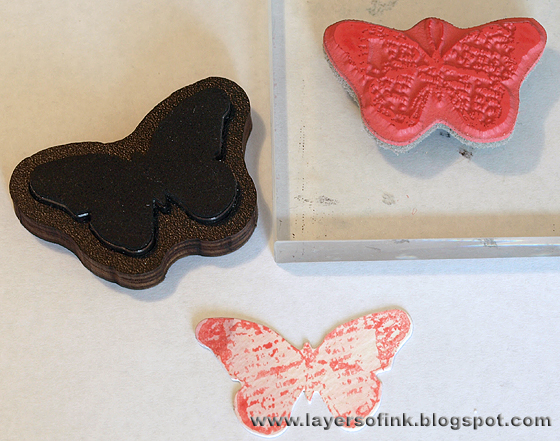
Step 6. Stamp the butterflies on clear modeling film with Stazon Jet Black ink. If you make a mistake, you can wipe off the stamping with Alcohol Blending Solution or with surgical spirits (this applies to the next step too).
Step 7. When dry, roughly cut out the butterflies, making it easier to colour them. Turn them around. You need to apply the alcohol inks at the back; otherwise the Stazon ink will smear. Using an ink applicator and felt squares, and ink the butterflies with alcohol inks. I used Sunshine Yellow, Sailboat Blue, Stonewashed, Citrus, Red Pepper and Raisin. Let the first layer dry and then add ink for a more intense colour. Also add a little bit of a second colour to each one. Let dry.
Step 8. Cut out the butterflies. Heat one at a time up on your craft sheet, using a heat gun. Shape them so that it looks like they are flying. Take care not to burn yourself, although the modeling film doesn’t get very hot. If you are not happy with the shape, just reheat and shape again. The film cools down quickly, so sometimes you might have to reheat just the one wing to shape it. I shaped them with the Stazon stamped side up and the alcohol inked one down. When the modeling film is cool, it keeps its shape perfectly.
Step 9. Glue a piece of baker's twine to each butterfly, using a tiny bit of Glossy Accents.
Step 10. Attach the butterflies to the card with a mini stapler. I attached some of them before taping the card to the base cardstock – the ones I knew I wouldn’t be able to reach with the stapler otherwise. The rest were stapled once the card had been taped to the base (to secure it even better). Tie a not with the strings and glue it to the card with Glossy Accents. And the card is finished.
Close-up of the butterflies:
I also made a vertical card, on this one I only stamped half the sentiment.
I hope you have enjoyed this tutorial! If you have any questions, just let me know.
Happy stamping!
Anna-Karin


