Showing posts with label Shrink Plastic. Show all posts

Tuesday, December 17, 2024

Frosty Christmas Window Tutorial

Hello friends! Today, I am happy to have a tutorial on the Simon Says Stamp store blog. I enjoy making my own Christmas decorations and they also make great gifts. For this project, I made a sparkly window. Below is a sneak peek.

 Please note: this post has affiliate links, for which I receive a small percentage of sales generated by the link, at no extra cost to you.

Layers of ink - Frosty Christmas Window Tutorial by Anna-Karin Evaldsson.

For this project, I built a Christmas scene using mainly Tim Holtz idea-ology pieces. I wanted to add parcels, but the stamps that I had at home were all too large. The problem was solved with Simon Says Stamp Shrink Sheets, making the parcels the perfect size. I am very fond of creating snow for projects and here I used one of my favorite methods for that: texture paste, glitter and mica flakes.

Head over to the Simon Says Stamp Store blog to see the full project and all the steps in the tutorial.


Thank you for visiting!

Happy Christmas crafting!

Anna-Karin


Monday, August 14, 2023

Calm and Stormy Seas Tag

Hi stampers! It is Monday and this week school starts again. I hope summer will still last a little longer.

Please note: this post has affiliate links, for which I receive a small percentage of sales generated by the link, at no extra cost to you.


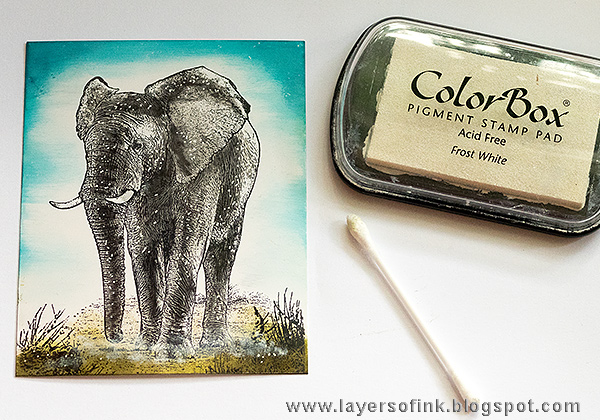
This week at the Simon Says Stamp Monday Challenge Blog we have a Use your Favorite Technique theme. I have way too many favorite techniques to pick just one or two, but ended up using a bunch of favorites such as resist and texture created by layers of Distress Ink and Distress Oxide Ink. 

Don't miss the project by our August guest designer Carrie Swift aka Redfire Studios.

Layers of ink - Calm and Stormy Seas Tag by Anna-Karin Evaldsson.

We have had a week and a half in a cabin at the sea and it was the inspiration for this tag. We had some calm days, but also quite a few very stormy days, with a wild sea and trees falling. The background is inspired by the storm, while the plants are inspired by the calm weather and the beautiful moor we walked through to the sea. These flowers as well as pine trees could be found at the sea. There are also some shells that I picked on the beach.

Layers of ink - Calm and Stormy Seas Tag by Anna-Karin Evaldsson. White emboss Simon Says Stamp Tumbling Shells.

Start by white embossing the Simon Says Stamp Tumbling Shells on a tag. Drag the embossing ink pad around the edges and emboss them too.

Layers of ink - Calm and Stormy Seas Tag by Anna-Karin Evaldsson. Ink with Distress Ink.

Smear Distress Inks on a non-stick craft sheet, mist with water and press the paper into the ink.

Layers of ink - Calm and Stormy Seas Tag by Anna-Karin Evaldsson. Add more ink.

When dry, repeat until you are happy with the look.

Layers of ink - Calm and Stormy Seas Tag by Anna-Karin Evaldsson.

Continue adding more Distress Ink in the same way, but this time, don't press the tag into the ink, just touch the ink with the tag, to get a splattered look.

Layers of ink - Calm and Stormy Seas Tag by Anna-Karin Evaldsson.

Finally, add a last layer of Distress Oxide Ink, again just touching the paper to the ink. 

Layers of ink - Calm and Stormy Seas Tag by Anna-Karin Evaldsson. Die cut Tim Holtz Wildflowers.

Die cut flowers and pine branches from heavystock paper. I used Tim Holtz Wildflowers and Mini Holiday Greens.

Layers of ink - Calm and Stormy Seas Tag by Anna-Karin Evaldsson. Ink with Distress Inks in various colors.

Smear Distress Inks on a non-stick craft sheet and color the flowers in the same way as the background.

Layers of ink - Calm and Stormy Seas Tag by Anna-Karin Evaldsson.

Finish with a last layer of Distress Oxide Ink.

Layers of ink - Calm and Stormy Seas Tag by Anna-Karin Evaldsson. Stamp on shrink plastic.

I needed some crabs on the tag too, since there were lots at the sea. The stamp from Tim Holtz Sea Life was too large so I stamped it on Simon Says Stamp Shrink Film. Shrink plastic is also an old favorite of mine.

ink with alcohol ink.

Color on the back with alcohol ink.

Layers of ink - Calm and Stormy Seas Tag by Anna-Karin Evaldsson. Add Glossy Accents.

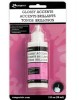
Shrink the crabs and add a layer of Glossy Accents on top. Let dry (it takes a while).
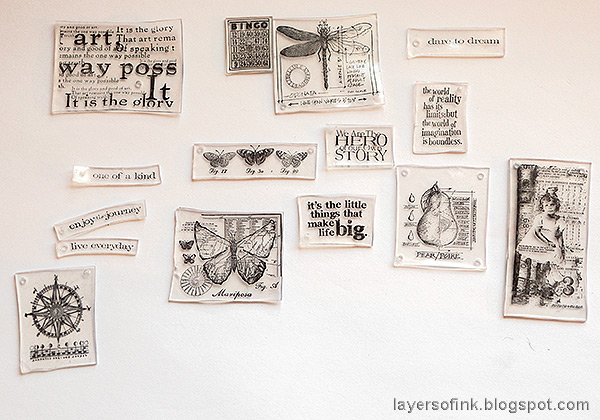
Layers of ink - Calm and Stormy Seas Tag by Anna-Karin Evaldsson. Stamp a sentiment.

The sentiments was stamped on a Tim Holtz Journal Card and cut into strips (another favorite of mine). I also added some sequins, which is also something I enjoy doing as a finishing touch to projects.

Layers of ink - Calm and Stormy Seas Tag by Anna-Karin Evaldsson.

These flowers are meant to be heather, the most common plant on the moor.

Layers of ink - Calm and Stormy Seas Tag by Anna-Karin Evaldsson.

And some clover flowers. 

Layers of ink - Calm and Stormy Seas Tag by Anna-Karin Evaldsson. Add real shells.

I dyed cheese cloth with Frayed Burlap Ink. The shells were picked on the beach and made a good home for the three crabs.

Layers of ink - Calm and Stormy Seas Tag by Anna-Karin Evaldsson.

The crabs are pretty dark, since the colors intensify as you shrink them and since they aren't placed on a white surface.

Layers of ink - Calm and Stormy Seas Tag by Anna-Karin Evaldsson.

The Glossy Accents give a really nice look to shrink plastic.

Layers of ink - Calm and Stormy Seas Tag by Anna-Karin Evaldsson. Resist texture.

The embossing resists the ink and gives great texture. I also added dots with a white gel pen.

Layers of ink - Calm and Stormy Seas Tag by Anna-Karin Evaldsson.

The shells and crabs are pretty dimensional, if you want to make a flatter project, stamp shells instead.

Layers of ink - Calm and Stormy Seas Tag by Anna-Karin Evaldsson.

I remember well when I bought my first Distress Ink, which was Walnut Stain, many years ago in Johannesburg. Now there are so many more wonderful colors, and Oxide inks too. 

Layers of ink - Calm and Stormy Seas Tag by Anna-Karin Evaldsson.

I hope you enjoyed this tutorial! 

I hope you will join us this week in our Use Your Favorite Technique challenge. You have a chance to win a $25 gift voucher to do some fun shopping at Simon Says Stamp. You have until Monday 8am Ohio time. 1pm UK time, 2 pm CET to join in.

We also have our annual Kid's Vacation Challenge, with an Anything Goes theme. It is open for kids ages 2-16 years old. You can read more here.


Do you use Instagram? If so please add #sssmchallenge so we can see your entries there too.


Thank you so much for stopping by here today! 

Happy crafting!

Anna-Karin

Supplies:

* Please note: the links are affiliate links, for which I receive a small percentage of sales generated by the link, at no extra cost to you.


Tuesday, January 31, 2023

Shrink Plastic Panels Card Tutorial

Hello stampers! Welcome to my blog on this last day of January! For today's project, I revisited an old favorite, namely shrink plastic. I never stopped using shrink plastic, but definitely used it more in my early papercrafting days. 

Please note: this post has affiliate links, for which I receive a small percentage of sales generated by the link, at no extra cost to you.

Layers of ink - Shrink Plastic Card Tutorial by Anna-Karin Evaldsson, with Simon Says Stamp Shrink Sheets.

Shrink plastic is like magic and makes it possible to shrink a large stamp or die cut into something smaller and dimensional. I used a whole bunch of sentiment and collage type stamps for this card and decided to fill the entire card front with shrink plastic panels. 

Layers of ink - Shrink Plastic Card Tutorial by Anna-Karin Evaldsson. Stamp Stamper's Anonymous Tim Holtz images on shrink sheets.

Start by stamping images on Simon Says Stamp Shrink Sheets and cut into squares and rectangles. Stazon ink works the best on shrink plastic. I used a mix of older Stamper's Anonymous Classics and Tim Holtz stamps. 

Layers of ink - Shrink Plastic Card Tutorial by Anna-Karin Evaldsson, with Simon Says Stamp Shrink Sheets.

I find that it is often easiest to use brads, string or stitches to attach shrink plastic pieces. You need to punch holes before shrinking the plastic. Punch holes with a Crop-A-Dile. 

Layers of ink - Shrink Plastic Card Tutorial by Anna-Karin Evaldsson, with Simon Says Stamp Shrink Sheets.

There are various ways to shrink the plastic. I used my heat tool. Be very careful so that you don't burn yourself. You can find a Simon Says Stamp video by Shari Carroll showing this process here.

Layers of ink - Shrink Plastic Card Tutorial by Anna-Karin Evaldsson.

I used a Simon Says Stamp Pawsitively Everything Tool on top of a box when shrinking my pieces. Flatten them out with an acrylic block or a wood-mounted stamp. The pieces don't always shrink to the exact shape that they originally were, which means that many of them won't be completely square or rectangular. I like that imperfect look. Move the pieces around on your cardstock until you are happy with the placement. I made two additional pieces to fill in two gaps.

Layers of ink - Shrink Plastic Card Tutorial by Anna-Karin Evaldsson.

Here you can see the amount of shrinking that will happen. Cool isn't it?

Layers of ink - Shrink Plastic Card Tutorial by Anna-Karin Evaldsson. Color with Ranger alcohol ink.

You can color the shrink plastic before shrinking, but I decided to do it afterwards since I wanted to be able to plan where the pieces would go first. It also gives you more control of the color since the shrinking process darkens colors. Color the pieces at the back with alcohol ink and a felt applicator on your ink-blending tool. Don't color on the front since that will ruin your stamping.

Layers of ink - Shrink Plastic Card Tutorial by Anna-Karin Evaldsson.

The background is neutral. I inked the heavystock paper with Distress Ink and misted lightly with water.

Layers of ink - Shrink Plastic Card Tutorial by Anna-Karin Evaldsson.

Place the pieces on the cardstock again to see if you want to change anything. You can remove the alcohol ink with blending solution. I lightened the pieces in a few places.

Layers of ink - Shrink Plastic Card Tutorial by Anna-Karin Evaldsson.

Attach the pieces with Tim Holtz brads. As you can see, they are a little wonky and skewed, which I really like. 

Layers of ink - Shrink Plastic Card Tutorial by Anna-Karin Evaldsson.

The small sentiment banners were stamped with Tim Holtz Simple Sayings. The beautiful dragonfly, as well as the compass and pear, come from Stamper's Anonymous Classics #1. I used several of the Classics sets since they have beautiful collage images.

Layers of ink - Shrink Plastic Card Tutorial by Anna-Karin Evaldsson.

I added a Label Sticker sentiment too. The art words panel behind it comes from the Classics #4 set

Layers of ink - Shrink Plastic Card Tutorial by Anna-Karin Evaldsson.

The collage girl stamp to the left is an old favorite of mine, from Tim's The Girls set.

Layers of ink - Shrink Plastic Card Tutorial by Anna-Karin Evaldsson.

Since the pieces aren't all completely flat, the card has quite a bit of dimension and it also adds movement.

Layers of ink - Shrink Plastic Card Tutorial by Anna-Karin Evaldsson.


I hope you enjoyed this tutorial and that it inspired you to use some shrink plastic.


Thank you so much for visiting my blog today!

Happy stamping!

Anna-Karin


Supplies:

* Please note: the links are affiliate links, for which I receive a small percentage of sales generated by the link, at no extra cost to you.

Monday, June 5, 2017

Elephant Card Tutorial

Hello everyone and welcome to another Simon Says Stamp Monday Challenge post. We had a fun weekend with swim and soccer practice, a flea market, and friends coming over to play on both Saturday and Sunday. Tomorrow is a public holiday here (national day) and the kids are home today so they got a nice long weekend.


Since this week is the first week of a new month, the team is showcasing products from a specific designer/company, and the turn has come to Darkroom Door and their wonderful and versatile stamps. This week at we have a Masculine challenge theme.

A new month also means a new guest designer, and during June the wonderful Anne Redfern will be our guest designer. Don't miss her fantastic projects and the often clever and unusual ways that she uses products.

Layers of ink - Elephant Card Tutorial by Anna-Karin with stamps by Darkroom Door

I decided to make another card this week and wanted to make this gorgeous elephant the star of the card. I love elephants and I am lucky to have seen them in the wild quite a few times. The Darkroom Door Wild Africa sets are really wonderful and I have used them quite a few times lately.

Layers of ink - Elephant Card Tutorial by Anna-Karin with stamps by Darkroom Door

I wanted to use the Camera Eclectic stamp, but it was too big for my card, so I stamped it on shrink plastic and shrunk it. Here you can see the original and the shrunk versions. Punch a hole through the cameras before shrinking.

Layers of ink - Elephant Card Tutorial by Anna-Karin with stamps by Darkroom Door

I colored the cameras with alcohol in on the back. Be careful not to color them on the front since you'll smear the black ink then.

Layers of ink - Elephant Card Tutorial by Anna-Karin with stamps by Darkroom Door

The elephant was stamped with Black Soot Archival Ink on gloss cardstock. I filled the bottom out with grasses from the Leopard stamp on Wild Africa Vol. 2 set.

Layers of ink - Elephant Card Tutorial by Anna-Karin with Colorbox Stylus Tool

I coloured it with Distress Inks using a Colorbox Stylus Tool with an Oval Tip. Start with the lightest color and gradually build up darker shades. For the smaller areas, I used a Ranger Craft Nib. I want to do a video on this type of inking, but things have been too busy lately. Hopefully soon!

Layers of ink - Elephant Card Tutorial by Anna-Karin with stamps by Darkroom Door

Add some highlights to the elephant with a white gel pen. It really brings it to life.

Layers of ink - Elephant Card Tutorial by Anna-Karin with stamps by Darkroom Door

Finally, I sponged a thin layer of white pigment ink underneath the elephant, using a Q-tip. It kinds of looks like mist.

Layers of ink - Elephant Card Tutorial by Anna-Karin with stamps by Darkroom Door

For the background, I decided to extend the scene and applied Distress Inks to an acrylic block. The block was misted and then stamped on a a piece of watercolour paper.

Layers of ink - Elephant Card Tutorial by Anna-Karin with stamps by Darkroom Door

Add a layer of Glossy Accents on top of the cameras and leave them to dry overnight. The Glossy Accents gives them a great finished look. Attach with a Mini Fastener to the card. The birds come from the African Trees set.

Layers of ink - Elephant Card Tutorial by Anna-Karin with stamps by Darkroom Door

I love the look of this gentle giant. For a different twist, color her pink instead.

Layers of ink - Elephant Card Tutorial by Anna-Karin with stamps by Darkroom Door

A closer look of the mist at the feet. Stamp the sentiment on a Tattered Curvy Banner, for some added dimension. I also layered the elephant on a piece of burlap.


Don't forget to follow Simon Says Stamp on Instagram, they post great stuff daily. 


Do you use Instagram? If so please add #sssmchallenge so we can see your entries there too.


Thank you for visiting today!

Happy crafting!

Anna-Karin

Supplies: