Showing posts with label Tissue paper. Show all posts

Monday, October 28, 2024

Skull Mixed Media Tag

 Hello crafters! I hope you are well and had a good weekend. 

Please note: this post has affiliate links, for which I receive a small percentage of sales generated by the link, at no extra cost to you.


This week Stencil it is our theme at the Simon Says Stamp Monday Challenge Blog. I hope you will make something for the challenge. Also, remember to look at the gorgeous project by our October guest designer Alison Bomber. 


Layers of ink - Skull Mixed Media Tag Tutorial by Anna-Karin Evaldsson.

I made a skull tag with easy mixed media techniques and a bunch of products by Tim Holtz. The skull comes from the Halloween Collage Paper set and fit well on the tag, making the skull look large since it covers the tag.

Apply the skull design paper to the tag.

Start with a tag that has been coated with gesso. Apply the collage paper with Ranger's matte medium. Then add a couple of coats of clear gesso on top, letting it dry in between. The gesso will give tooth for the Distress Watercolor Pencils to adhere to.

Apply texture paste through Tim Holtz Skull stencil.

Add a little Uncharted Mariner paint to Texture Paste and apply through Tim's Batground folder.

Color with Distress Watercolor pencils.

When the paste is dry, paint the background with Distress Watercolor Crayons. Use water to blend.

Add glitter with Ranger Stickles gel.


Stamp with Simon Says Stamp Crackle background.

Stamp in a few places with Simon Says Stamp Crackle Background.

Die cut bats from Simon Says Stamp black glitter cardstock.


Die cut a moon and coat with Ranger Glow Grit paste.

Die cut the moon from Vault Wicked from heavystock paper and coat with Ranger's Glow Grit Paste. The moon glows in the dark, which is pretty cool. I inked the edges slightly so that it wouldn't look quite as bright on the background. For an example of how the Glow Grit Paste looks in the dark check out my Beware Pumpkins and Witches' Brew tutorials.

Add idea-ology Halloween stickers as sentiments.

Pick a bunch of sentiments from the idea-ology Halloween Sticker Book.

Add Simon Says Stamp Gunmetal Pawsitively Dazzling Gems.

I also added Simon Says Stamp Gunmetal Pawsitively Dazzling Gems. 

Sand the edges of the sentiment strips.

There is a bit of dyed mummy cloth under the sentiment from Halloween Baseboards and also tied to the top of the tag. The sentiment was cut into two and the edges were sanded. I also added a Halloween Quote Flair. 

Join us this week in our Stencil It challenge! You have a chance to win a $25 gift voucher to do some fun shopping at Simon Says Stamp. You have until Monday 8am Ohio time. 1pm UK time, 2 pm CET to join in.


Do you use Instagram? If so please add #sssmchallenge so we can see your entries there too.


Thank you so much for visiting my blog today! 

Happy crafting!

Anna-Karin

Supplies:

* Please note: the links are affiliate links, for which I receive a small percentage of sales generated by the link, at no extra cost to you.


Monday, August 12, 2024

Shimmery Art Journal Page

Hi friends! It is Monday again and we are back with a new Simon Says Stamp Monday Challenge.

Please note: this post has affiliate links, for which I receive a small percentage of sales generated by the link, at no extra cost to you.


This week our theme at the Simon Says Stamp Monday Challenge Blog is Sparkle & Shine. Don't miss the project by our August guest designer Carrie Swift aka Redfire Studies.

Layers of ink - Shimmery Art Journal Page Tutorial by Anna-Karin Evaldsson.

We are back from a couple of weeks at the coast with my family. I enjoyed sketching and watercoloring seaside landscapes. But it is also good to be back at my desk again. For this week's challenge I made an art journal page with lots of shimmer and shine. I used a mix of new Simon Says Stamp from the Cheering for You release and Tim Holtz products.

Layers of ink - Shimmery Art Journal Page Tutorial by Anna-Karin Evaldsson. Stamp with Simon Says Stamp Old Letter.

Start by white embossing the Simon Says Stamp Old Letter background on watercolor paper.

Layers of ink - Shimmery Art Journal Page Tutorial by Anna-Karin Evaldsson. Color with Distress Ink.

Smear Distress Inks on a non-stick craft sheet, mist with water and press the paper into the ink. The embossing will resist the ink.

Layers of ink - Shimmery Art Journal Page Tutorial by Anna-Karin Evaldsson. Mist with Distress Spritz.

When dry, mist with various Tim Holtz Distress Spritz colors. 


Stamp here and there with Simon Says Stamp Crackle Background and distress the edges.

Layers of ink - Shimmery Art Journal Page Tutorial by Anna-Karin Evaldsson. Die cut Simon Says Stamp Delicate Hummingbird Duo

Die cut the Simon Says Stamp Delicate Hummingbird Duo from watercolor paper.

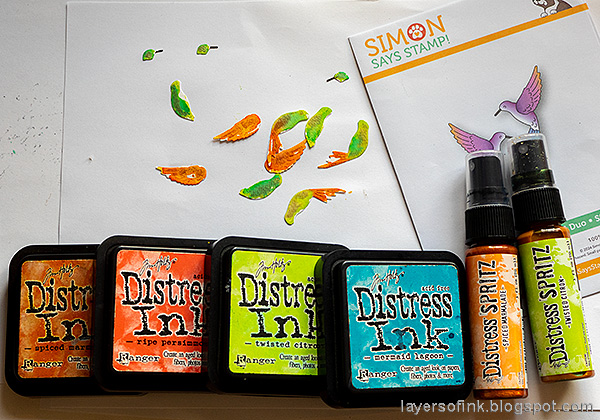
Layers of ink - Shimmery Art Journal Page Tutorial by Anna-Karin Evaldsson. Color the hummingbirds.

Watercolor the birds with a mix of Distress Ink and Distress Spritz.

Layers of ink - Shimmery Art Journal Page Tutorial by Anna-Karin Evaldsson. Paint with Antique Linen.

Coat a page in an art journal with gesso and when dry, paint with Antique Linen Distress Paint.

Layers of ink - Shimmery Art Journal Page Tutorial by Anna-Karin Evaldsson.

When the paint was dry, I tore pieces of Tim Holtz Archives Collage Paper and adhered to the background with matte medium. Add a layer of medium on top too. The paint with Distress Paint and mist with water to blend. Splatter with a little Distress Spritz.

Layers of ink - Shimmery Art Journal Page Tutorial by Anna-Karin Evaldsson. Mist through stencil.

Mist Unchartered Mariner Distress Spritz through the Bubble stencil. Mist a little Twisted Citron here and there too.

Layers of ink - Shimmery Art Journal Page Tutorial by Anna-Karin Evaldsson. Paint with Gansai Tambi Pearl.

Die cut the Simon Says Stamp Etched Delicate Frond three times from watercolor paper. Watercolor with a mix of Distress Ink Mowed Lawn and Zig Kuretake Gansai Tambi Pearl green.

Layers of ink - Shimmery Art Journal Page Tutorial by Anna-Karin Evaldsson. Die cut with Simon Says Stamp You.

Die cut Simon Says Stamp You from Tangerine glitter cardstock, Color Blend cardstock and black cardstock. Glue together.

Layers of ink - Shimmery Art Journal Page Tutorial by Anna-Karin Evaldsson. Tim Holtz Archives Collage Paper.

I also stamped a bunch of sentiments on the background, picking words and sentences which fit with the theme. The birds come from Hero Arts Sunset over Waves.

Layers of ink - Shimmery Art Journal Page Tutorial by Anna-Karin Evaldsson.

The Distress Spritz misting through the stencil is uneven and imperfect, mainly since the background is acrylic paint and medium. I stamped the Crackle Background on a few places on the background of the page too.

Layers of ink - Shimmery Art Journal Page Tutorial by Anna-Karin Evaldsson. Paper hummingbird.

The bodies of the birds were die cut one more time from black cardstock, so that the birds would stand out better from the background.

Layers of ink - Shimmery Art Journal Page Tutorial by Anna-Karin Evaldsson.

It is hard to capture all the shimmer and shine on a photo.

Layers of ink - Shimmery Art Journal Page Tutorial by Anna-Karin Evaldsson. Add more orange.

The second word of the title comes from Simon Says Stamp You stamp set, which coordinate with the die. 

Layers of ink - Shimmery Art Journal Page Tutorial by Anna-Karin Evaldsson. Shimmery background.

The Distress Spritz gives an interesting effect, looking different from different angles. The Twisted Citron Spritz, for example, only looks green when the light hits the background from a specific angle.

Layers of ink - Shimmery Art Journal Page Tutorial by Anna-Karin Evaldsson. Shimmery hummingbird.


Join us this week in our Sparkle and Shine challenge! You have a chance to win a $25 gift voucher to do some fun shopping at Simon Says Stamp. You have until Monday 8am Ohio time. 1pm UK time, 2 pm CET to join in.


Don't miss the Kid's Summer Vacation Challenge! Read more here. 


Do you use Instagram? If so please add #sssmchallenge so we can see your entries there too.


Thank you so much for stopping by here today! 

Happy crafting!

Anna-Karin

Supplies:

* Please note: the links are affiliate links, for which I receive a small percentage of sales generated by the link, at no extra cost to you.


Thursday, April 25, 2024

Vintage Frame Canvas

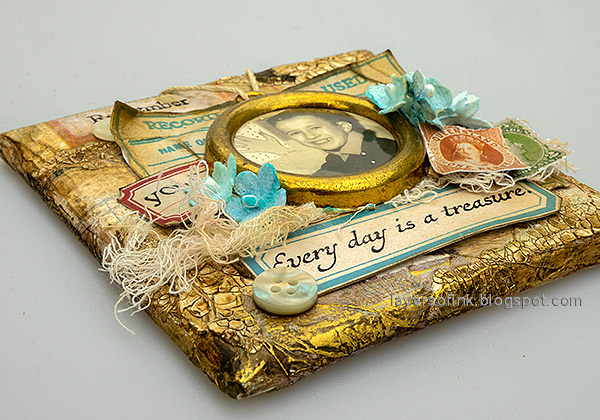
Hello crafters! Today I have a mixed media canvas to share, using a vintage frame, crackle paste and a bunch of ephemera. The techniques can be used on other surfaces too.

 Please note: this post has affiliate links, for which I receive a small percentage of sales generated by the link, at no extra cost to you.

Layers of ink - Vintage Frame Canvas Tutorial by Anna-Karin Evaldsson.

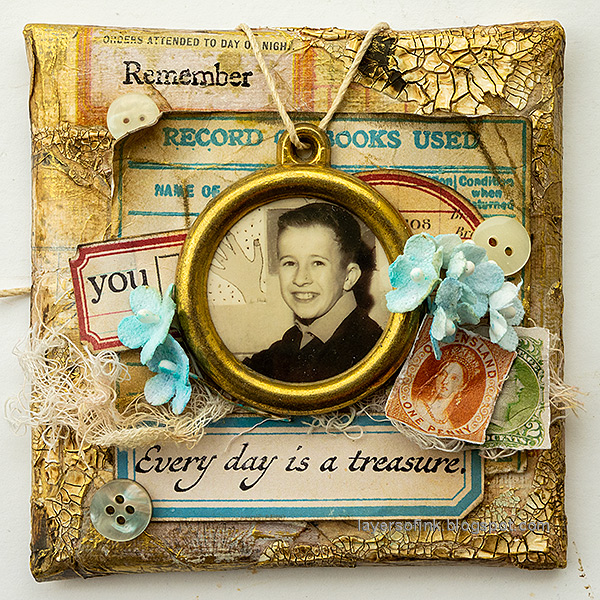
I found the vintage frame in a second hand store some time ago and used together with a childhood photo of my dad. The canvas is about 4x4 in. Stamped labels, idea-ology ephemera, tissue paper and crackle paste were used to build up the layers, together with some bits and pieces. 

Layers of ink - Vintage Frame Canvas Tutorial by Anna-Karin Evaldsson. Cover with idea-ology collage paper.

Start by applying matte medium to the canvas and place Tim Holtz Typography tissue paper into the medium. Add wrinkles and then add another layer of medium on top of the tissue paper.

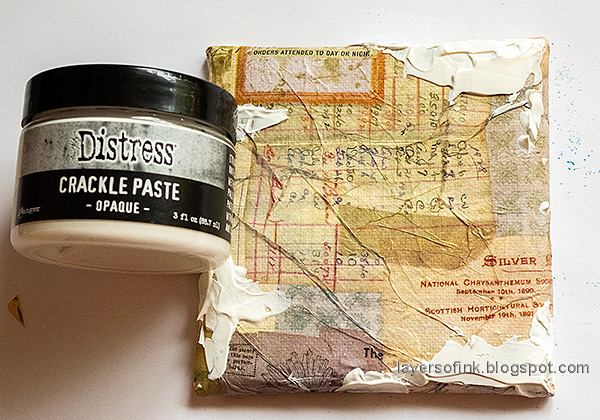
Layers of ink - Vintage Frame Canvas Tutorial by Anna-Karin Evaldsson. Add crackle paste.

Add a little crackle paste here and there with a palette knife.

Layers of ink - Vintage Frame Canvas Tutorial by Anna-Karin Evaldsson.

When the paste is dry, crackles will appear. Paint with watered-down Ground Espresso distress paint.

Layers of ink - Vintage Frame Canvas Tutorial by Anna-Karin Evaldsson. Add Sizzix Luster Wax.

Apply a tiny bit of Sizzix Gold Luster Wax to the project, with your finger.

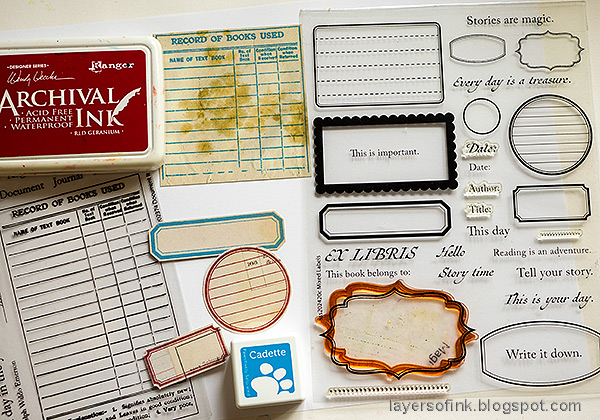
Layers of ink - Vintage Frame Canvas Tutorial by Anna-Karin Evaldsson. Stamp with Simon Says Stamp Mixed Labels.

Stamp labels on Tim Holtz Backdrops papers using Simon Says Stamp Pawsitively Saturated Cadette ink and Red Geranium Archival Ink. Die cut with the Mixed Labels coordinating dies. The larger stamp comes from Simon Says Stamp Document It and the smaller labels from Mixed Labels.

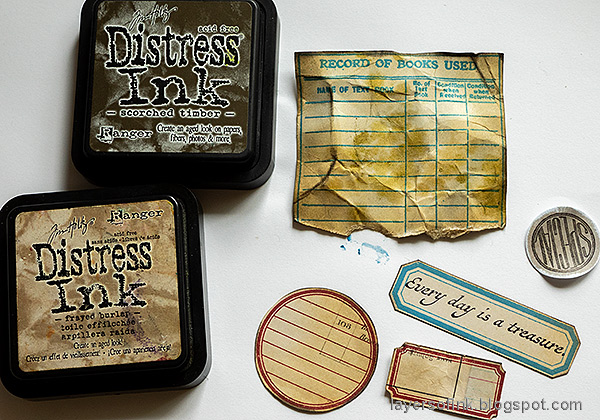
Layers of ink - Vintage Frame Canvas Tutorial by Anna-Karin Evaldsson. Ink the labels with Distress Ink.

Ink and distress the labels. 

Layers of ink - Vintage Frame Canvas Tutorial by Anna-Karin Evaldsson. Color flowers with watercolor pencils.

Color Tim Holtz Bouquet Findings flowers with Distress Watercolor Pencils and mist with water to blend to colors.

Layers of ink - Vintage Frame Canvas Tutorial by Anna-Karin Evaldsson.

Layer the labels under the frame and add a small piece of mummy cloth / cheese cloth. Fold up some of the edges.

Layers of ink - Vintage Frame Canvas Tutorial by Anna-Karin Evaldsson. Stamp sentiments.

You can also stamp sentiments directly on the background. Tie the frame with twine and glue to the canvas.

Layers of ink - Vintage Frame Canvas Tutorial by Anna-Karin Evaldsson.

Add the flowers in a couple of place and two postage stamps from Tim's ephemera packs. 

Layers of ink - Vintage Frame Canvas Tutorial by Anna-Karin Evaldsson.

I also glued a few vintage buttons to the canvas. Here you can see the effect of the Gold Luster Wax well.

Layers of ink - Vintage Frame Canvas Tutorial by Anna-Karin Evaldsson.

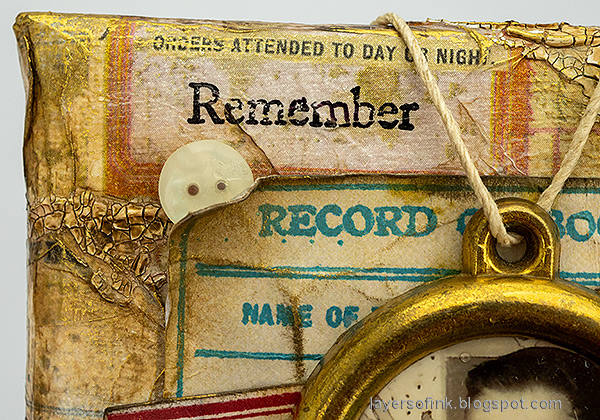
Stamp small sentiments on the areas of the labels and ticket which show.

Layers of ink - Vintage Frame Canvas Tutorial by Anna-Karin Evaldsson. Crackle paste.

I really like the effect of crackle paste and all that texture.

Layers of ink - Vintage Frame Canvas Tutorial by Anna-Karin Evaldsson.

Labels are great 'homes' for sentiments and titles.

Layers of ink - Vintage Frame Canvas Tutorial by Anna-Karin Evaldsson.

Behind my dad there are lots of drawings from his class mates. 


Thank you so much for stopping by here today! 


Anna-Karin

Supplies:

* Please note: the links are affiliate links, for which I receive a small percentage of sales generated by the link, at no extra cost to you.