Showing posts with label simon says stamp card kit. Show all posts

Saturday, December 23, 2023

Christmas Tree with Baubles

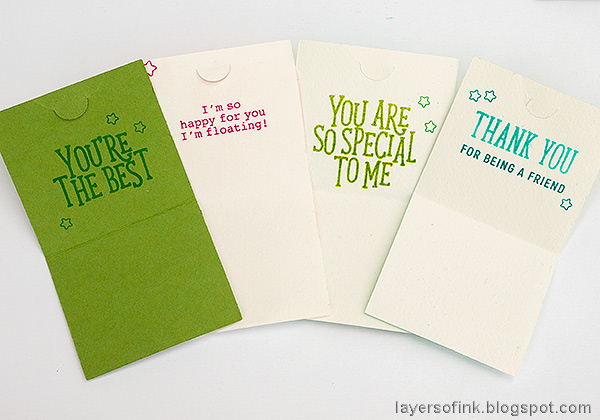
Hello stampers! I really like to make Christmas tags and have a pretty big collection by now. Here's a new one.

Please note: this post has affiliate links, for which I receive a small percentage of sales generated by the link, at no extra cost to you.

Layers of ink - Christmas Tree with Baubles Tag Tutorial by Anna-Karin Evaldsson.

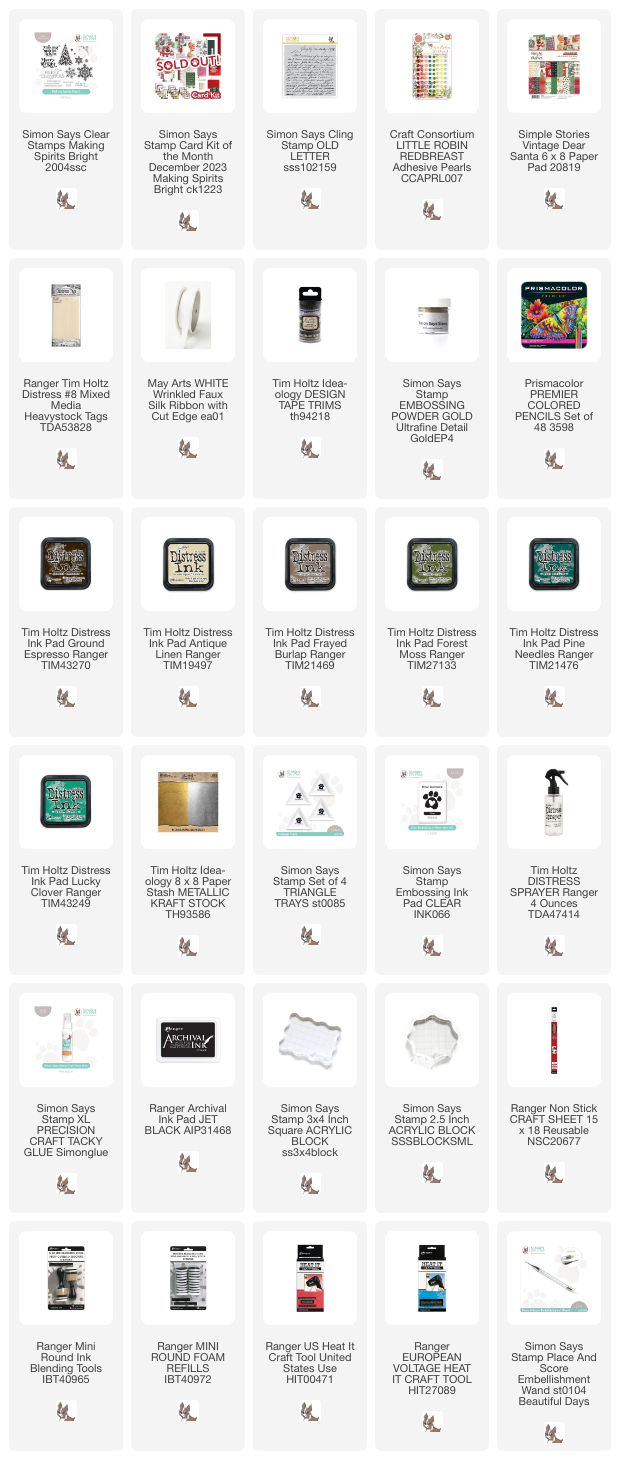
Making Christmas tags sometimes reminds me of Tim Holtz 12 Tags of Christmas series and how I enjoyed to make all those tags. This tag was made with the Simon Says Stamp December card kit, Making Spirits Bright. The kit is sold out by you can still get the individual products.

Layers of ink - Christmas Tree with Baubles Tag Tutorial by Anna-Karin Evaldsson. Ink with Distress Ink.

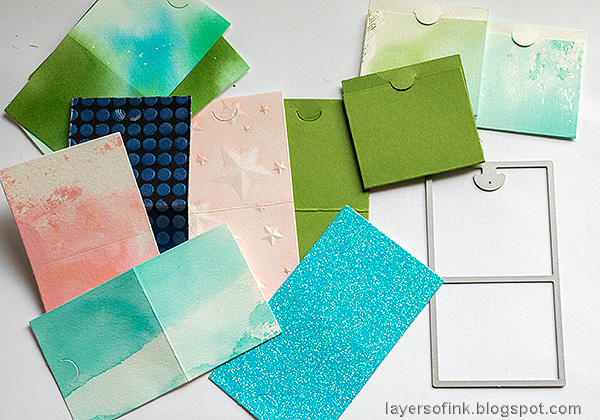
Start out by smearing Distress Ink on a non-stick craft sheet, mist with water and press a tag into the ink. Let dry and repeat. I wanted a neutral background, but with some texture.

Layers of ink - Christmas Tree with Baubles Tag Tutorial by Anna-Karin Evaldsson. Stamp with Simon Says Stamp Making Spirits Bright.

Ink the gorgeous tree from Simon Says Stamp Making Spirits Bright with three shades of green Distress Ink. Start with the lighter ink at the top. Mist with water about 4-5 times before stamping.

Layers of ink - Christmas Tree with Baubles Tag Tutorial by Anna-Karin Evaldsson. Stamp with Simon Says Stamp Old Letter.

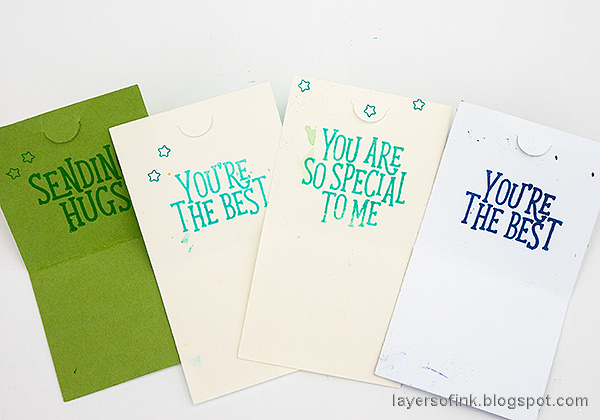
Stamp the sentiment from Making Spirits Bright twice under the tree and draw around it with a brown pencil to create a stem/pot for the tree. Stamp the background here and there with Simon Says Stamp Old Letter. Gold emboss stars from Making Spirits Bright.

Layers of ink - Christmas Tree with Baubles Tag Tutorial by Anna-Karin Evaldsson. Add baubles.

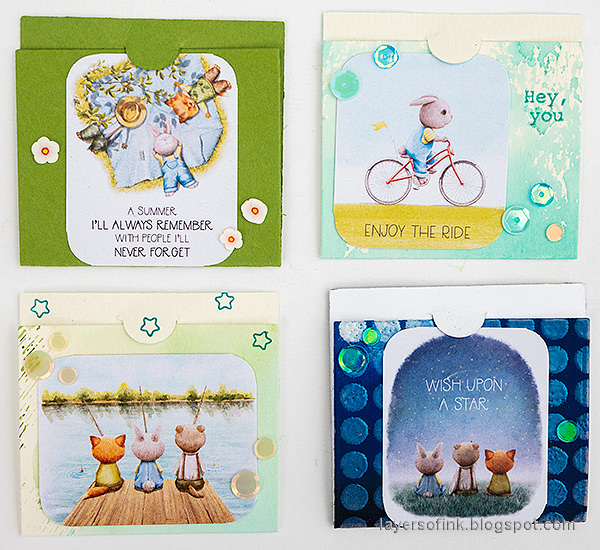
Use pearls from Craft Consortium Little Robin Redbreast as baubles on the tree.

Layers of ink - Christmas Tree with Baubles Tag Tutorial by Anna-Karin Evaldsson. Ink with Ground Espresso.

Ink the edges with Ground Espresso.

Layers of ink - Christmas Tree with Baubles Tag Tutorial by Anna-Karin Evaldsson.

Dye Faux Silk Ribbon with the three shades of green Distress Ink that were used on the tree.

Layers of ink - Christmas Tree with Baubles Tag Tutorial by Anna-Karin Evaldsson. Gold emboss stars.

The gold embossed stars adds to the festive look.

Christmas Tree With Baubles- Layers of ink

The sentiment also comes from Making Spirits Bright and was stamped on one of the Simple Stories Vintage Dear Santa patterned papers and cut into a strip. Cut a larger strip from another piece of green paper. Add a strip of gold metal kraft stock paper underneath. I used Design Tape Trims to create a wall behind the stem of the tree, so that the tree doesn't look like it is floating.

Layers of ink - Christmas Tree with Baubles Tag Tutorial by Anna-Karin Evaldsson.

Half-pearls are great as baubles and these were such pretty colors.

Layers of ink - Christmas Tree with Baubles Tag Tutorial by Anna-Karin Evaldsson.

I hope you enjoyed this last Christmas tag of the year. 

I also want to wish everyone a very Merry Christmas!!


Thank you for visiting my blog! 

Happy crafting!

Anna-Karin

Supplies:

* Please note: the links are affiliate links, for which I receive a small percentage of sales generated by the link, at no extra cost to you.


Thursday, February 9, 2023

Glittery Valentine's Day Card

Hello friends! Today I have a card to share filled with glitter and gloss. 

Please note: this post has affiliate links, for which I receive a small percentage of sales generated by the link, at no extra cost to you.

Layers of ink - Glittery Valentine's Day Card Tutorial by Anna-Karin Evaldsson.

I don't often use patterned paper, but for this card I decided to try to use texture paste and glitter on top of patterned paper and thought the result was pretty fun. The card was made with the Simon Says Stamp Sweet Days February Card Kit, but you can also get the products individually.

Layers of ink - Glittery Valentine's Day Card Tutorial by Anna-Karin Evaldsson.

I die cut the Fancy Love die twice from Simon Says Stamp White Glossy Cardstock and colored the word with the lightest of the three colors in the Spectrum Noir Bright Pink Tri-Blend Brush marker.

Layers of ink - Glittery Valentine's Day Card Tutorial by Anna-Karin Evaldsson.

Next, I decided to also color the outline, using the darkest shade. It is pretty handy having three shades of the same color in one pen.

Layers of ink - Glittery Valentine's Day Card Tutorial by Anna-Karin Evaldsson. Coat with Glossy Accents.

The second die cut was colored with a black marker and off set slightly to create a shadow. I coated the word with Glossy Accents, for even more shine.

Layers of ink - Glittery Valentine's Day Card Tutorial by Anna-Karin Evaldsson.

Lightly sand the edges of the paper. Apply texture paste through the Simon Says Stamp Hearts and Stars stencil, working on one of the Paper Rose Cozy Days papers from the card kit. Let dry.

Layers of ink - Glittery Valentine's Day Card Tutorial by Anna-Karin Evaldsson. Apply Ranger Stickles Glitter Gel through stencil.

When the paste was dry, I applied Ranger Venus Stickles Glitter Gel through the stencil. Let dry and repeat until you are happy with the look.

Layers of ink - Glittery Valentine's Day Card Tutorial by Anna-Karin Evaldsson.

The May Arts Wrinkled Faux Silk Ribbon ribbon was also colored with the Bright Pink Tri-Blend marker, first with the lightest shade and then on one side with the mid-tone, creating an ombre effect.

Layers of ink - Glittery Valentine's Day Card Tutorial by Anna-Karin Evaldsson.

The jars of Ranger Stickles Glitter Gel have glitter pieces of different kinds and sizes as well as sequins in each jar. The small star sequins are part of the Venus glitter jar. The larger stars were added by me. The sequins come from Simon Says Stamp Disco Hearts.

Layers of ink - Glittery Valentine's Day Card Tutorial by Anna-Karin Evaldsson.

You can also skip the paste layer and just apply glitter directly to the paper, but the paste adds an interesting dimensional element.

Layers of ink - Glittery Valentine's Day Card Tutorial by Anna-Karin Evaldsson.

Glossy paper is one of my favorite surfaces and it was super quick to color with the brush marker. It also looks great colored with dye ink, such as Distress Ink. The glossy accents makes the word stand out even more. I adhered it with Simon Says Stamp Pawsitively Perfect Foam Tape.

Layers of ink - Glittery Valentine's Day Card Tutorial by Anna-Karin Evaldsson.

The smaller sentiment comes from Simon Says Stamp Swoopy Flowers

Layers of ink - Glittery Valentine's Day Card Tutorial by Anna-Karin Evaldsson.

The ribbon was tied around the card and I added a second bow too. I was happy to find the May Arts Wrinkled Faux Silk Ribbon since it reminded me of the Tim Holtz Crinkle Ribbon that I used to love and which you can't get hold of anymore. 

Layers of ink - Glittery Valentine's Day Card Tutorial by Anna-Karin Evaldsson.


Thank you so much for visiting my blog today!


Happy stamping!

Anna-Karin


Supplies:

* Please note: the links are affiliate links, for which I receive a small percentage of sales generated by the link, at no extra cost to you.

Friday, June 24, 2022

Mini Pocket Notes

Hi friends! Today I have a sweet little project to share, which is perfect for using up some scrap papers.

Please note: this post has affiliate links, for which I receive a small percentage of sales generated by the link, at no extra cost to you.


Layers of ink - Cute Mini Pocket Notes Tutorial by Anna-Karin Evaldsson.

I often need little cards to put on a gift for a kid's party or something similar, almost like a more elaborate form of a gift label. When I saw the sweet Paper Rose Sunny Days images on one of the patterned papers in the Simon Says Stamp Happiest Wishes June card kit, I thought they would be perfect for such little cards. If the card kit is sold out, you can also get the products individually.

Layers of ink - Cute Mini Pocket Notes Tutorial by Anna-Karin Evaldsson. Die cut with Simon Says Stamp Small Pocket Note.

I started out by die cutting cards from various scrap papers, using Simon Says Stamp Small Pocket Note die.

Layers of ink - Cute Mini Pocket Notes Tutorial by Anna-Karin Evaldsson.

Cut out the various scenes from Paper Rose Sunny Days and round the corners. 

Layers of ink - Cute Mini Pocket Notes Tutorial by Anna-Karin Evaldsson.

Pair up the patterned paper scenes with die cut cards, looking for instance at the colors.

Layers of ink - Cute Mini Pocket Notes Tutorial by Anna-Karin Evaldsson. Stamp with Simon Says Stamp inks.

Stamp sentiments on the inside with Simon Says Stamp Pawsitivily Saturated Inks. I also stamped some sentiments on the fronts as well as a bunch of stars. The stamp sets are from the June and May card kits: Happiest Wishes and Brushed Flowers.

Layers of ink - Cute Mini Pocket Notes Tutorial by Anna-Karin Evaldsson.

I added sequins to the little cards and Trinity Stamps Lily Pad Leaps embellishments.

Layers of ink - Cute Mini Pocket Notes Tutorial by Anna-Karin Evaldsson.

Since these were scrap papers, some of the insides are a little messy. 

Layers of ink - Cute Mini Pocket Notes Tutorial by Anna-Karin Evaldsson.

The glitter card is my youngest's favorite of these. Die cut from Aqua Glitter paper.

Layers of ink - Cute Mini Pocket Notes Tutorial by Anna-Karin Evaldsson. Add sequins.

These small images are so cute, but since they are so small, they would easily disappear on a large project.

Layers of ink - Cute Mini Pocket Notes Tutorial by Anna-Karin Evaldsson.

The little cards will fit for many occasions. 

Layers of ink - Cute Mini Pocket Notes Tutorial by Anna-Karin Evaldsson.

And more sentiments. 

Layers of ink - Cute Mini Pocket Notes Tutorial by Anna-Karin Evaldsson.

If you want a larger card, you can glue the little card to a normal-sized card. On this art journal page I did something similar, also with the Small Pocket Note die.

Layers of ink - Cute Mini Pocket Notes Tutorial by Anna-Karin Evaldsson.


I hope you enjoyed this project! Thank you so much for taking the time to stop by here today!


Happy crafting!

Anna-Karin

Supplies:

* Please note: the links are affiliate links, for which I receive a small percentage of sales generated by the link, at no extra cost to you.

Wednesday, April 21, 2021

Flower Layout

Hello friends! Today I have a scrapbooking layout to share, but it can also be turned into a card. 

Please note: this post has are affiliate links, for which I receive a small percentage of sales generated by the link, at no extra cost to you.

Layers of ink - Flower Layout Tutorial by Anna-Karin Evaldsson.

I used products from the Simon Says Stamp April Card Kit. It is such a beautiful kit. You can also get the stamps, papers and stickers separately. The patterned papers, from Simple Stories Vintage Cottage Fields are so pretty and I wanted to create a scrapbooking page with them, so that I could use a bunch of papers on one project. If you would rather make a card, just use one or two of the papers instead. I used an old photo of my eldest. Pink and flowers can be used for a boy page too. 

Layers of ink - Flower Layout Tutorial by Anna-Karin Evaldsson. White emboss the flowers on vellum.

The beautiful flowers and butterflies from Simon Says Stamp Friendly Flowers were embossed on vellum with the Cream Embossing powder. The powder is in the kit, but not the vellum. 

Layers of ink - Flower Layout Tutorial by Anna-Karin Evaldsson. Color vellum with colored pencils.

Cut out and color the images on the back with colored pencils

Layers of ink - Vellum flowers.

Turn the vellum around and add a few details with a white gel pen.

Layers of ink - Flower Layout Tutorial by Anna-Karin Evaldsson. Simon Says Stamp April Card Kit.

I used cardstock from the kit and arranged the panels that I wanted to use on top. 

Layers of ink - Flower Layout Tutorial by Anna-Karin Evaldsson.

Distress all the edges and tear some of them. 

Layers of ink - Flower Layout Tutorial by Anna-Karin Evaldsson.

Stitch around the layout with a sewing machine. Some of the vellum pieces were stapled to the background and the others were glued.

Layers of ink - Flower Layout Tutorial by Anna-Karin Evaldsson.

I also added a few stickers from the Simple Stories sticker sheets included in the kit.

Layers of ink - Flower Layout Tutorial by Anna-Karin Evaldsson.

Coloring at the back of vellum gives a soft and subtle look.

Layers of ink - Flower Layout Tutorial by Anna-Karin Evaldsson.

This sticker is also a part of the kit. Crafting with kits is fast!

Layers of ink - Flower Layout Tutorial by Anna-Karin Evaldsson.

Shape the wings of the butterflies a little and only adhere them in the center. If you are making a card, you can layer butterflies on top of each other to create a dimensional look.

Layers of ink - Flower Layout Tutorial by Anna-Karin Evaldsson.

I hope you enjoyed this post and I will see you soon again.


Thank you so much for taking the time to stop by here today! I will see you again tomorrow.

Happy crafting!

Anna-Karin

Supplies:

* Please note: the links are affiliate links, for which I receive a small percentage of sales generated by the link, at no extra cost to you.