Hi and welcome! This month the Eileen Hull Inspiration Team is doing quick and easy
party ideas.
Eileen's Sizzix dies are perfect for party items: gift packaging, center pieces, table placements, invitation cards, etc. etc., for both kiddies and adult parties.
I made a party pack filled with flowers that the recipient can assemble her or himself. This would work great as a gift for a crafty friend too. The suitcase is filled with flowers die cut from different types of papers. I also added some rhinestones, a bottle of Stickles and a pack of brads. Buttons would be another idea. I am so glad that Eileen's
Suitcase Bag die is back in production, it is one of my all time favourite dies.
This specific suitcase is a gift for my son. He loves to go on treasure hunts where he has to follow clues, so I am going to do that for him, with the suitcase as the final treasure, and the rhinestones, Stickles and brads being found along the way. A great activity for kiddies parties (although in this case it will be more of a summer fun thing).
Start by die cutting the
suitcase from mat board or chipboard. Since this is an XL die, you need the Extended Cutting Pads. As you can see, the Scoreboards dies both cuts and scores the material.
Coat with gesso, on the inside too.
Paint the suitcase with Distress Paints. I didn't use Cracked Pistachio, but Tumbled Glass, and added the wrong paint bottle when I took the photo.
The top stamp by
Tim Holtz, from the
Sideshow set, fits perfectly at the front of the suitcase. I really like this image, especially since that handmade wheel toy is, and used to be, common in South Africa. Stamp it directly on the background, or as I did, on tissue paper first. I also stamped a
pointing hand and some numbers for the back of the suitcase.
Apply a layer of gloss multi medium on the background, place the tissue on top, and add another layer of gloss medium. I made the tissue paper wrinkle a bit for extra texture - that was the main reason for stamping on tissue paper and not directly on the background.
When dry, add some more paint. I used bits of orange, and silver and dry-brushed black paint around the edges and on the tissue texture.
Adhere the closure flap to the inside. Don't fold it down completely.
The bag is so easy to assemble, you just use brads. I like to pinch the brads with a pair of pliers, to make sure they are stuck a little harder.
I
stamped his name on the closure flap and added some more paint around the edges.
The flowers were die cut with the:
Pansy Flower,
Romance Flower,
Heart & Soul Flower, and
Spring Leaves dies, from Sizzix patterned papers, which are double-sided, as well as from Metallic Kraft-core cardstock, vellum, burlap and some embossed Core'dinations cardstock that I found on my desk.
I added some crackle and number stamping to the suitcase (and forgot to take a step photo of that). By skipping some of the steps, you can make this project a lot faster, which is good if it needs to be mass produced. Then after painting the background, just stamp the Sideshow image directly on the background, and skip the additional stamping, the embellishments, and the extra layers of paint.
The 'a' was die cut with Eileen's
Homemade Alphabet, from silver Metallic Kraft-Core and sanded slightly.
The idea-ology embellishments were painted with Distress Paint and sanded when dry. I picked some pieces that I know that Anton likes, such as the Game Spinner.
I also added an Industrious sticker border, which happened to be on my desk.
Here you can maybe see the silver paint a little better, it was hard to capture on photo.
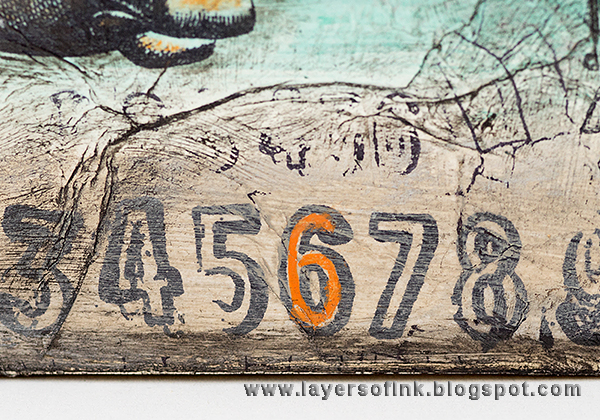
The back of the suitcase looks like this, with some extra cracks and number stamping.
I painted his number orange, so that it would stand out.
All but the largest Romance flowers fit into the suitcase. Doesn't this look like a fun surprise to open? I can't wait to see the flowers that he will create.
Here you can see some of the flowers and leaves a little better. The Sizzix paper pads have great patterns and since they are 6 x 13 in, you don't need to cut them to make them fit into your Big Shot or Vagabond.
Glue the handle on top. If you want to, you could tie a tag to the handle with the recipient's name.
The sides look like this. Anton loves numbers, which is why I added lots of them.
I did some stamping on the inside too, but if you need to be quick, you can skip this. The inside can also be left unpainted.
For more suitcase projects, you can check out my
Suitcase Mini-book,
Summer Suitcase,
Thank You Suitcase and
Postage Stamp Suitcase. I also did a big party project, using Eileen's dies when Anton turned three. He still uses all the containers that I made in his room for storage. Here is the
Spider and Monster Party Post.
A similar project that I made for Anton is my
Alphabet Sewing Box, filled with letters.
Thank you so much for stopping by here at the blog today!
Happy crafting!
Anna-Karin
Supplies:


