Tuesday, April 30, 2024

Rose and Filmstrip Tag

Hi friends! It is the last day of April and the sun is shining. I have a tutorial to share of a tag with dimensional roses and a bunch of other fun techniques.

Please note: this post has affiliate links, for which I receive a small percentage of sales generated by the link, at no extra cost to you.


Layers of ink - Rose and Filmstrip Tag Tutorial by Anna-Karin Evaldsson.

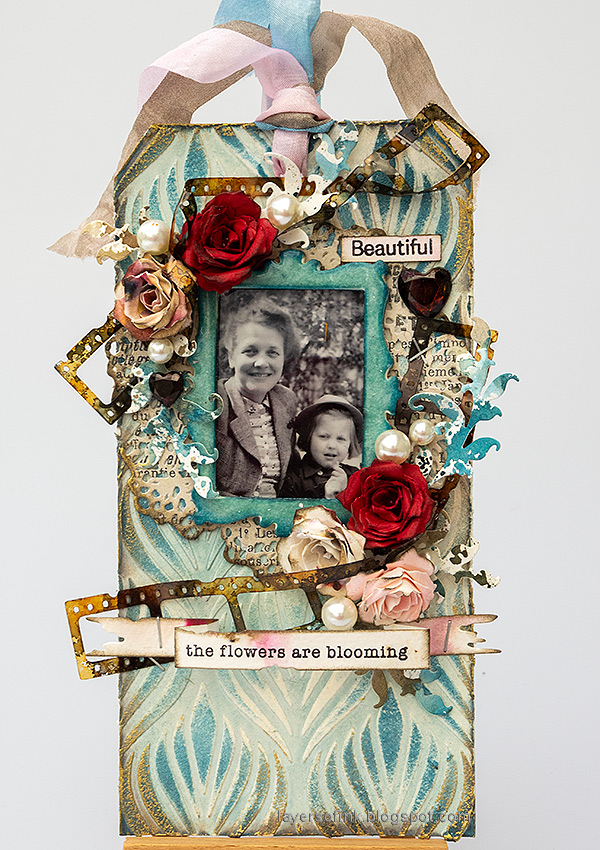
I had such fun making this tag! It has a lot of dimension, a textured background, paper roses, plastic elements and lots of other things. The photo of is my grandmother and mother. I used Tim Holtz Sizzix Vault Boutique for many of the elements. You can of course use the techniques for cardmaking too.

Layers of ink - Rose and Filmstrip Tag Tutorial by Anna-Karin Evaldsson.

Start by applying Texture Paste through Tim's Deco Feather stencil.

Layers of ink - Rose and Filmstrip Tag Tutorial by Anna-Karin Evaldsson.

Let dry and then paint with watered-down Distress Paint.

Layers of ink - Rose and Filmstrip Tag Tutorial by Anna-Karin Evaldsson. Apply Uncharted Mariner through stencil.

Place the stencil back on the design and sponge Uncharted Mariner on the background.

Layers of ink - Rose and Filmstrip Tag Tutorial by Anna-Karin Evaldsson. Die cut rose with Tim Holtz Boutique set.

Die cut roses from scrap inky or watercolored papers and from Simon Says Stamp Schoolhouse red cardstock.

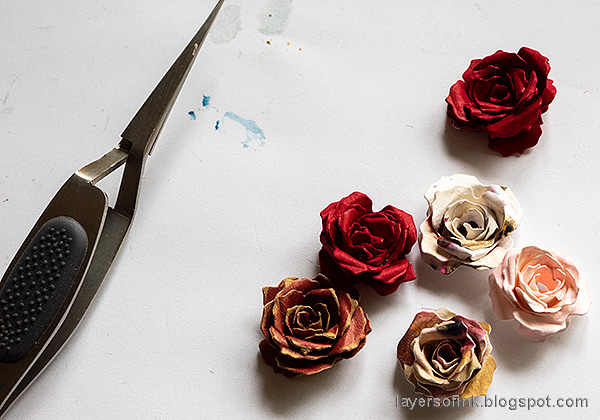
Layers of ink - Rose and Filmstrip Tag Tutorial by Anna-Karin Evaldsson. Assemble paper roses.

Roll them up with a pair of Tim Holtz tweezers. 

Layers of ink - Rose and Filmstrip Tag Tutorial by Anna-Karin Evaldsson. Shape the paper roses.

Fold out the edges with tweezers. Ink them slightly with brown Distress Ink.

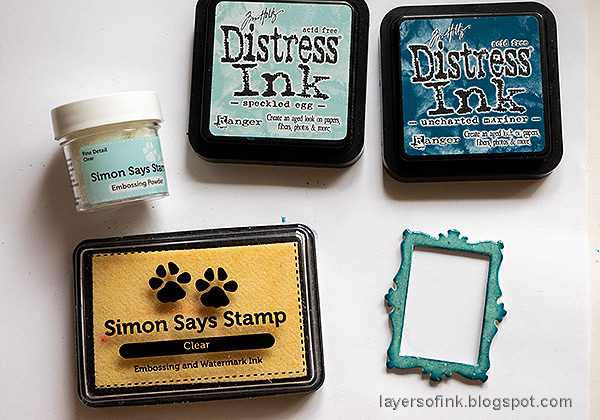
Layers of ink - Rose and Filmstrip Tag Tutorial by Anna-Karin Evaldsson. Layer the frame.

I die cut the frame about five or six times from heavystock paper and glued the pieces together to make a dimensional frame.

Layers of ink - Rose and Filmstrip Tag Tutorial by Anna-Karin Evaldsson. Ink with Distress Ink.

Ink with Distress Ink and emboss with several layers of clear embossing powder. Do not touch the melted powder until it has cooled down completely. 

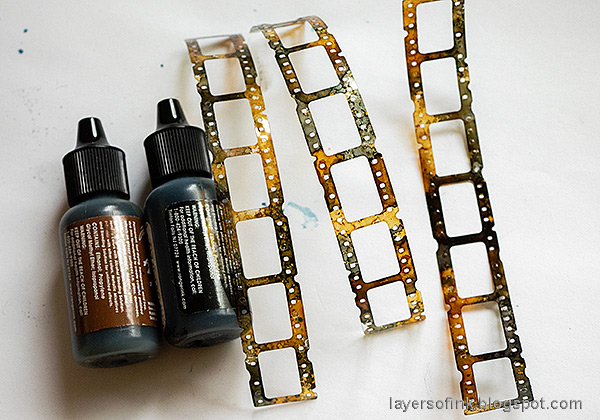
Layers of ink - Rose and Filmstrip Tag Tutorial by Anna-Karin Evaldsson. Ink filmstrip with alcohol ink.

I die cut the filmstrips from Tim's Vault Picture Show set, from Simon Says Stamp Acetate and colored them with alcohol ink. I love this filmstrip die. 

Layers of ink - Rose and Filmstrip Tag Tutorial by Anna-Karin Evaldsson. Die cut leaves.

Leaves were die cut from leftover inky papers.

Layers of ink - Rose and Filmstrip Tag Tutorial by Anna-Karin Evaldsson. Stamp sentiment on banner.

I also die cut the banner from the Boutique set. Tims Tattered Banners Sizzlits die was an old favorite of mine and this banner is such a great size. Stamp a sentiment, fold the banner and adhere with staples.

Layers of ink - Rose and Filmstrip Tag Tutorial by Anna-Karin Evaldsson. Paper roses.

I also really like the size of the roses and they are very easy to make. 

Layers of ink - Rose and Filmstrip Tag Tutorial by Anna-Karin Evaldsson.

The filmstrip was twisted and stapled to the tag.

Layers of ink - Rose and Filmstrip Tag Tutorial by Anna-Karin Evaldsson. Mirrored Hearts.

Mirrored Hearts were colored with brown alcohol ink. The sentiment comes from Simon Says Stamp Forest Scenery.

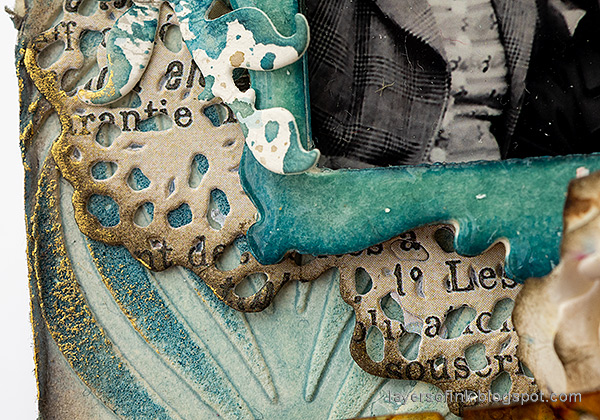
Layers of ink - Rose and Filmstrip Tag Tutorial by Anna-Karin Evaldsson.

I die cut the doily from the Bouquet set, inked the edges and glued it to the background.

Layers of ink - Rose and Filmstrip Tag Tutorial by Anna-Karin Evaldsson.

Sizzix Gold Luster Wax was applied here and there around the edges.

Layers of ink - Rose and Filmstrip Tag Tutorial by Anna-Karin Evaldsson.

I glued some baubles here and there too.

Layers of ink - Rose and Filmstrip Tag Tutorial by Anna-Karin Evaldsson.

The tag has quite a lot of dimension.

Layers of ink - Rose and Filmstrip Tag Tutorial by Anna-Karin Evaldsson.

I hope you enjoyed this tutorial! See you again soon!


Thank you so much for stopping by here today! 


Anna-Karin

Supplies:

* Please note: the links are affiliate links, for which I receive a small percentage of sales generated by the link, at no extra cost to you.


Monday, April 29, 2024

Lemon Butterflies Tag

Hello friends! I hope you are well and had a good weekend! My youngest tried out instruments since he needs to decide which instrument/s to start playing after the summer. 

Please note: this post has affiliate links, for which I receive a small percentage of sales generated by the link, at no extra cost to you.


This week we have a Feminine theme at the Simon Says Stamp Monday Challenge Blog, which can be so many different things. Don't miss the last project by our April guest designer Estelle Palumbo aka Atouscrap.


Layers of ink - Lemon Butterflies Tag Tutorial by Anna-Karin Evaldsson.

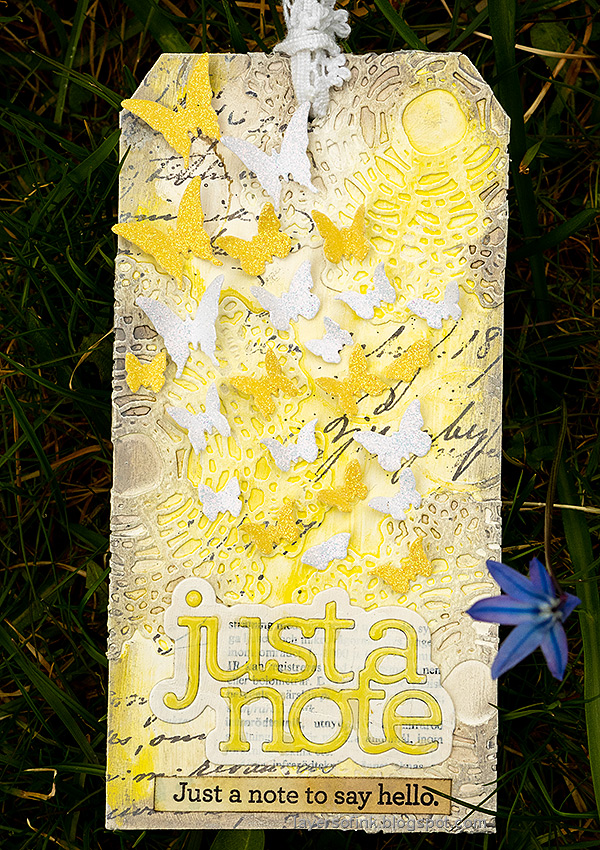
I made a tag celebrating the first butterfly of spring, the lemon butterfly. I went with a soft yellow, grey and white color combo and a textured background. The doilies and butterflies were die cut with Tim Holtz Boutique Vault set and the sentiments come from Simon Says Stamp new Celebrate release.

Layers of ink - Lemon Butterflies Tag Tutorial by Anna-Karin Evaldsson. Die cut the doily.

Start by die cutting three doilies from watercolor paper. I used wax paper in between the die and the paper when die cutting this intricate die.

Layers of ink - Lemon Butterflies Tag Tutorial by Anna-Karin Evaldsson. Paint with Distress Paint.

Glue the doilies to a tag and coat with gesso (I forgot to take a photo of this step). When dry, paint with watered-down Distress Paints and mist with more water if needed.

Layers of ink - Lemon Butterflies Tag Tutorial by Anna-Karin Evaldsson. Stamp Simon Says Stamp Old Letter.

Stamp here and there with Simon Says Stamp Old Letter and Watering Can ink.

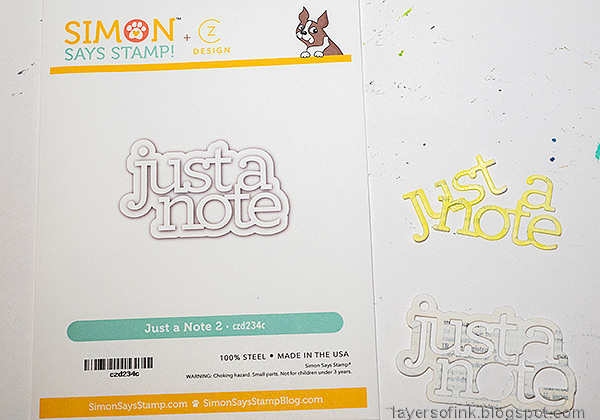
Layers of ink - Lemon Butterflies Tag Tutorial by Anna-Karin Evaldsson. Die cut Simon Says Stamp Just a Note.

Die cut Simon Says Stamp Just a Note 2 from collage paper. The paper was made by adhering old book paper to watercolor paper and coating it with gesso. Paint the words yellow. This die also coordinates with the largest stamp in the Just a Note Notes set.

Layers of ink - Lemon Butterflies Tag Tutorial by Anna-Karin Evaldsson. Apply Sizzix Luster Wax.

Apply Sizzix Luster Wax Ivory to the doilies and around the edges of the tag, for a soft shine.

Layers of ink - Lemon Butterflies Tag Tutorial by Anna-Karin Evaldsson. Die cut butterflies from Simon Says Stamp glitter paper.

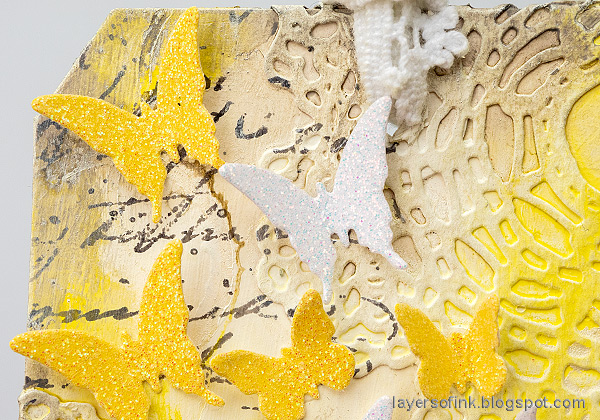
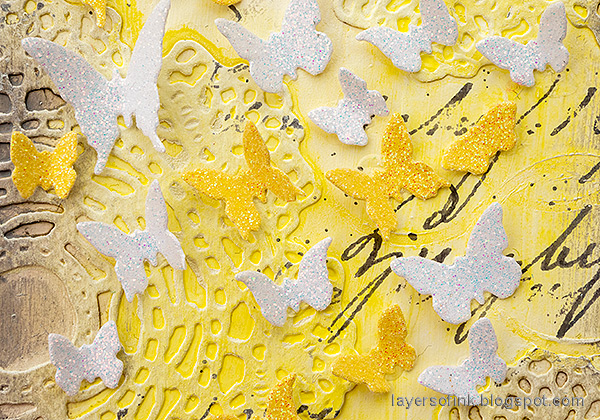
Die cut butterflies from Simon Says Stamp Lemon and White Glitter paper. The butterflies are also from Tim's Boutique Vault set, which is a very versatile die set. Shape and glue to the tag.

Layers of ink - Lemon Butterflies Tag Tutorial by Anna-Karin Evaldsson.

You can to fold up some of the wings once the glue is dry, so that it looks like they are fluttering across the tag.

Layers of ink - Lemon Butterflies Tag Tutorial by Anna-Karin Evaldsson.

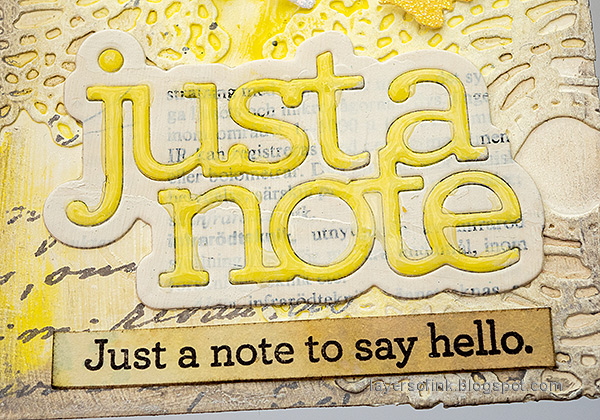
Stamp a sentiment from Simon Says Stamp Just a Note Notes from an inky left-over paper. Cut into a strip. Coat the die cut sentiment with Glossy Accents.

Layers of ink - Lemon Butterflies Tag Tutorial by Anna-Karin Evaldsson.

I haven't seen a lemon butterfly yet this year and spring has been cold so far here. 

Join us this week in our Up In The Air challenge! You have a chance to win a $25 gift voucher to do some fun shopping at Simon Says Stamp. You have until Monday 8am Ohio time. 1pm UK time, 2 pm CET to join in.


Do you use Instagram? If so please add #sssmchallenge so we can see your entries there too.


Thank you so much for stopping by here today! 

Happy crafting!

Anna-Karin

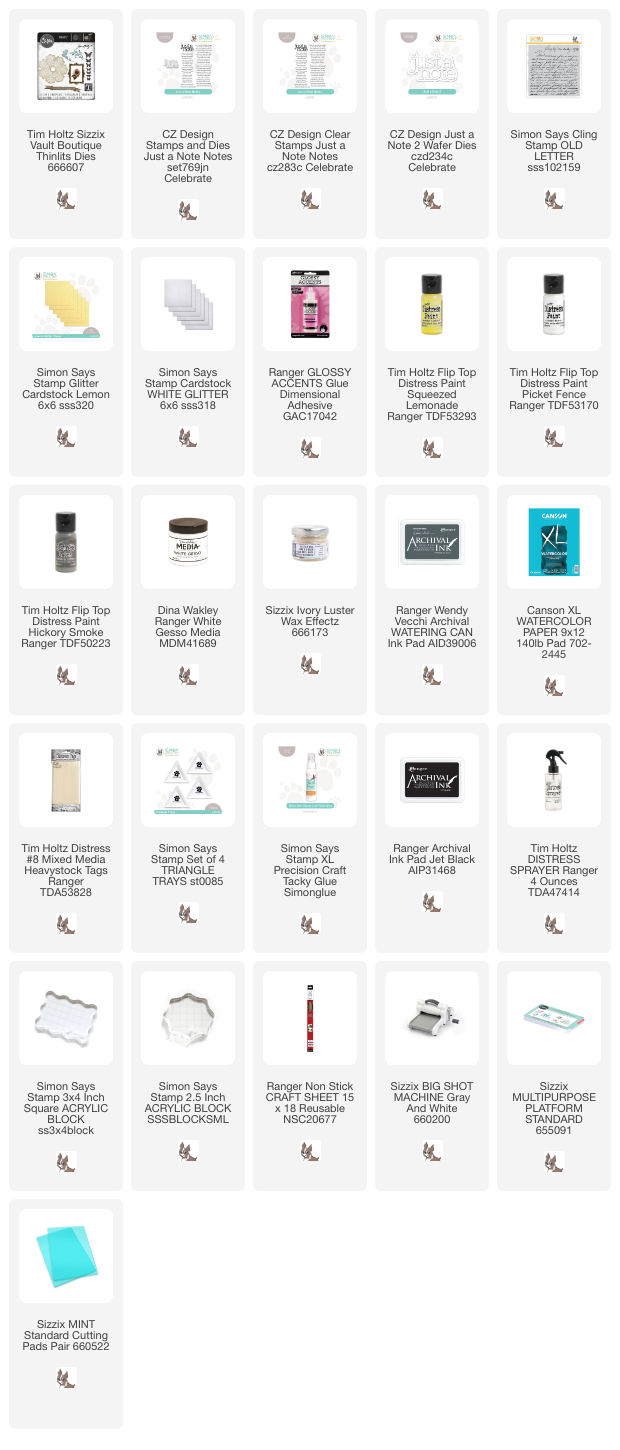
Supplies:

* Please note: the links are affiliate links, for which I receive a small percentage of sales generated by the link, at no extra cost to you.


Saturday, April 27, 2024

Bird Tin Tutorial

Hello crafters! Today I have an altered tin to share. I made it for a friend who likes birds, but you can of course use a different theme instead.

 Please note: this post has affiliate links, for which I receive a small percentage of sales generated by the link, at no extra cost to you.

Layers of ink - Bird Tin Tutorial by Anna-Karin Evaldsson.
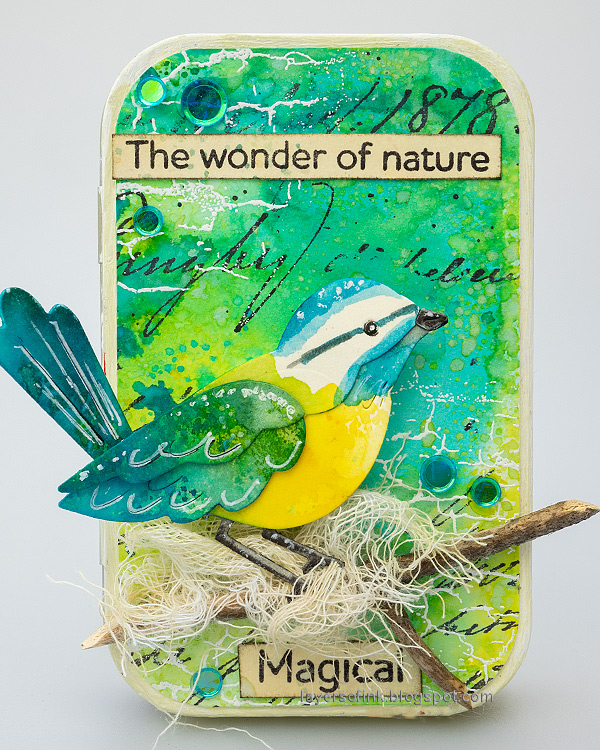
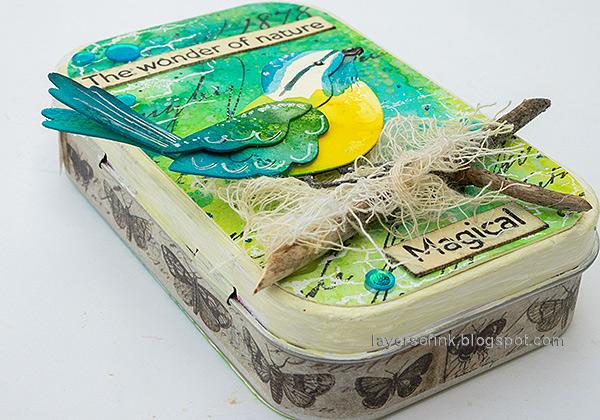
I recycled an old mint tin for this project and altered it with lots of ink, stamping and blue tit birds. The birds were die cut and then watercolored with Distress Ink. Tins are fun because you get four different surfaces to decorate, the front, the inside (which is great for fragile dimensional items), and the back.

Layers of ink - Bird Tin Tutorial by Anna-Karin Evaldsson.

The inside looks like this, with a quote to the left and two smaller birds to the right. 

Layers of ink - Bird Tin Tutorial by Anna-Karin Evaldsson. Die cut and color the birds.

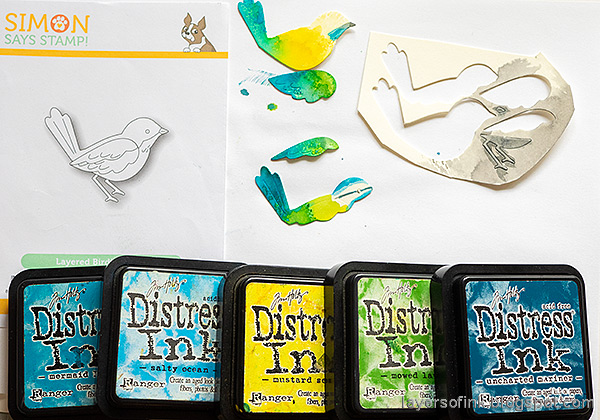
Start by die cutting Simon Says Stamp Layered Bird Bunch from Ranger's heavystock paper. Smear Distress Inks on a non-stick craft sheet and press some of the pieces into the ink. Let dry and repeat. Paint the heads with a paint brush.

Layers of ink - Bird Tin Tutorial by Anna-Karin Evaldsson. Die cut Simon Says Stamp Layered Birdie.

I did the same with the Simon Says Stamp Layered Birdie, only here I used the paintbrush a little more. The legs and beak were later colored with a darker shade of Black Soot.

Layers of ink - Bird Tin Tutorial by Anna-Karin Evaldsson. Assemble the flowers.

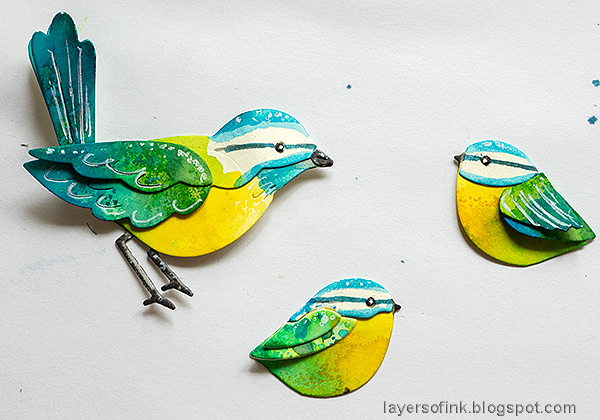
Shape the wings a little and piece together the birds. Add white highlights with a gel pen and color the eyes with a black pen.

Layers of ink - Bird Tin Tutorial by Anna-Karin Evaldsson. Color paper with Distress Ink.

For the backgrounds I colored heavystock cardstock with several layers of first Distress Ink and then at the end, also Distress Oxide Ink. Let the paper dry in between.

Layers of ink - Bird Tin Tutorial by Anna-Karin Evaldsson. Cut into cards.

Cut them into cards and round the edges with a We R Memory Keepers Corner Chomper. Later I also cut a fourth card for the back of the tin.

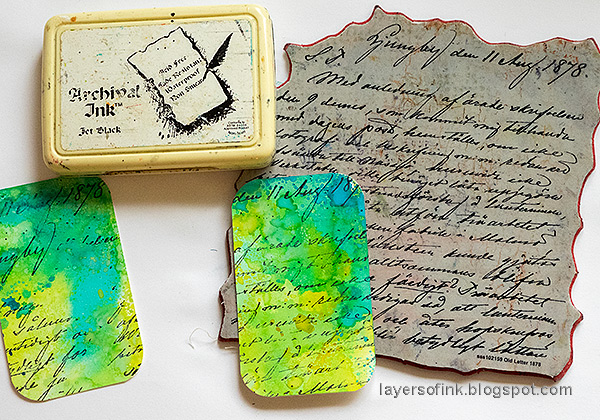
Layers of ink - Bird Tin Tutorial by Anna-Karin Evaldsson. Stamp with Simon Says Stamp Old Letter.

Stamp two of the cards with Simon Says Stamp Old Letter.

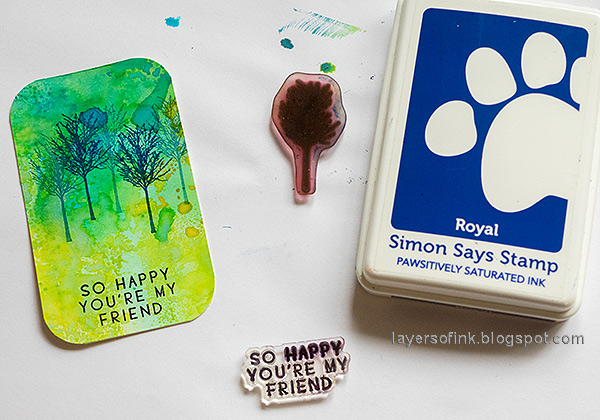
Layers of ink - Bird Tin Tutorial by Anna-Karin Evaldsson. Stamp with Simon Says Stamp All Seasons Tree.

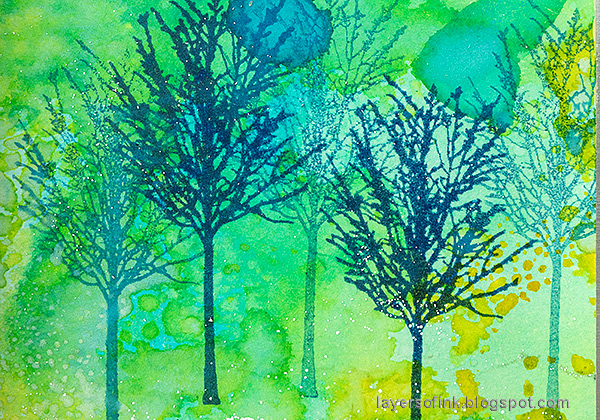
Stamp the third card with a sentiment. Stamp the small tree from Simon Says Stamp All Seasons Tree with Pawsitively Saturated Royal ink. Stamp twice without reinking.

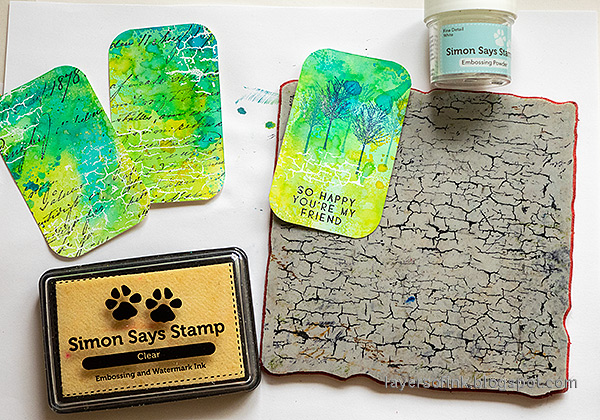
Layers of ink - Bird Tin Tutorial by Anna-Karin Evaldsson. Stamp with Simon Says Stamp Crackle Background.

Stamp in a few places with Simon Says Stamp Crackle Background and white emboss.

Layers of ink - Bird Tin Tutorial by Anna-Karin Evaldsson.

Adhere the papers to the inside of the tin. Add small twigs, dyed mummy cloth/cheese cloth and some sequins. The birds were adhered with three layers of Simon Says Stamp Pawsitively Perfect Foam Tape.

Layers of ink - Bird Tin Tutorial by Anna-Karin Evaldsson. paper and ink bird.

Make sure that it is possible to close the tin before gluing everything in place. I have made a few tins that don't close too, but I wanted this one to close.

Layers of ink - Bird Tin Tutorial by Anna-Karin Evaldsson. Inked bird.

The small birds and twigs are protected inside the tin. They are meant to be baby blue tit birds.

Layers of ink - Bird Tin Tutorial by Anna-Karin Evaldsson.

If there is space, you can tuck in another sentiment.

Layers of ink - Bird Tin Tutorial by Anna-Karin Evaldsson.

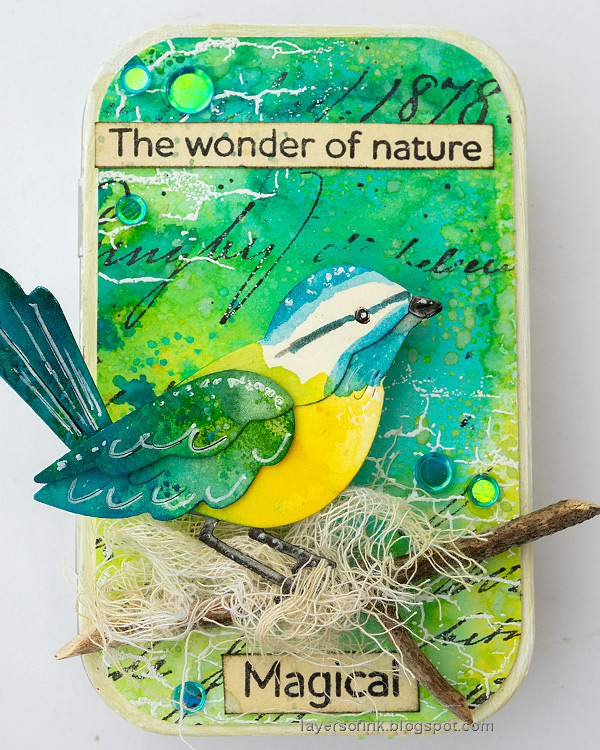
The lid of the tin had been coated with two layers of gesso and painted with Antique Linen Distress Paint. Glue a twig to the front of the tin and add some dyed mummy cloth / cheese cloth. Adhere the bird with two layers of foam tape

Layers of ink - Bird Tin Tutorial by Anna-Karin Evaldsson.

I adhered Tim Holtz Tissue Tape around the tin, adding a little glue too, to make sure it was stuck down well.

Layers of ink - Bird Tin Tutorial by Anna-Karin Evaldsson.

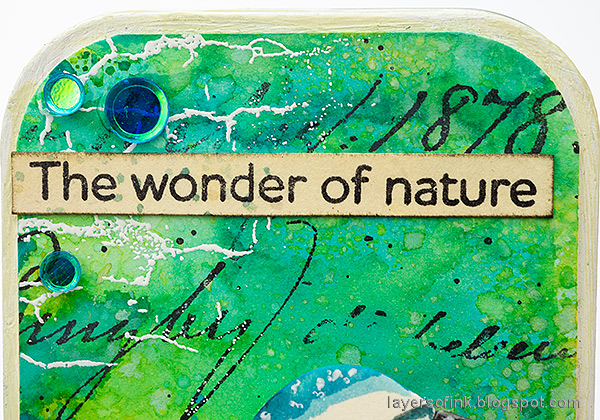
The sentiments were stamped on inky paper and cut into strips. They come from Simon Says Stamp Forest Scenery.

Layers of ink - Bird Tin Tutorial by Anna-Karin Evaldsson. White embossing.

The ink background has a lot of texture and in some places it looks like the ink shines.

Layers of ink - Bird Tin Tutorial by Anna-Karin Evaldsson. Blue tit.

I turned the birds into blue tits, which is one of my favorite birds, but you can also turn them into other birds.

Layers of ink - Bird Tin Tutorial by Anna-Karin Evaldsson.

By stamping twice without reinking in between, you create a sense of dimensions, since the fainter trees appear to be further away.

Layers of ink - Bird Tin Tutorial by Anna-Karin Evaldsson.

Don't worry about stray embossing powder, it only adds texture.

Layers of ink - Bird Tin Tutorial by Anna-Karin Evaldsson.

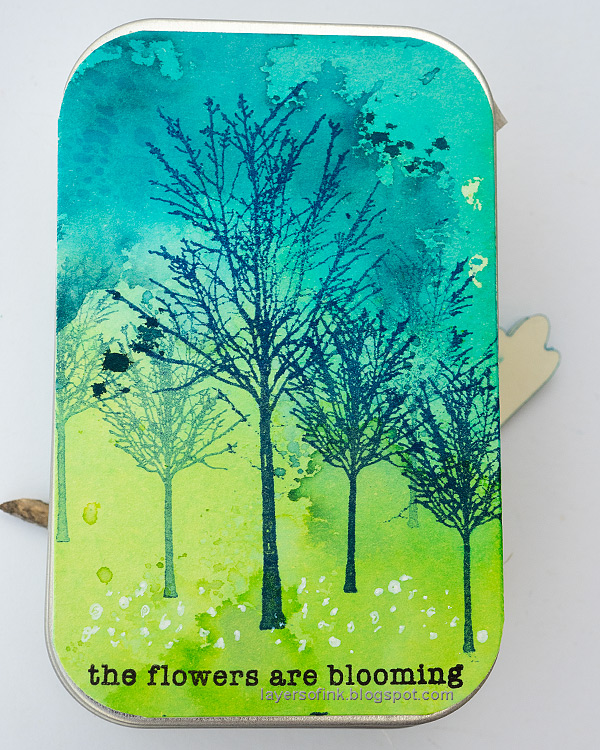
I decided to add paper to the back too. It was stamped with two sizes of trees from All Seasons Tree and and a sentiment from Simon Says Stamp Season's Greetings.

Layers of ink - Bird Tin Tutorial by Anna-Karin Evaldsson.

Add white anemone flowers with a white gel pen. 


Thank you so much for stopping by here today! 


Anna-Karin

Supplies:

* Please note: the links are affiliate links, for which I receive a small percentage of sales generated by the link, at no extra cost to you.