Showing posts with label Stampscapes. Show all posts

Wednesday, January 22, 2020

Photo Block Tutorial

Hello friends! I have a quick photo block tutorial to share with you today. It was fun doing a project focusing on photos, and since it is forest photos with many shades of green, it is a real feel-good project.

Layers of ink - Photo Block Tutorial by Anna-Karin Evaldsson.

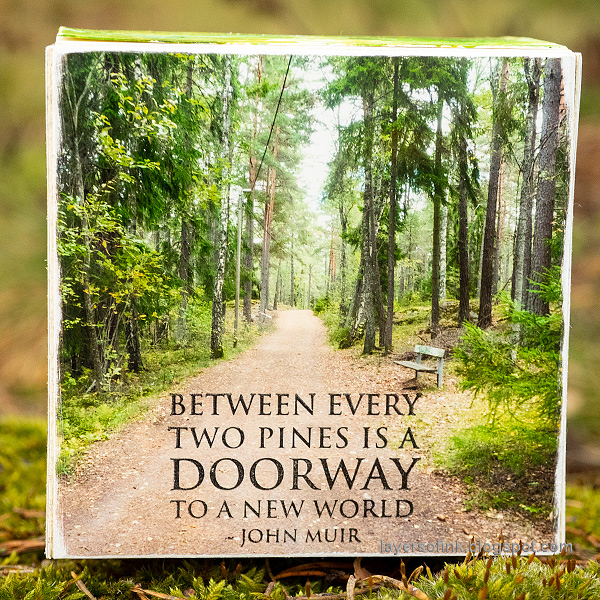
I love forests, the trees, the colors, the sounds, the smells, the peace and quiet and the way in which they are so full of life. Forests and especially forests with lakes are probably my favorite setting in nature and luckily there are many forests close by (which is the case for a large part of Sweden). During January the Eileen Hull Inspiration Team has shared projects made with Eileen's newly released dies. I used Eileen's new Gift Box with Scallop Edges XL die to create this. It is meant to be a gift box, which can open, but I turned it into a closed block instead. It's pretty large, with each square being 3.8 x 3.8 in. You can do a photo block with any types of photos and it would also make a great gift.

Layers of ink - Photo Block Tutorial by Anna-Karin Evaldsson.

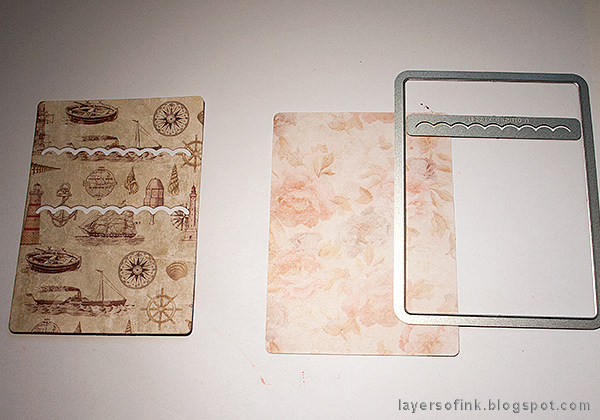
Start by die cutting two box parts from mat board. This is an XL die, so you need the Extended Cutting Pads. As you can see, the die both cuts and scores the mat board. I ended up not using the label.

Layers of ink - Photo Block Tutorial by Anna-Karin Evaldsson.

Cut four photos into 3.8 x 3.8.

Layers of ink - Photo Block Tutorial by Anna-Karin Evaldsson.

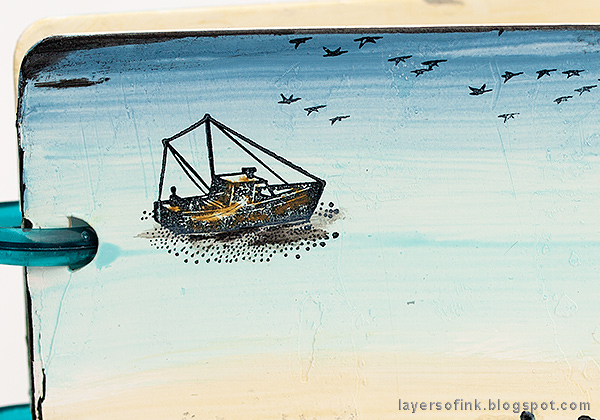
I wanted the top piece with the stamped sentiment to have a forest feeling, trying to capture the beautiful shades of green. This was done by smearing Distress Ink on a craft sheet, misting with water and repeatedly pressing the paper into the ink. Dry the paper in between each application. Finally, I splattered some ink on it with a paint brush to create even more texture. I only used the Distress Oxide towards the end of the inking process.

Layers of ink - Photo Block Tutorial by Anna-Karin Evaldsson.

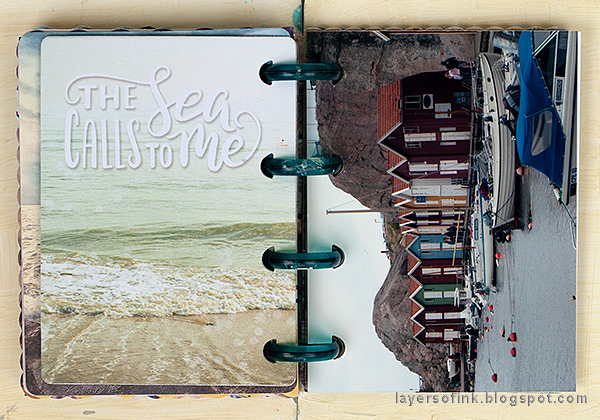
Stamp sentiments on some of the photos too, using Stazon ink. The sentiment stamps are by Stampscapes. I used a stamp positioner, to make sure I didn't mess up the stamping.

Layers of ink - Photo Block Tutorial by Anna-Karin Evaldsson.

Sand the edges of the photos to reveal the white core and adhere wonder tape along the flaps. 

 Layers of ink - Photo Block Tutorial by Anna-Karin Evaldsson.

This is one of my favorite quotes, and such a great description of forests.

Layers of ink - Photo Block Tutorial by Anna-Karin Evaldsson.

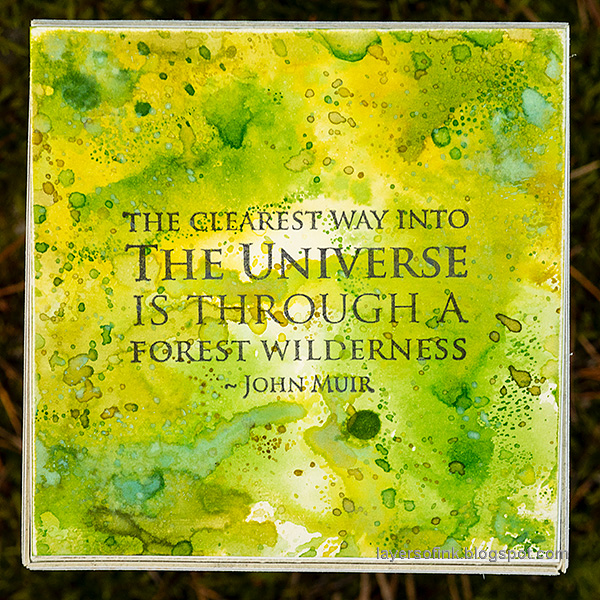
And another quote by John Muir, who shared my love of forests. This is also a Stampscapes Scenic Sentiment stamp.

Layers of ink - Photo Block Tutorial by Anna-Karin Evaldsson.

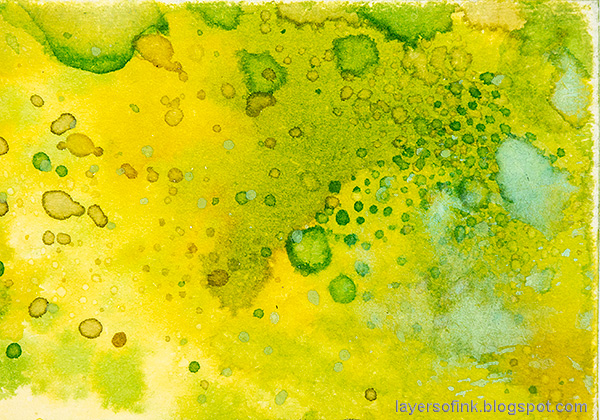
The inky goodness at the top of the block.

Layers of ink - Photo Block Tutorial by Anna-Karin Evaldsson.

Beautiful moss-covered ground and roots.

Layers of ink - Photo Block Tutorial by Anna-Karin Evaldsson.

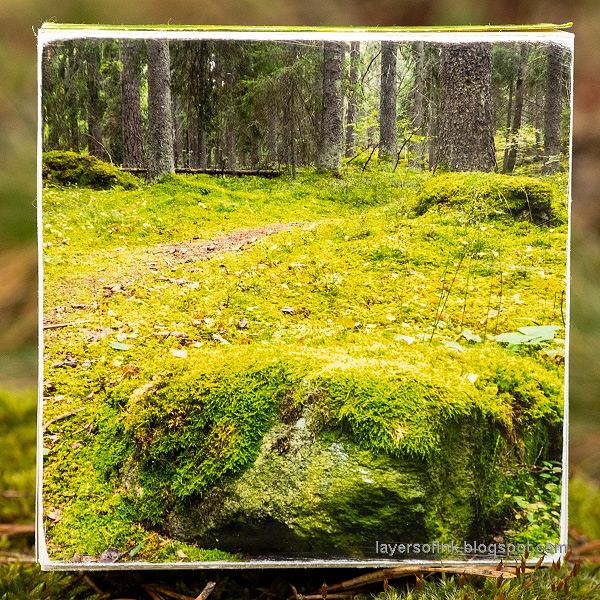
I take a lot of photos of mossy stones, so one had to feature on the block.

Layers of ink - Photo Block Tutorial by Anna-Karin Evaldsson.

And here is a very small Leo pointing at something across the water.

Layers of ink - Photo Block Tutorial by Anna-Karin Evaldsson.

If you want to display some of your favorite photos, or need a quick gift, this is a great project. You can also leave the top without adhesive so that it can be opened and use it as a combined photo block and gift box. This was a fun project to make and it reminded me of all the Artist Trading Blocks that I used to make around five years ago.

Thank you so much for taking the time to visit my blog today!  

Happy crafting!

Anna-Karin

Supplies:

* Please note: the links are affiliate links, for which I receive a small percentage of sales generated by the link, at no extra cost to you.


Sizzix Eileen Hull: Gift Box with Scallop Edges XL die
Stampscapes: Scenic Sentiments 1, Scenic Sentiments 3


Thursday, December 27, 2018

Eileen Hull Favorite Projects 2018

Hello crafters! I hope you had a lovely Christmas! We had a wonderful time with lots of fun, good food, spending time with relatives and meeting Santa. During December, the Eileen Hull Inspiration Team has shared their favorite projects from the past year. I always do a recap post or two at the end of the year, so today I will share only my favorite projects with Eileen's die, and in a couple of days, there were be a second, more general, post.


I am not good at picking favorites, since I usually like each project in its own way. This Mini Book Storage Container is one of my favorites from the year, also since it is completely full with little books and we use it a lot. I need to make a second one and perhaps even third one, partly since the boys had an advent calender with these little books, so we now have 24 new ones. It was made with the Card Box, Planner Storage & Organizer Scoreboards die.


Another favorite project, is this Guest Book tutorial, made with  Journal Die and the lovely Simon Says Stamp Brushed Branches tree stamp. The cute little flowers come from Eileen's Bookmark, Tag & Pocket set. It doesn't have to be a guest book, but could work for many themes.

Layers of ink - Nautical Mini-Book by Anna-Karin Evaldsson.

A summery project that I made, was this Nautical Mini Album, filled with photos taken almost ten years ago. I printed those photos in small sizes with the thought of using them for a mini-album, so I am happy that they are finally in an album. The album was made with the Book Binding die and with Eileen's Flowers & Leaves Journaling Cards, and Heart Journaling Cards.

Layers of ink - Wrapped Journal by Anna-Karin Evaldsson.

I also made five wrapped journals this year, and I couldn't pick a favorite among them, since they are all pretty different. Above is the first one, a mixed media journal. There is also a Blue Textured Journal, a Wrapped Leather Journal, a Felt Journal and an In The Forest Journal. All of them were made with the Wrapped Journal.


And let's finish the post with a Christmas project, namely my Winter Wonderland Shadow Box. It was made with the Trinket Box & Frame, Book & Pages and filled with snow and happiness.

Thank you so much for stopping by today! I will see you soon again.

Happy crafting and enjoy the last day of the year.

Anna-Karin

* Please note: the links are affiliate links, for which I receive a small percentage of sales generated by the link, at no extra cost to you.

Thursday, August 23, 2018

Nautical Mini Album Tutorial

Hello crafters! Things are starting to settle into our normal routine here and the nights are getting cooler. During August, the Eileen Hull Inspiration Team is sharing projects with an anything goes theme. Don't miss all the very varied inspiration. 

Layers of ink - Nautical Mini Album Tutorial by Anna-Karin Evaldsson
As you probably know, I love to make mini albums and mini books of different kinds and I was happy to use the Book Binding die for the first time. It's a fun and easy way to bind a book and all you need are some Planner Mini Discs. I like that you can move pages around, if you change your mind about placement. When looking through a pile of photos I came upon photos from a holiday with my parents in 2009, which I had planned to use in a mini book, but never got to, so I decided it was about time. The cover was painted and stamped with Stampscapes stamps.

Layers of ink - Nautical Mini Album Tutorial by Anna-Karin Evaldsson with Eileen Hull Sizzix Book Binding die

Some of the step photos aren't perfect, because my camera is being repaired and my old camera doesn't do so well in low light. I made two lines with a white gel pen on the Book Binding die, as a guide to know where to place my papers. You don't see them here since the paper is exactly lined up with the lines. Use the Movers & Shapers Shuttle and place the die on top. All you need to do is to add one Cutting Pad on top of the paper. If you use larger binding rings, you can die cut the holes further in, to prevent a too big gap between the pages.

Layers of ink - Nautical Mini Album Tutorial by Anna-Karin Evaldsson with Eileen Hull Sizzix Journaling Card dies

I used various shapes of pages, two of them were scalloped pages die cut with Eileen's Flowers & Leaves Journaling Cards, and Heart Journaling Cards. Place the edge of the paper just inside the cutting line on one side, to get a straight edge where the binding will be.

Layers of ink - Nautical Mini Album Tutorial by Anna-Karin Evaldsson with Eileen Hull Sizzix Credit Card Sleeve dies

I also made a couple of pocket pages, using the Credit Card Sleeve & Tags set. Place the scalloped die as shown here to die cut the slots - it is easiest to do with the Magnetic Platform. Die cut one paper without the slots. For another example check out my Book Club Chapter 2 Card tutorial.

Layers of ink - Nautical Mini Album Tutorial by Anna-Karin Evaldsson

Apply adhesive along the edges and glue the two pieces together to make a pocket. Die cut tags with the Credit Card Sleeve & Tags set, from the same set.

Layers of ink - Nautical Mini Album Tutorial by Anna-Karin Evaldsson, painting with Distress Paint

The covers were die cut with the Passport Book die, from mat board. After coating them with gesso (and letting it dry), they were painted with Distress Paints, forming a very simple beach background.

Layers of ink - Nautical Mini Album Tutorial by Anna-Karin Evaldsson with Stampscapes scenic stamps

The covers were stamped with various Stampscapes stamps to create a simple scene. I used my trusted Stamp-a-ma-jig stamp positioner, both for precise placement, but in this case also to hold the stamped plastic sheet over the background to check placement and perspective before stamping. If the kids were placed at the very edge of the water, for instance, they would look gigantic.

Layers of ink - Nautical Mini Album Tutorial by Anna-Karin Evaldsson

After stamping the scene, I added some color and, in particular, shadows with paint.

Layers of ink - Nautical Mini Album Tutorial by Anna-Karin Evaldsson with Prima Flower St Tropez papers

I used teal Me and My Big Ideas Planner Mini Discs to bind my mini album. It is very easy to do.

Layers of ink - Nautical Mini Album Tutorial by Anna-Karin Evaldsson

Since we saw lots of different kinds of boats on this coastal holiday, a fishing boat worked well for the cover, especially since the area is an old fishing community.

Layers of ink - Nautical Mini Album Tutorial by Anna-Karin Evaldsson

I always like this quote, and it fits for many different themes. The mirrored heart was colored blue with Denim alcohol ink.

Layers of ink - Nautical Mini Album Tutorial by Anna-Karin Evaldsson with Eileen Hull Book Club dies by Sizzix

Here's the back cover, with another beautiful Stampscapes sentiment stamp.

Layers of ink - Nautical Mini Album Tutorial by Anna-Karin Evaldsson with Stampscapes stamps

And a peaceful rowing boat.

Layers of ink - Nautical Mini Album Tutorial by Anna-Karin Evaldsson

I didn't aim for perfect stamping here, since I wanted a textured look to go with the papers I used on the inside. I used a pebble and a flower texture stamp to stamp the texture.

Layers of ink - Nautical Mini Album Tutorial by Anna-Karin Evaldsson

I used to play badminton until I injured my knee and here I had fun playing badminton with some kids from a family we visited. 

Layers of ink - Nautical Mini Album Tutorial by Anna-Karin Evaldsson

I used papers by Prima Flowers, especially from their St Tropez line, mainly from the A4 paper pad, but also from the 4 x 6 pad and a couple of pages straight from the 3 x 4 pad (no need to die cut those since they were already of a good size).

Layers of ink - Nautical Mini Album Tutorial by Anna-Karin Evaldsson

I still need to add journaling to the album, and left enough space for that.

Layers of ink - Nautical Mini Album Tutorial by Anna-Karin Evaldsson

You can also die cut pages from photos only. The righthand page is two 2 x 3 photos adhered to the back of a 3 x 4 photo.

Layers of ink - Nautical Mini Album Tutorial by Anna-Karin Evaldsson

I love the look of those colorful houses up against the cliff. It was fun working with these photos again and remembering that special holiday.

Layers of ink - Nautical Mini Album Tutorial by Anna-Karin Evaldsson

The pocket pages were used both for die cut tags with journaling, and for additional photos.

Layers of ink - Nautical Mini Album Tutorial by Anna-Karin Evaldsson

To the right is another photo page. I wanted to use some 3 x 4 photos, and this was a very easy way to do so. 

Layers of ink - Nautical Mini Album Tutorial by Anna-Karin Evaldsson

The book is pretty full as it is and I wanted to focus on photos and text, but I might add some flat embellishments later too. I love the page to the right here, and I still use my yellow rain coat.

Layers of ink - Nautical Mini Album Tutorial by Anna-Karin Evaldsson

I used mainly 2 x 3 in photos, and had to cut them a little so that they would fit, but some of them were hard to cut down without affecting the photo too much, and then I just adhered them sideways instead.

Layers of ink - Nautical Mini Album Tutorial by Anna-Karin Evaldsson

As you can see, the book is nice and chunky. There are tiny hearts in the middle of the discs.

Layers of ink - Nautical Mini Album Tutorial by Anna-Karin Evaldsson

This book can easily be made for any topic or theme and would be a great gift too. It is the perfect place to use up some scrap paper. You could also turn it into a notebook or a small planner.

Thank you so much for stopping by here today!

Happy crafting!!

Anna-Karin

Supplies:

* Please note: the links are affiliate links, for which I receive a small percentage of sales generated by the link, at no extra cost to you.

Binding discs: Me & My Big Ideas Planner Mini Discs 9/Pkg - Clear Teal
Stamps: Stampscapes: 164A Fishing Boat, 256A Pebbles, 067B Reeds, 230B Running Kids, 299B 3 Rocks & Grass, 166A Row Boat, 210C Boulders with Lichen Sm., 152D Migrating Birds, Scenic Sentiment Sheet 1, Scenic Sentiment Sheet 4, Nature Sheet 4


Friday, November 17, 2017

Whales in the Sea Scenic Stamping

Hi everyone!! I have a scenic stamping piece to share with you today. I have a done a bunch of scenes in my art journals recently, but haven't posted all of them on the blog yet. I really enjoy using scenic stamped pieces in my art journal, instead of making them into cards, and they fit well in the journals since I often aim to convey a specific feeling or theme in my scenic pieces.

Layers of ink - Whales in the Sea Scenic Stamping by Anna-Karin Evaldsson

This page was inspired by the lovely Stampscapes Whale Breaching stamp. Both my boys are very interested in animals and we have a couple of books at home about sea animals, with the whales and sharks are big favourites. Leo, in fact calls all whales, fish and sharks for 'shark' (it is 'haj' in Swedish, which is easy to pronounce). Yesterday, he pointed at Nemo and called him a shark, which was pretty funny.

On this page, I wanted to create a dramatic night-time scene, where the whales are playing in the waves. I went with a monochrome color scheme, using mainly turquoise. The scene was done on glossy cardstock and colored with dye inks.

Layers of ink - Whales in the Sea Scenic Stamping by Anna-Karin Evaldsson

I started out by stamping the images with Archival ink. The waves were stamped repeatedly with the Waves Medium and Waves Small stamps, using both first and second impressions (without reinking).

Layers of ink - Whales in the Sea Scenic Stamping by Anna-Karin Evaldsson

I used a Colorbox Stylus Tool with an oval tip to color the scene and started with the lightest shade. It is often easier to start with the lightest shade and gradually build up color. I wanted a kind of wispy looking sky and worked roughly and quickly. Shine and mist were added with white pigment ink, applied with a Q-tip. It is better to do several light layers than to add too much ink at once.

Highlights were added with a white gel pen.

Layers of ink - Whales in the Sea Scenic Stamping by Anna-Karin Evaldsson

I stamped the Whale Breaching stamp three times and for the third one, I used a piece of torn printer paper as a mask, so that the whale would be lower in the water.

Layers of ink - Whales in the Sea Scenic Stamping by Anna-Karin Evaldsson

Finally, I used a sticker for a small sentiment. After rounding two of the corners, I adhered it into my Ranger Dylusions Small Creative Journal. If you want to see step photos for this process of coloring a scenic stamped piece, check out my Train Ride scenic stamping tutorial. For another scene in an art journal, there's the Forest Walk. I also did a tutorial on using different media to color scenic pieces, which is called Colour Love.
Kevin Nakagawa from Stampscapes also has a great YouTube channel and posts new videos often. Don't miss checking it out. 

Thank you so much for stopping by here today and I hope you will have a great weekend!

Happy stamping!

Anna-Karin

Supplies:


Clearsnap Colorbox STYLUS HANDLES 3 PACK
[ SSS ]
Clearsnap Colorbox OVAL BLENDER...
[ SSS ]
Dyan Reaveley SMALL CREATIVE JOURNAL
[ SSS ]
Ranger Inkssentials GLOSS PAPER
[ SSS ]
Clearsnap Colorbox FROST WHITE INK PAD
[ SSS ]
Sakura WHITE MEDIUM POINT Gelly Roll...
[ SSS ]
Tim Holtz Distress Ink Pad MERMAID...
[ SSS ]
Tim Holtz Distress Ink Pad CRACKED...
[ SSS ]
Tim Holtz Distress Ink Pad PEACOCK...
[ SSS ]
Tim Holtz Distress Ink Pad TUMBLED GLASS
[ SSS ]
Tim Holtz Distress Ink Pad BLACK SOOT
[ SSS ]
Tim Holtz Distress Ink Pad HICKORY...
[ SSS ]
Ranger TIM HOLTZ DISTRESS
[ SSS ]
Tim Holtz Idea-ology QUOTATIONS...
[ SSS ]
Hero Arts Rubber Stamp SMALL BLOCK...
[ SSS ]
Hero Arts Rubber Stamp CLEAR ACRYLIC...
[ SSS ]
Hero Arts Rubber Stamp CLEAR ACRYLIC...
[ SSS ]
We R Memory Keepers Cropadile CORNER...
[ SSS ]
3M Scotch PINK ATG ADVANCED TAPE GLIDER
[ SSS ]
3M Scotch ATG 0.25 Inch GOLD REFILL TAPE
[ SSS ]

* Please note: the links are affiliate links, for which I receive a small percentage of sales generated by the link, at no extra cost to you.