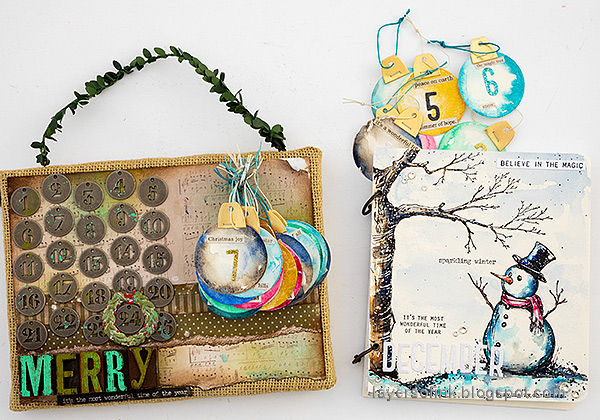
Monday, November 11, 2024

Thankful Tag

Hello crafters! It is a new week and I hope you had a good weekend and got some crafty time. 

Please note: this post has affiliate links, for which I receive a small percentage of sales generated by the link, at no extra cost to you.

This week we have a Thanks/Thanksgiving theme at the Simon Says Stamp Monday Challenge Blog. I hope you will join us! Our guest designer Teresa York has created a lovely project, don't miss it. 

Layers of ink - Thankful Tag Tutorial by Anna-Karin Evaldsson.

I made a tag this week, with a background made from Simon Says Stamp sentiment strips, stamped flowers colored with pencils, gems for sparkle and gold letters. I like to cover an entire background with words and there are many different ways to do that. You can also use stamps or old book paper.

Glue the sentiment strips to the background.

I used a Gratitude sentiment strip sheet from the new Simon Says Stamp Festive Fun release. Cut one of the pages into strips and then cut apart the individual sentiments. I cut off some of the words too, since I needed shorter sentiments. Glue them to a tag cut from watercolor paper. Add a layer of Matte Medium on top too. Let dry. 

Paint with Distress Paint.

Paint with watered-down Distress Paint and mist with more water if needed. Wipe some of the paint off from the words.


Stamp Tim Holtz Floristry on heavystock paper.

Die cut with the coordinating dies.

I used the coordinating Floristry dies by Simon Says Stamp to die cut most of the larger flowers and some of the smaller ones.

Color with Prismacolor pencils.

Color with colored pencils. I used Prismacolors. Use a white pencil to blend the colors. 

Shape the colored flowers.

Add details with a black pen and highlights with a white gel pen. Then give the flowers some shape with Tim Holtz Shaping Kit. Place the flowers on Simon Says Stamp Pawsitively Perfect Craft Pad when using the stylus tools. 

Add Simon Says Stamp Pointy Pine Needle Sprigs.

Die cut Simon Says Stamp Pointy Pine Needle Sprigs from green and Pine Glitter cardstock. Tuck the pine needles under the flowers.


Adhere the flowers with foam tape. I used two layers for some of them.


Don't worry if the strips aren't completely straight and even. In fact, you can make then uneven on purpose, for a playful look. The paint will collect in the recessed areas.

Die cut thankful from gold paper with Tim Holtz Vault Seasonal Sketch.

The sentiment was die cut from gold and dark brown kraft-stock paper, using Tim Holtz Vault Seasonal Sketch set. I also added Simon Says Stamp Pawsitively Dazzling Gems here and there.

Join us this week in our Thanks/Thanksgiving challenge! You have a chance to win a $25 gift voucher to do some fun shopping at Simon Says Stamp. You have until Monday 8am Ohio time. 1pm UK time, 2 pm CET to join in.


Do you use Instagram? If so please add #sssmchallenge so we can see your entries there too.


Thank you so much for visiting my blog today! 

Happy crafting!

Anna-Karin

Supplies:

* Please note: the links are affiliate links, for which I receive a small percentage of sales generated by the link, at no extra cost to you.


Friday, November 8, 2024

Simon Says Stamp Festive Fun Blog Hop

Hello and welcome to my blog! I am so happy to take part in the Simon Says Stamp Blog Hop to celebrate the new Festive Fun release. If you are following along in the hop, you should have come here from Miriam Prantner.

Please note: this post has affiliate links, for which I receive a small percentage of sales generated by the link, at no extra cost to you.


The Festive Fun release is full of wonderful new and versatile stamps, embossing folders, stencils, dies, ink and gems, perfect for holiday crafting. You can find the entire Festive Fun release here.

Simon Says Stamp Festive Fun Blog Hop


The new and exclusive Cozy Together stamp and die set will be automatically added to your cart that contains $100 or more of Festive Fun release products! This gift with purchase will expire 11/10 at 11:59 pm EST. While supplies last.
 
Layers of ink - Winter Tags Tutorial by Anna-Karin Evaldsson.

I had fun making two tags for the blog how, using the very cute Snow Buddies stamp set, combined with the Forest Ring die and the Fluted Forest Decor embossing folder. I used a combination of watercolor paint and ink on the tag. There is glitter and bling too!

Stamp with Simon Says Stamp Snow Buddies.

Start by cutting two dies from watercolor paper. Stamp the owl and the deer from Simon Says Stamp Snow Buddies with Archival Ink Jet Black on the tags.

Paint the tags with watercolors.

Watercolor the animals first and then add a quick wash of watercolor paint for the sky and the snow. No need for perfection.

Emboss in Simon Says Stamp Fluted Forest Decor.

I embossed the top and the bottom of the tags in the new Simon Says Stamp Fluted Forest Floor folder. Place the edge of the folder just outside the edge of the embossing platform to avoid getting an embossed edge. Test on a scrap paper first before embossing the watercolored tags.

Ink with Distress Inks.

Ink to darken the colors. I also used Blueprint Sketch, but forgot to include it in the photo.

Die cut the Simon Says Stamp Forest Ring.

Die cut the Simon Says Stamp Forest Ring twice from watercolor paper.

Add masking fluid.

Add masking fluid as shown and let dry completely. I used a blue tinted fluid so that you can see it. Or you can skip this step and just avoid painting those areas. 

Paint with watercolor paint.

Paint the trees and greenery with watercolor paint.

Remove the masking fluid.

When the paint is dry, carefully rub off the masking fluid.

Ink with Scorched Timber.

Add a little more paint to the trees. Smear Scorched Timber Distress Ink on a non-stick craft sheet, mist with water and paint the frame of the ring with a paint brush. I used the ink instead of paint here since I wanted the color to coordinate with the ink on the tag.

Die cut the Forest Ring from white glitter paper.

I wanted to add a bit of glitter too and die cut the Forest Ring from Simon Says Stamp White Glitter Cardstock twice.

Add Ranger Moondust Stickles.

Add Moon Dust Stickles to the snowy areas on the Forest Ring. I also added some highlights with a white gel pen.

Layers of ink - Deer Winter Tag Tutorial by Anna-Karin Evaldsson.

The stamp of the deer looking at the little bird is so cute. There are also coordinating dies to the Snow Buddies stamp set. You can easily turn this design into a card, if you would rather make a card. I stamped the sentiment on scrap inky paper. The larger sentiment was adhered with foam tape.


I added Simon Says Stamp Pawsitively Dazzling Gems Pastel Tones to the flower centers and in a few more places. I love all the Dazzling Gems and have been using them a lot since they came out.

Watercolor deer.

Leave some of the paper showing when watercoloring as highlights. As you can see here, the white gel pen dots work both as highlights and as tiny specks of snow.


Off-set the white glitter paper when gluing the Forest Rings to the background.


This is such a cute sentiment! It was adhered with foam tape. The sentiments I used also comes from the Snow Buddies set.

Layers of ink - Owl Winter Tag Tutorial by Anna-Karin Evaldsson.

I am very fond of owls and had a little collection of owl figurines as a child. Some of them are displayed in my study now. I like how the Forest Ring frames the watercolored image, so that it doesn't disappear on the background.


Again, sentiments were stamped on scrap paper and cut into strips. 

Watercolor owl.

I don't know if you can see it, but I added Glossy Accents to the eyes of the owl.


Drop blue paint into the green paint before the paint dries completely, for some fun color blending directly on the paper.


The ribbons were dyed with ink to coordinate with the tags.

Don't miss all the inspiration along the hop! There are of course prizes to be won too, and at each stop on the hop SSS is giving away a $25 coupon, randomly drawn from those who leave a comment. The winners will be posted post on the Simon Says Stamp store blog on 13 November.


For more inspiration, remember to check out the Festive Fun gallery at Simon Says Stamp, and if you make something with products from the range, it is fun if you post it in the galleries too. There are galleries for all releases, and for the card kits, full of inspiration.

This is the first Festive Fun blog hop, don't miss blog hop number day number 2, which is tomorrow.


Thank you so much for stopping by here today! 


Anna-Karin

Supplies:

* Please note: the links are affiliate links, for which I receive a small percentage of sales generated by the link, at no extra cost to you.


Monday, November 4, 2024

Robin Mixed Media Canvas

Hello crafters! I hope you had a fun Halloween and a good weekend! My youngest was Bumblebee for Halloween and had a great time trick or treating.

Please note: this post has affiliate links, for which I receive a small percentage of sales generated by the link, at no extra cost to you.


This week we have a Thinking of You theme at the Simon Says Stamp Monday Challenge Blog. I hope you will join us! Since it is the first Monday of a new month, the team is showcasing products by a specific designer/company and this week it is Tim Holtz. You can find Tim's fantastic ranger of products here. You don't have use his products to join, but it is fun if you do. 

We also have a new guest designer and during November Teresa York is joining us. Check out her Instagram account to see the stunning tag that she created for this week's challenge.

Layers of ink - Robin Mixed Media Canvas Tutorial by Anna-Karin Evaldsson. Main image of the project.

I made a Thinking of You mixed media canvas with a winter/Christmas theme. The canvas is 6x6 in. The bird is a loosely colored robin. I used paint, stencils, paste, glitter and stamping on the background. Lots of wintery foliage was die cut from scrap papers.

Die cut Tim Holtz Feathered Friends from watercolor paper.

Start by die cutting the bird from watercolor paper with Tim Holtz Sizzix Feathered Friends.

Watercolor the robin bird.

Watercolor the three pieces in a loose manner. Leave some of the white of the paper showing for highlights. I ended up using two wings instead of one.

Add details with a white gel pen and a black pen.

Glue the bird together and add feathers, details and highlights with a black pen and a white gel pen. 

Paint with Distress Paint.

Coat a canvas or canvas board with gesso and let dry. Paint with watered-down Distress Paint and mist with more water to blend. Leave to dry.

Add stamping.

Stamp the branch from Tim's Winter Watercolor 2 twice. Stamp the birds from Tim's Mini Ornates and the sentiment on tissue paper and adhere to the canvas with gloss medium. Add a layer of medium under and on top of the tissue paper. The tissue paper will disappear. I did this since I noticed that it was hard to get a crisp stamped impression on this particular canvas. 

Die cut foliage with Sizzix Vault Festive Wreath.

The foliage was die cut with Tim Holtz Sizzix Vault Festive Foliage. I used left-over inky and watercolored papers. 


Glue together and give them some shape. Later, I die cut new red berries, using a piece of watercolor paper where I tested the orange/red shade for the bird. 

Stamp with Simon Says Stamp Old Letter.

Stamp the background with Simon Says Stamp Old Letter.

Sponge paint through Latticework stencil.

Sponge Distress Paint through Tim Holtz Latticework. This is such a pretty stencil.

Apply texture paste through Tim Holtz Bubble stencil.

Apply Texture Paste through the Bubble stencil and not Grit-Paste which I accidentally photographed here. Sprinkle Distress Rock Candy Glitter over the paste. Let dry.


It was hard to capture the glitter as day-light was almost over when I photographed this project. The Texture Paste is not completely opaque. If you want it to be, you can mix in a little white paint. For this project, I wanted a hint of the background to show through.

Stamp birds.

Magical comes from Simon Says Stamp Forest Scenery and was stamped on inky paper. 

Watercolor robin.

I used a pen for the eye and the white gel pen to add the white dot in the eye. The cut out was too small for the actual eye, but too large for the white dot. Fold the wings and tail feathers out slightly. 

Winter greenery.

The foliage was layered under the bird, almost as a nest. Here you can see the new berries, die cut from paper painted with the same paint as the bird. The sentiment comes from Forest Scenery.

Thinking of you canvas.

I also added some foliage around the sentiment. The branches with the red berries were placed so that they would help the eye move around the canvas. The sentiment comes from Simon Says Stamp Retro Wishes.

Vault Festive Wreath.

I added a bunch of Simon Says Stamp Clear and Surf Pawsitively Dazzling Gems. I have written it before, but I really like these gems. Sequins, gems, pearls, brads and small buttons have for a long time been favorites of mine when it comes to finishing touches.

Layers of ink - Robin Mixed Media Canvas Tutorial by Anna-Karin Evaldsson.


Join us this week in our Thinking of You challenge! You have a chance to win a $25 gift voucher to do some fun shopping at Simon Says Stamp. You have until Monday 8am Ohio time. 1pm UK time, 2 pm CET to join in.


Do you use Instagram? If so please add #sssmchallenge so we can see your entries there too.


Thank you so much for visiting my blog today! 

Happy crafting!

Anna-Karin

Supplies:

* Please note: the links are affiliate links, for which I receive a small percentage of sales generated by the link, at no extra cost to you.