Friday, January 31, 2020

Chickadee Wrapped Journal Tutorial

Hello friends! I can't believe January is almost over. This month flew by and we have had a busy start of the year, but almost only with good stuff. I have a journal/notebook/sketchbook tutorial to share with you today. 

Layers of ink - Chickadee Wrapped Journal Tutorial by Anna-Karin Evaldsson.
 
As you know, I love to make my own notebooks and sketchbooks, and I take them along and use them. I am also trying to make fewer to-do lists and notes on printer paper. Outside my window, I often see great tits outside my window, which is why I decided to turn the bird on this journal into a great tit - which is a kind of chickadee, so the Chickadee stamp by Whimsy Stamps that I used worked very well.
Layers of ink - Chickadee Wrapped Journal Tutorial by Anna-Karin Evaldsson.

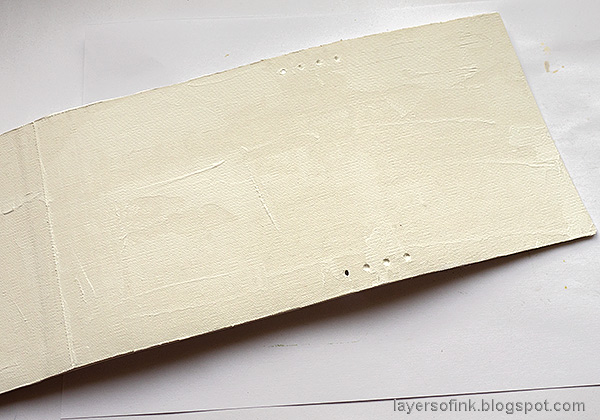
Start by die cutting the Wrapped Journal by Eileen Hull, from mat board. It's an XL die, so you need the Extended Cutting Pads, but it fits in an ordinary Big Shot or Vagabond. Die cut it from sticky-back canvas too. You need to die cut two pieces, since the canvas is a little too short. Glue the canvas to the mat board and leave under a heavy book. Coat with gesso. 
Layers of ink - Chickadee Wrapped Journal Tutorial by Anna-Karin Evaldsson.

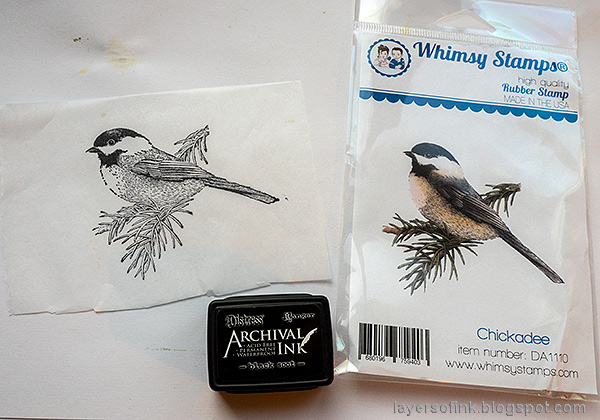
Stamp the Chickadee with permanent ink on tissue paper.

Layers of ink - Chickadee Wrapped Journal Tutorial by Anna-Karin Evaldsson. Mirror stamping.

I wanted the bird to face towards the opening of the journal, and not towards the spine, which is why the tissue paper was a great solution. Flip the tissue paper over and you get a mirrored image. Apply glossy medium to the book, carefully place the bird on the book, add a second layer of glossy medium on top of the tissue paper. Don't worry if the tissue paper shows a little, we will turn it invisible.

Layers of ink - Chickadee Wrapped Journal Tutorial by Anna-Karin Evaldsson.

Color the bird with Distress Paints. I used a bird book to get the colors right. You will paint over some of the stamped lines, but don't worry about it.
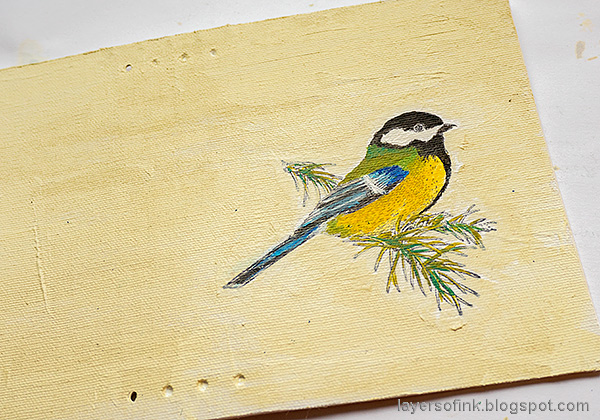
Layers of ink - Chickadee Wrapped Journal Tutorial by Anna-Karin Evaldsson. Paint with acrylic paints.

Paint the cover with Antique Linen. This hides most of the visible tissue paper around the bird.

Layers of ink - Chickadee Wrapped Journal Tutorial by Anna-Karin Evaldsson.

Dry brush Pumice Stone and Black Soot around the edges, and add some shadows to the bird.

Layers of ink - Chickadee Wrapped Journal Tutorial by Anna-Karin Evaldsson.

When the paint is dry, add details to the bird with a black pen, and highlights with a white gel pen

Layers of ink - Chickadee Wrapped Journal Tutorial by Anna-Karin Evaldsson. Tim Holtz Craze stamp.

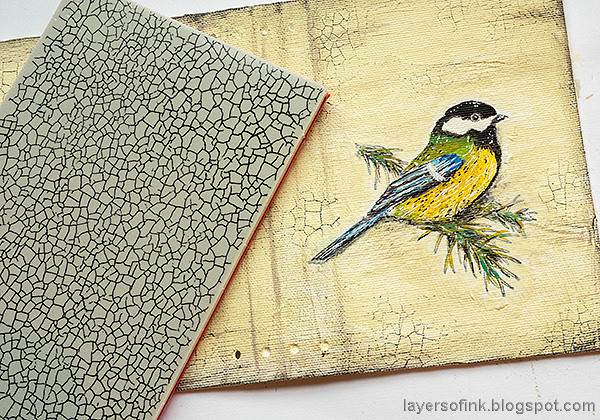
Stamp the background here and there with Tim's Craze stamp and black ink.
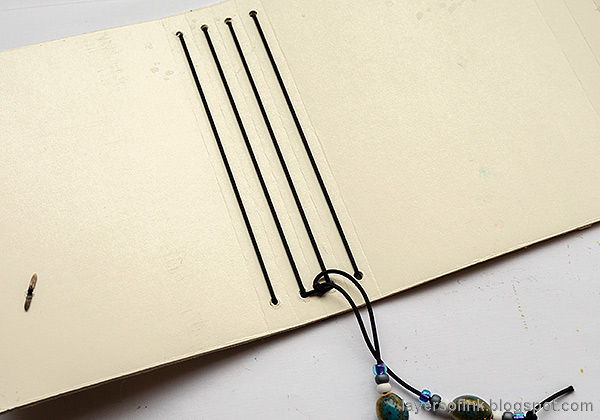
Layers of ink - Chickadee Wrapped Journal Tutorial by Anna-Karin Evaldsson. Bind the journal.

You can bind the Wrapped Journals in different ways. I used an elastic string, going back and forth through the holes created by the die. Tie at the bottom and if you want to, you can add some beads to the strings.

Layers of ink - Chickadee Wrapped Journal Tutorial by Anna-Karin Evaldsson. Make signatures.

One of the best things with making your own journal is that you can use your favorite paper. Cut into7.7 x 4.7 in (19.5 x 12 cm), fold in half and, and place into four signatures. The weight of your paper determines how many pages you can add to each signature. I stitched down the center, but you can also leave it as is, or use staples.
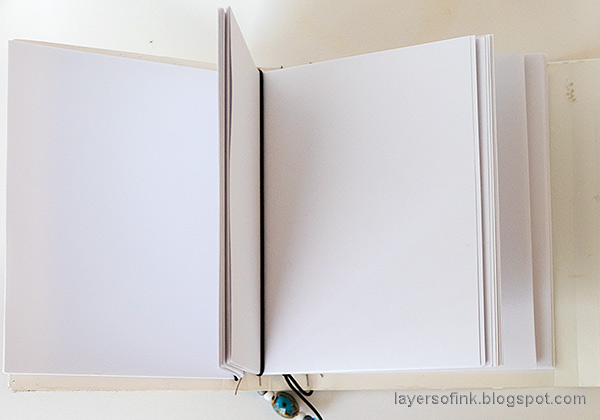
Layers of ink - Chickadee Wrapped Journal Tutorial by Anna-Karin Evaldsson.
 
Slip the signatures under the elastic strings. You can also easily add new signatures when the old ones are full.

Layers of ink - Chickadee Wrapped Journal Tutorial by Anna-Karin Evaldsson.

Here's a close up of the bird.

Layers of ink - Chickadee Wrapped Journal Tutorial by Anna-Karin Evaldsson. Journal cover

I aimed for a simple cover, so that the focus would be on the bird. The crackle stamp added just the right amount of texture.
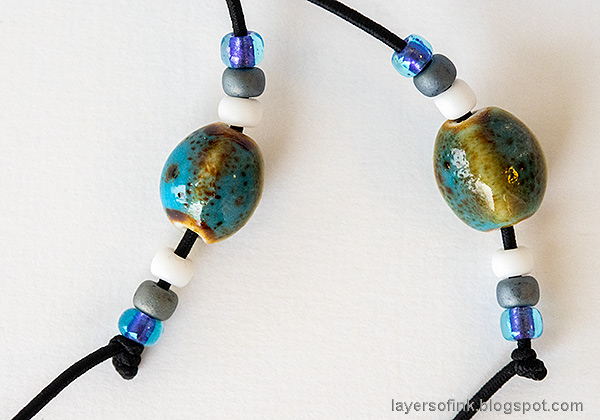
Layers of ink - Chickadee Wrapped Journal Tutorial by Anna-Karin Evaldsson.

I have quite a lot of beads, from my earlier jewelry-making days, and I really should add them to projects more often.
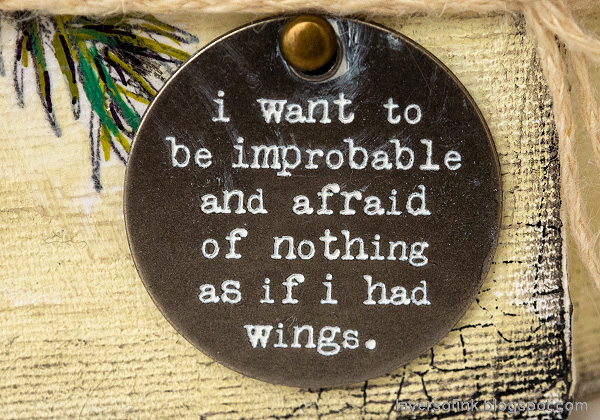
Layers of ink - Chickadee Wrapped Journal Tutorial by Anna-Karin Evaldsson.

Isn't this a wonderful sentiment? It's from Tim's Quote Tokens. Rub white paint into the words to make them stand out.
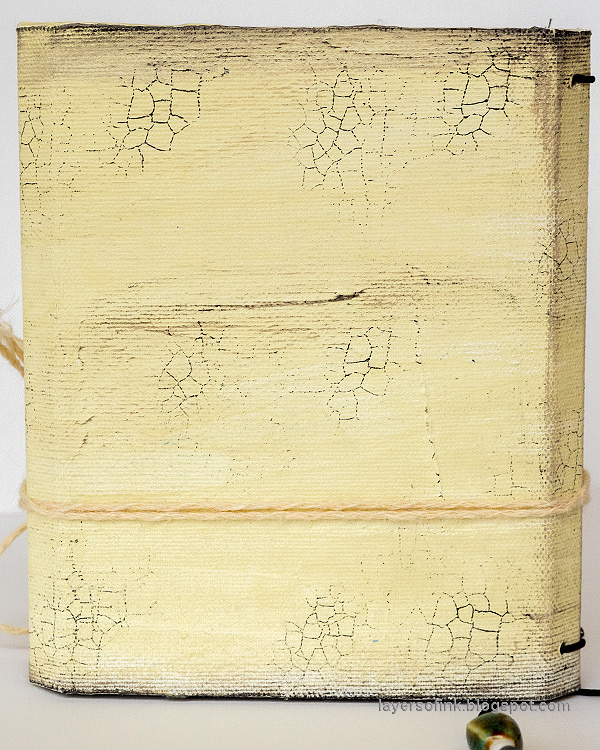
Layers of ink - Chickadee Wrapped Journal Tutorial by Anna-Karin Evaldsson.

I left the back plain, but you could decorate it too, if you'd like to.

Layers of ink - Chickadee Wrapped Journal Tutorial by Anna-Karin Evaldsson.

Here's a look at the spine, so that you can see what it looks like with the elastic string.
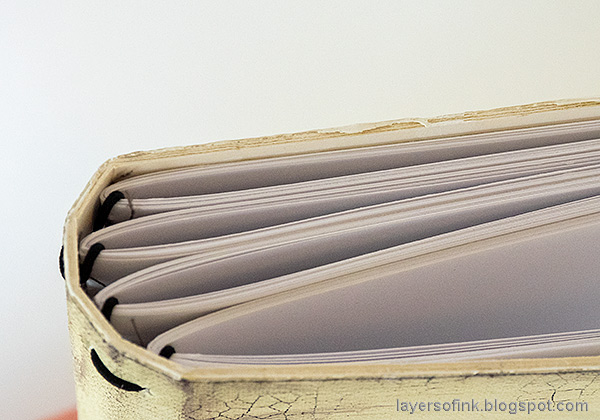
Layers of ink - Chickadee Wrapped Journal Tutorial by Anna-Karin Evaldsson.

Here's a look at the journal from the top.

Layers of ink - Chickadee Wrapped Journal Tutorial by Anna-Karin Evaldsson.

I hope you enjoyed this tutorial and that it inspired you to make a journal, or to do the techniques on a different surface. You don't need to use a bird stamp since the techniques work with many different types of stamps.


Thank you so much for taking the time to visit my blog today!  

Happy crafting!

Anna-Karin

Supplies:

* Please note: the links are affiliate links, for which I receive a small percentage of sales generated by the link, at no extra cost to you.


Thursday, January 30, 2020

Snowflake Builder Tutorial

Hello friends! I have a quick tutorial for you today, made with Simon Says Stamp stamps and dies. 

Layers of ink - Snowflake Builder Card Tutorial by Anna-Karin Evaldsson.

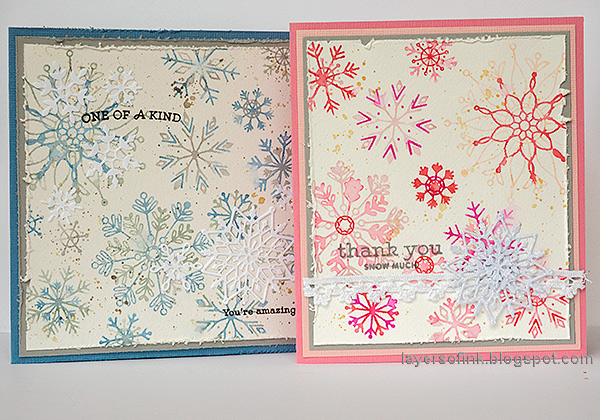
Winter cards aren't only for Christmas, but can be sent for any occasion during winter. I made two cards using the new Simon Says Stamp Snowflake Builder stamp set, and to show you how easy you can get a different look by just changing the colors.

Layers of ink - Snowflake Builder Card Tutorial by Anna-Karin Evaldsson. Stamp snowflakes with Distress Ink.

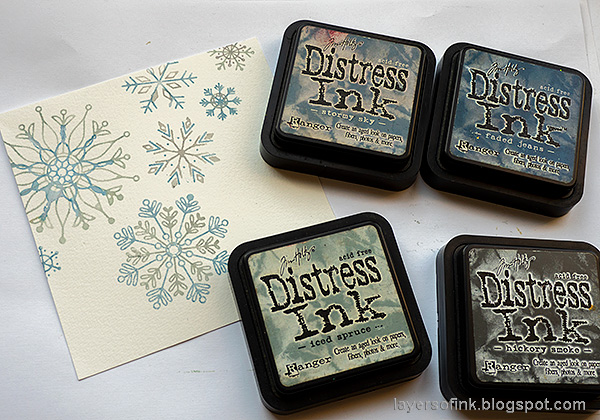
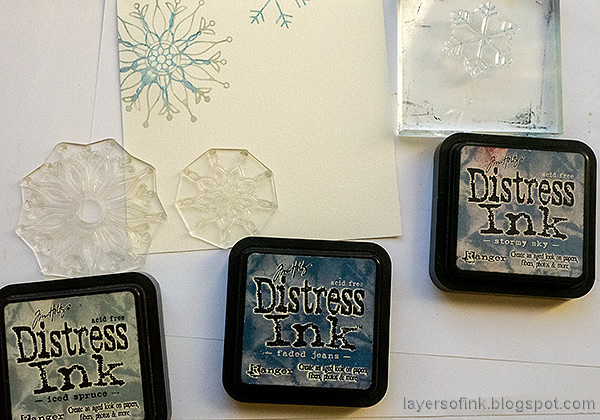
The stamps are designed so that you can build up a snowflake using two or more stamps. You can stamp all the parts in one color, or use different colors. I picked four shades of blue and grey ink. Ink a snowflake and then mist two or three times with water. Stamp on watercolor paper. Repeat with a different snowflake shape.

Layers of ink - Snowflake Builder Card Tutorial by Anna-Karin Evaldsson.

Here you can see the smaller snowflake, which was first stamped with Faded Jeans and then with Hickory Smoke.

Layers of ink - Snowflake Builder Card Tutorial by Anna-Karin Evaldsson.

Continue adding snowflakes. Aren't they pretty? There are so many designs that you can create with the snowflake stamps on the set.

Layers of ink - Snowflake Builder Card Tutorial by Anna-Karin Evaldsson.

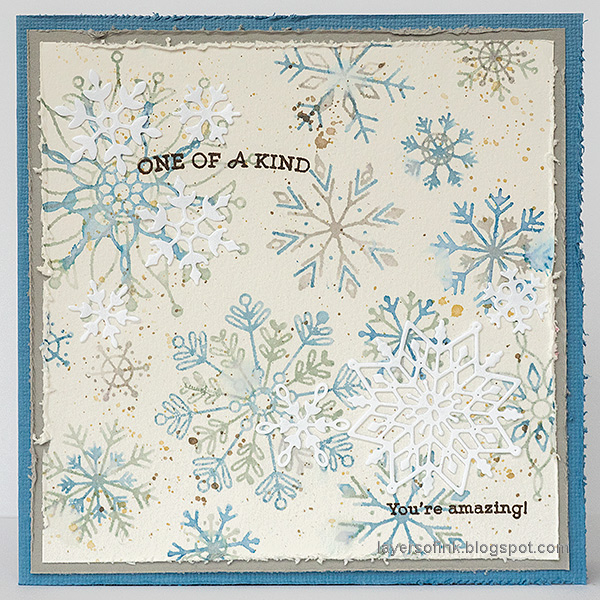
Here's the finished blue-grey card.

Layers of ink - Snowflake Builder Card Tutorial by Anna-Karin Evaldsson.

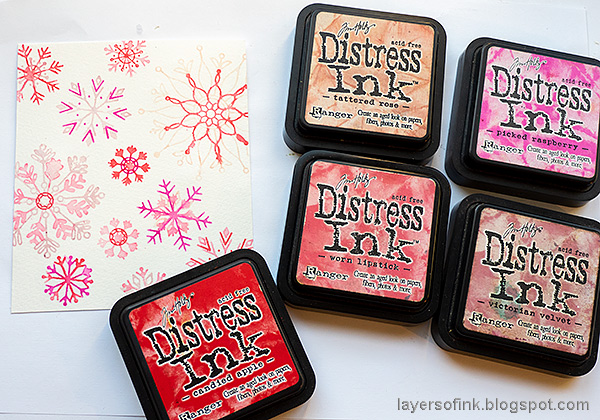
For the pink card, I used these shades of pink and red Distress Inks.

Layers of ink - Snowflake Builder Card Tutorial by Anna-Karin Evaldsson. Simon Says Stamp Snowflake Builder.

Here you can see what the Snowflake Builder stamp set looks like. Some of the designs are meant to go together and have a dotted line around them. But you can also mix and match them just as you'd like. I misted the background slightly with water to increase the watercolor look.

Layers of ink - Snowflake Builder Card Tutorial by Anna-Karin Evaldsson.

Splatter with Distress Ink (smear on a craft sheet and mist with water first).

Layers of ink - Snowflake Builder Card Tutorial by Anna-Karin Evaldsson.

The blue and grey card uses mainly cool shades, except for the brown splatters. The stamping was done with a dark brown ink too. I also die cut some flakes using the Mini Snowflake Mandala and the Stitched Flakes set, from white paper. You can skip that step if you want to.

Layers of ink - Snowflake Builder Card Tutorial by Anna-Karin Evaldsson.

With watercolor stamping, you don't have to worry about precise placement of the stamps, since we are aiming for a fluid look.

Layers of ink - Snowflake Builder Card Tutorial by Anna-Karin Evaldsson.

The snowflakes would also look great embossed.

Layers of ink - Snowflake Builder Card Tutorial by Anna-Karin Evaldsson.

I like the sentiments that come on the Snowflake Builder set. The panel was layered on SSS gray cardstock and then on folded blue cardstock, distressing the edges first.

Layers of ink - Snowflake Builder Card Tutorial by Anna-Karin Evaldsson.

The pink card uses exactly the same stamps and technique, but has a different look because of the color combo. I like pink and red together when it comes to snowflakes. This Snowflake Wall-Hanging is an example of that.

Layers of ink - Snowflake Builder Card Tutorial by Anna-Karin Evaldsson.

It was layered on SSS grey cardstock and then on lighter pink, finishing with folded cardstock in a darker shade of pink.

Layers of ink - Snowflake Builder Card Tutorial by Anna-Karin Evaldsson.

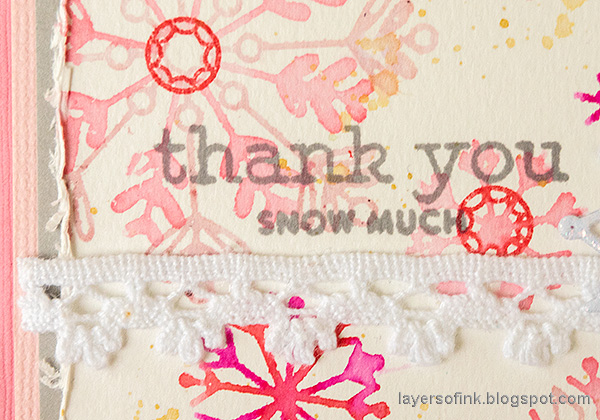
Even the lightest shades, such as the Tattered Rose snowflake in the background here, look nice.

Layers of ink - Snowflake Builder Card Tutorial by Anna-Karin Evaldsson. Glitter snowflakes.

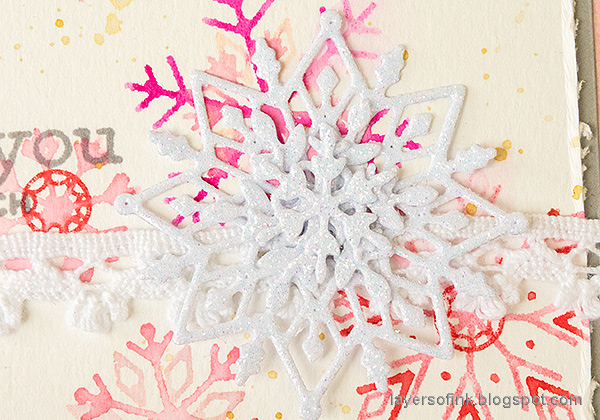
The snowflakes were die cut from glittery white paper and layered together.

Layers of ink - Snowflake Builder Card Tutorial by Anna-Karin Evaldsson.

The sentiment was stamped with grey ink, to give the card a softer look. I also used a piece of lace that I found on my desk.


Thank you so much for taking the time to visit my blog today!  

Happy crafting!

Anna-Karin

Supplies:

* Please note: the links are affiliate links, for which I receive a small percentage of sales generated by the link, at no extra cost to you.

Elephant Printed Canvas and Art Journal Page

Hello crafters! We have had such a grey day today, with misty and wet weather, so some bright colors are needed to lighten things up a little. I have something of a different post for you today.

Layers of ink - Photowall

Recently, I was contacted by Photowall, asking if I could do a review/post. I hardly ever say yes to such collaborations and sponsored posts, but in this case, I thought it could fit on my blog, and I also created a little inspiration project of mine own, which you will see below. Photowall is a Swedish company that sells wall-murals, wallpaper, canvas prints and posters and there are thousands of designs in a wide variety of sizes. Since I love elephants, I ordered a colorful elephant canvas, designed by Patrice Murciano. I had a hard time choosing and almost picked a print by Vincent van Gogh instead.

You can also use your own photos and art. If we had our own place, I would have loved to have one of my own photos as a wall-paper, or maybe something like a textured mixed media background.


The canvas came in a narrow box, which I could carry home after having picked it up. I like to walk and pick up parcels, since it's a good reason to take a walk. The canvas frame is easy to assemble and you can find a handy video for it here. I took a couple of photos too. You don't need any tools. I only used a ruler and a pencil.


Make marks 12 millimeters from the both edges, as shown here. Remove the adhesive cover and place the wooden bar as shown. Press on the canvas so that the adhesive sticks down well.


Continue with all four sides and fold up the flaps.


Attach the metallic bars in the premade holes. Don't attach them too tightly.


Attach all the bars and then gradually make them a little tighter, to stretch the canvas. It was easy to get a perfect result. The canvas also comes with a hook for hanging.


I haven't decided yet if it should hang above the couch as in the first photo, or here in the hallway, where it almost covers the entire wall between the doors. I walk past here a lot and probably see it more often than at the couch. We'll see where it will finally end up.

I love the bright colors, paint splatters and all the scribbles on this elephant art.


You can chose whether you want a black or white edge, or if you want the design to continue on the edge. I love letting the design continue on the edges of my own canvases, so it was an easy choice.

Layers of ink - Pop Art Elephant Journal Page by Anna-Karin Evaldsson.

After having had the elephant canvas on my wall for a couple of days, I did a quick art journal page using the canvas as my inspiration, and since I really wanted an elephant in my art journal. I have loved elephants for a long time. When I was little, I had a book where I wrote down facts about animals. My sister was sometimes motivated to join me, and she still remembers the difference between and Asian and African elephants, from having written down those facts in the animal notebook. I think this stamp by Tim Holtz is, in fact, an Asian elephant, but it is paired up with a South African post card stamp from the same stamp set, so today we are pretending that it is an African elephant. Since I have seen them in the wild relatively many times, I like them the best.

Layers of ink - Pop Art Elephant Journal Page by Anna-Karin Evaldsson.

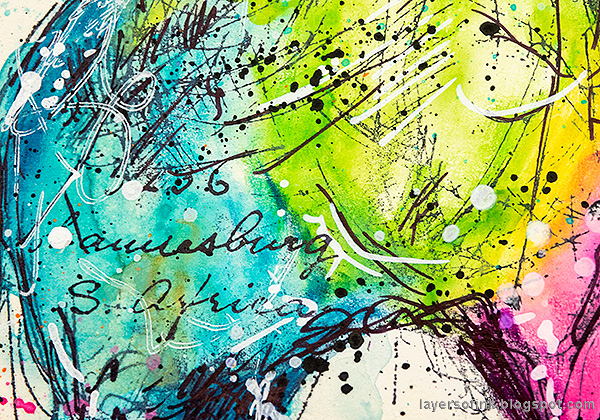
The page had already been painted with a rough layer of white gesso. The elephant was stamped with black ink and colored with Dina Wakley's Scribble Sticks. Inspired by my new canvas, I added lots of splatters and extra scribbles, but I also stamped some script on the elephant 'Johannesburg, South Africa', since that carries special meaning to me.

Layers of ink - Pop Art Elephant Journal Page by Anna-Karin Evaldsson.

Add water to the Scribble Sticks with a paint brush, to turn them into watercolor paint.

Layers of ink - Pop Art Elephant Journal Page by Anna-Karin Evaldsson.

I just couldn't leave the background entirely white, but instead colored it with grey and cream Scribble Sticks and added lots of splatters, also using the Scribble Sticks. Dip it in water and flick a paint brush against it. The birds were stamped with the same colors used to color the elephant.

Layers of ink - Pop Art Elephant Journal Page by Anna-Karin Evaldsson.

I also stamped a sentiment, from Paper Artsy's Travels and Journeys set, designed by Alison Bomber.

Layers of ink - Pop Art Elephant Journal Page by Anna-Karin Evaldsson.

Lots of scribbles and another stamped word.

If you would like to have a look at the Photowall products, I have a 25% discount code for you, it is layersofink2020 and will be valid for a month.

Thank you so much for stopping by here today! I will be back tomorrow with a card or two.

Happy crafting!

Anna-Karin

Supplies:

* Please note: the links are affiliate links, for which I receive a small percentage of sales generated by the link, at no extra cost to you.