Friday, September 28, 2018

Ticket Mini Book Tutorial

Hello friends! The weekend is almost here and today, I have a quick and easy mini book tutorial to share with you, which was made with Sizzix dies by Tim Holtz

Layers of ink - Ticket Mini Book Tutorial by Anna-Karin Evaldsson

I made this little ticket book for my youngest son, and it is full of interesting images and words for him to learn. The book was kept quite plain and simple on purpose, so that the focus would be on the various images and concepts. It is also full of interesting textures. You can make the book for any theme, and add photos, text, embellishments etc. I used Tim Holtz Stacked Label set for the pages, but I think the shape also looks like a ticket, so I decided that in this case, it is a ticket and not a label. There is an idea-ology adornment globe on the cover.

Layers of ink - Ticket Mini Book Tutorial by Anna-Karin Evaldsson with Tim Holtz Sizzix Stacked Label

I have a folder full of pieces of scrap papers that I colored while doing various techniques. I love to dig into that folder when making projects, and it is especially very handy for quick projects. If you want to start from scratch, color watercolor paper with watercolors, Distress Ink, Infusions, or any other media. Those were the three that I used here. Die cut using one of the labels from Tim's Stacked Label set. You can easily make a book using any of the five sizes of tickets in the set, ranging from 5" x 3 1/2" - 2 3/8" x 1 3/4". The one I used is 3 x 2.2 in.

Layers of ink - Ticket Mini Book Tutorial by Anna-Karin Evaldsson, with dry embossing

Since I used a pretty small ticket, it was perfect for the small embossing folders that are included in the Side Order sets. I embossed the pages in folders from the following sets: Birthday, Springtime, Travel, and Valentine. This step gives instant interest and texture to the pages.

Layers of ink - Ticket Mini Book Tutorial by Anna-Karin Evaldsson with Tim Holtz Sizzix Side-Order

I used only Side Order sets - the ones linked above in addition to the Autumn set - to decorated the pages, die cutting various images that I knew Leo would like, from cardstock. Arrange them on top of the ticket pages, until you have decided what goes where.


Glue the parts of the die cuts together. Aren't they cute? I love all those tiny little details.


For the cover, I die cut a word using the Springtime set, and added some label letter stickers and a metallic globe embellishment.


I wanted to keep the pages simple, but you can of course add more details. Each image was accompanied by a word written in stickers. The words are all in Swedish - I will add little dots above some of the 'a's and 'o's later - this a for example, is meant to be an 'รค'.


Punch holes through the pages with a Crop-a-Dile and bind with rings. Here's a little die cut globe. The pages are also great for little photos.


Seasonal images can be used all year around.


A suitcase, with cute little labels.


Some leaves, since Leo loves to pick up leaves.


This background is one of my favorites. It was done with Paper Arty's Infusions, for more inspiration, check out my Geometric Banner or Guestbook tutorial.


And a favorite air plane.


There are lots of oak trees in the neighbourhood and I always walk around with acorns in my pockets that the kids found (and stones, etc.).


A cute pumpkin.


And a balloon from the party Birthday set.


This is a cute little book, that can easily be made larger, or smaller. You can also add more pages, and if you use larger rings, you can add a lot more pages. For an even sturdier book, die cut the covers from a thicker surface.

Thank you so much for stopping by today! I hope you will have a lovely weekend!

Happy crafting!

Anna-Karin

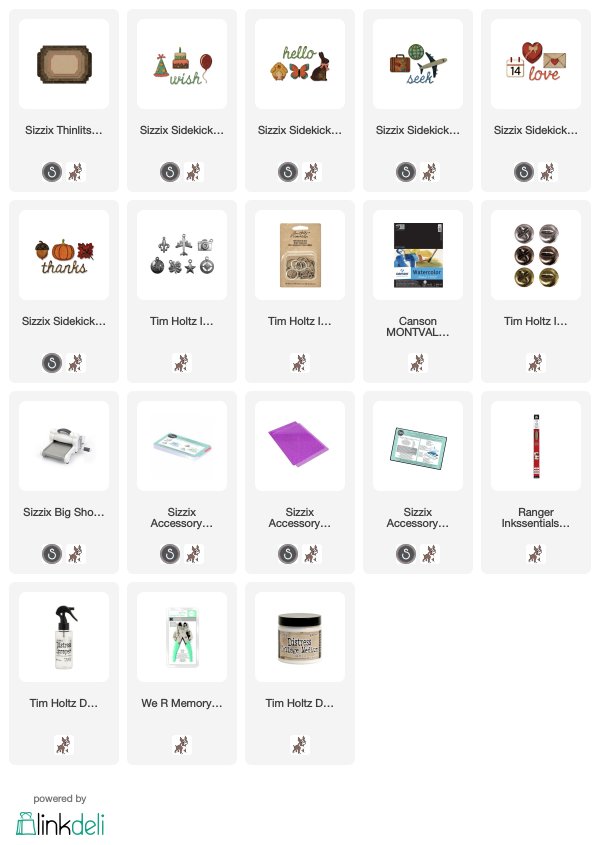
Supplies:

* Please note: the links are affiliate links, for which I receive a small percentage of sales generated by the link, at no extra cost to you.


Monday, September 24, 2018

Alcohol Ink Lift Background Tutorial

Hello friends! I hope your weekend was a nice one. We did our usual things this weekend: playgrounds, autumn walks, soccer and playing with friends. 


This week at the Simon Says Stamp Monday Challenge Blog, we have a Monochrome challenge. I love to to a monochrome project now and then. It is really fun to see how many shades of one color that you can achieve. Don't miss the very inventive project by our September guest designer Terelisa Agosti.

Layers of ink - Alcohol Ink Lift Background Tutorial by Anna-Karin Evaldsson, orange monochrome fall wall-hanger

Orange is one of those colors that not everybody likes, but I always liked orange and thought it had an unfair bad reputation. So, for this week, I decided to go with an all orange project and I was happy with how it turned out. I was also excited to try the Ranger Alcohol Lift-Ink for the first time and loved the background effect. I've done alcohol ink lifting before, but with Jet Black Archival Ink, and I thought the Alcohol Lift-Ink was very easy to work with in comparison. It also allows for additional techniques, since the lifted ink remains on the stamp. 

Layers of ink - Alcohol Ink Lift Background Tutorial by Anna-Karin Evaldsson, with Ranger alcohol inks

Working on Yupo, apply Butterscotch and Valencia alcohol ink, with a felt applicator. Add layers until you are happy with the look. I also dripped a few drops of alcohol ink blending solution on the background. Pounce the felt applicator here and there, to create the smaller dots that you see.

Layers of ink - Alcohol Ink Lift Background Tutorial by Anna-Karin Evaldsson, using Ranger Alcohol Lift-Ink on Yupo paper

Ink a stamp with Alcohol Lift-Ink and stamp on the surface. Dab off the ink from the surface, to prevent smearing it, and then wipe with a paper towel. Make sure that you use a clean part of the paper towel the whole time. The amount of detail you get is amazing. I used leaf stamps and sentiments from the lovely Nature's Wonder set.

Layers of ink - Alcohol Ink Lift Background Tutorial by Anna-Karin Evaldsson, stamping with Ranger's Alcohol Ink-Lift on gloss cardstock

Keep a piece of paper next to you, and each time you lift up an image, stamp it on the second paper. I used glossy cardstock. Look at these very detailed alcohol ink stamped leaves. We couldn't stamp with alcohol inks before, so this is a really cool technique. And the impressions are permanent, so you can use other techniques on top. I am looking forward to using this piece on a project.

Layers of ink - Alcohol Ink Lift Background Tutorial by Anna-Karin Evaldsson, Distress Stain Spray background

Mist a piece of watercolor paper with Distress Spray Stains and finish with a layer of Buttercup Mica Spray.

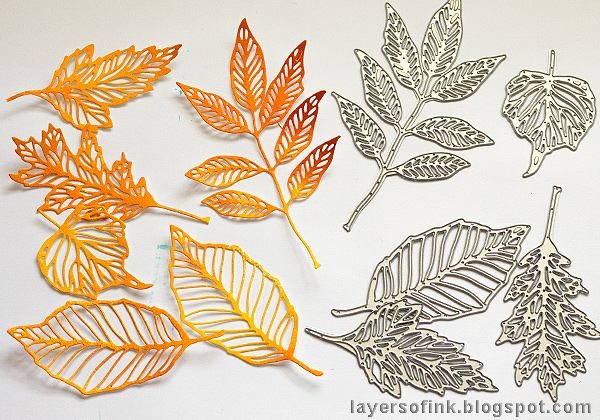
Layers of ink - Alcohol Ink Lift Background Tutorial by Anna-Karin Evaldsson, with Tim Holtz Sizzix Skeleton Leaves thinlits

When dry, die cut Skeleton Leaves from the piece. I love the wonderful details on these leaves. It is a good idea to use the Sizzix Chrome Precision Base Plate to get a perfect cut.

Layers of ink - Alcohol Ink Lift Background Tutorial by Anna-Karin Evaldsson, using Tim Holtz Sizzix Tattered Pinecone to make a rose.

For my roses, I used an old favorite, namely Tim's Tattered Pinecone die, and die cut two roses from orange classic kraft paper.

Layers of ink - Alcohol Ink Lift Background Tutorial by Anna-Karin Evaldsson, Tattered Pinecone DIY paper roses

Sand the edges and roll into roses. I also added some Rock Candy Glitter by first applying Glossy Accents here and there.

Layers of ink - Alcohol Ink Lift Background Tutorial by Anna-Karin Evaldsson

For the base of my wall-hanger, I used mat board and covered the edges with orange Deco Tape.

Layers of ink - Alcohol Ink Lift Background Tutorial by Anna-Karin Evaldsson, with Tim Holtz Nature's Wonder stamps

The detailed ghost images of leaves and words in the background are really cool.

Layers of ink - Alcohol Ink Lift Background Tutorial by Anna-Karin Evaldsson

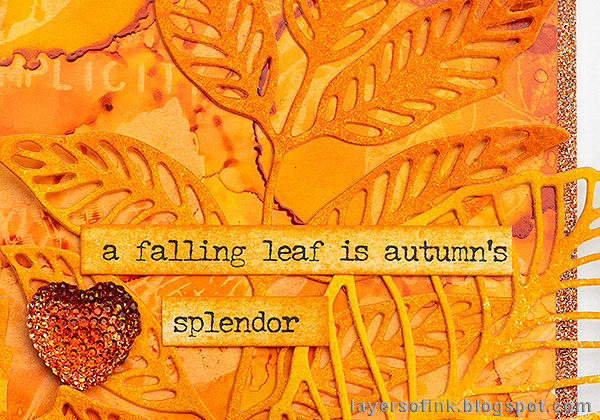
The skeleton leaves are very shiny because of the mica spray, a look that works well with autumn projects. I inked the Small Talk stickers with Spiced Marmalade.

Layers of ink - Alcohol Ink Lift Background Tutorial by Anna-Karin Evaldsson, inking gum drop hearts

The Gumdrop Hearts were colored with orange alcohol ink, so that everything would be orange.

Layers of ink - Alcohol Ink Lift Background Tutorial by Anna-Karin Evaldsson, beauty in simplicity wall-hanger

Behind the roses there is a piece of lace which was dyed orange, orange twine and a Mini Provincial border die cut from Sizzix foil and also colored with alcohol ink.

Layers of ink - Alcohol Ink Lift Background Tutorial by Anna-Karin Evaldsson, dimensional DIY paper roses

Here'a look at the dimension of the roses.


The STAMPtember® celebrations are continuing at Simon Says Stamp, with surprises and happenings almost every day. You can see the whole wonderful STAMPtember® release here

I hope you will join us this week in our Monochrome challenge. As always, you have a chance to win a $50 gift voucher to do some fun shopping at Simon Says Stamp. You have until next Monday 8am Ohio time. 1pm UK time, 2 pm CET to join in.


Don't forget to follow Simon Says Stamp on Instagram, they post great stuff daily. 


Do you use Instagram? If so please add #sssmchallenge so we can see your entries there too.


Thank you so much for taking the time to visit my blog today!  

Happy stamping!

Anna-Karin

Supplies:

* Please note: the links are affiliate links, for which I receive a small percentage of sales generated by the link, at no extra cost to you.


Thursday, September 20, 2018

Fall Gift Card Holder Card Tutorial

Hello friends! During my walks, I like to observe, photograph and sometimes also sketch changes in nature, and today I saw that one of my favorite sets of autumn trees had turned color. The three particular trees are always among the first trees to get their autumn shades. Today, I am happy to share another tutorial on the Sizzix blog

Layers of ink - Autumn Card with Gift Card Pocket tutorial by Anna-Karin Evaldsson with Sizzix dies by Tim Holtz.

I made an autumn card featuring a pocket, which is perfect for a gift card, or a small note or photo. There are also Funky Floral autumn foliage, and a rosette. If you want to make it even more special, put a magnet on the back of the rosette, so that it can be used as an ornament. All the dies that I used are by Tim Holtz. For more rosette inspiration, check out my Rosette Wall-hanger, where I also used some left-overs from this card.

You can find all the steps for this easy card on the Sizzix blog.

Thank you so much for stopping by today!

Happy crafting!

Anna-Karin

Monday, September 17, 2018

Embossed Acetate Autumn Tag Tutorial

Hi friends! We are having a rainy autumn day here, and I hope everyone who has been in the path of the big storms in different parts of the world are safe. We had a calm and quiet weekend, which included two long walks - Leo loves to walk in tunnels and hear the echo, and in one of the walks, I managed to find four different little tunnels to walk through. We also went to a garden market at a local coffee shop/art gallery.


This week at the Simon Says Stamp Monday Challenge Blog, we have an It's a Wrap challenge - you can make your own gift wrap, gift bag or box, or make a tag etc. Lots of options. Don't miss the project by our September guest designer Terelisa Agosti.

Layers of ink - Embossed Acetate Autumn Tag Tutorial by Anna-Karin Evaldsson made with Tim Holtz Sizzix dies

Instead of making a gift package or wrapping, I decided to recycle packaging material and make a tag. The tag might later become a part of a gift, but at first, it will be a part of my autumn decorations at home. I like the mix of textures and surfaces. I used mainly products by Tim Holtz here.

Layers of ink - Embossed Acetate Autumn Tag Tutorial by Anna-Karin Evaldsson, embossing acetate with Sizzix 3D cobbelstones embossing folder

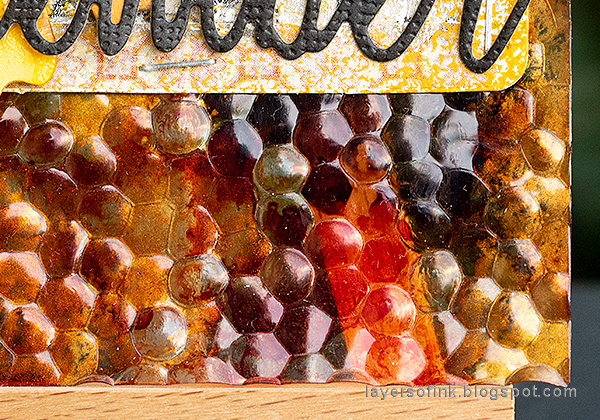
For the background, I used a piece of Sizzix die packaging, which is very sturdy. It was embossed in the cool 3D Cobblestone folder. You can also use Clearly For Art Modeling Film.

Layers of ink - Embossed Acetate Autumn Tag Tutorial by Anna-Karin Evaldsson, coloring acetate with alcohol ink.

Working on the back of the tag, add layers of alcohol inks until you are happy with the result. I finished it with a tiny bit of Gold Mixative here and there, for a metallic look.

Layers of ink - Embossed Acetate Autumn Tag Tutorial by Anna-Karin Evaldsson, using Tim Holtz Design Tape.

A second piece of packaging comes from one of Tim Holtz's Christmas idea-ology packages. I forgot to take a photo of the unaltered piece. But I kept the white edges, and added some gesso to the center and then covered it with design tape.

Layers of ink - Embossed Acetate Autumn Tag Tutorial by Anna-Karin Evaldsson

Dab white Distress Paint to the piece and mist with water.

Layers of ink - Embossed Acetate Autumn Tag Tutorial by Anna-Karin Evaldsson, altered packaging

When dry, add a little Fossilized Amber.

Layers of ink - Embossed Acetate Autumn Tag Tutorial by Anna-Karin Evaldsson, with Ranger mica spray¨

And give the piece shine with Buttercup Mica Spray.
 Layers of ink - Embossed Acetate Autumn Tag Tutorial by Anna-Karin Evaldsson, with Tim Holtz Sizzix Fall Foliage

Leaves were die cut from watercolor paper using the Fall Foliage set. Smear Distress Inks on a craft sheet, mist with water and press the shapes into the ink. Repeat with more colors until you are happy.

Layers of ink - Embossed Acetate Autumn Tag Tutorial by Anna-Karin Evaldsson, with Distress Rock Candy

Smear a little Rock Candy Distress Crackle Paint on the leaves and branches, not covering them completely.

Layers of ink - Embossed Acetate Autumn Tag Tutorial by Anna-Karin Evaldsson

When the crackle paint is dry, rub darker shades of Distress Crayons into the cracks, to make them more visible. I really like the shape of these tall grain pieces.

Layers of ink - Embossed Acetate Autumn Tag Tutorial by Anna-Karin Evaldsson with Tim Holtz Sizzix Funky Foliage

Using the brand new Funky Foliage set, die cut two mushrooms from watercolor paper and colored the pieces as before with Distress Ink.

Layers of ink - Embossed Acetate Autumn Tag Tutorial by Anna-Karin Evaldsson, die cut mushrooms with Funky Foliage

Glue the shapes together and layer them on top of the leaves and branches. Aren't they cute? They were adhered with foam tape.

Layers of ink - Embossed Acetate Autumn Tag Tutorial by Anna-Karin Evaldsson

The title was die cut from black kraft core cardstock using the Calendar Words Script set.

Layers of ink - Embossed Acetate Autumn Tag Tutorial by Anna-Karin Evaldsson, with gumdrop hearts

The background panel was stapled to the plastic tag. I also colored a gumdrop heart with alcohol ink and used a Clippings Sticker.

Layers of ink - Embossed Acetate Autumn Tag Tutorial by Anna-Karin Evaldsson, lace dyed with ink

The lace trim was dyed with Distress Ink.

Layers of ink - Embossed Acetate Autumn Tag Tutorial by Anna-Karin Evaldsson

The embossed plastic with all the alcohol ink coloring is really yummy and is easy and quick to do. I almost didn't want to cover any of it up.

Layers of ink - Embossed Acetate Autumn Tag Tutorial by Anna-Karin Evaldsson

I hope you enjoyed this post and that it inspired you to recycle some packaging. Packaging is often quite sturdy and can be a great surface to alter.


The STAMPtember® celebrations are continuing at Simon Says Stamp, with surprises and happenings almost every day. You can see the whole wonderful STAMPtember® release here

I hope you will join us this week in our It's a Wrap challenge. As always, you have a chance to win a $50 gift voucher to do some fun shopping at Simon Says Stamp. You have until next Monday 8am Ohio time. 1pm UK time, 2 pm CET to join in.


Don't forget to follow Simon Says Stamp on Instagram, they post great stuff daily. 


Do you use Instagram? If so please add #sssmchallenge so we can see your entries there too.


Thank you so much for taking the time to visit my blog today!  

Happy stamping!

Anna-Karin

Supplies:

* Please note: the links are affiliate links, for which I receive a small percentage of sales generated by the link, at no extra cost to you.