Showing posts with label DecoArt. Show all posts

Wednesday, May 16, 2018

Flowers and Birds Canvas Tutorial

Hello friends! During May the Eileen Hull Inspiration Team is sharing projects with flowers, which is a perfect theme for this beautiful month. Don't miss all the inspiration from the team. Eileen has many pretty and versatile flower dies.

Layers of ink - Flowers and Birds Canvas Tutorial by Anna-Karin Evaldsson

I made a little canvas board this week, which is going to be a Mother's Day gift (Mother's Day is on 27 May here). It is 4 x5 in big. Sometimes, I really enjoy working on a small scale. I used only one flower from Eileen's Romance Flower die, to make these dimensional flowers and they are really easy to make.

Layers of ink - Flowers and Birds Canvas Tutorial by Anna-Karin Evaldsson

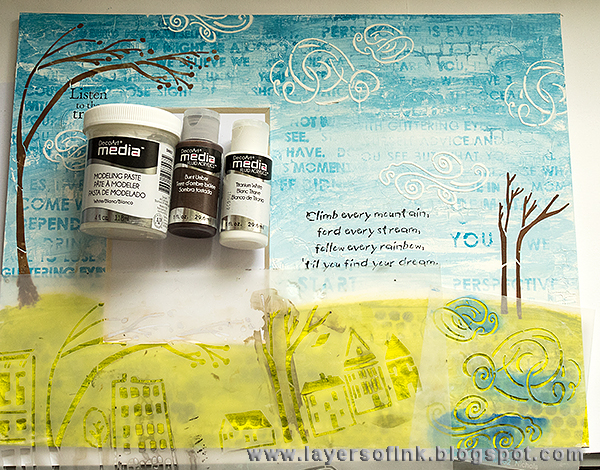
I wasn't sure what to do with the background, but when I spotted Tim Holtz's Aviary Collage Paper one one of my shelves, I thought these birds would be the perfect match. Adhere them to the canvas by adding a layer of Matte Medium below and on top. If you rather want them to be glossy, use gloss multi-medium.

Layers of ink - Flowers and Birds Canvas Tutorial by Anna-Karin Evaldsson

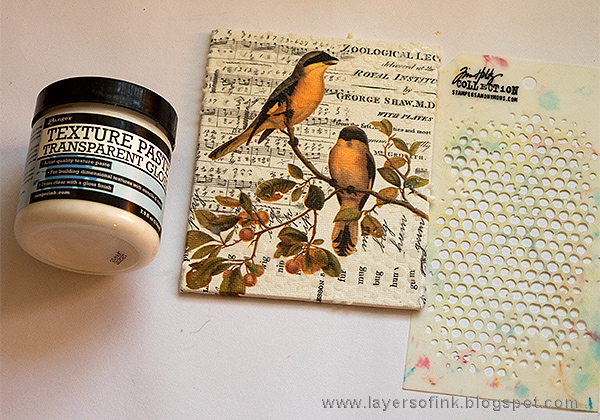
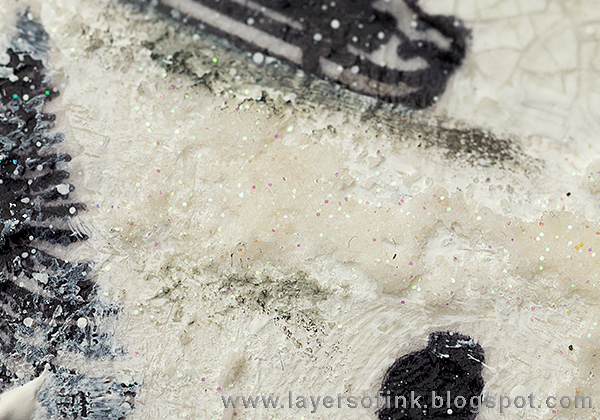
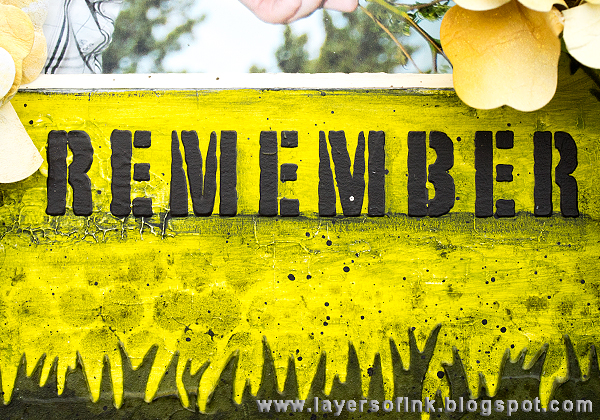
Smear Transparent Texture Paste through the small bubbles stencil in the corners and around the edges of the canvas with a palette knife. Leave to dry.

Layers of ink - Flowers and Birds Canvas Tutorial by Anna-Karin Evaldsson

Paint with watered-down Distress Paint and when dry, dry brush some additional brown paint around the edges.

Layers of ink - Flowers and Birds Canvas Tutorial by Anna-Karin Evaldsson

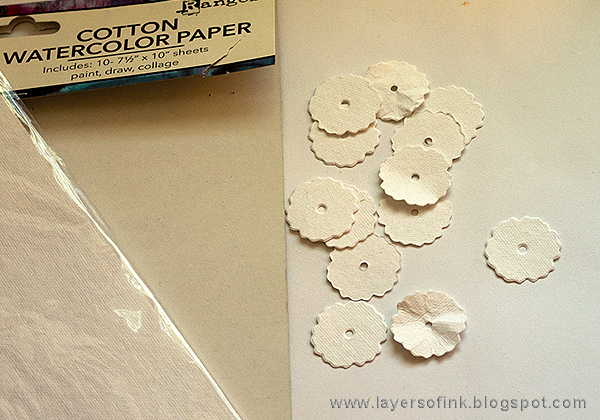
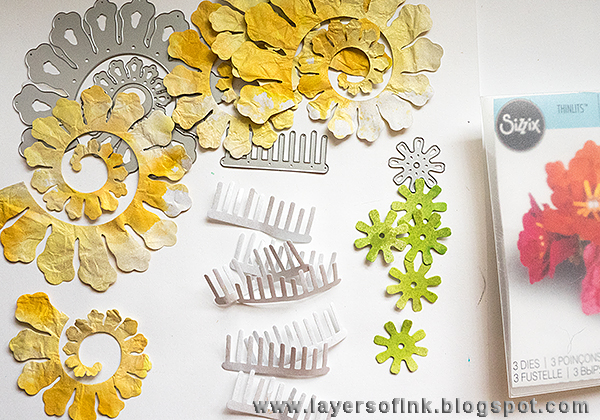
Die cut the smallest flower on the Romance Flower die from Ranger's Cotton Watercolor paper. You can die cut three flowers in one go, since this is a Bigz die.

Layers of ink - Flowers and Birds Canvas Tutorial by Anna-Karin Evaldsson

I also adhered some natural sticky-back canvas to paper and die cut some more flowers.

Layers of ink - Flowers and Birds Canvas Tutorial by Anna-Karin Evaldsson

Scribble with Dina Wakley's Scribble Sticks. I left the edges white.

Layers of ink - Flowers and Birds Canvas Tutorial by Anna-Karin Evaldsson

Dissolve the pigment with water.

Layers of ink - Flowers and Birds Canvas Tutorial by Anna-Karin Evaldsson

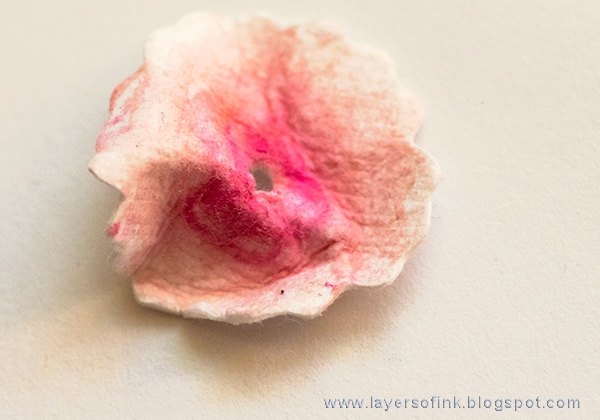
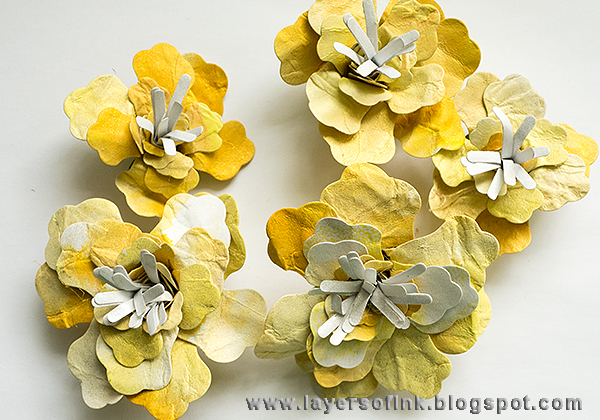
Before the flowers dry completely, scrunch them up.

Layers of ink - Flowers and Birds Canvas Tutorial by Anna-Karin Evaldsson

I arranged the flowers with a canvas one at the bottom. Originally I planned to also use one of the flowers from Heart & Soul Flowers, but I thought it made the flowers too large for the canvas.

Layers of ink - Flowers and Birds Canvas Tutorial by Anna-Karin Evaldsson

Fold four stamen pieces in half and thread through the holes in the flowers.

Layers of ink - Flowers and Birds Canvas Tutorial by Anna-Karin Evaldsson

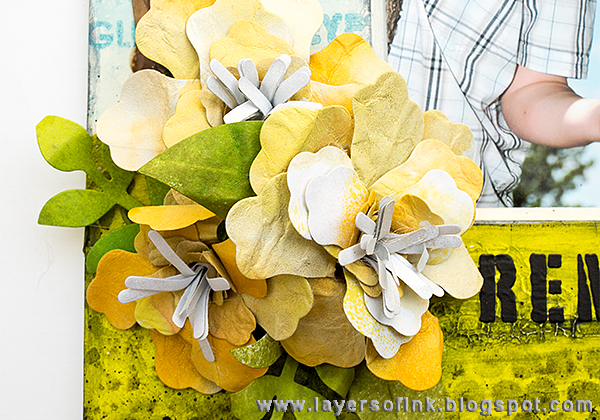
Ink the flowers slightly with brown ink and glue them to the canvas.

Layers of ink - Flowers and Birds Canvas Tutorial by Anna-Karin Evaldsson

Stamp sentiments from the Simon Says Stamp Mom Flowers set on inky paper.

Layers of ink - Flowers and Birds Canvas Tutorial by Anna-Karin Evaldsson

I also colored three Mirrored Hearts with alcohol ink and glued to the canvas board.

Layers of ink - Flowers and Birds Canvas Tutorial by Anna-Karin Evaldsson

The branches of the tree worked great as a home for these little flowers. I also added some dimension to the sentiment, shaped as a banner.

Layers of ink - Flowers and Birds Canvas Tutorial by Anna-Karin Evaldsson

The paste dots add subtle texture and interest to the background.

Layers of ink - Flowers and Birds Canvas Tutorial by Anna-Karin Evaldsson

I made a couple of flowers smaller, by just using a single die cut watercolor paper flower.

Layers of ink - Flowers and Birds Canvas Tutorial by Anna-Karin Evaldsson

Here you can see how dimensional the flowers are. These little flowers would fit on many different kinds of projects, and you can make them in any color that you want. If you want to make the same flowers but larger, there are three larger shapes of the same flower on the Romance Flower die.

Thank you so much for taking the time to stop by today!!

Happy crafting!

Anna-Karin

Supplies:

* Please note: the links are affiliate links, for which I receive a small percentage of sales generated by the link, at no extra cost to you.


Monday, January 8, 2018

Sleigh ride mini canvas

Hello everyone! I hope you have enjoyed the first week of the year. I have been busy finishing a big assignment, which is almost done and the boys have both been a little under the weather.


This week at the Simon Says Stamp Monday Challenge Blog we have a Winter Blues theme. Don't miss our January guest designer Amber Sheaves.

Layers of ink - Sleigh ride mini canvas by Anna-Karin Evaldsson with Winter Silhouette stamps by Hero Arts

I really like silhouette stamps and I wanted to use the adorable Hero Arts Winter Silhouettes set. At first, I was planning to paint this scene in blue shades, but then 'inspired' by the grey and rainy weather we had during Christmas and New Year, I stuck to shades of grey. We had blue weather, without any blue at all (and no snow). Hopefully it will come, January is usually a better winter month than December. This canvas is only 3 x 3 in, so is is pretty tiny. It's the smallest board in the Ranger Dina Wakley Assorted Media Boards, but I managed to squeeze in quite a few techniques.

Layers of ink - Sleigh ride mini canvas by Anna-Karin Evaldsson with Winter Silhouette stamps by Hero Arts

The proportions are a little off here, with the girl riding down the hill looking too large, but I figured that the trees are small instead, and that she is not far away from the boy and the dog. I almost removed her all together, but Anton liked her, so she is still riding down that hill.

Layers of ink - Sleigh ride mini canvas by Anna-Karin Evaldsson with Winter Silhouette stamps by Hero Arts

I wish I had taken step photos, but I was in a hurry and, forgot to take photos of the first steps. The board was coated with gesso and then with a layer of Crackle Paste for the sky, and Texture Paste for the snowy hill. 

Layers of ink - Sleigh ride mini canvas by Anna-Karin Evaldsson with Winter Silhouette stamps by Hero Arts

I tore off a piece of tissue paper large enough to cover the entire board and stamped the kids and the trees on the paper. Gloss multi-medium was applied to the background and the tissue paper was carefully placed on top. Add another layer of gloss medium on top of the tissue paper. When it was dry, I painted it with white, grey and black acrylic paints. 

Layers of ink - Sleigh ride mini canvas by Anna-Karin Evaldsson with Prima Snowflake Paste.

On top of the snow, there is some Prima Snowflake Paste, which gives a textured and glimmery effect.

Layers of ink - Sleigh ride mini canvas by Anna-Karin Evaldsson with Winter Silhouette stamps by Hero Arts

I also added some mica flakes, which is a favorite material of mine. It shimmers and shines so nicely, and works great for snow.

Layers of ink - Sleigh ride mini canvas by Anna-Karin Evaldsson with Ranger pastes and paints.

I wanted even more shine and applied a glue stick here and there on the background. Silver foil was rubbed on top, giving the effect that you see here. The foil especially sticks to the raised parts and gives a really nice shine. Finally, I splattered the canvas with white paint.

I hope you will join us this week in our Winter Blues challenge. As always, you have a chance to win a $50 gift voucher to do some fun shopping at Simon Says Stamp. You have until next Monday 8am Ohio time. 1pm UK time, 2 pm CET to join in.


Don't forget to follow Simon Says Stamp on Instagram, they post great stuff daily. 


Do you use Instagram? If so please add #sssmchallenge so we can see your entries there too.


Thank you for taking the time to stop by my blog today!  

Happy crafting!

Anna-Karin

Supplies

Hero Arts WINTER SILHOUETTES
[ SSS ]
Dina Wakley Ranger ASSORTED MEDIA BOARD
[ SSS ]
Stampendous PEARLIZED Mica Fragments
[ SSS ]
Ranger Archival Ink Pad JET BLACK
[ SSS ]
Prima Marketing SNOWFLAKE PASTE
[ SSS ]
Wendy Vecchi Embossing Paste WHITE 8OZ
[ SSS ]
Ranger TEXTURE PASTE OPAQUE CRACKLE
[ SSS ]
Ranger FROZEN Shiny Transfer Foil Sheets
[ SSS ]
Tim Holtz Idea-ology BEADED BERRIES
[ SSS ]
Tim Holtz Idea-ology OCCASIONS Small Talk
[ SSS ]
Dina Wakley Ranger BLACK
[ SSS ]
Dina Wakley Ranger WHITE
[ SSS ]
Dina Wakley Ranger WHITE GESSO
[ SSS ]
Tim Holtz Flip Top Distress Paint ICED SPRUCE
[ SSS ]
Tim Holtz Flip Top Distress Paint HICKORY SMOKE
[ SSS ]
Ranger Inkssentials MINI COLLAGE GLUE STICK
[ SSS ]
Ranger MULTI MEDIUM GLOSS
[ SSS ]
Tim Holtz Distress SPLATTER BRUSH
[ SSS ]
Tim Holtz Distress 3/4 INCH COLLAGE BRUSH
[ SSS ]
Ranger Inkssentials GLOSSY ACCENTS
[ SSS ]
Tim Holtz DISTRESS SPRAYER
[ SSS ]
Dina Wakley Ranger PALETTE KNIFE
[ SSS ]
Hero Arts Rubber Stamp SMALL BLOCK TRIO CLEAR ACRYLIC BLOCKS
[ SSS ]
Hero Arts Rubber Stamp CLEAR ACRYLIC BLOCK
[ SSS ]
Ranger Inkssentials Non Stick CRAFT SHEET 15 X 18
[ SSS ]

* Please note: the links are affiliate links, for which I receive a small percentage of sales generated by the link, at no extra cost to you.

Tuesday, June 21, 2016

Climb Every Mountain Tutorial

Hello and welcome to another mixed media tutorial! Today's project is made for the Eileen Hull Inspiration Team and this month we are collaborating with Crescent, using some of their great mat board and papers. We are also using Eileen's new Sizzix flower dies.

Layers of ink - Climb Every Mountain Mixed Media Tutorial by Anna-Karin with Sizzix dies by Eileen Hull, Crescent mat board, DecoArt Media and StencilGirl stencils.
I made a mixed media project on a 11 x 14 in Photo Mat Art Board. These consist of heavy mat board with a pre-cut opening for a 4 x 6 photo. You might already know that I love working on mat board, and this was no exception. The mat board holds up to a lot of techniques, as you will see below in my tutorial. I used another photo of Anton from our photo session with Alet Groenewald from Blessed Reflection Photography. It's a pretty typical photo of him, he is up in a tree, with a branch of some sort in his, pretty dirty, hand. He also found a lot of really big pine cones during this outing. I extended the scene in the photo with paint, stamps, stencils and dies. 

Layers of ink - Climb Every Mountain Mixed Media Tutorial by Anna-Karin with Sizzix dies by Eileen Hull
Start by coating the mat board with Gesso. Press the lid of a Distress Paint bottle into the wet gesso to create circles and press Eileen's Basket Weave embossing folder into the gesso here and there. Clean the folder immediately.

Layers of ink - Climb Every Mountain Mixed Media Tutorial by Anna-Karin with Sizzix dies by Eileen Hull, Crescent mat board, DecoArt Media and StencilGirl stencils.
When the gesso is dry, paint the background with DecoArt Media paint, Green Gold and Cerulean Blue, mixing the paint into Tinting Base, to create different shades. Wipe some of the blue paint off with a cloth right before it dries completely.

Layers of ink - Climb Every Mountain Mixed Media Tutorial by Anna-Karin with Sizzix dies by Eileen Hull, Crescent mat board, DecoArt Media and StencilGirl stencils.
Stamp sentiments to the sky, these two are some of my favourite sentiments from Darkroom Door, from the Gum Trees and Wilderness Vol. 1 sets. The sentiments were stamped first, so that I wouldn't cover those areas up with anything else. I used stencils by StencilGirl, starting with the Wall of Words and more Cerulean paint.

Layers of ink - Climb Every Mountain Mixed Media Tutorial by Anna-Karin with Sizzix dies by Eileen Hull, Crescent mat board, DecoArt Media and StencilGirl stencils.
Add texture to the grass with the Journal Texture stencil and Sap Green paint.

Layers of ink - Climb Every Mountain Mixed Media Tutorial by Anna-Karin with Sizzix dies by Eileen Hull, Crescent mat board, DecoArt Media and StencilGirl stencils.
Mix Raw Umber paint into Modeling Paste and smear through the City Stories stencil. The clouds were made with the Clouds stencil, same as on this winter canvas of mine. Mix a little white paint into the paste to make it more opaque.

Layers of ink - Climb Every Mountain Mixed Media Tutorial by Anna-Karin with Sizzix dies by Eileen Hull, Crescent mat board, DecoArt Media and StencilGirl stencils.
Add a word with black Modeling Paste and the Uplifting Words stencil. Greenery was added with the lovely Herbs stencil, mixing Green Gold and Sap Green into Modeling Paste. Later, I added some more herbs.

Layers of ink - Climb Every Mountain Mixed Media Tutorial by Anna-Karin with Sizzix dies by Eileen Hull, Crescent mat board, DecoArt Media and StencilGirl stencils.
I wanted a grassy border at the front, since the photo was taken on a grass field. Die cut Eileen's Grass Thinlits from Eclipse Art Masking Tape, three times, and use as a homemade stencil. Sap Green paint was mixed into Modeling Paste for the grass.

Layers of ink - Climb Every Mountain Mixed Media Tutorial by Anna-Karin with Sizzix dies by Eileen Hull, Crescent mat board, DecoArt Media and StencilGirl stencils.
Add shadows and shading to the piece using Sap Green and Paynes Grey paint. This step really brings the scene to life and makes a big difference. I also stamped the grass with the Darkroom Door Splatter Texture stamp and Fern Green ink.

Layers of ink - Climb Every Mountain Mixed Media Tutorial by Anna-Karin with Sizzix dies by Eileen Hull, Crescent mat board, DecoArt Media and StencilGirl stencils.
Splatter a little black and white paint on the background, for added texture.

Layers of ink - Climb Every Mountain Mixed Media Tutorial by Anna-Karin with Sizzix dies by Eileen Hull, Crescent mat board, DecoArt Media and StencilGirl stencils.
To make the flowers, I used Crescent's RENDR paper and Eileen's beautiful Rolled Flower die. Smear yellow Distress Inks on your craft sheet, mist with water and press the paper into the ink. Repeat on the other side and crumble the paper up before it dries completely. The RendR paper is very strong and durable and can take a lot of action.

Layers of ink - Climb Every Mountain Mixed Media Tutorial by Anna-Karin with Sizzix dies by Eileen Hull, Crescent RENDR paper.
The RENDR paper doesn't show through on the other side, which is very cool, although in my case, I wanted both sides of the paper in the same colour. For a shiny effect, mist with Wendy Vecchi's Buttercup Mica Spray and Tim Holtz Tarnished Brass Mica Spray.

Layers of ink - Climb Every Mountain Mixed Media Tutorial by Anna-Karin with Sizzix dies by Eileen Hull, Crescent RENDR paper
I misted more RENDR paper with green shades of Distress Spray Stain, adding some Tarnished Brass spray. The sheet to the left was misted with Pearl Mica Spray, on both sides.

Layers of ink - Climb Every Mountain Mixed Media Tutorial by Anna-Karin with Sizzix Eileen Hull Rolled Flower Thinlits die.
When the paper is dry, die cut the Rolled Flower five times. I made two full-sized flowers and three smaller ones. To make smaller flowers, simply cut off some of the petals. Die cut the stamen from the pearly white paper.

Layers of ink - Climb Every Mountain Mixed Media Tutorial by Anna-Karin with Sizzix Eileen Hull Rolled Flower Thinlits die.
Glue two stamen pieces to each other, for the large flowers, and glue the end to the smallest flower petal. Use the slotted quilling tool included in Tim Holtz Tiny Tattered Florals set, or another slotted quilling tool, to roll the flower.

Layers of ink - Climb Every Mountain Mixed Media Tutorial by Anna-Karin with Sizzix Eileen Hull Rolled Flower Thinlits die.
Use hot glue (be careful not to burn yourself!) or another strong adhesive to gluy the flowers together.

Layers of ink - Climb Every Mountain Mixed Media Tutorial by Anna-Karin with Sizzix Eileen Hull Rolled Flower Thinlits die.
Roll the petals out and give them some shape, until you are happy with the flowers.

Layers of ink - Climb Every Mountain Mixed Media Tutorial by Anna-Karin with Sizzix Eileen Hull Spring Leaves die.
Die cut leaves using the Spring Leaves die. Shape them a little.

Layers of ink - Climb Every Mountain Mixed Media Tutorial by Anna-Karin with Sizzix Eileen Hull Rolled Flower Thinlits die.
Glue the flowers to the background and add the leaves.

Layers of ink - Climb Every Mountain Mixed Media Tutorial by Anna-Karin with Sizzix dies by Eileen Hull, Crescent mat board, DecoArt Media and StencilGirl stencils.
I coated the background in three layers of DecoArt Soft-Touch Varnish, which gives a lovely matte look to the background, and feels wonderful to the touch.

Layers of ink - Climb Every Mountain Mixed Media Tutorial by Anna-Karin with Sizzix dies by Eileen Hull, Crescent mat board, DecoArt Media and StencilGirl stencils.
Add just the touch of a shadow under the clouds.

Layers of ink - Climb Every Mountain Mixed Media Tutorial by Anna-Karin with Sizzix dies by Eileen Hull, Crescent mat board, DecoArt Media and StencilGirl stencils.
I just love this sentiment stamp and it is perfect for Anton. I've used it on quite a lot of projects before.

Layers of ink - Climb Every Mountain Mixed Media Tutorial by Anna-Karin with Sizzix dies by Eileen Hull, Crescent mat board, DecoArt Media and StencilGirl stencils.
The shadows make the shapes look more dimensional and gives them life. I messed up the stamping a little here, but left it as it was.

Layers of ink - Climb Every Mountain Mixed Media Tutorial by Anna-Karin with Sizzix dies by Eileen Hull, Crescent mat board, DecoArt Media and StencilGirl stencils.
Here you can see the textures created with the paint, embossing folder, paint lids, stencilling and splattering.

Layers of ink - Climb Every Mountain Mixed Media Tutorial by Anna-Karin with Sizzix dies by Eileen Hull, Crescent mat board, DecoArt Media and StencilGirl stencils.
I also added a metallic bird by Prima.

Layers of ink - Climb Every Mountain Mixed Media Tutorial by Anna-Karin with Sizzix dies by Eileen Hull, Crescent mat board, DecoArt Media and StencilGirl stencils.
The rusted heart is by Prima and Finnabair.

Layers of ink - Climb Every Mountain Mixed Media Tutorial by Anna-Karin with Sizzix dies by Eileen Hull, Crescent mat board, DecoArt Media and StencilGirl stencils.
The flowers would look great on a card too, or on any type of 3-D project.

Layers of ink - Climb Every Mountain Mixed Media Tutorial by Anna-Karin
It is easy to use your dies to make stencils, such as with this grass, making dies even more versatile.

Thank you so much for looking! I hope you enjoyed this tutorial.

Happy crafting!

Anna-Karin

Supplies:


Additional supplies;
Paint: DecoArt Media: Cerulean Blue, Green Gold, Sap Green, Paynes Grey, Raw Umber, Burnt Umber, Carbon Black, Titanium White
Medium: DecoArt Media: Tinting Medium, White Gesso, Soft-Touch Varnish, White Molding Paste, Black Molding Paste
Stencil: StencilGirl: Wall of Words