Showing posts with label Fabric. Show all posts

Monday, June 17, 2024

Mixed Media Seascape Tutorial

Hello friends! It is a new Monday, the best day of the week since there is also a new Simon Says Stamp Monday Challenge. This week our theme is Let's Paint.

Please note: this post has affiliate links, for which I receive a small percentage of sales generated by the link, at no extra cost to you.


I hope you will join us in the challenge and don't miss the project by our June guest designer Thom Santilla.


Layers of ink - Mixed Media Seascape Tutorial by Anna-Karin Evaldsson.

I painted a scene with Distress Paint in one of my Small Creative Journal. The colors were inspired by the colors of the sky on one of my evening walks this week. I snapped a photo of the sky to remember to use it as inspiration for my project. Lots of textures and stamped sentiments here. The boats were cut from Tim Holtz Eclectic Elements fabric. 

Layers of ink - Mixed Media Seascape Tutorial by Anna-Karin Evaldsson. Apply texture paste.

Coat the page with gesso and when dry, add texture paste through Simon Says Stamp Clouds for Days. Also add paste to the base of the page as the beach.

Layers of ink - Mixed Media Seascape Tutorial by Anna-Karin Evaldsson. Add cheese cloth.

Glue cheese cloth to the beach with matte medium. You can also use Tim's Mummy Cloth.

Layers of ink - Mixed Media Seascape Tutorial by Anna-Karin Evaldsson. Paint with distress paint.

Use Simon Says Stamp Very Very Low Tack tape to mask the sea from the sky. Paint the clouds.

Layers of ink - Mixed Media Seascape Tutorial by Anna-Karin Evaldsson.

Paint the sky and then remove the tape. Add it back but on the sky instead of the sea and then paint the sea (I forgot to take a photo of that step).

Layers of ink - Mixed Media Seascape Tutorial by Anna-Karin Evaldsson.

Paint the beach with watered-down Distress Paint: Antique Linen, Frayed Burlap and Ground Espresso.

Layers of ink - Mixed Media Seascape Tutorial by Anna-Karin Evaldsson. Darken the colors.

Add darker blue to the sky and the sea. The light comes from the right, so the sea is darker on the left-hand side. Mist with water and let the paint run, but only a little. I also let it run into the beach area. Add some more Dried Marigold too.

Layers of ink - Mixed Media Seascape Tutorial by Anna-Karin Evaldsson. Make fabric boats.

Cut the sails from Tim Holtz Memoranda Fabric. Cut the boats from brown cardstock.

Layers of ink - Mixed Media Seascape Tutorial by Anna-Karin Evaldsson. Add Sizzix Luster Wax.

Add Sizzix Gold Luster Wax to the cheese cloth.

Layers of ink - Mixed Media Seascape Tutorial by Anna-Karin Evaldsson. Add stickles glitter gel.

Add Moon Dust Stickles to the clouds and to a few areas in the sea.

Layers of ink - Mixed Media Seascape Tutorial by Anna-Karin Evaldsson.

Here you can see the stickles on the clouds. I stamped sentiments both directly on the background and on paper and cut into strips.

Layers of ink - Mixed Media Seascape Tutorial by Anna-Karin Evaldsson. Stamp with Simon Says Stamp Forest Scenery.

Repeat 'summer' three times without reinking. The birds come from Hero Arts Sunset Over Waves.

Layers of ink - Mixed Media Seascape Tutorial by Anna-Karin Evaldsson.

Sand the boats. Connect the sail to the boat with a black pen.

Layers of ink - Mixed Media Seascape Tutorial by Anna-Karin Evaldsson. Fabric and paper boat.

I cut this sail so that the word 'transfer' would be clearly visible.

Layers of ink - Mixed Media Seascape Tutorial by Anna-Karin Evaldsson.

Summer dreaming comes from Simon Says Stamp Dandelion Messages.

Layers of ink - Mixed Media Seascape Tutorial by Anna-Karin Evaldsson.

The combination of texture paste and cheese cloth gives a great texture. Here I only added a few strands of thread onto the background.

Layers of ink - Mixed Media Seascape Tutorial by Anna-Karin Evaldsson. Beach textures.

The sentiment comes from Tim Holtz Odds & Ends. The Luster Wax adds a really nice texture and shine to the cheese cloth.

Layers of ink - Mixed Media Seascape Tutorial by Anna-Karin Evaldsson.

The paint will run into the cheese cloth texture in interesting ways.

Layers of ink - Mixed Media Seascape Tutorial by Anna-Karin Evaldsson.

I added pebbles with a black pen.

Layers of ink - Mixed Media Seascape Tutorial by Anna-Karin Evaldsson.

The last sentiment comes from Simon Says Stamp Forest Scenery.

Join us this week in our  Let's Paint challenge! You have a chance to win a $25 gift voucher to do some fun shopping at Simon Says Stamp. You have until Monday 8am Ohio time. 1pm UK time, 2 pm CET to join in.


Do you use Instagram? If so please add #sssmchallenge so we can see your entries there too.


Thank you so much for stopping by here today! 

Happy crafting!

Anna-Karin

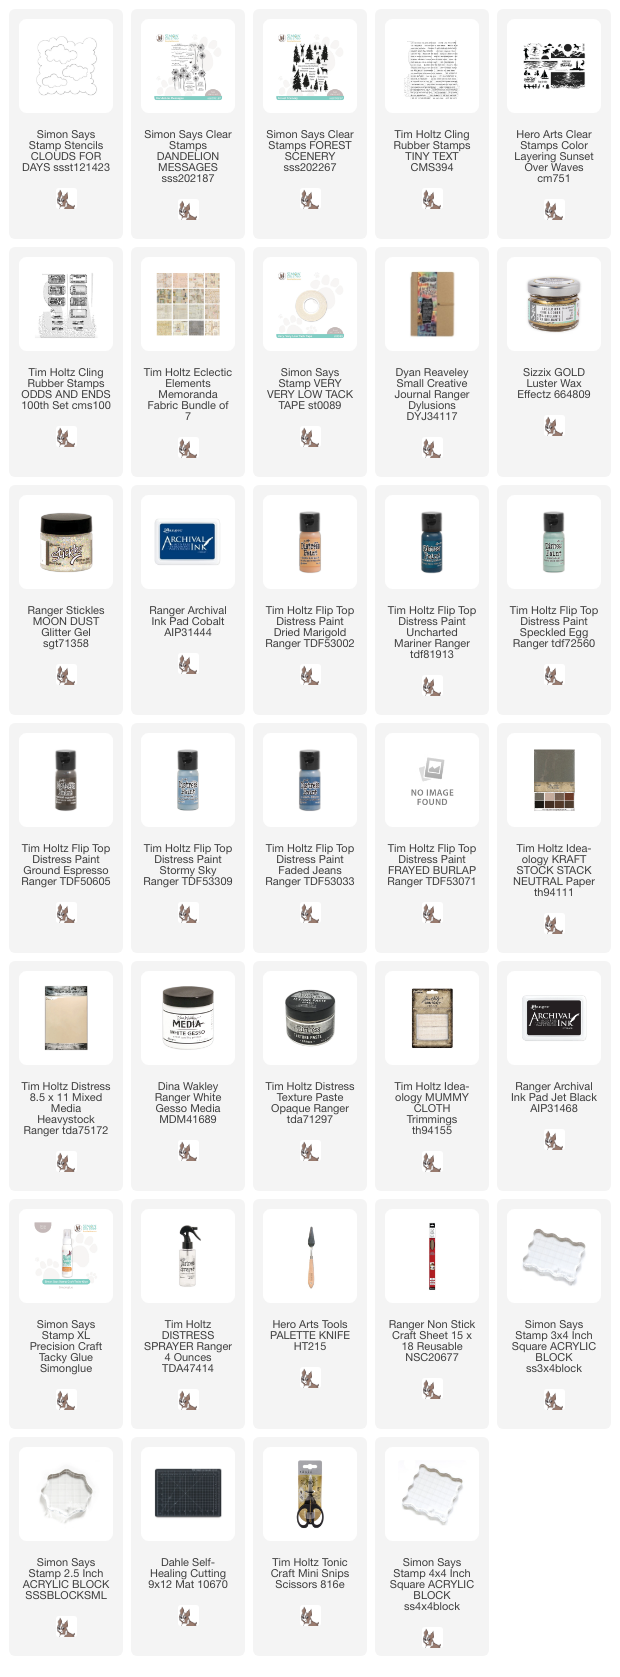
Supplies:

* Please note: the links are affiliate links, for which I receive a small percentage of sales generated by the link, at no extra cost to you.


Sunday, July 16, 2023

Nature Collage Panel Tutorial

Hi crafters! Today I am happy to have a tutorial on Simon Says Stamp Store blog. I made a collage panel inspired by nature. 

Layers of ink - Nature Collage Panel Tutorial by Anna-Karin Evaldsson.

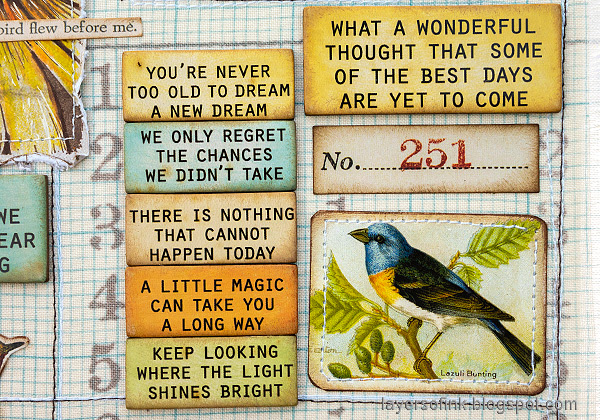
Here is a sneak peak. This panel is inspired by Tim Holtz new idea-ology products and in particular the Quote Chip Labels. I love the different quotes, sizes and distressed finish of these chips and wanted to use many of them on one project. The background is fabric and there is also some stamping and coloring with colored pencils. 

You can find the whole project and the tutorial on Simon Says Stamp Store Blog

Thank you so much for stopping by here today! 

Happy crafting!

Anna-Karin


Monday, December 19, 2022

Joyful Christmas Panel

Hello friends! I hope you are well and had a good weekend. Christmas is suddenly happening very soon and we had the last Christmas market on Sunday. 

Please note: this post has affiliate links, for which I receive a small percentage of sales generated by the link, at no extra cost to you.


This week we have a Party Time theme at the Simon Says Stamp Monday Challenge Blog and the challenge will run for two weeks. I hope you will join us in our last challenge of the year 2022!

Don't miss the project by our December guest Natasha Vacca.


Layers of ink - Joyful Christmas Wall-Hanger Tutorial by Anna-Karin Evaldsson.

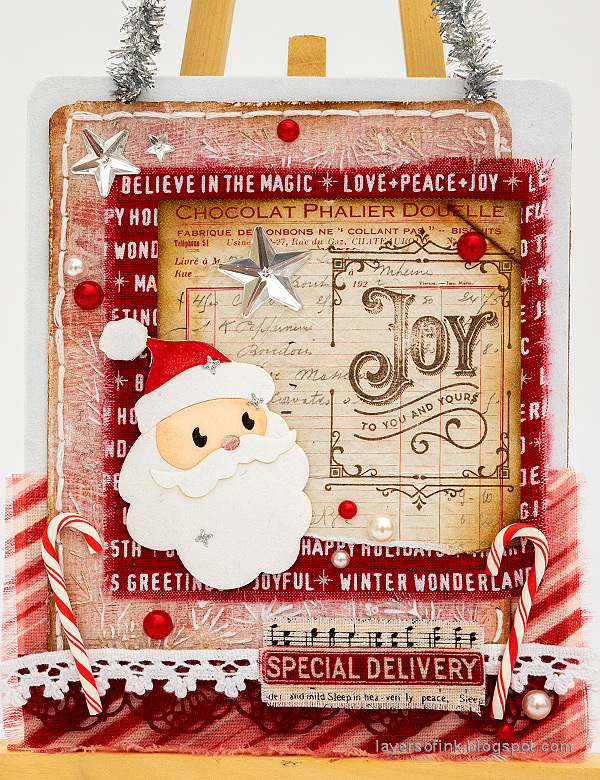
I made a wall-hanger with a joyful Christmas theme, which might become a Christmas gift. The Simon Says Stamp Santa Claus is so jolly and I thought he would fit well on a panel devoted to joy. The die set comes from the Joy to You and Yours December Card Kit, but you can also get it on its own. For a warm feeling, I used velvet paper and a bunch of Tim Holtz Holiday Fabric.

Layers of ink - Joyful Christmas Wall-Hanger Tutorial by Anna-Karin Evaldsson.

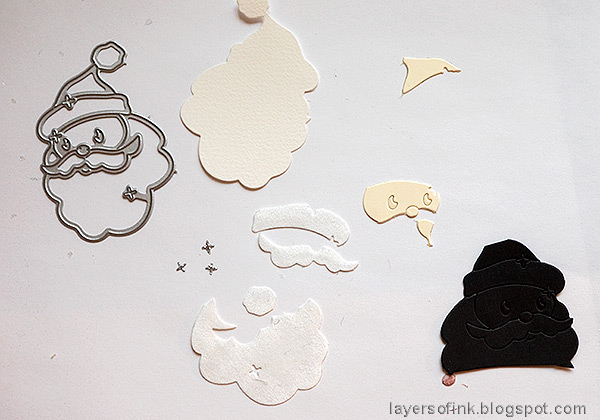
Start by die cutting the Simon Says Stamp Santa Claus from Snow White Luxury Velvet paper, heavystock paper, silver glitter paper. I die cut the base from watercolor paper, but you can use any light-colored paper for that.

Layers of ink - Joyful Christmas Wall-Hanger Tutorial by Anna-Karin Evaldsson.

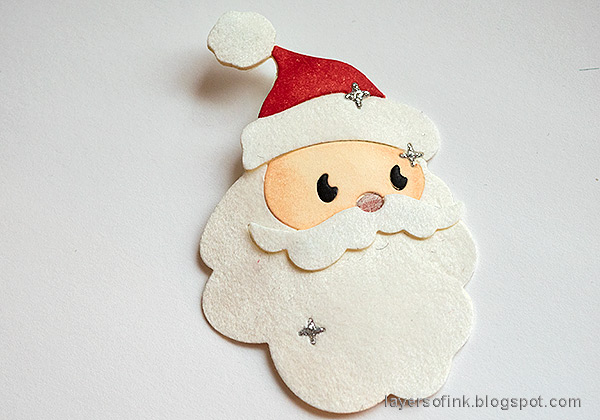
Ink the hat with Lumberjack Plaid and his face with Tattered Rose.

Layers of ink - Joyful Christmas Wall-Hanger Tutorial by Anna-Karin Evaldsson. Simon Says Stamp Santa Claus.

Assemble the Santa on the base. I added foam dots under the mustasch and the ball on the hat.

Layers of ink - Joyful Christmas Wall-Hanger Tutorial by Anna-Karin Evaldsson.


Layers of ink - Joyful Christmas Wall-Hanger Tutorial by Anna-Karin Evaldsson.

Cut a base from Simon Says Stamp chipboard. Cut a piece of Simon Says Stamp Snow White Velvet paper and tear a piece of Tim Holtz Holiday Fabric. Glue to the background.

Layers of ink - Joyful Christmas Wall-Hanger Tutorial by Anna-Karin Evaldsson.

Stamp a sentiment from Simon Says Stamp Joy to You and Yours on a piece of Tim Holtz Christmas ephemera, or on Backdrops paper.

Layers of ink - Joyful Christmas Wall-Hanger Tutorial by Anna-Karin Evaldsson.

I rounded the corners and stitched around the embossed panel with embroidery floss. I added Tim Holtz Mirrored Stars and a bunch of Christmas Droplets.

Layers of ink - Joyful Christmas Wall-Hanger Tutorial by Anna-Karin Evaldsson.

The stamping wasn't perfect, but it fit with the vintage looking paper.

Layers of ink - Joyful Christmas Wall-Hanger Tutorial by Anna-Karin Evaldsson. Simon Says Stamp Santa Claus.

Santa was adhered with Simon Says Stamp Pawsitively Foam Tape. 

Layers of ink - Joyful Christmas Wall-Hanger Tutorial by Anna-Karin Evaldsson.

Tim Holtz Crochet border was die cut from Simon Says Stamp red velvet paper and I also used a piece of real lace. The music and sentiment was cut from Tim's Holiday Fabric. The Candy Canes finished the happy theme of the panel.

Layers of ink - Joyful Christmas Wall-Hanger Tutorial by Anna-Karin Evaldsson.

The foam tape adds subtle dimension to the Santa. I also shaped his face a little before adhering to the background. After taking the photos, I added white highlights to his eyes.

Layers of ink - Joyful Christmas Wall-Hanger Tutorial by Anna-Karin Evaldsson.


I hope you will join us this week in our Party Time challenge. You have a chance to win a $25 gift voucher to do some fun shopping at Simon Says Stamp. You have until Monday 2 January 8am Ohio time. 1pm UK time, 2 pm CET to join in.


Do you use Instagram? If so please add #sssmchallenge so we can see your entries there too.


Thank you so much for stopping by here today! 

Happy crafting!

Anna-Karin

Supplies:

* Please note: the links are affiliate links, for which I receive a small percentage of sales generated by the link, at no extra cost to you.


Tuesday, June 16, 2020

Cork Mini Book

Hello friends! I have a mini book using cork and jeans fabric to share with you today. It's quick and easy.

Layers of ink - Cork Mini Book Tutorial by Anna-Karin Evaldsson.

The Eileen Hull Inspiration team is using cork fabric by Belagio this month, but since the international shipping times are very long at the moment, I didn't get my parcel yet. Instead I found a sheet of cork that I had kept from my decoupage days, bought in South Africa over fifteen years ago. I also used a piece from an old pair of jeans. So a bit of cork and a bit of fabric, instead of cork fabric.

Layers of ink - Cork Mini Book Tutorial by Anna-Karin Evaldsson. Die cut the mat board

Using Eileen's Tiny Book die, die cut all the shapes from mat board.

Layers of ink - Cork Mini Book Tutorial by Anna-Karin Evaldsson. Add the cork

Die cut the book from cork too and glue on top of the mat board.

Layers of ink - Cork Mini Book Tutorial by Anna-Karin Evaldsson. Silver emboss the key.

Die cut the oval from a Tim Holtz Journal Card. Emboss the key with several layers of Eileen's Polished Silver Molten Dimensions powder and also emboss the edges of the oval. Be very careful when working with heat embossing. Never touch the melted powder until it has cooled down completely.

Layers of ink - Cork Mini Book Tutorial by Anna-Karin Evaldsson.

Die cut the corners from an old pair of jeans and glue to the mat board corners. Glue the corners and to the cover and also glue a strip of jeans to the spine of the book.

Layers of ink - Cork Mini Book Tutorial by Anna-Karin Evaldsson. Make signatures.

Cut pages from your favorite sketching paper and arrange into two signatures. Tie each signature with a piece of string around the cover.

Layers of ink - Cork Mini Book Tutorial by Anna-Karin Evaldsson.

I usually make holes in the cover for the strings, but since this is such a tiny book and since the jeans fabric partly holds the strings in place, I didn't do that here. For an example with holes for the binding check out my Tiny Flower Book.

Layers of ink - Cork Mini Book Tutorial by Anna-Karin Evaldsson.

Here you can see the book from above with the two signatures.
Layers of ink - Cork Mini Book Tutorial by Anna-Karin Evaldsson.

The embossing powder gives a very cool, dimensional look to the key.

Layers of ink - Cork Mini Book Tutorial by Anna-Karin Evaldsson.

Ink the edges slightly with brown Distress Ink.

Layers of ink - Cork Mini Book Tutorial by Anna-Karin Evaldsson.

I also added a Clippings Sticker.

Layers of ink - Cork Mini Book Tutorial by Anna-Karin Evaldsson.

Tie the book with a piece of string and you are done. The finished book measures 3x2.4 in. For more inspiration check out my Tiny Books Tutorial, with four different books.


Thank you so much for taking the time to visit my blog today!  

Happy crafting!

Anna-Karin

Supplies:

* Please note: the links are affiliate links, for which I receive a small percentage of sales generated by the link, at no extra cost to you.