Showing posts with label gel printing. Show all posts

Tuesday, August 18, 2020

Junk Journal

Hi crafters! If you are like me, you might have a big box or pile of scrap papers and today I am going to share a project that is perfect for scrap papers. In fact, the charm of this project comes to a large part from it being created from left-over pieces from other projects. 

Layers of ink - Junk Journal Tutorial by Anna-Karin Evaldsson.

The Eileen Hull Inspiration Team is creating Junk Journals this week, a theme that can be interpreted widely. A junk journal is usually made up of various recycled papers and I decided to use only my own scrap papers. I have a lot of papers which are left-over from projects or where I simply tried out a technique or tested a color combo. I use them a lot. Even the paper on the cover comes from that folder. I also used the Simon Says Stamp Thoughtful Flowers stamp set, which I am very happy to have designed.


Start by die cutting Eileen's Notebook die from mat board and from a piece of scrap paper. My scrap paper was a left-over from a gel printing session. Glue the paper to the mat board and let dry under a heavy book.

Layers of ink - Junk Journal Tutorial by Anna-Karin Evaldsson.

I picked out a pile of scrap papers in different colors. Since I use a lot of watercolor paper, most of them are watercolor paper. Some where tags where I tried techniques or where I hadn't been happy with the background.

Layers of ink - Junk Journal Tutorial by Anna-Karin Evaldsson. Make pages and inserts from scrap papers.

The papers were cut into pages of different size, depending on the size of the scrap paper. The tags were simply folded in half.

Layers of ink - Junk Journal Tutorial by Anna-Karin Evaldsson.

Here are some more pages. 

Layers of ink - Junk Journal Tutorial by Anna-Karin Evaldsson. Add design tape to the spine.

I glued a piece of Tim Holtz Design Tape to the spine.

Layers of ink - Junk Journal Tutorial by Anna-Karin Evaldsson. Stamp with Simon Says Stamp Thoughtful Flowers.

I stamped flowers from Thoughtful Flowers with green ink. I wanted a bit of variety from black ink, but still wanted the lines to show after coloring. The smallest flower looks like it is flying in the air, but it was easy to extend the stem with a colored pencil later. You can find more inspiration for this stamp set in these posts: Thoughtful Flowers Watercolor Garden, Distress Ink Blocks, and Wildflowers No-line Stamping and Coloring.

Layers of ink - Junk Journal Tutorial by Anna-Karin Evaldsson. Color with colored pencils.

Color the flowers with colored pencils. I used Prismacolor pencils and blended with a white pencil.

Layers of ink - Junk Journal Tutorial by Anna-Karin Evaldsson. Bind the junk journal.

Punch five holes in the spine as shown here and thread with an elastic string. 

Layers of ink - Junk Journal Tutorial by Anna-Karin Evaldsson.

Here you can see the binding from the outside. I tied the string through a button and then tied it again to form a closure.

Layers of ink - Junk Journal Tutorial by Anna-Karin Evaldsson.

I tied two beads which I found on my desk to the ends of the closure.

Layers of ink - Junk Journal Tutorial by Anna-Karin Evaldsson.

Arrange the scrap papers into two signatures and simply slip them under the elastic band. Later you can easily add more papers or move the various pages around. The tag on top comes from my Sherlock Holmes Tag tutorial if you want to see how it was made. 

Layers of ink - Junk Journal Tutorial by Anna-Karin Evaldsson.

Your journal is ready to be filled with thoughts and memories.

Layers of ink - Junk Journal Tutorial by Anna-Karin Evaldsson.

I added a thinner piece of Design Tape at the side of the spine. Stamp sentiments from Thoughtful Flowers with black ink.

Layers of ink - Junk Journal Tutorial by Anna-Karin Evaldsson.

I also decided to add two butterflies from Thoughtful Flowers and stamped them with blue ink.

Layers of ink - Junk Journal Tutorial by Anna-Karin Evaldsson.

The yellow flowers look nice on the gel printed background. That background came from my Gel Printed Circle Background project.

Layers of ink - Junk Journal Tutorial by Anna-Karin Evaldsson.

Stamp grass repeatedly with green ink.

Layers of ink - Junk Journal Tutorial by Anna-Karin Evaldsson.

The back of the journal was left simple, but you could add stamping there too.

Layers of ink - Junk Journal Tutorial by Anna-Karin Evaldsson.

I let this page be the first page since I liked the repeat stamping. The sentiment comes from Tim Holtz Scribble Wonderland set.

Layers of ink - Junk Journal Tutorial by Anna-Karin Evaldsson.

The back of most of the pages is plain, leaving space to add color and writing later.

Layers of ink - Junk Journal Tutorial by Anna-Karin Evaldsson.

The page to the right was a test of colors and stamping for my African Night Watercolor art journal page, with Darkroom Door stamps. I remember when each of these scrap papers were created, making them more special. Some have been in my scrap folder for a long time.

Layers of ink - Junk Journal Tutorial by Anna-Karin Evaldsson.

The SSS Spring Flowers Background had been embossed in white and I tested a yellow and blue watercolor combo over it.

Layers of ink - Junk Journal Tutorial by Anna-Karin Evaldsson.

This little scene was also a test piece for my African Night page.

Layers of ink - Junk Journal Tutorial by Anna-Karin Evaldsson.

Stenciled and misted pages.

Layers of ink - Junk Journal Tutorial by Anna-Karin Evaldsson.

You might look at your scrap pieces in a new way. This little scrap piece almost looks like a landscape.

Layers of ink - Junk Journal Tutorial by Anna-Karin Evaldsson.

The bubble embossed paper comes from a gel printing session.

Layers of ink - Junk Journal Tutorial by Anna-Karin Evaldsson. Watercolor landscape.

A simple landscape which was made when I was preparing an article for the Craft Stamper. I was so sad to learn that the Craft Stamper has now closed its doors. It was a wonderful magazine and I loved creating for it.

Layers of ink - Junk Journal Tutorial by Anna-Karin Evaldsson.

I haven't decided what to use this journal for yet. I might add small photos from this summer to it, and journaling about the summer.


Thank you so much for taking the time to visit my blog today! I hope the tutorial inspired you to use some scrap paper.

Happy crafting!

Anna-Karin

Supplies:

* Please note: the links are affiliate links, for which I receive a small percentage of sales generated by the link, at no extra cost to you.

Other supplies
Eileen Hull Sizzix Notebook L die

Monday, November 12, 2018

Dry Embossing and Printing Layout

Hello crafters! I hope you had a fun weekend! I was planning to have taken the Christmas card photo of the boys this weekend, but it was rainy, so it has to wait a little, since we have a tradition of always taking it outdoors.


This week at the Simon Says Stamp Monday Challenge Blog we have a Thanks/Thankful theme. Don't miss the gorgeous Thanksgiving project by our November guest designer Jo, aka Let's Art Journal.

Layers of ink - Dry Embossing and Gel Printing Layout Tutorial by Anna-Karin Evaldsson

I started out planning to do an autumn themed project, and felt like a scrapbooking page. As I was looking through a pile of photos, thinking about thankfulness, I came across this photo of a humble little Common Daisy, or lawn daisy. I had to google the English name, in Swedish it is called a Tusensköna, which translates to something like 'beauty of thousands' or more literary 'thousand-beauty'. My grandmother had many of these in her lawn and she thought they were weeds. I couldn't understand why since I thought they were so pretty and almost colored the lawn. My favorites were always the ones with purple tips. I was happy to discover them in our lawn and they always make me think of my grandmother. She lived on the countryside and had a huge lawn, which must have been hard work. She used to cut the grass and then rake it all into a pile for us to jump in. 

So instead of an autumn project, I made a cheerful layout about thankfulness, for both the little things and the big things, with journaling on the back. 

Layers of ink - Dry Embossing and Gel Printing Layout Tutorial by Anna-Karin Evaldsson, with Sizzix embossing folder.

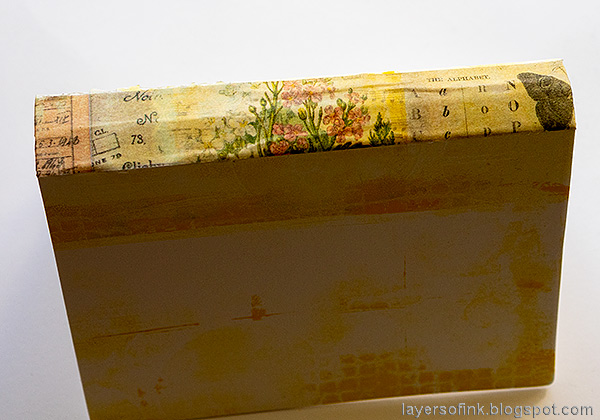
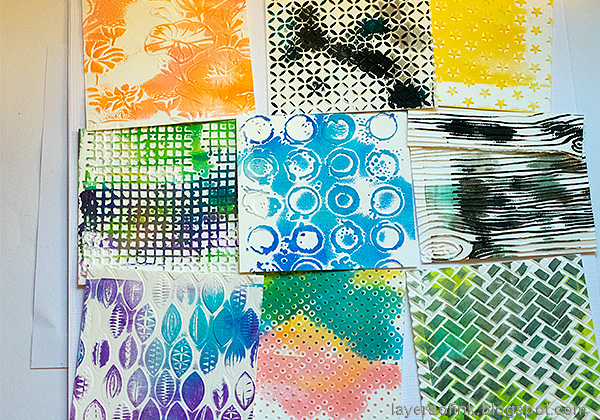
The background panels are left-over from a gel printing session. I like to use dry embossed papers to make impressions and patterns when gel printing and sometimes those very paper end up looking even nicer than the prints. I have a tutorial coming soon on the printing process too. The panels were cut into squares, and I also distressed the edges. I used paints by Dina Wakley and Ranger's gel printing plates for the printing.

Layers of ink - Dry Embossing and Gel Printing Layout Tutorial by Anna-Karin Evaldsson. Stamping on gel printed papers.

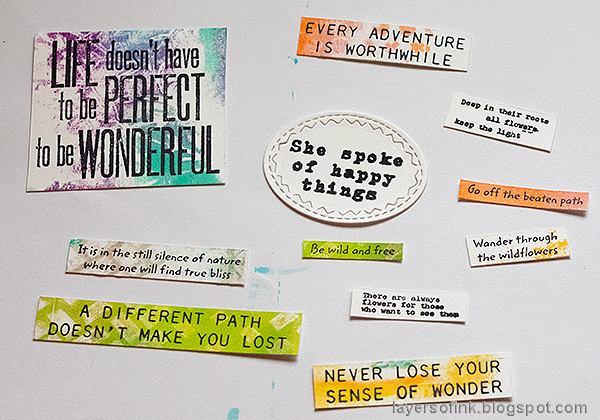
I wanted this page to be full of words and used a bunch of different sentiment stamps. They were stamped on left-over printed papers, so they coordinate in color with the dry embossed panels. Some were stamped on white paper. I used the following stamp sets: Inky Antics/Andrea Ockey Parr The Queen's Quips, Darkroom Door Nature Walk, AALL & Create/Tracy Evans clear stamp set #44, Tim Holtz Way With Words and Nature's Wonder.

Layers of ink - Dry Embossing and Gel Printing Layout Tutorial by Anna-Karin Evaldsson. Die cutting gel printed papers. Printed with Ranger's gel printing plates.

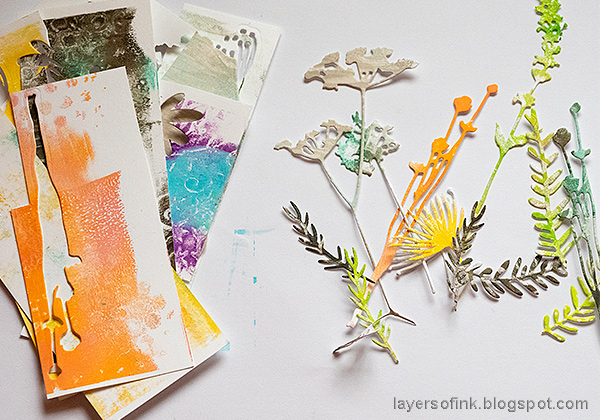
For some additional flowers and even more color and happiness, I die cut flowers and leaves from more left-over gel printed papers, using Tim Holtz Sizzix
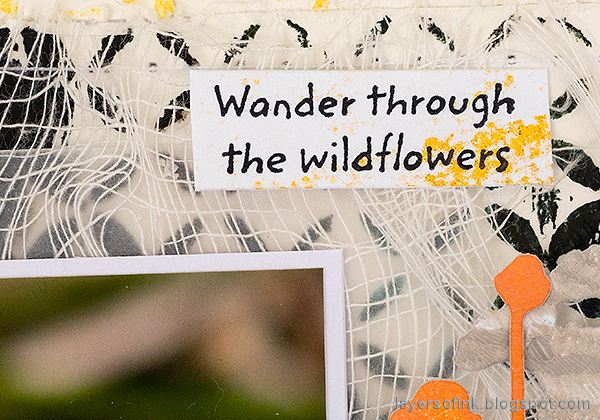
 Wildflowers, Funky Floral 1, 2 and 3.

Layers of ink - Dry Embossing and Gel Printing Layout Tutorial by Anna-Karin Evaldsson, with Tim Holtz Sizzix Letterboard.

I wanted the title to be white, and die cut it from white mat board using Tim's new Letterboard die. The letters were coated with Glossy Accents, which makes them look really nice and shiny.

Layers of ink - Dry Embossing and Gel Printing Layout Tutorial by Anna-Karin Evaldsson

I love the random paint on these panels and on the papers used for the sentiments and die cutting. A couple of the sentiments from Tracy Evans' set were small enough to stamp in between dry embossed areas. The third sentiment here comes from the Darkroom Door Nature Walk set. The embossing folder used for this panel is the Sizzix 3-D Lily Pond folder.

Layers of ink - Dry Embossing and Gel Printing Layout Tutorial by Anna-Karin Evaldsson

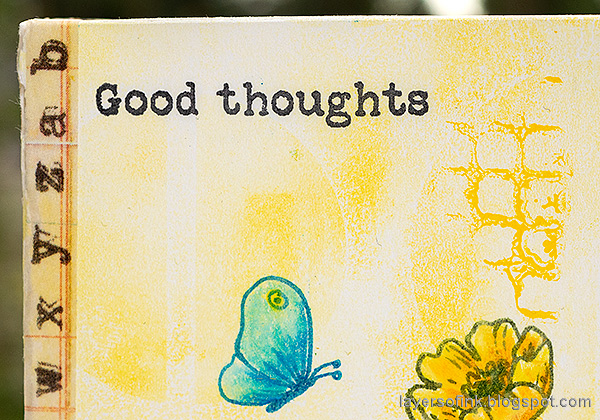
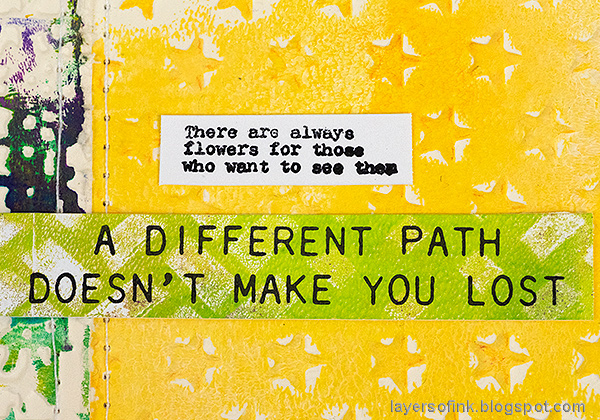
I really like both of these sentiments, and on that different path, you might also be more likely to see the flowers. The first sentiment is from Tracy Evans and the second from Tim Holtz's Nature's Wonder. All the panels were stitched to the background.

Layers of ink - Dry Embossing and Gel Printing Layout Tutorial by Anna-Karin Evaldsson, with Tim Holtz Gridlock folder.

Some of the panels had only been used for one print, while others had been pressed on the gel printing plate more than once, giving them a multitude of colors. This is dry embossed in the Tim Holtz Gridlock folder.

Layers of ink - Dry Embossing and Gel Printing Layout Tutorial by Anna-Karin Evaldsson. With Darkroom Door Garden Birds.

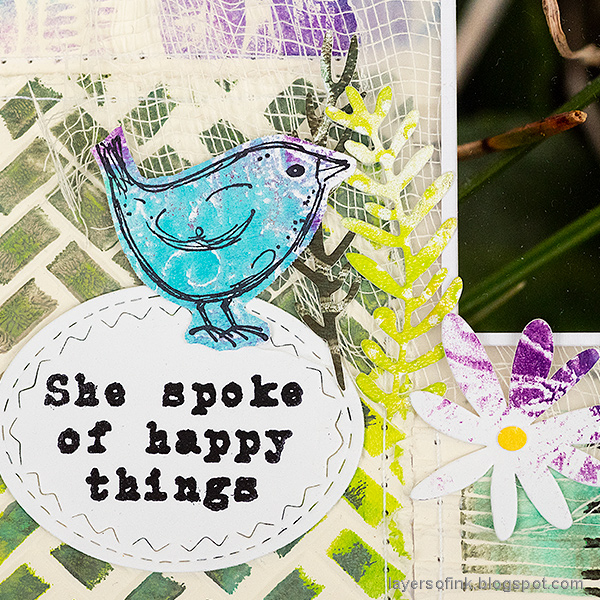
The page needed more life and I stamped three adorable Garden Birds by Darkroom Door, designed by Godelieve Tijskens. They were stamped on more gel printed paper.

Layers of ink - Dry Embossing and Gel Printing Layout Tutorial by Anna-Karin Evaldsson

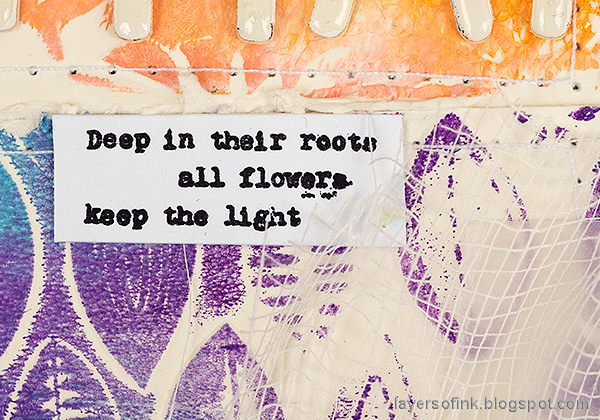
Here's another lovely sentiment from the Tracy Evans set. The photo was layered on vellum and cheese cloth.

Layers of ink - Dry Embossing and Gel Printing Layout Tutorial by Anna-Karin Evaldsson

Yesterday, when I was out walking, the weather was pretty grey and damp, but with a sense of wonder, you can find little treasures and beautiful things everywhere. So the theme for my walk ended up being moss and bark, both of which have gorgeous colors and interesting textures. The embossing folder used here is the 3D Leaves folder.

Layers of ink - Dry Embossing and Gel Printing Layout Tutorial by Anna-Karin Evaldsson

This lovely sentiment comes from The Queens Quip's stamp set by Inky Antics, designed by my SSS Monday Blog team mate, Andrea Ockey Parr. It was stamped on a die cut Stitched Oval.

Layers of ink - Dry Embossing and Gel Printing Layout Tutorial by Anna-Karin Evaldsson. With Tim Holtz Nature's Wonder stamp.

I went wild with favorite sentiments on this page, since I wanted it to be filled with colorful words.

Layers of ink - Dry Embossing and Gel Printing Layout Tutorial by Anna-Karin Evaldsson, with Tim Holtz Way With Words stamp set.

And I just had to add one of my favorite Tim Holtz sentiments, which fits well on a page about thankfulness.

Layers of ink - Dry Embossing and Gel Printing Layout Tutorial by Anna-Karin Evaldsson

This tiny Darkroom Door sentiment, fit perfect with the theme and the flowers.

Layers of ink - Dry Embossing and Gel Printing Layout Tutorial by Anna-Karin Evaldsson. With Tim Holtz Sizzix Wildflowers and Funky Floral.

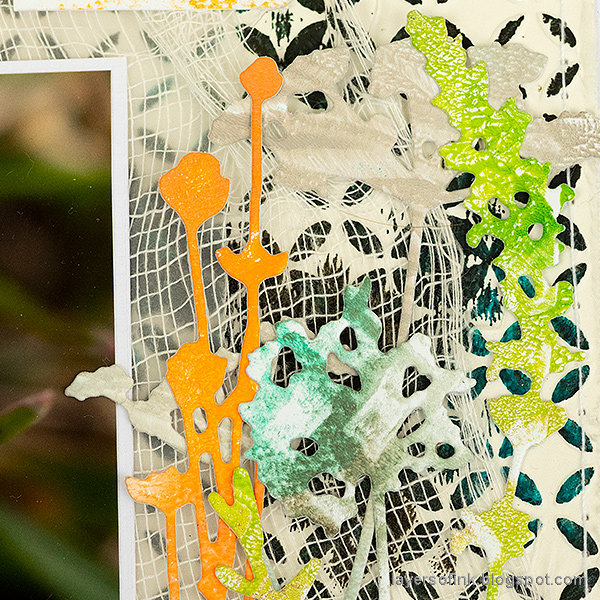
To the right of the photo, there is a little cluster of wild flowers. Die cutting them from gel printed papers give interest and variation to the flowers, while also being very quick.

Layers of ink - Dry Embossing and Gel Printing Layout Tutorial by Anna-Karin Evaldsson

And another adorabel bird.

Layers of ink - Dry Embossing and Gel Printing Layout Tutorial by Anna-Karin Evaldsson, with Ranger Glossy Accents.

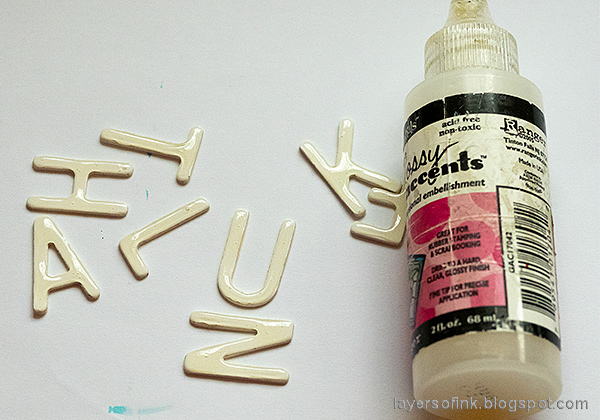
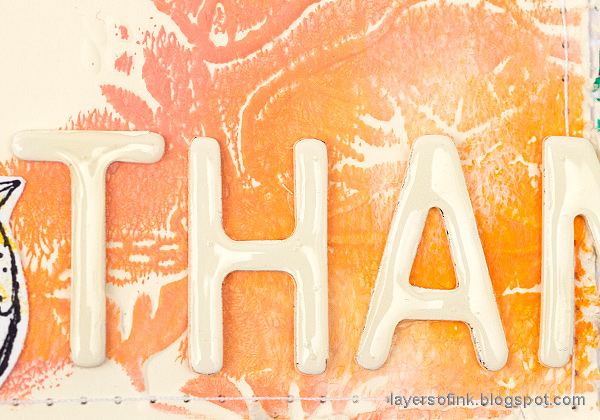
Here's a close up on the effect of the Glossy Accents on the letters.

I hope you will join us this week in our Thanks/Thanksgiving challenge. As always, you have a chance to win a $50 gift voucher to do some fun shopping at Simon Says Stamp. You have until next Monday 8am Ohio time. 1pm UK time, 2 pm CET to join in.


Don't forget to follow Simon Says Stamp on Instagram, they post great stuff daily. 


Do you use Instagram? If so please add #sssmchallenge so we can see your entries there too.


Thank you so much for taking the time to visit my blog today!  

Happy crafting!

Anna-Karin

Supplies:

* Please note: the links are affiliate links, for which I receive a small percentage of sales generated by the link, at no extra cost to you.