
Hello friends! The kids have trick and treated and handed out paper zombies to the neighbours. I have a quick tutorial to share with you, with a fun and easy technique using Distress Oxide ink.

I made two Sherlock Holmes tags, and had fun picking out words and phrases to fit with the theme. The focal image was stamped with Tim Holtz's Evolution set. I also made a fun dimensional light bulb. I used Ranger's Specialty Stamping Paper for the tag, but you can try the technique on different surfaces, and you will get different effects. You can use the techniques for any theme.
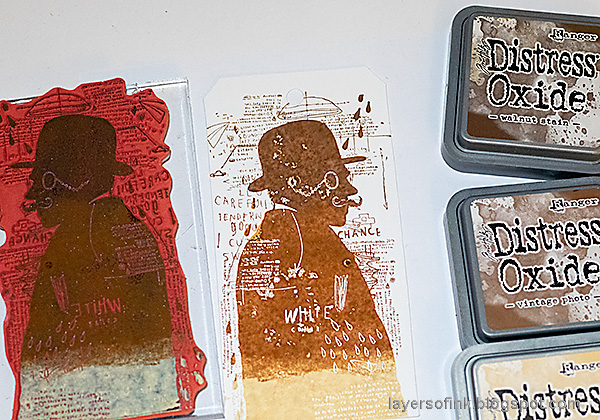
Ink Sherlock up with three shades Distress Oxide, starting with the lightest shade. Here I used Antique Linen, Vintage Photo and Walnut Stain. For the blue tag, I used Faded Jeans, Broken China and Cracked Pistachio. It was stamped on a tag die cut from Specialty Stamping Paper, which is a matte coated paper.
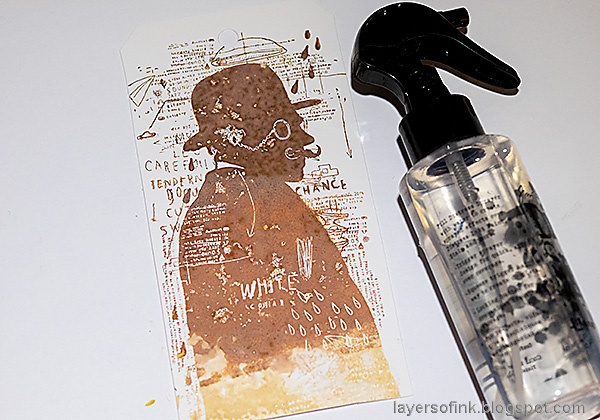
Mist and/or splatter the tag with water. Don't use too much. You can also cover some parts up with a scrap paper, to preserve the detail. I did that for the glasses and mustache area on this tag, while on the blue tag I used more water, so that you can see the difference. Blot the water away with a paper towel.
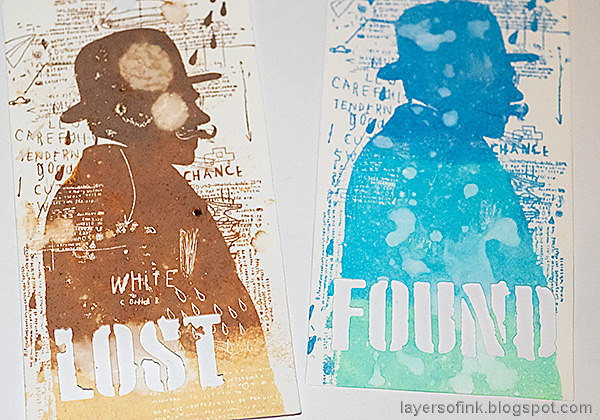
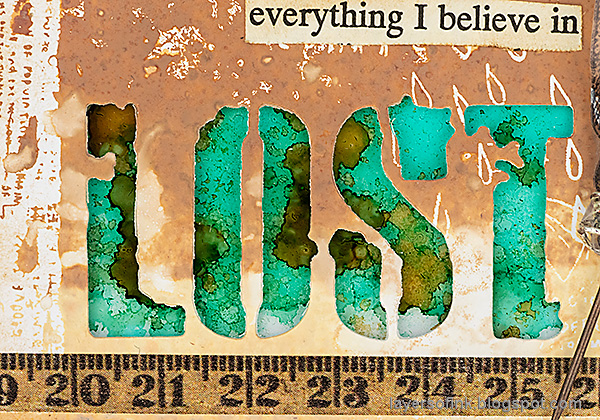
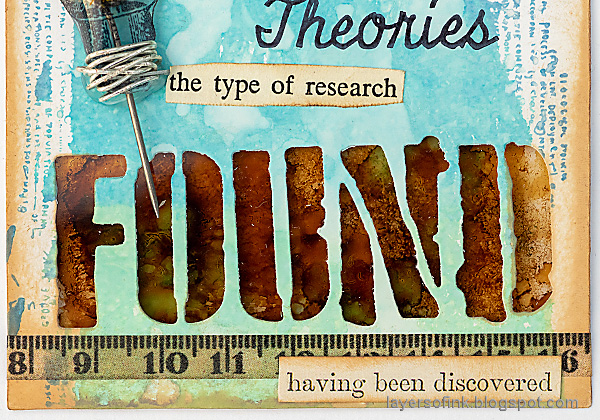
Die cut words from Tim's Mixed Media 6 set. If you look closely, you will see that I used the wrong brown tag for this photo. The Sherlock you see here was the first one that I made and I didn't like the two big water drops that ended up on his face and hat. So I made a new one, but then die cut the first one by mistake before discovering it.
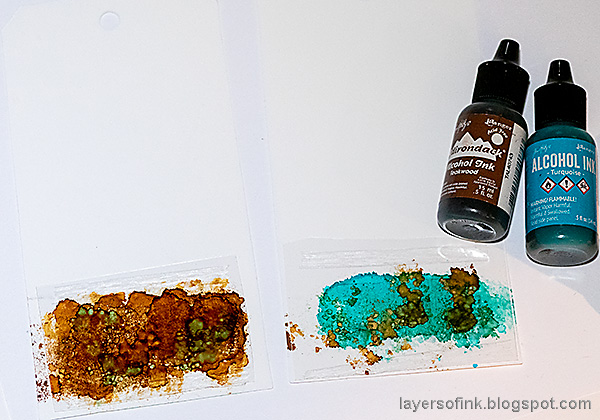
Tape a piece of acetate at the back of the tag, over the die cut word. Ink them with alcohol inks. I used more of the turquoise ink for the brown tag, and more of the Teakwood ink for the blue tag.
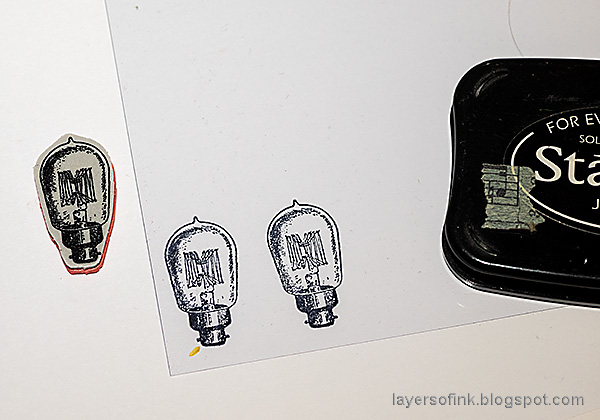
Stamp the light bulb from Noble Gents on Wendy Vecchi's Clearly For Art Modeling Film, with Jet Black Stazon ink.
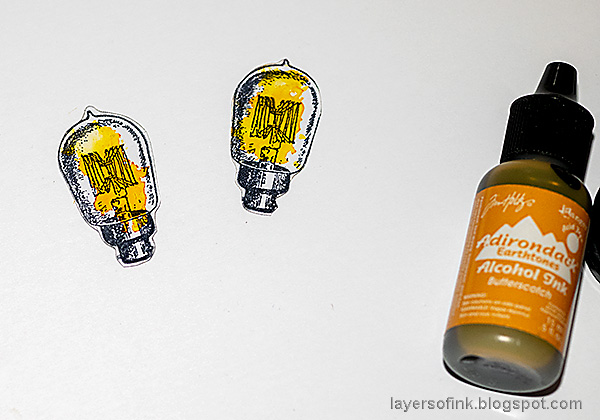
At the back, add some yellow alcohol ink. Don't work on the stamped side, since it will smear then.
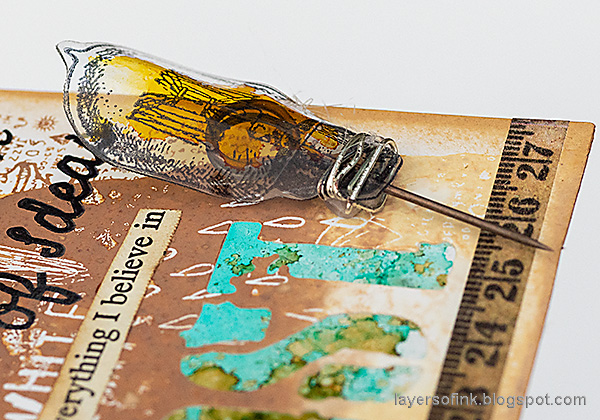
Use a heat tool to heat up the modeling film and shape it into a bulb. Be careful not to burn yourself. I forgot to take a photo of this step. Use a Tim Holtz Memo Pin and wrap a piece of wire around the base, to hold the pin in place.

I liked the idea of a transparent area on the tag, to symbolizing seeing through things and making discoveries. Words from the Noble Gents were stamped on the background with black ink. The edges were inked with Vintage Photo Distress ink.
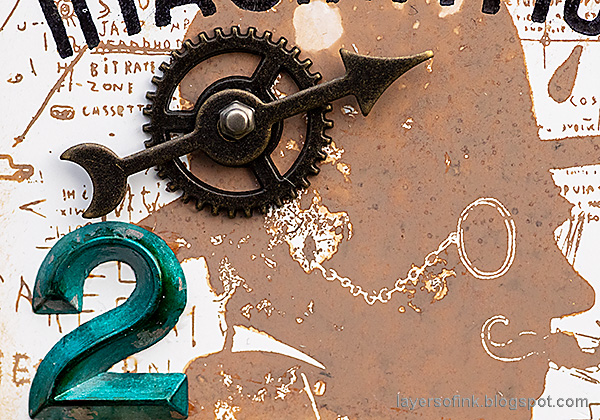
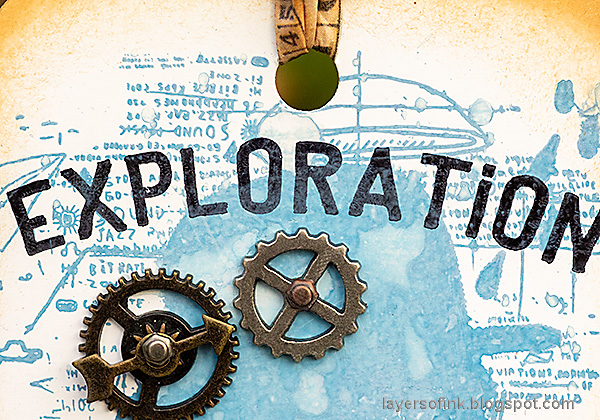
I also used some idea-ology embellishments. Gears and game spinners for the thought processes of a brilliant mind, and a number 2, for Sherlock and Watson. The number was colored with alcohol ink.

I had an old book page on my desk and cut some phrases from it. This is really fun to do, and you'd be surprised to see how many fitting words and phrases you can find on a single page. I only used a random page that happened to be within reach.
Here's a close-up of the transparent text. I also added a piece of Design Tape as a border.

The blue tag has a darker brown look to the transparent word, so that the tags would coordinate. As you can see, I used more water on the background, creating more drops and texture, but also removing some of the details such as the glasses, making the image even more of a silhouette. Both techniques are fun, it depends on the look you are aiming for.
I love how the Distress Oxide ink almost becomes a part of the Archival Jet Black ink. If you look closely at the word, you will see the blue texture in the letters. So cool.

Some of the phrases are from Tim's Clipping Stickers.
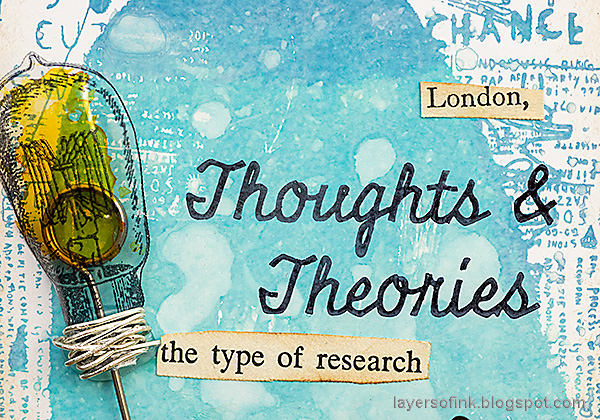
Here's another look at the dimensional bulbs, with the Memo Pin centers. The modeling film keeps its shape perfectly.
As you can see, I was having fun with the words. I love adding words as details and to support a theme.

Lost and then found. Observe, explore and imagine. This is the second Sherlock inspired project I do with this stamp set, you can find my Sherlock Holmes Notebook here. That notebook also happens to be the notebook I take along when I am out and about at the moment, which is probably the reason for why I was inspired to use this stamp again.

Thank you so much for stopping by here today!
Happy crafting!
Anna-Karin
Supplies:
* Please note: the links are affiliate links, for which I receive a small percentage of sales generated by the link, at no extra cost to you.
* Please note: the links are affiliate links, for which I receive a small percentage of sales generated by the link, at no extra cost to you.
Beautiful tags! The TH stamp looks wonderful with the inky wording you created and other adornments 😀. Happy November and enjoy your weekend! Hugs, Jo x
ReplyDeleteTwo fabulous tags... I love the ombre Oxide stamping with the (subtle) water spritzes, and the alcohol ink panels behind the lettering look amazing. Love, love those light bulbs!
ReplyDeleteAlison x