Showing posts with label Easter. Show all posts

Monday, March 30, 2026

Floral Easter Card

Hi crafters! I hope you are well and had a fun weekend! 

Please note: this post has affiliate links, for which I receive a small percentage of sales generated by the link, at no extra cost to you.


This week we have an Emboss It theme at the Simon Says Stamp Monday Challenge Blog. I hope you will join us! Don't miss the last project from our March guest designer Simona Rebecchi.

Layers of ink - Floral Easter Card Tutorial by Anna-Karin Evaldsson.

I wanted to make an Easter card with lots of green and yellow. The background is white embossed and then misted. The flowers were die cut from various inky paper, some of them have also been misted with Distress Spritz through stencils.

White emboss the background.

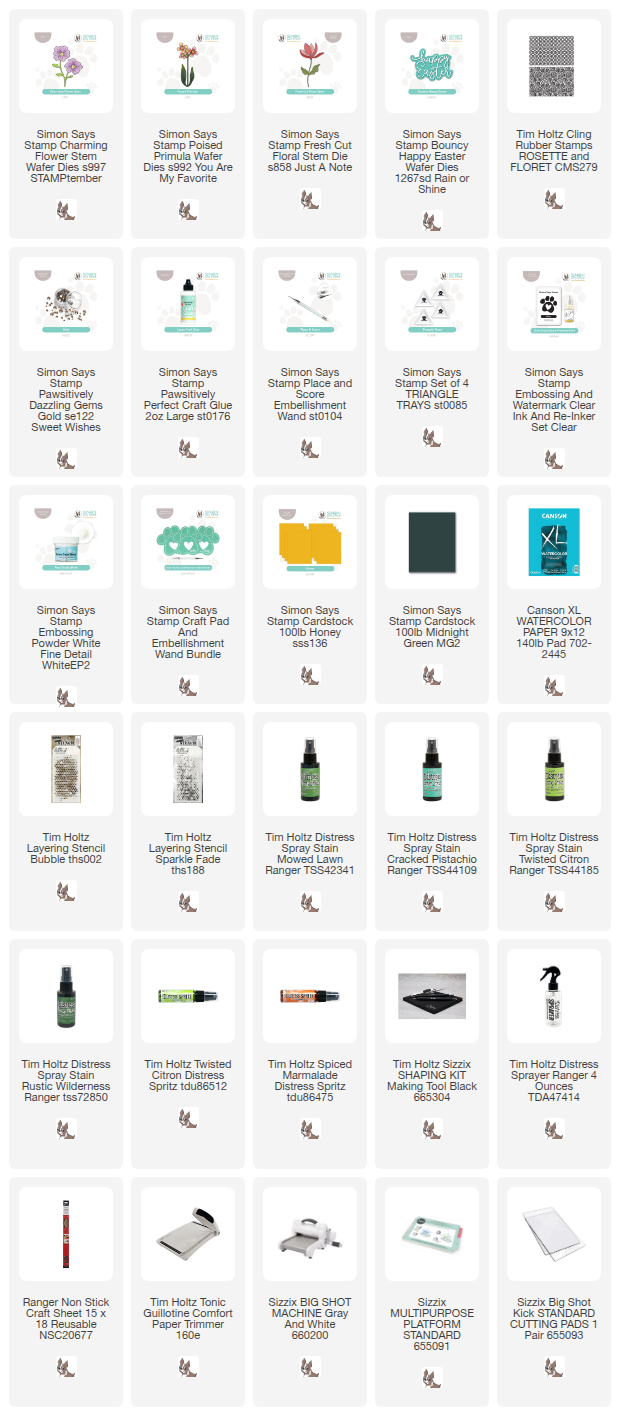
Start by white embossing Tim Holtz Florette background on watercolor paper. Don't worry about getting it perfect.

Mist with Distress Spray Mist.

Mist heavily with Distress Spray Stains and finish with a little Twisted Citron Distress Spritz, for glimmer.

Die cut flowers using Simon Says Stamp dies.

Most of the papers had been prepared for previous projects. I die cut Simon Says Stamp Charming Flower Stem, Poised Primula and Fresh Cut Floral Stem from yellow, orange and green inky papers. 

Shape the flowers.

Shape the flowers with Tim Holtz Shaping Tool Kit. 


Assemble the flowers and adhere to the background. 

Emboss resist background.

The embossing will resist the ink, creating a blended green background, with shimmer. 


Here you can see that some of the papers had been misted with Distress Spritz, through Tim Holtz Bubble and Sparkle Fade stencils.


I added Simon Says Stamp Pawsitively Dazzling Gold Gems to the flower centers. The Dazzling Gems are a favorite of mine, which you might have noticed.


Die cut Simon Says Stamp Bouncy Happy Easter from yellow inky paper and dark green cardstock. 

Layers of ink - Floral Easter Card Tutorial by Anna-Karin Evaldsson.

The flowers have quite a bit of dimension.


Join us this week in our Emboss It challenge! You have a chance to win a $25 gift voucher to do some fun shopping at Simon Says Stamp. You have until Monday 8am Ohio time. 1pm UK time, 2 pm CET to join in.


Do you use Instagram? If so please add #sssmchallenge so we can see your entries there too.


Thank you so much for visiting today! 

Happy crafting!

Anna-Karin

Supplies:

* Please note: the links are affiliate links, for which I receive a small percentage of sales generated by the link, at no extra cost to you.


Friday, March 27, 2026

Easter Bunny Card

Hello crafters! My Easter decor is out and I was inspired to make an Easter card today.

Please note: this post has affiliate links, for which I receive a small percentage of sales generated by the link, at no extra cost to you.

Layers of ink - Easter Bunny Card tutorial by Anna-Karin Evaldsson.

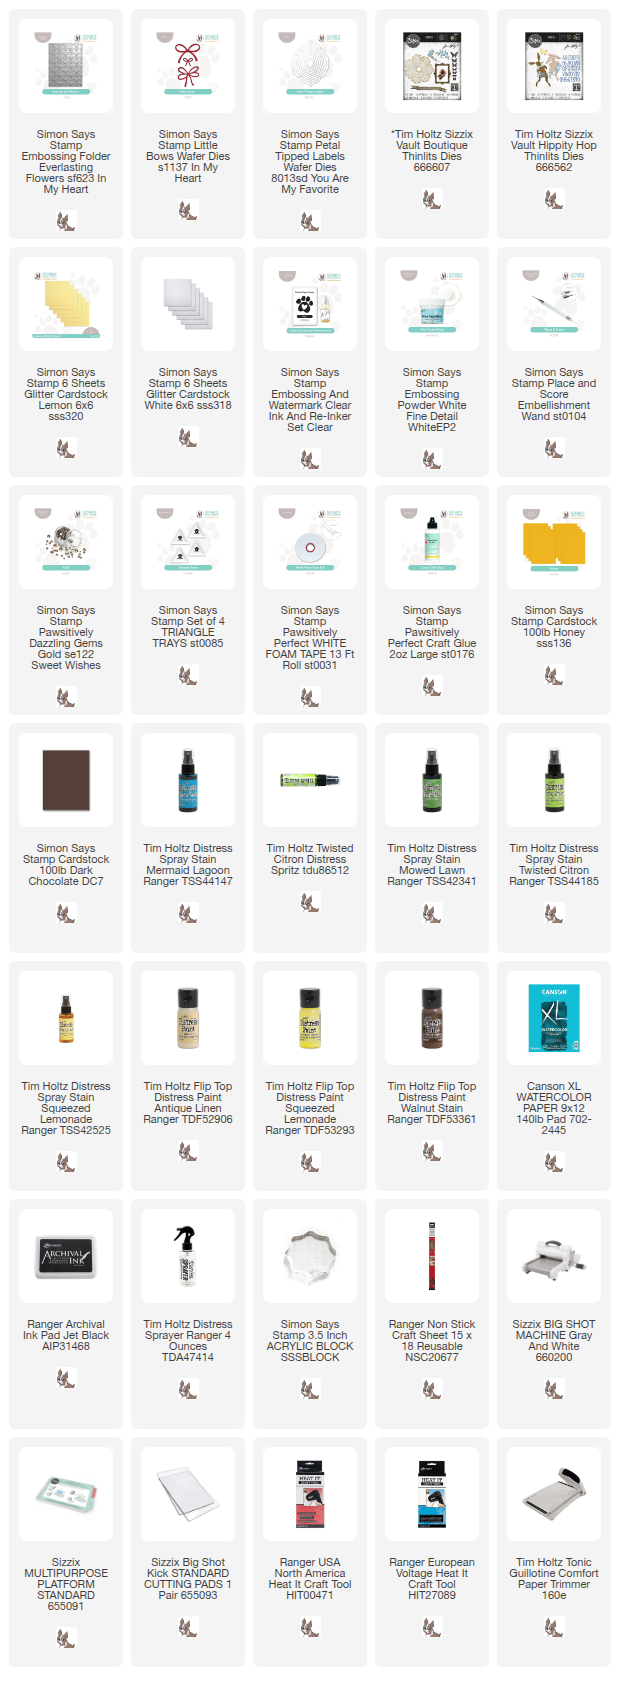
The bright yellows and greens of spring are just wonderful, especially after the long winter. Here I used the Simon Says Stamp Everlasting Flowers embossing folder for the background together with a fun debossed resist technique. The folder and the Little Bows die set are both from the new In My Heart release.

Emboss Simon Says Stamp Everlasting Flowers.

Start by inking the Everlasting Flowers embossing folder with Simon Says Stamp Clear Emboss ink. Place watercolor paper in the folder and emboss. We are using the debossed side. Cover with white embossing powder. Remove the excess and melt. Be careful when using a heat tool and do not touch the powder until it has cooled down completely.

Mist with Distress Spray Stain and Spritz.

Mist the background with Distress Spray Stain, starting with Squeezed Lemonade. Add just a little Mermaid Lagoon. Next, mist with Distress Spritz Twisted Citron, for glimmer. 

Die cut the bunny.

I had some left-over collage paper and die cut three butterflies and one bunny from Tim Holtz Sizzix Vault Hippity Hop. You can see how I made that paper in this post.

Paint with Distress Paint.

Paint them with Distress Paint.

Die cut butterflies.

I die cut more butterflies. The collage paper butterflies were die cut again from Simon Says Stamp Lemon Glitter Cardstock and placed underneath the collage butterflies. I also die cut tiny butterflies from Tim Holtz Sizzix Vault Boutique, from glitter cardstock and from left-over pink inky cardstock.


Bend the wings of the butterflies and let them flutter across the page. 

Die cut Simon Says Stamp Petal-tipped labels.

For the sentiment I die cut a Simon Says Stamp Petal-Tipped Label and stamped a sentiment from Hoppy Spring on top. The bows were die cut from glitter paper using Simon Says Stamp Little Bows.

Die cut Simon Says Stamp Little Bows.

I die cut the bunny one more time from brown cardstock and off-set slightly. The bunny also got a little bow. 


The deboss resist technique gives a great textured look. Don't worry if you don't get a perfect result, that is part of the fun with the technique.


This little corner of blue is one of my favorite parts of this card.

Layers of ink - Easter Bunny Card tutorial by Anna-Karin Evaldsson.

For another background technique using this same Everlasting Flowers folder, check out this tutorial of mine.


See you again tomorrow!

Happy crafting!

Anna-Karin

Supplies:

* Please note: the links are affiliate links, for which I receive a small percentage of sales generated by the link, at no extra cost to you.


Monday, April 14, 2025

Sweet TreatsTag

 Hello friends! I hope you had a good weekend! Today I have a spring/Easter tag to share.

Please note: this post has affiliate links, for which I receive a small percentage of sales generated by the link, at no extra cost to you.


This week we have a Sweet Treats theme at the Simon Says Stamp Monday Challenge Blog. I hope you will join us! Don't miss the project by our April guest designer Fiona Whitehead.
.
Layers of ink - Sweet Treats Tag Tutorial by Anna-Karin Evaldsson.

I made a tag featuring a bunny who is out for a walk on a bright spring day and sprinkles sweet treats on the ground. Or is he maybe picking the treats up? The background was inked and stamped and the bunny is colored with pencils. 

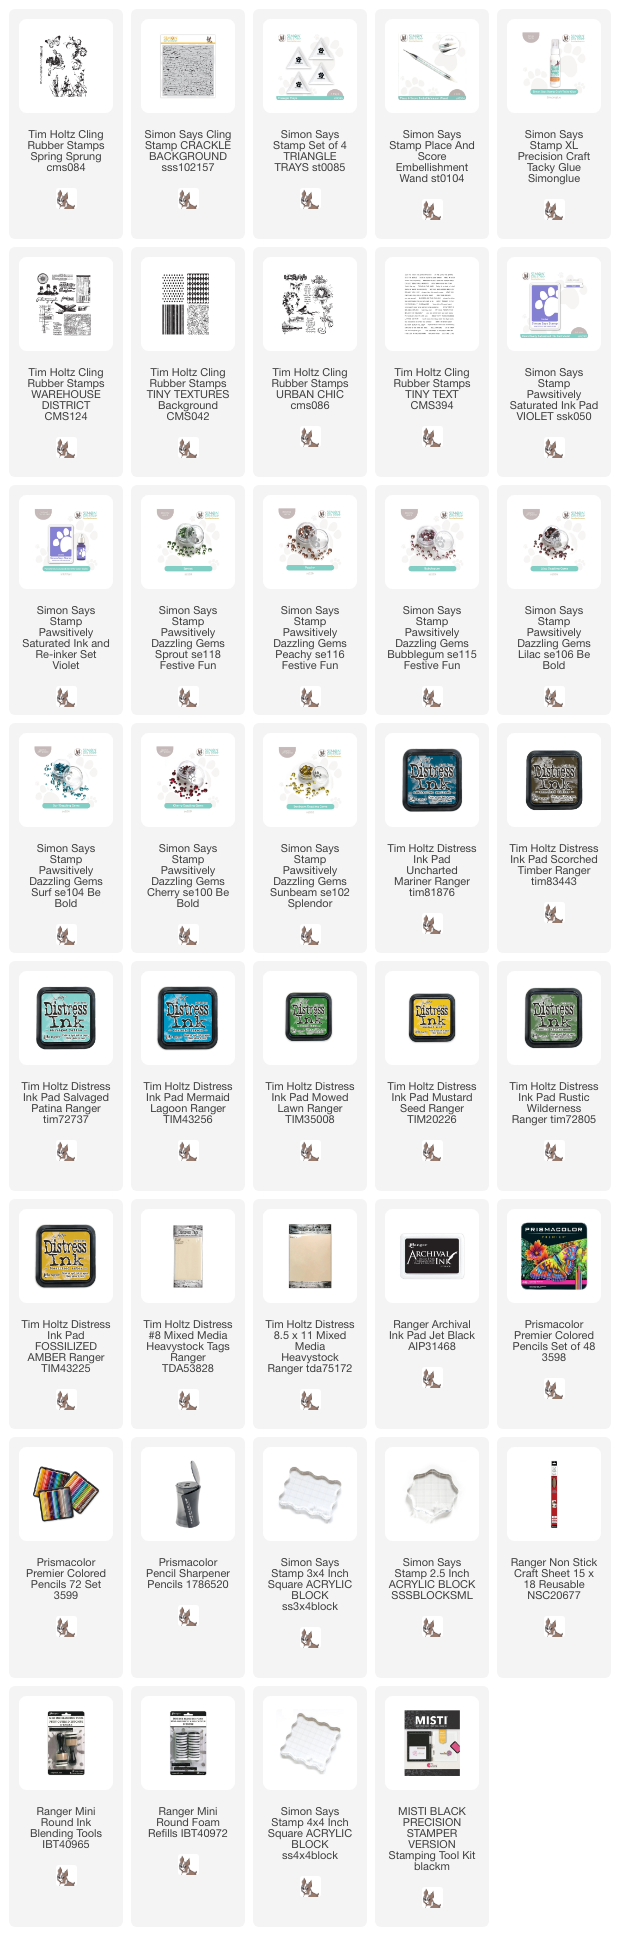
Stamp Tim Holtz Spring Sprung.

I started out by stamping one of my favorite stamps by Tim Holtz on a tag. It is from the Spring Sprung set. Using my MISTI, I first stamped the bunny with Simon Says Stamp Pawsitively Saturated Violet ink and then again with black ink (avoiding to ink the jacket, apart from the edges). 

Mask the image, ink and stamp the background.

Stamp the bunny again on Simon Says Stamp Masking Paper and cut out. Ink the background with Distress Ink and stamp with the grass stamp from Spring Sprung and a dot stamp from Tiny Textures. Stamp a sentiment.


The smaller sentiments come from Tim's Holtz Tiny Text and were stamped and cut into strips. The sentiment is from Tim's Warehouse District.

Color the bunny with pencils.

The rest of the bunny was colored with Prismacolor pencils. Use the white pencil to blend the colours. 

Sprinkle Simon Says Stamp Pawsitively Dazzling Gems.

Sprinkle Simon Says Stamp Pawsitively Dazzling Gems on the ground as treats. I used a different colors.

Join us this week in our Sweet Treats challenge! You have a chance to win a $25 gift voucher to do some fun shopping at Simon Says Stamp. You have until Monday 8am Ohio time. 1pm UK time, 2 pm CET to join in.


Do you use Instagram? If so please add #sssmchallenge so we can see your entries there too.


Thank you so much for visiting today! 

Happy crafting!

Anna-Karin

Supplies:

* Please note: the links are affiliate links, for which I receive a small percentage of sales generated by the link, at no extra cost to you.

Tuesday, March 25, 2025

Happy Easter Bunny Circle Card

Hi crafters! Today I have a sweet Easter card to share with a circle design. 

Please note: this post has affiliate links, for which I receive a small percentage of sales generated by the link, at no extra cost to you.

Layers of ink - Happy Easter Bunny Circle Card tutorial by Anna-Karin Evaldsson.

The Easter scene was stamped and watercolored and all the papers were die cut into circles and then layered. Circle cards are a fun variation to the normal rectangular or square cards.

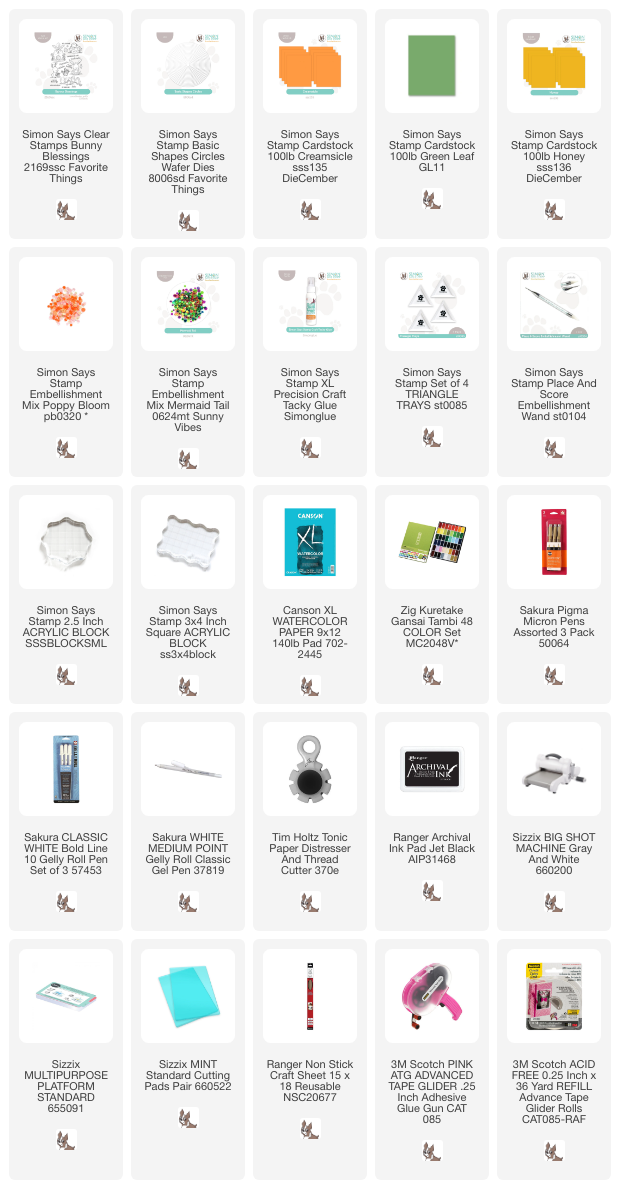
Die cut with Simon Says Stamp Basic Shapes Circles.

I used products from Simon Says Stamp Favorite Things release: the Bunny Blessings stamp set and the Basic Shapes Circles. Die cut the circle from watercolor paper and stamp the bunny and flowers with waterproof ink. I used Archival Ink Jet Black.

Paint with watercolor paint.

Watercolor the images, leaving some of the white paper showing for highlights.

Paint the sky.

Watercolor the sky and add shading.

Add highlights with a white gel pen.

Add details with a black pen and highlights with a white gel pen.


Don't worry about perfection when watercoloring.

Layer the circles to create the card.

Distress the edges of the watercolor panel. The cardstock circles were die cut from Simon Says Stamp cardstock. Fold the green cardstock before die cutting and let the folded edge go slightly outside the cutting plate. The Simon Says Stamp Basic Shapes Circles is a very versatile die set. It consists of 18 circle dies.


I also added some sequins to the card.

Layers of ink - Happy Easter Bunny Circle Card tutorial by Anna-Karin Evaldsson.

I hope you enjoyed this project! Easter crafting is so joyful.


Thank you for visiting!

Happy crafting!

Anna-Karin

Supplies:

* Please note: the links are affiliate links, for which I receive a small percentage of sales generated by the link, at no extra cost to you.