Hello friends! I hope you are all well! I had a much needed hair cut today, and my hair is now shorter than in a long time. I like to be able to tie my hair (especially when I craft), but it will take a few weeks before I can do that again. I have a
Sizzix tutorial to share today, using some new dies by
Tim Holtz.
I made a mosaic mixed media board, with
Dina Wakley's large Media Board (9 x 12 in) as my base. When I got the
Mosaic and the
Crosshatch Frameworks dies, I thought they would be great to combine in a mosaic pattern and I also really wanted to use the
Distress Paper Mosaic kit again. My panel was partly inspired by my
Frameworks Mosaic art journal page from a couple of years ago, and if you want to see a paper mosaic project using texture paste instead of the the mosaic kit grout, you should have a look at that tutorial. The photo on this panel was taken by Alet Groenewald from
Blessed Reflection Photography on our recent trip to South Africa.
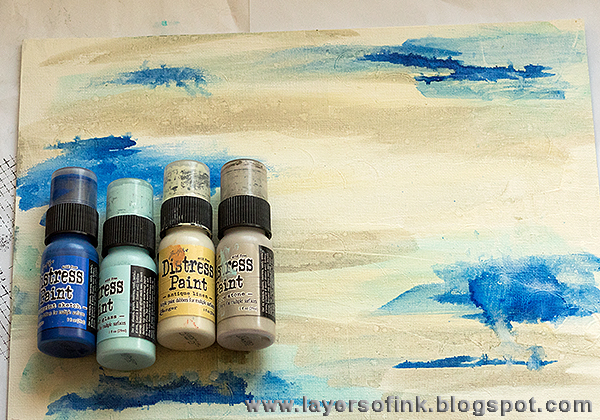
Start by coating the panel with gesso and when that is dry, paint the panel with slightly watered down Distress Paints. Mist with water to create droplets and to make the paints run and blend.
When the paint was dry, I stamped the background with a new Tim Holtz
Flourish background stamp and Potting Soil ink. I also added some
text with black ink and birds.
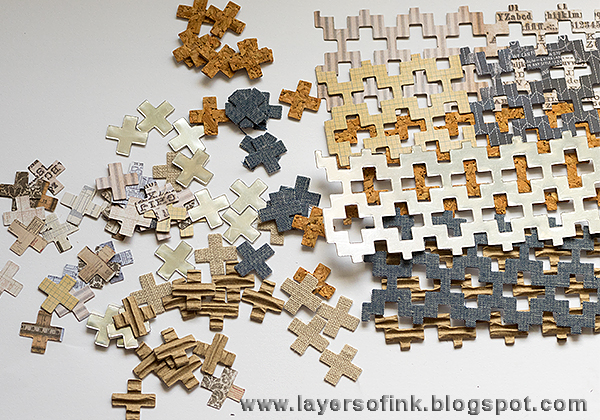
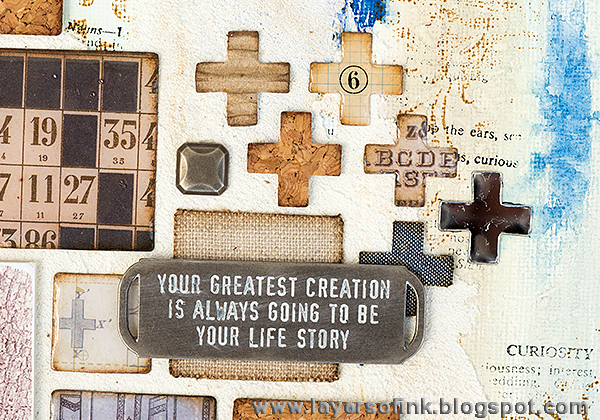
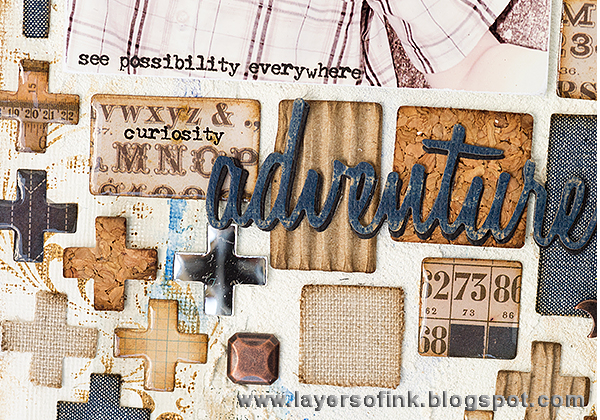
Die cut squares and rectangles from various materials with the
Mosaic die. I love this die, it is so versatile and I'll be using it a lot. And since it is a Bigz die, you can use it with thick materials such as the
Mirrored Sheets. I used papers from the
Dapper paper stash, particularly those with small patterns,
Texture Sheets (cork and corrugated card), and two colours
Textile Surfaces. The fabric, cork and corrugated card were adhered to paper before die cutting.
Die cut the
Crosshatch Frameworks from the same surfaces. I have plenty of left-overs for another project.
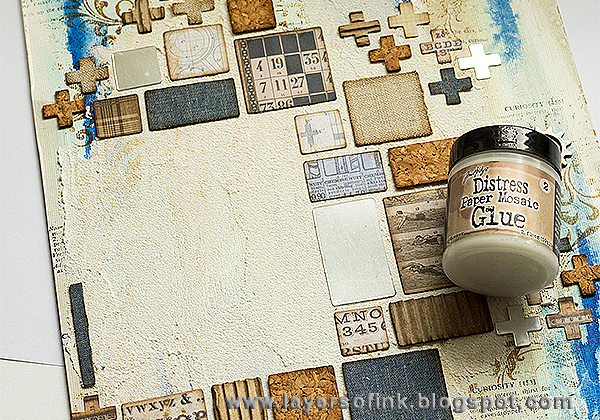
Roughly plan where you want to place your photo and mosaic pieces and then apply a thin layer of
Distress Paper Mosaic Grout on the board. I took this photo when the grout was already dry, and because the brown ink wasn't totally dry when I applied the grout, some of it shows through. I kind of liked the effect.
Ink the edges of all the pieces with Ground Espresso. When the grout is dry, start gluing the pieces down with the Mosaic Glue. Leave the protective covers of the Mirrored pieces in place to prevent getting glue on the mirrors. For my previous two Distress Paper Mosaic projects,
Mosaic Pen Holder and
Mosaic Butterflies, I applied glue on top of the papers too. I didn't do that here, but instead held down the die cuts a little longer to make sure they were stuck. I didn't want to apply a layer of glue on top of the fabric, cord, corrugated card and mirror pieces, so I simply left if out for the paper pieces too.
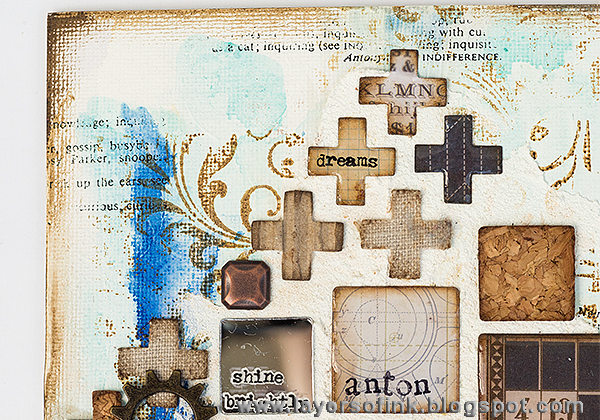
Adhere rub-ons to some of the pieces. Then apply a layer of Paper Mosaic Glaze to all the paper pieces. Set aside to dry. The photo was adhered to a piece of matte board, to give it a little more stability and to make it stand out slightly from the background. I also sanded the edges.
I was really happy with the combination of squares, rectangles and plus shapes, and in all the different interesting papers and surfaces.
There always have to be a few
birds. The background with the distressed stamping and paints look interesting and can of course be accommodated to fit your project. I dry brushed Ground Epsresso paint around the edges.
To add another material to the board, I used metallic idea-ology pieces, such as this Quote Word Band and Nailheads.
There is also an arrow and some gears.
You can apply rub-ons to the
mirror pieces. They truly look like real mirrors and I like the idea that whoever looks at the board, can also see him or herself at the same time. My son loves this too, Mirrored Sheets is a favourite surface of his and whenever he finds a piece on my desk, he wants to use it for his own craft projects.
The
denim coloured fabric worked well here and I like the shade of blue.
The
word was die cut twice from navy kraft-core cardstock and from black cardstock. Sand slightly and glue together so that the black cardstock forms a shadow.
It is a little hard to capture the shine of the mosaic glaze and mirror pieces on a photo, you might see it a little better here. His name was stamped with alphabet stamps.
I hope you enjoyed this tutorial. You can easily change the board by using different colours, papers and surfaces. Or try the same techniques on a scrapbooking or art journaling page, or make a mini version as a card.
Thank you so much for visiting today!
Happy crafting!
Anna-Karin
Supplies: