Friday, August 31, 2018

Dahlia Paper Flowers Tutorial

Hello friends! It is the last day of August and the rain is pouring down. I am back with another Sizzix tutorial, which will brighten the grey weather outside my window.

Layers of ink - DIY Dahlia Paper Flowers Tutorial by Anna-Karin Evaldsson with Sizzix David Tutera dies.

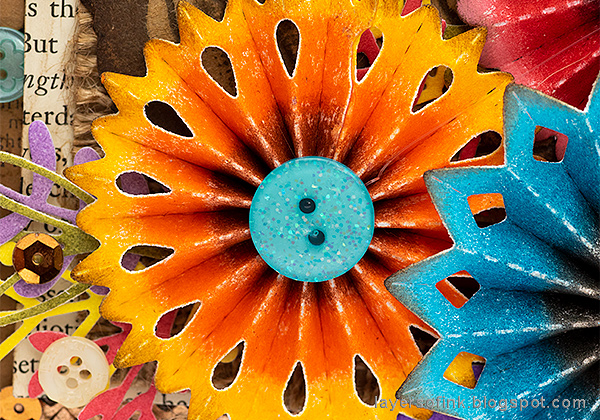
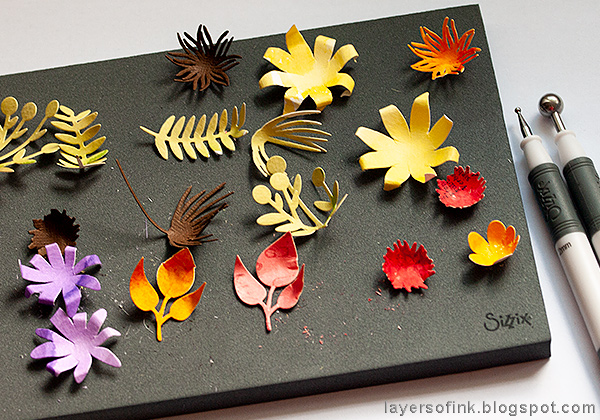
I made two paper Dahlia flowers, using David Tutera's Sizzix Dahlia set and a cool new tool. My flowers are pretty different from each other, since I wanted to give an example of just how wide a variety of flowers that you can make with this one set of dies. The base for both flowers were white paper (smooth for the one to the left and watercolor for the one to the right), with the purple one being inked with Distress Inks and the pink one colored with Infusions powders. Both flowers are quick and easy to make, and you might be surprised to hear that the quickest one is the one to the right.

Layers of ink - DIY Dahlia Paper Flowers Tutorial by Anna-Karin Evaldsson with Sizzix David Tutera dies.

The Dahlia set comes with four dies, three petals of different size and one die for the center piece. Start by folding large enough pieces of white paper. Place the dies as shown when die cutting. Use this sandwich: Multipurpose Platform Tab 2, Cutting Pad, paper, die facing down, second Cutting Pad.

Layers of ink - DIY Dahlia Paper Flowers Tutorial by Anna-Karin Evaldsson with Sizzix David Tutera dies.

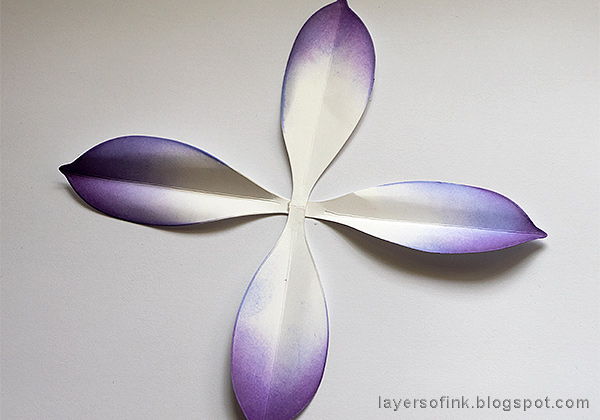
Since the die was placed along the folded line, you get a double petal when you die cut, making it much faster to make the flowers, than if you had to die cut eight separate petals. You need four of each.

Layers of ink - DIY Dahlia Paper Flowers Tutorial by Anna-Karin Evaldsson with Sizzix David Tutera dies.

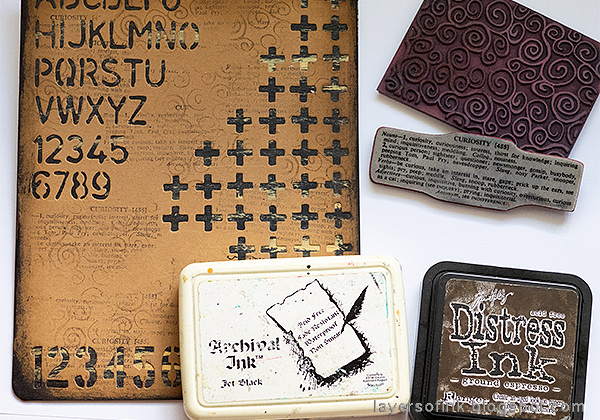
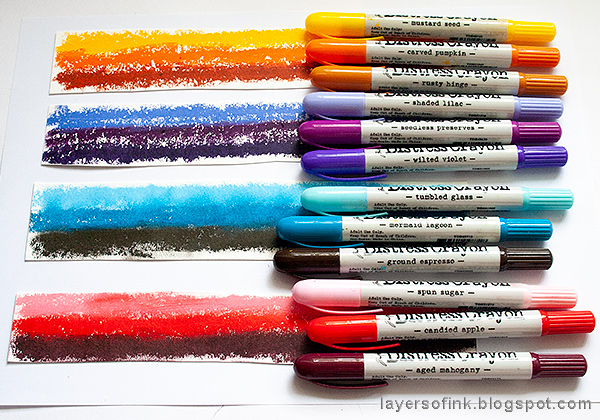
Dahlias come in a fantastic range of colors and I had a hard time picking my colors. I saw a Dahlia which was white towards the center and and a bluish purple towards the edges and tried to mimic that. Ink with an ink-blending tool, starting with the lightest shade of ink (Shaded Lilac). Then gradually build up darker colors. Repeat for all petals.

Layers of ink - DIY Dahlia Paper Flowers Tutorial by Anna-Karin Evaldsson with Sizzix David Tutera dies.

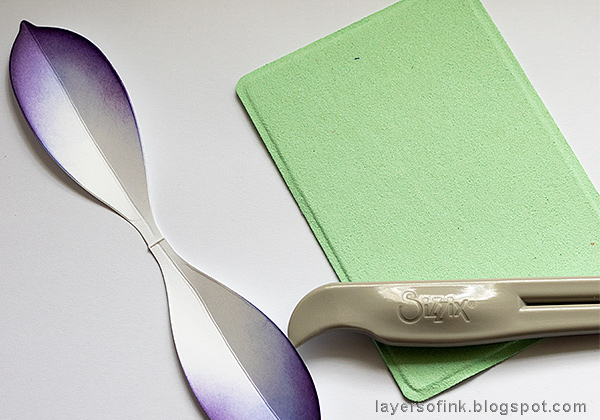
To make a full and dimensional looking flower, you need to give some shape to the petals. David Tutera also designed a cool Crease & Curl tool to make it easier to shape the petals. Use the side shown above to score a line down the center of each petal. The green mat on the photo doesn't come with the Crease & Curl tool, but is included in the Paper Sculpting Tool kit. I placed the paper on top of it when scoring. Fold the petals in the middle along the score line.

Layers of ink - DIY Dahlia Paper Flowers Tutorial by Anna-Karin Evaldsson with Sizzix David Tutera dies.

Next, place the paper in the slot on the other side of the tool and pull the tool off from the paper, at an angle so that it shapes the petal. The prongs are rounded, which makes for a nice smooth shape. Repeat on the other side of the petal. It is very easy and quick.

Layers of ink - DIY Dahlia Paper Flowers Tutorial by Anna-Karin Evaldsson with Sizzix David Tutera dies.

Start by gluing the largest petals together, as shown here.

Layers of ink - DIY Dahlia Paper Flowers Tutorial by Anna-Karin Evaldsson with Sizzix David Tutera dies.

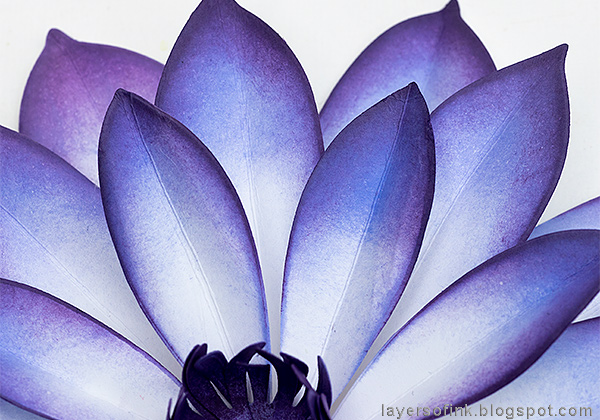
Add the next two pairs of petals, and continue with the smaller petals and the flower center in the same manner.

Layers of ink - DIY Dahlia Paper Flowers Tutorial by Anna-Karin Evaldsson with Sizzix David Tutera dies.

Adhere the petal layers together, making sure to alternate the angle, so that the petals are not lined up on top of each other. If you want to, you can use a piece of foam tape between the layers, for an even more dimensional flower.

Layers of ink - DIY Dahlia Paper Flowers Tutorial by Anna-Karin Evaldsson with Sizzix David Tutera dies.

It is hard to see the size of the flowers in the photos, and to give you a better idea, you can see how big it is when I am holding it in my hand here. If you want an even larger flower, there is also a Large Dahlia Thinlits set, which makes a 12 x 12 in flower.

Layers of ink - DIY Dahlia Paper Flowers Tutorial by Anna-Karin Evaldsson with Sizzix David Tutera dies.

You can ink this flower in any shade that you can imagine. It will also look great if you let the edges be white instead of the center, which is a common look for Dahlias. You could also use two colors of ink, such as red/pink for the center and yellow at the tips. There are so many possible alternatives.

Layers of ink - DIY Dahlia Paper Flowers Tutorial by Anna-Karin Evaldsson with Paper Artsy Infusions.

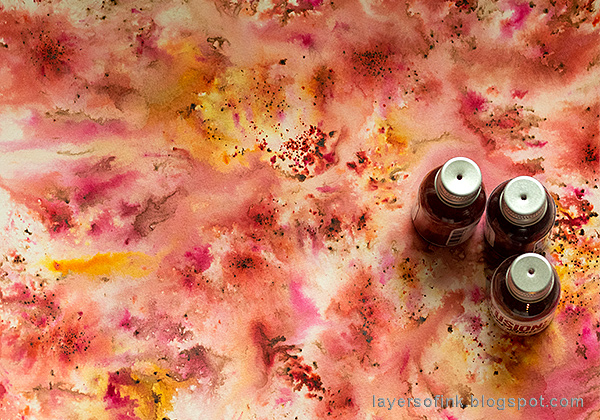
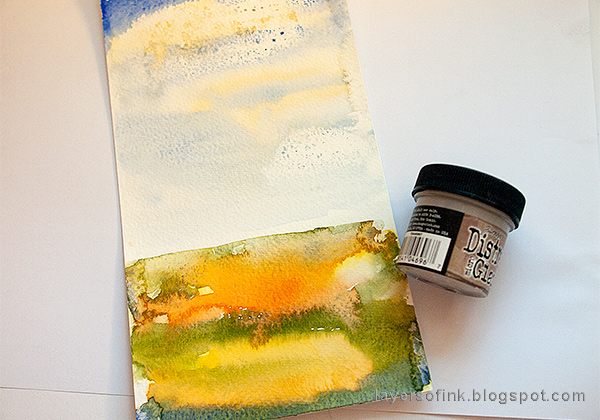
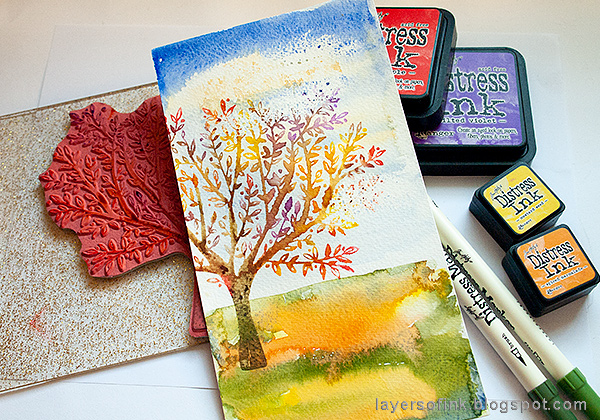
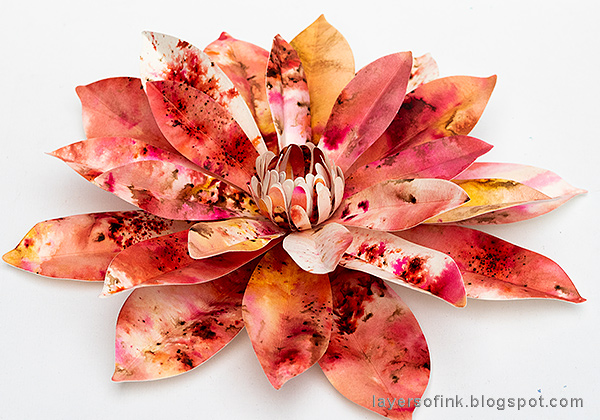
For the second flower, I used two sheets of watercolor paper and colored them with Paper Artsy's Infusions Coloured Stains, which is a really quick way of getting a lot of color and texture. Mist the paper with water, sprinkle a small amount of powder on the paper, mist with more water to help it blend. As you can see, I pricked holes in the lids of the bottles, making it easy to sprinkle out the powder. I used these Infusions: Are You Cerise, Sunset Beach, and Frankly Scarlet.

Layers of ink - DIY Dahlia Paper Flowers Tutorial by Anna-Karin Evaldsson with Sizzix David Tutera dies.

After the paper is dry, you can continue and make the flower using the same steps as above. This creates a very textured and colorful flower.

Layers of ink - DIY Dahlia Paper Flowers Tutorial by Anna-Karin Evaldsson with Sizzix David Tutera dies.

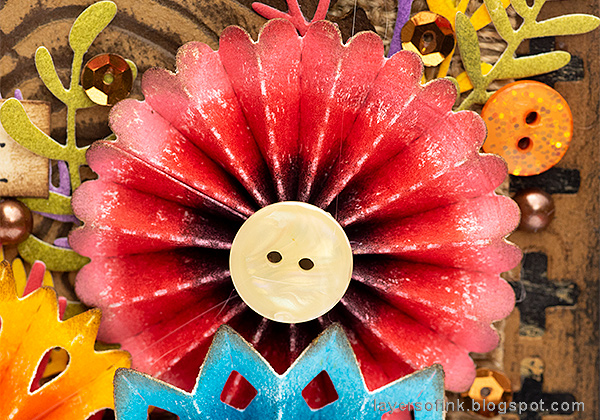
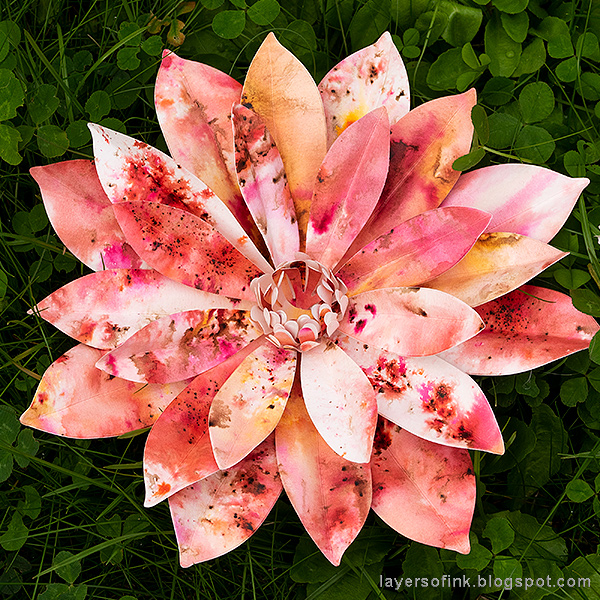
The only thing I did differently on the two flowers, was that I die cut eight flower centers for the pink flowers, instead of four. It gives the flower a fuller center.

Layers of ink - DIY Dahlia Paper Flowers Tutorial by Anna-Karin Evaldsson with Sizzix David Tutera dies.

Here you can see the dimension of the flower better. If you want an even fuller flower, die cut eight of each petal set, and layer them together.

Layers of ink - DIY Dahlia Paper Flowers Tutorial by Anna-Karin Evaldsson with Sizzix David Tutera dies.

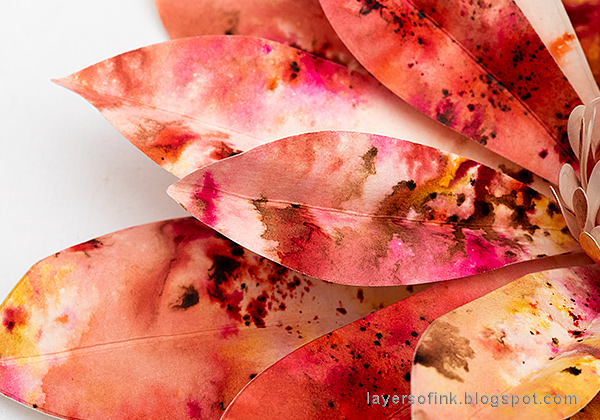
The Infusions give a fun textured look. You could also use, for example, watercolor paint.

Layers of ink - DIY Dahlia Paper Flowers Tutorial by Anna-Karin Evaldsson with Sizzix David Tutera dies.

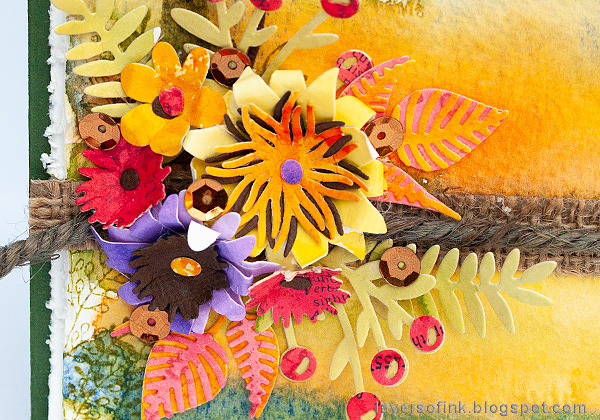
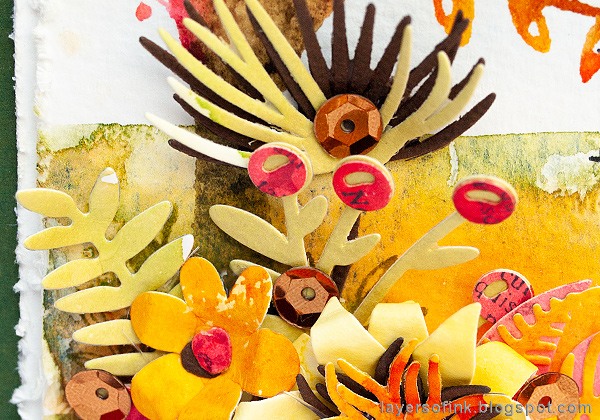
These flowers would work great as a gift, and you can easily customize the colors to fit a specific person or occasion. You can also add leaves to them, if you want to. The flower will look fantastic as part of a table and/or party décor. Imagine guests being greeted with one of these flowers on their plate as they come to sit down - of add a whole bunch of flowers together as a center piece.

Layers of ink - DIY Dahlia Paper Flowers Tutorial by Anna-Karin Evaldsson with Sizzix David Tutera dies.

My Mom has a couple of big paper flowers that I made for her, displayed on a sideboard in the living room. One idea would be to make one or a couple for each season, to use as seasonal décor. Another option is to use a flower to decorate a gift for a special person, and where the flower can be removed to be used as home décor. You can use the recipient's favorite colors, to make it even more personal.
 
Thank you so much for looking at this tutorial! I hope it inspired you to create some paper flowers.
 
Have a lovely weekend! I will be back on Sunday with a fun STAMPtember post.
 
Happy crafting!
 
Anna-Karin
 
Supplies:
 

* Please note: the links are affiliate links, for which I receive a small percentage of sales generated by the link, at no extra cost to you.


Thursday, August 30, 2018

Rosette Wall-hanger Tutorial

Hi crafters!! I am happy to have my camera back home again, after having been repaired. I missed it when it was away. Today, I have a colorful Sizzix tutorial to share with you. 

Layers of ink - Rosette Wall-hanger Tutorial by Anna-Karin Evaldsson

I made an autumn wall-hanger with vibrant colors, but you can use the techniques for any type of project. And if you don't want an autumn theme, just change the colors. I used a bunch different surfaces here to create texture and a project that you'd want to reach out and touch. The wall-hanger is 7.5 x 6 in and was made with dies by Tim Holtz.

Layers of ink - Rosette Wall-hanger Tutorial by Anna-Karin Evaldsson

Some of the surfaces I used are: Sizzix Paper Leather, Little Sizzles Mat Board and Foil Adhesive Sheets, all which are fun surfaces which work for a wide range of techniques.

Layers of ink - Rosette Wall-hanger Tutorial by Anna-Karin Evaldsson with Tim Holtz Mixed Media

I started out by die cutting the background using brown Paper Leather. You can also use kraft cardstock, for a similar effect. Die cut with Tim Holtz Mixed Media 6 dies.

Layers of ink - Rosette Wall-hanger Tutorial by Anna-Karin Evaldsson

I cut a piece of mat board the same size as the Paper Leather and painted it black.

Layers of ink - Rosette Wall-hanger Tutorial by Anna-Karin Evaldsson

When dry, add a little bit of gold paint, which will shine through the negative die cutting. If you wonder about the splotch to the bottom right, it is because there is a star die cut there, and I wanted the star to be gold.

Layers of ink - Rosette Wall-hanger Tutorial by Anna-Karin Evaldsson

Glue the Paper Leather background on top of the mat board with Matte Medium. Place under a heavy book until it is dry.

Layers of ink - Rosette Wall-hanger Tutorial by Anna-Karin Evaldsson

Stamp the background with a swirl stamp and Ground Espresso ink as well as with a text stamp and Jet Black ink. Ink the edges and add some Black Soot paint to make them darker.

Layers of ink - Rosette Wall-hanger Tutorial by Anna-Karin Evaldsson with Ranger Distress Crayons

For the Rosettes I used a very fun and easy technique. My rosettes were die cut from white Paper Leather, but you can also use white cardstock. Cut strips and color each one with three shades of Distress Crayons, making them darker on one side and gradually lighter. Blend the crayons with your finger - in the photo, the bottom two are blended and the top two are not, to show you the difference.

Layers of ink - Rosette Wall-hanger Tutorial by Anna-Karin Evaldsson with Tim Holtz Sizzix Rosette set

The Rosette set has three designs. Die cut using this sandwich: Multipurpose Platform Tab 2, Cutting Pad, paper, die facing down, second Cutting Pad. Place the papers so that the darkest part will be on the inside of the finished rosette - where the straight edge of the die is.

Layers of ink - Rosette Wall-hanger Tutorial by Anna-Karin Evaldsson

Fold along the perforated lines. If you use ordinary cardstock, place a piece of tissue tape at the back before folding, to make sure the paper doesn't tear along any of the perforated lines. Paper Leather is very strong and if you use it, you can skip that step.

Layers of ink - Rosette Wall-hanger Tutorial by Anna-Karin Evaldsson

Glue the ends together. You can use hot glue to assemble the rosettes - but be careful not to burn yourself. I used Matte Medium instead. I like to use the largest circle from the Rosette set as a base to glue the rosette upon. Press the rosette down onto the glue and place under a book.

Layers of ink - Rosette Wall-hanger Tutorial by Anna-Karin Evaldsson

I made four rosettes. Later I decided to leave the purple one for another project, since it looked better with three than four rosettes on the wall-hanger.

Layers of ink - Rosette Wall-hanger Tutorial by Anna-Karin Evaldsson

Instead of die cutting a center using the Rosette set, I glued a button to each center. It covered up less of the color and gave a nice extra touch.

Layers of ink - Rosette Wall-hanger Tutorial by Anna-Karin Evaldsson with Sizzix Tim Holtz 3-D embossing folder

I used the Mini Scallops Impresslits 3-D Embossing folder for the first time, and loved the cool effect. It looks just like German Scraps. Adhere the foil to a piece of paper first and then place in the folder. It cuts and embosses at the same time. Use this sandwich: Multipurpose Platform Tab 1, Impresslits folder with paper inside, Cutting Pad.

Layers of ink - Rosette Wall-hanger Tutorial by Anna-Karin Evaldsson

Distress with a little black paint.

Layers of ink - Rosette Wall-hanger Tutorial by Anna-Karin Evaldsson with Sizzix Tim Holtz Tree Ring

I also used the Tree Rings Bigz, which comes with a coordinating embossing folder. Depending on which way you place the paper in the folder, you can get a different wood grain effect, as you can see on the photo. I used the first example.

Layers of ink - Rosette Wall-hanger Tutorial by Anna-Karin Evaldsson with Sizzix Tim Holtz Funky Floral

Press Distress Ink on a craft sheet, mist with water and press pieces of white Paper Leather into the ink. You can also use watercolor paper. Die cut with the Funky Floral 1, Funky Floral 2 and Funky Floral 3 sets, picking leaves that you like.

 Layers of ink - Rosette Wall-hanger Tutorial by Anna-Karin Evaldsson

Punch two holes at the top of the wall-hanger and set an eyelet in them. Tie with twine.

Layers of ink - Rosette Wall-hanger Tutorial by Anna-Karin Evaldsson

Behind the wood circle, I placed a piece of burlap and a page from an old book. I liked this particular page because of the text about the color of earth, tree, bread and hair.

 Layers of ink - Rosette Wall-hanger Tutorial by Anna-Karin Evaldsson

Stamp a sentiment and cut out.

Layers of ink - Rosette Wall-hanger Tutorial by Anna-Karin Evaldsson with Sizzix Tim Holtz Rosette set.

If you want to cover up the white perforated lines, you can simply use one of the Distress Crayons, but I left mine as they were.

Layers of ink - Rosette Wall-hanger Tutorial by Anna-Karin Evaldsson

The Distress Crayons give really vibrant colors to the rosettes.

Layers of ink - Rosette Wall-hanger Tutorial by Anna-Karin Evaldsson with Sizzix Tim Holtz Funky Floral

 
I added extra buttons, pearls and sequins here and there for some shine.

Layers of ink - Rosette Wall-hanger Tutorial by Anna-Karin Evaldsson

I also used a Small Talk sticker sentiment.

Layers of ink - Rosette Wall-hanger Tutorial by Anna-Karin Evaldsson

Here you can see the cool look of the embossed metal, as well as how the gold paint peaks through the die cut shapes in the background.

Thank you so much for taking the time to look at this long tutorial! I hope you enjoyed it!

Happy crafting!

Anna-Karin

Supplies:

* Please note: the links are affiliate links, for which I receive a small percentage of sales generated by the link, at no extra cost to you.


Monday, August 27, 2018

Autumn Tree with Dimensional Flowers Tutorial

Hi crafters! I hope your weekend was a good one. We had a fun weekend with soccer, a birthday party for one of my friends and a really long walk. The weather is starting to turn and although the days are still pretty warm, the nights are getting cooler. 


This week at the Simon Says Stamp Monday Challenge Blog we have a Fall/Autumn theme. Don't miss the last project of our wonderful August guest designer Anne Redfern.

Layers of ink - Autumn Tree with Dimensional Flowers Tutorial by Anna-Karin Evaldsson

I made an autumn themed birthday card, which started out as an art journal page. I was in the mood for some dimensional flowers, and I try to keep my art journal pages as flat as possible, so I turned it into a big card instead.

Layers of ink - Autumn Tree with Dimensional Flowers Tutorial by Anna-Karin Evaldsson, watercolor background

I found the background in my box of scrap papers and it was perfect for an autumn project. I might have made it when working on this Watercolor Tree Art Journal page. The clouds were done with Distress Micro Glaze before painting the background with watercolors. The glaze resists the paint.

Layers of ink - Autumn Tree with Dimensional Flowers Tutorial by Anna-Karin Evaldsson with SSS Brushed Branches stamp

I used the Simon Says Stamp Brushed Branches as my focal point. I love this stamp. It was inked with a combination of ink pads and markers. It is a big stamp, and I used one of my Sizzix Cutting Pads as an acrylic block. Mist with water before stamping.

Layers of ink - Autumn Tree with Dimensional Flowers Tutorial by Anna-Karin Evaldsson with Tim Holtz Sizzix Funky Floral

The flowers and foliage were made with Tim Holtz Funky Floral 3 Thinlits set. The Funky Floral sets are so versatile and you can make an almost unlimited variation of flowers with them. I colored watercolor paper with Distress Inks and let it dry before die cutting the pieces. It helps to use the Sizzix Precision Base Plate with these intricate dies. The red paper was in my scrapbox and had been stamped with various stamps.

Layers of ink - Autumn Tree with Dimensional Flowers Tutorial by Anna-Karin Evaldsson with Tim Holtz Sizzix Funky Floral

Use the new Sizzix Paper Sculpting tool kit to give shape and life to the flowers and leaves.

Layers of ink - Autumn Tree with Dimensional Flowers Tutorial by Anna-Karin Evaldsson with Tim Holtz Sizzix Funky Floral 3

Layer the flower pieces to create dimensional flowers and glue them to the card. I added a piece of burlap and twine below the flowers. Tuck the leaves in all around.

Layers of ink - Autumn Tree with Dimensional Flowers Tutorial by Anna-Karin Evaldsson with Tim Holtz Sizzix Funky Floral3.

I also glued some sequins among the flower, for a touch of bling.

Layers of ink - Autumn Tree with Dimensional Flowers Tutorial by Anna-Karin Evaldsson with Ranger Distress Micro Glaze

Here you can see the resist effect of the micro glace. It also resist the stamping, so that it looks like the tree fades out in some areas. The birds were stamped with Faded Jeans ink.

Layers of ink - Autumn Tree with Dimensional Flowers Tutorial by Anna-Karin Evaldsson with Tim Holtz Sizzix Funky Floral

The Brushed Branches stamp looks great with the watercolor stamping technique. If you want to see more examples using it, check out my Guestbook tutorial.

Layers of ink - Autumn Tree with Dimensional Flowers Tutorial by Anna-Karin Evaldsson with Tim Holtz Sizzix Funky Floral

The sentiment stamp comes from the SSS Big Greetings set.

Layers of ink - Autumn Tree with Dimensional Flowers Tutorial by Anna-Karin Evaldsson with Tim Holtz Sizzix Funky Floral

Here you can see that the inky red paper I die cut some of the flowers from, already had some stamping up. It was a full sheet that I had inked and stamped to use on projects. I need to do that more often, because it is very handy, especially if you are in a hurry.

Layers of ink - Autumn Tree with Dimensional Flowers Tutorial by Anna-Karin Evaldsson with Tim Holtz Sizzix Funky Floral 3 dimensional flowers.

Here's another look at the dimensional autumn flowers. If you don't want to do an autumn project, just use different colors.

I hope you will join us this week in our Fall/Autumn challenge. As always, you have a chance to win a $50 gift voucher to do some fun shopping at Simon Says Stamp. You have until next Monday 8am Ohio time. 1pm UK time, 2 pm CET to join in.


Don't forget to follow Simon Says Stamp on Instagram, they post great stuff daily. 


Do you use Instagram? If so please add #sssmchallenge so we can see your entries there too.


Thank you so much for taking the time to visit my blog today!  

Happy crafting!

Anna-Karin

Supplies:

* Please note: the links are affiliate links, for which I receive a small percentage of sales generated by the link, at no extra cost to you.