Monday, January 31, 2022

Butterflies Art Journal Tutorial

Hi friends! Today I have a sunny art journal page to share featuring large butterflies, as well as a butterfly window ornament. 

Please note: this post has affiliate links, for which I receive a small percentage of sales generated by the link, at no extra cost to you.

Layers of ink - Butterflies Art Journal Tutorial by Anna-Karin Evaldsson.

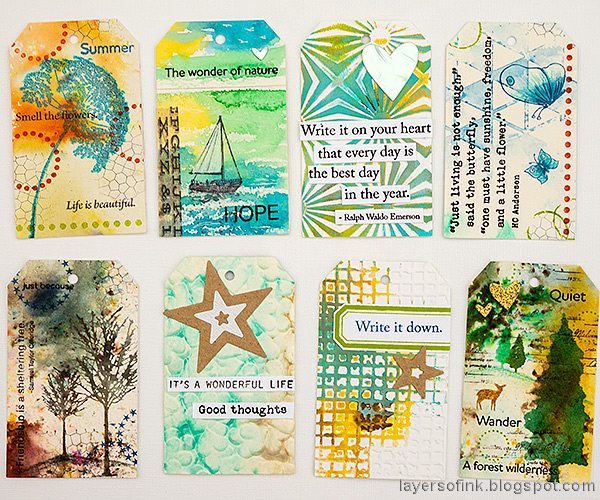
While I was finishing this project, winter storm Malik was busy outside, although it wasn't so bad here. The snow did affect my project in a surprising manner, which you can read about below. I made a double page spread in my Large Dylusions journal, so that there would be lots of space for this big butterflies. There is a mix of paint, stenciling and stamping on the background. The butterflies were die cut with Tim Holtz Perspective Butterfly die.

Layers of ink - Butterfly Window Ornament Tutorial by Anna-Karin Evaldsson.

These butterflies are over six inches wide and I thought they would also look great as window ornaments, with the light shining through all those intricate details. There is a second butterfly behind the colorful one, die cut from vellum. It gives an outline/shadow effect to the butterfly which almost glows.

Layers of ink - Butterflies Window Ornament Tutorial by Anna-Karin Evaldsson.

Here you can see the colors and textures better.

Layers of ink - Butterflies Art Journal Tutorial by Anna-Karin Evaldsson.

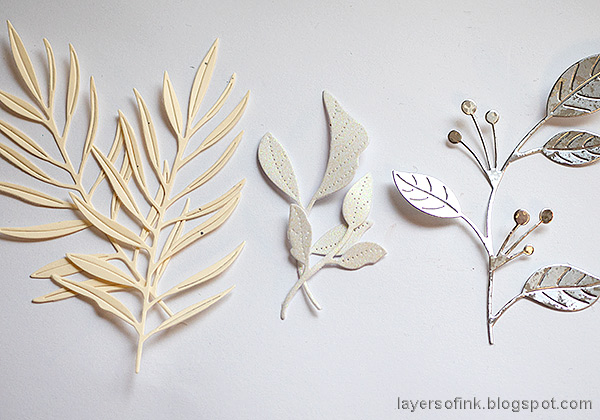
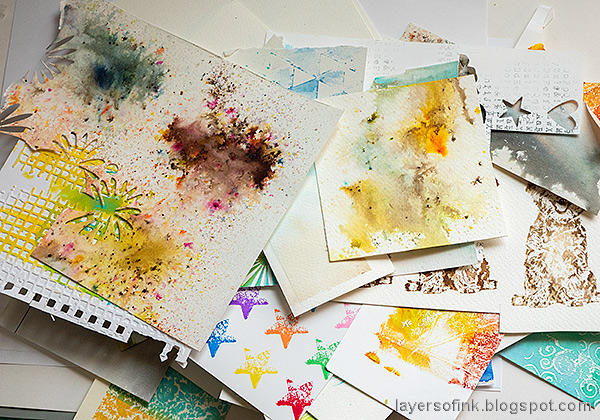
Start by die cutting butterflies from heavystock paper.

Layers of ink - Butterflies Art Journal Tutorial by Anna-Karin Evaldsson. Ink the butterflies with Distress Ink.

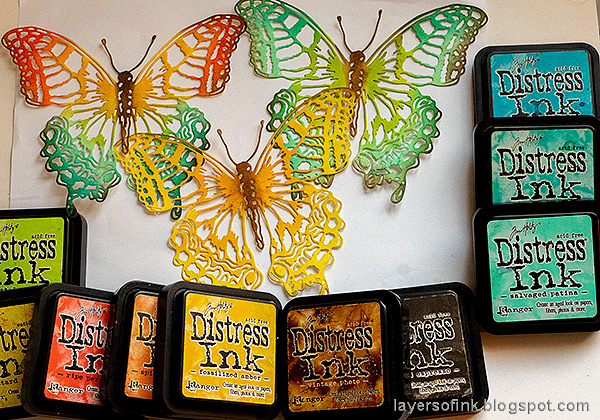
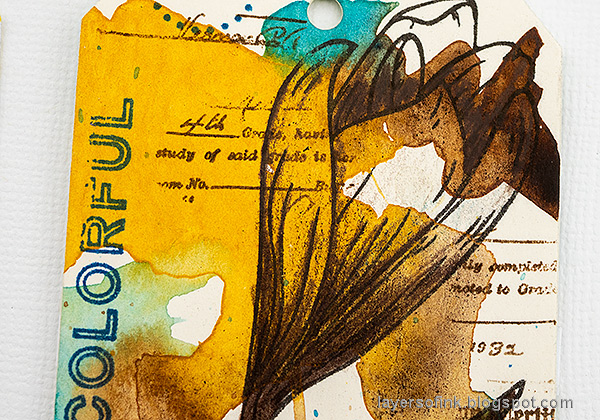
Ink them with Distress Inks in various colors. 

Layers of ink - Butterflies Art Journal Tutorial by Anna-Karin Evaldsson. Ink with Distress Oxide Ink.

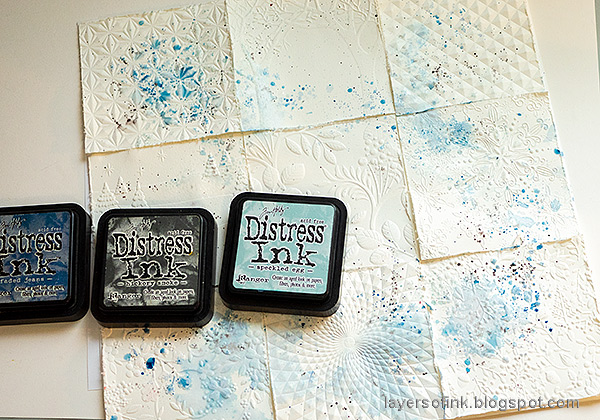
Smear Distress Oxide Ink on a non-stick craft sheet, mist with water and lightly press the butterflies into the ink, here and there.

Layers of ink - Butterflies Art Journal Tutorial by Anna-Karin Evaldsson.

Apply a little Sizzix Gold Luster Wax around the edges of the wings and on the body.

Layers of ink - Butterflies Art Journal Tutorial by Anna-Karin Evaldsson. Stamp with Simon Says Stamp Crackle Background.

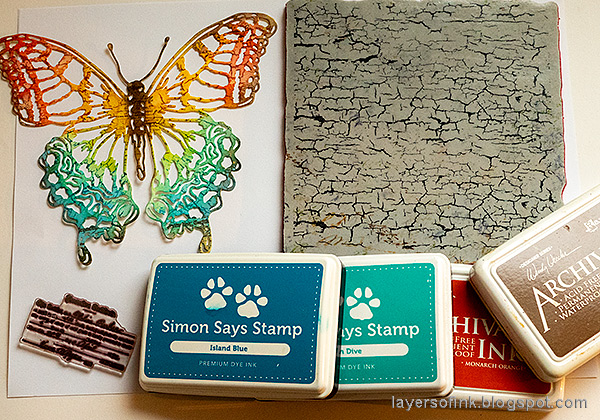
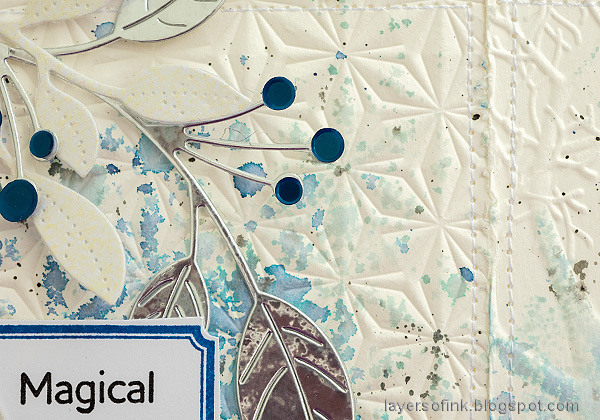
Stamp with Simon Says Stamp Crackle background using tone-on-tone colors. Add a hint of script with the script stamp from the Document It set.

Layers of ink - Butterflies Art Journal Tutorial by Anna-Karin Evaldsson.

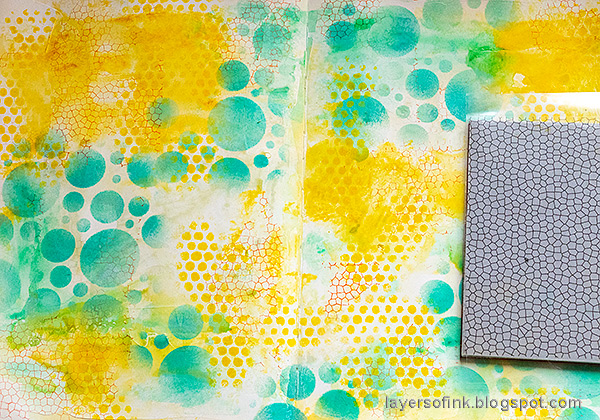
The journaling page was first coated with gesso and then painted with Distress Paint. Mist with water to blend.

Layers of ink - Butterflies Art Journal Tutorial by Anna-Karin Evaldsson. Stencil with Simon Says Stamp Mix and Match Circles stencil.

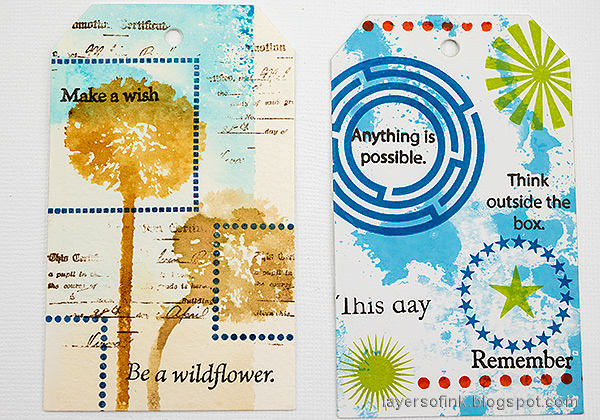
The circles/bubbles were added with the Simon Says Stamp Mix and Match Circles Stencil using two shades of Distress Oxide Ink and an ink-blending brush.

Layers of ink - Butterflies Art Journal Tutorial by Anna-Karin Evaldsson.

Yellow dots were added in the same way, with Tim's Bubble stencil.

Layers of ink - Butterflies Art Journal Tutorial by Anna-Karin Evaldsson.

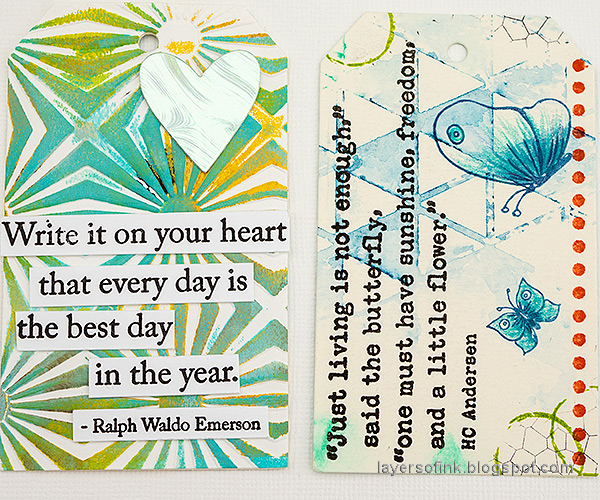
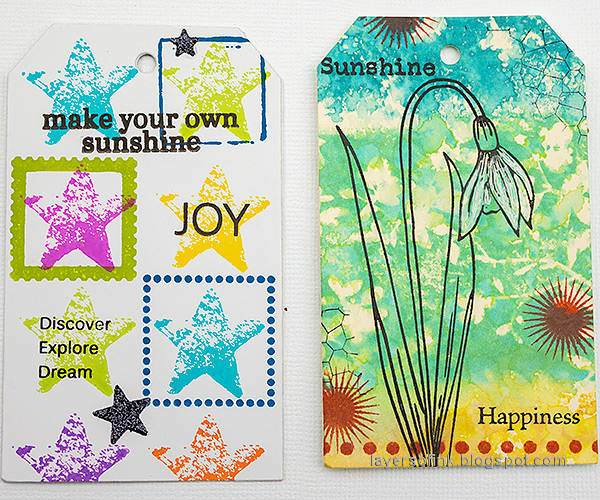
Stamp here and there with the Simon Says Stamp Stained Glass Background stamp and orange ink.

Layers of ink - Butterflies Art Journal Tutorial by Anna-Karin Evaldsson. Stamp with Simon Says Stamp Stained Glass.

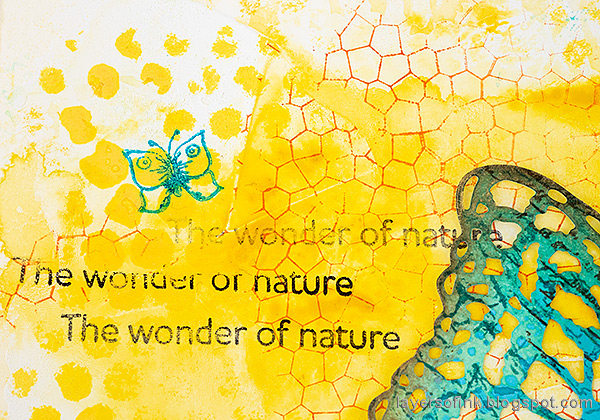
I also stamped some butterflies from Simon Says Stamp Thoughtful Flowers on the background with turquoise ink. The sentiment comes from Forest Scenery and was stamped repeatedly without reinking.

Layers of ink - Butterflies Art Journal Tutorial by Anna-Karin Evaldsson.

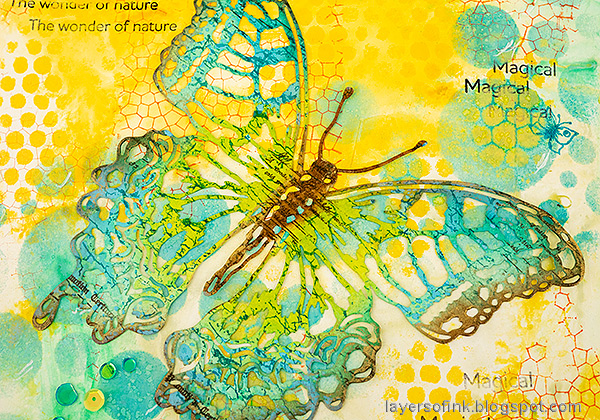
I just love how large and intricate these butterflies are. 

Layers of ink - Butterflies Art Journal Tutorial by Anna-Karin Evaldsson.

As I was struggling to photograph this project in the snowy and windy weather a whole lot of fine snow blew onto the page, giving me really cool and unintended textures, particularly on the Distress Oxide ink areas. 

Layers of ink - Butterflies Art Journal Tutorial by Anna-Karin Evaldsson.

Here you can see the snow itself, it made an irregular texture which would have been hard to create on purpose. If you look at the main photo of the project again, you will see that this texture is absent there, since it happened while I was taking the photos, and I usually start with the main photo.

Layers of ink - Butterflies Art Journal Tutorial by Anna-Karin Evaldsson.

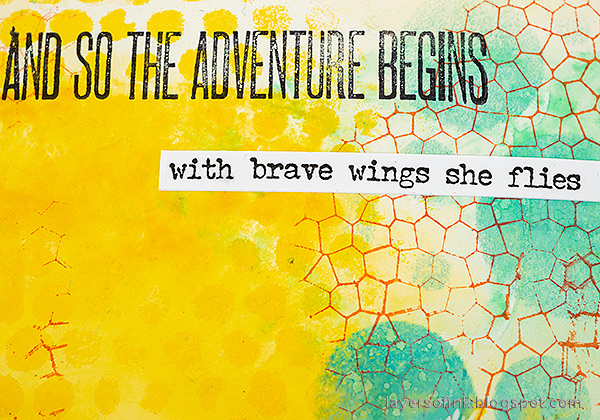
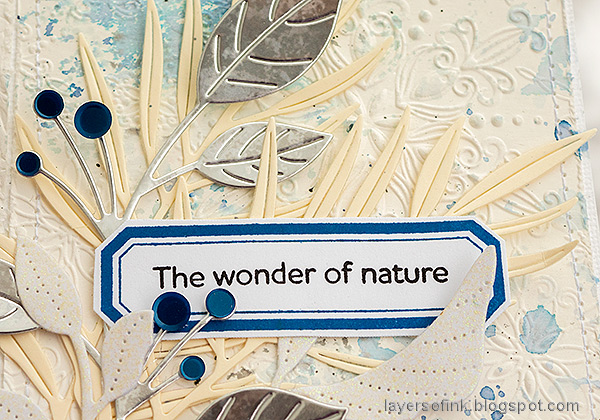
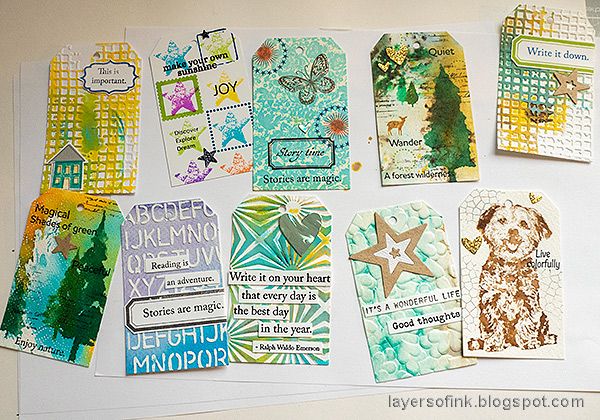
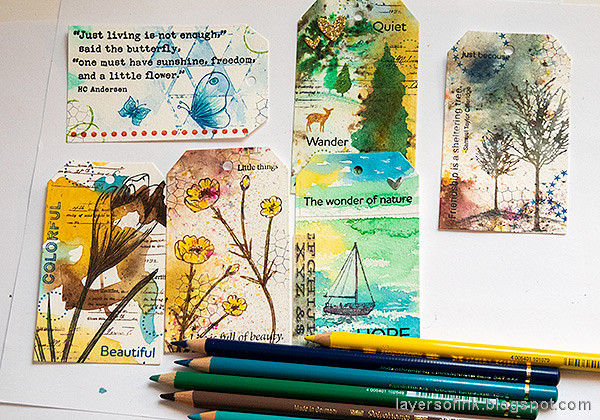
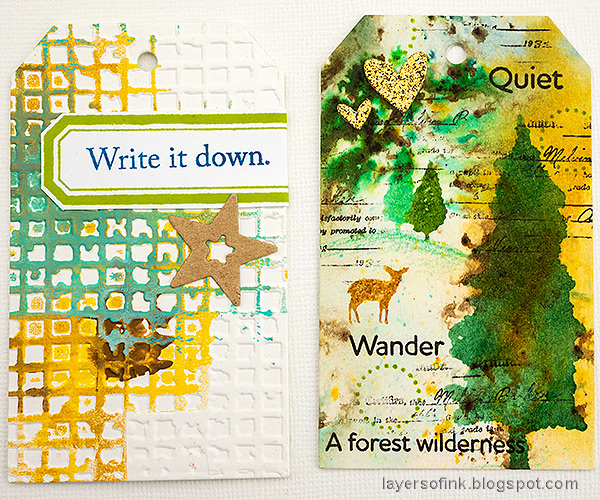
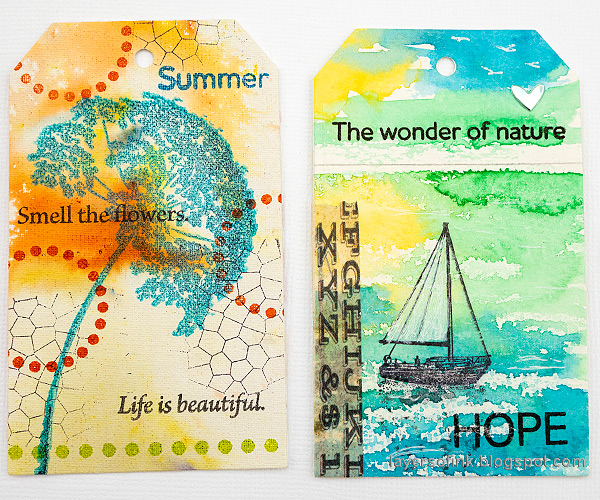
I added a bunch of sentiments right onto the background and cut others into strips. 

Layers of ink - Butterflies Art Journal Tutorial by Anna-Karin Evaldsson.

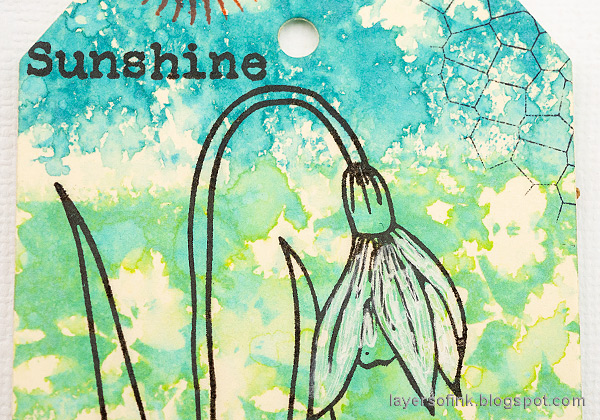
If you stamp on Distress Oxide ink while it is still wet, the black ink looks like it is stamped beneath the the yellow ink, which happened on this sentiment. It was a mistake, but I liked it in the end.

Layers of ink - Butterflies Art Journal Tutorial by Anna-Karin Evaldsson.

This sentiment comes from Tim's Ponderings set.

Layers of ink - Butterflies Art Journal Tutorial by Anna-Karin Evaldsson.

I placed the butterflies so that the yellow butterfly was mainly on a turquoise area and the turquoise one, mainly on a yellow area.

Layers of ink - Butterflies Art Journal Tutorial by Anna-Karin Evaldsson.

More sentiments, a stamped butterflies and that pretty snow texture. I added some lines to the bubbles with a white gel pen.

Layers of ink - Butterflies Art Journal Tutorial by Anna-Karin Evaldsson.

I added some sequins as a trail after the butterflies.

Layers of ink - Butterflies Art Journal Tutorial by Anna-Karin Evaldsson.

Here you can see the actual snow on the page, as it was doing its magic.

Layers of ink - Butterflies Art Journal Tutorial by Anna-Karin Evaldsson.

The Crackle background stamp adds a vein-like texture to the butterflies.

Layers of ink - Butterflies Art Journal Tutorial by Anna-Karin Evaldsson.

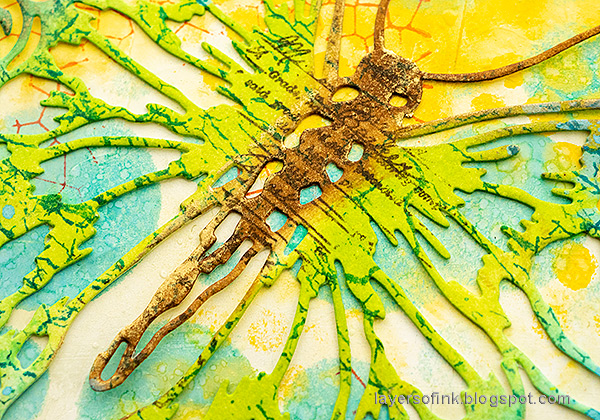
You can see the gold shine in this photo.

Layers of ink - Butterflies Art Journal Tutorial by Anna-Karin Evaldsson.

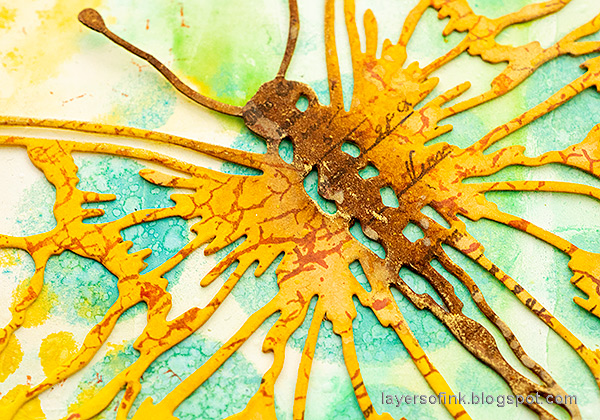
And the yellow butterfly with the gold details.

Layers of ink - Butterflies Window Ornament Tutorial by Anna-Karin Evaldsson.

The vellum butterfly was glued at the body and off-set a little. I also shaped the wings slightly.

Layers of ink - Butterflies Window Ornament Tutorial by Anna-Karin Evaldsson.

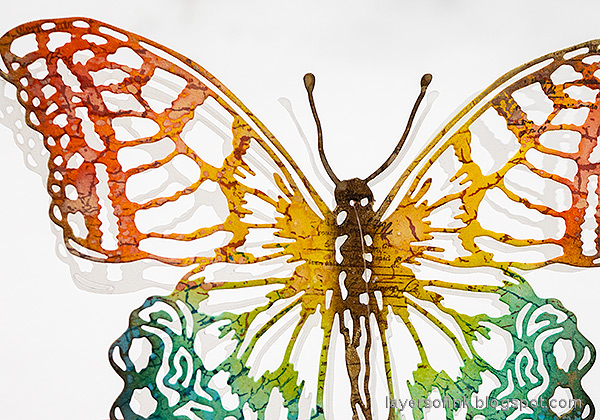
I picked the most colorful butterfly for my window.


Thank you so much for taking the time to stop by here today!

Happy crafting!

Anna-Karin

Supplies:

* Please note: the links are affiliate links, for which I receive a small percentage of sales generated by the link, at no extra cost to you.

Dry Embossed Background Tutorial

Hi stampers! I hope you had a good weekend!

Please note: this post has affiliate links, for which I receive a small percentage of sales generated by the link, at no extra cost to you.


This week we have an 'Use an embossing folder' theme at the Simon Says Stamp Monday Challenge Blog. I hope you will join us and don't miss the last project by our January guest designer Estelle Palumbo aka Atouscrap

Layers of ink - Dry Embossed Background Tutorial by Anna-Karin Evaldsson. With embossing folders by Simon Says Stamp.

I have always loved embossing folders, since I used one the first time years ago, and I am so happy that there are so many new ones out now. Simon Says Stamp's 3-D embossing folders are amazing, with wonderful details and deep embossing. I couldn't pick just one, but instead used nine folders on this scrapbooking layout about some amazing cross-country skiing over ten years ago. I came upon the photos as I was looking through some photos and was inspired to use them. 

Layers of ink - Dry Embossed Background Tutorial by Anna-Karin Evaldsson. With embossing folders by Simon Says Stamp.

Start by cutting watercolor paper into 4x4 in squares and emboss in the folders. You actually see the embossed effect better on this photo than on the main photo. I used these folders: KaleidoscopeWinter TreesGeometric Lattice, Snowflocked Hills, Christmas Floral, Triangle Burst, Vine CanopyFiligree Snowflakes, and Blossom Field.

Layers of ink - Dry Embossed Background Tutorial by Anna-Karin Evaldsson. With embossing folders by Simon Says Stamp. Distress the edges.

Distress the edges.

Layers of ink - Dry Embossed Background Tutorial by Anna-Karin Evaldsson. With embossing folders by Simon Says Stamp.

Adhere to a background paper.

Layers of ink - Dry Embossed Background Tutorial by Anna-Karin Evaldsson. With embossing folders by Simon Says Stamp.

Smear Distress Inks on a non-stick craft sheet, mist with water and press the paper into the ink, here and there. Splatter some more ink on the page.

Layers of ink - Dry Embossed Background Tutorial by Anna-Karin Evaldsson. With embossing folders by Simon Says Stamp. Die cut branches.

Die cut branches from cream, white glitter and holographic paper using the Simon Says Stamp Etched Delicate Frond, Tender Leaves and Etched Berry Branch die.

Layers of ink - Dry Embossed Background Tutorial by Anna-Karin Evaldsson. With embossing folders by Simon Says Stamp. Stamp labels with Simon Says Stamp Mixed Labels.

Stamp labels from Simon Says Stamp Mixed Labels with Royal ink and add sentiments from Forest Scenery.

Layers of ink - Dry Embossed Background Tutorial by Anna-Karin Evaldsson. With embossing folders by Simon Says Stamp.

I glued sequins to the berries. 

Layers of ink - Dry Embossed Background Tutorial by Anna-Karin Evaldsson. With embossing folders by Simon Says Stamp.

Stitch around all the squares with a sewing machine. The photos don't quite capture how deep this embossing is. 

Layers of ink - Dry Embossed Background Tutorial by Anna-Karin Evaldsson. With embossing folders by Simon Says Stamp.

Glue the branches in three areas of the layout, adding labels in between.

Layers of ink - Dry Embossed Background Tutorial by Anna-Karin Evaldsson. With embossing folders by Simon Says Stamp.

I love this Snowflocked Hills embossing folder. You can find a faux-linen technique using this folder here.

Layers of ink - Dry Embossed Background Tutorial by Anna-Karin Evaldsson. With embossing folders by Simon Says Stamp.

The stitching and distressed edges add even more texture to the background.

Layers of ink - Dry Embossed Background Tutorial by Anna-Karin Evaldsson. With embossing folders by Simon Says Stamp.

The white glittery paper and the holographic paper gives a nice contrast to the matte textures of the background and fits well with the snow theme. 

I hope you will join us this week in our Use An Embossing Folder theme. You have a chance to win a $25 gift voucher to do some fun shopping at Simon Says Stamp. You have until Monday 8am Ohio time. 1pm UK time, 2 pm CET to join in.


Do you use Instagram? If so please add #sssmchallenge so we can see your entries there too.


Thank you so much for visiting my blog today! 

Happy crafting!

Anna-Karin

Supplies:

* Please note: the links are affiliate links, for which I receive a small percentage of sales generated by the link, at no extra cost to you.


Friday, January 28, 2022

Tag Book Tutorial

Hi crafters! Today I have a fun tag mini-book to share made entirely from scrap papers.

Please note: this post has affiliate links, for which I receive a small percentage of sales generated by the link, at no extra cost to you.

Layers of ink - Scrap Paper Tag Book Tutorial by Anna-Karin Evaldsson.

I have several folders of left-over inky, painted or stamped papers from previous projects or from experiments and I always enjoy using those papers. Not only is the mix of colors, patterns and texture fun, but the papers themselves carry a history and a part from the projects they were originally meant to be a part of. Some of the papers I used today come from way back and come from projects or experiments that I did when in South Africa.

Layers of ink - Scrap Paper Tag Book Tutorial by Anna-Karin Evaldsson.

I used a canvas page as the back cover, but the pages can also easily be rearranged for a different look and order.

Layers of ink - Scrap Paper Tag Book Tutorial by Anna-Karin Evaldsson.

The book is nice and chunky and the tags have been glued together, making them thick and sturdy.

Layers of ink - Scrap Paper Tag Book Tutorial by Anna-Karin Evaldsson.

Start by finding a pile of interesting and colorful scraps. 

Layers of ink - Scrap Paper Tag Book Tutorial by Anna-Karin Evaldsson.

Die cut tags from the scraps using the Simon Says Stamp Large Standard Tag die. I positioned the die on the most interesting parts of the papers.

Layers of ink - Scrap Paper Tag Book Tutorial by Anna-Karin Evaldsson.

Next, I stamped images on most of the smooth tags, but not on the dry embossed tags. I used a mix of Simon Says Stamp stamp sets. Some of the tags got a larger sentiments as their focal point instead of an image. I stamped both with black and colored inks and used watercolor stamping on some tags.

Layers of ink - Scrap Paper Tag Book Tutorial by Anna-Karin Evaldsson.

I picked out a whole lot of small sentiment stamps and combined them with some border, circle and frame stamps. The latter came mainly from the Simon Says Stamp Mix and Match Circles and Mix And Match Squares sets. Have fun stamping sentiments on the tags. I also used a couple of background stamps, such as the Stained Glass background, and a small text stamp from Document It, to stamp here and there and give more unity to the book.

Layers of ink - Scrap Paper Tag Book Tutorial by Anna-Karin Evaldsson.

For the tags with so much texture that they were hard to stamp on, I stamped on either paper and cut into strips or on labels stamped with the Simon Says Stamp Mixed Labels set. I also added some die cut and stamped images that I found in small scrap bags on my desk.

Layers of ink - Scrap Paper Tag Book Tutorial by Anna-Karin Evaldsson.

Some of the stamped images needed a hint of coloring and I used colored pencils combined with markers and a white gel pen for that.

Layers of ink - Scrap Paper Tag Book Tutorial by Anna-Karin Evaldsson.

I glued the tags back to back.

Layers of ink - Scrap Paper Tag Book Tutorial by Anna-Karin Evaldsson.

The tag to the left was left-over from a gel printing session long ago. The paper had been used to make patterns in the paint. On the tag to the right, I created a little scene with the Forest Scenery set.

Layers of ink - Scrap Paper Tag Book Tutorial by Anna-Karin Evaldsson.

The tag to the left is canvas and the flower comes from Laugh In Flowers. On the tag to the right I had dropped the ship stamp on the background, stamping it twice. I covered the messy stamping up with the Design Tape.

Layers of ink - Scrap Paper Tag Book Tutorial by Anna-Karin Evaldsson.

I think I used a white wax crayon to create the resist effect in the water here.

Layers of ink - Scrap Paper Tag Book Tutorial by Anna-Karin Evaldsson.

The tag to the left was another gel print left-over and it was stamped with a sentiment from Document It. On the tag to the right, I stamped the sentiment vertically since it wouldn't have fitted otherwise. The sentiment and butterflies come from Thoughtful Flowers.

Layers of ink - Scrap Paper Tag Book Tutorial by Anna-Karin Evaldsson.

The tag to the left was originally colored with Paper Artsy Color Stains. It was watercolored-stamped with stamps from All Seasons Tree. The stars were die cut with the Stars die.

Layers of ink - Scrap Paper Tag Book Tutorial by Anna-Karin Evaldsson.

Using scraps will guarantee that you get a whole bunch of tags in different colors and patterns for the book. 

Layers of ink - Scrap Paper Tag Book Tutorial by Anna-Karin Evaldsson.

The tag to the left, which is also the cover tag, is a gel print. I stamped it with tone-on-tone flowers from Anna's Flowers, and with the Stained Glass background stamp. The tag to the right is also a left-over from gel printing. I thought you could almost see the globe in the background which is why I added the stamped house and that particular sentiment.

Layers of ink - Scrap Paper Tag Book Tutorial by Anna-Karin Evaldsson.

The dotted border from Mix and Match Circles were stamped on many of the tags, bringing them together.

Layers of ink - Scrap Paper Tag Book Tutorial by Anna-Karin Evaldsson.

The tag to the left was a paper where I had tested different watercolor paints. It was stamped with the crocus from Thoughtful Flowers and colored lightly with colored pencils. The tag to the right was meant to look a bit like a book cover. The ticket label stamp comes from Mixed Labels.

Layers of ink - Scrap Paper Tag Book Tutorial by Anna-Karin Evaldsson.

The flower needed just a little bit of pencil coloring to make it stand out from the background, without covering up the interesting watercolor shapes.

Layers of ink - Scrap Paper Tag Book Tutorial by Anna-Karin Evaldsson.

The tag already had the stars stamped on it. I just added frames and sentiments. The frames were stamped with Simon Says Stamp new pawsitively saturated inks, Royal and Pearfection. The tag to the right was a Distress Oxide experiment and was stamped with the snowdrop from Thoughtful Flowers

Layers of ink - Scrap Paper Tag Book Tutorial by Anna-Karin Evaldsson.

The flower was colored with a white gel pen, while the stem was left uncolored. 

Layers of ink - Scrap Paper Tag Book Tutorial by Anna-Karin Evaldsson.

The tag to the left was originally a stencil experiment, using the Simon Says Stamp Cosmo Flower stencil. You can find the resulting art journal page here and another one here. The tag to the right was stamped with flowers from Thoughtful Flowers and colored with pencils.

Layers of ink - Scrap Paper Tag Book Tutorial by Anna-Karin Evaldsson.

The interesting spots of color in the background comes from Paper Artsy Colored Stains.

Layers of ink - Scrap Paper Tag Book Tutorial by Anna-Karin Evaldsson.

The tag to the left had watercolor paint on it. Flowers from Laugh In Flowers were watercolor-stamped with Distress Ink and the squares were stamped with Simon Says Stamp Royal ink, as were the blue circles on the second tag. The circles come from Mix and Match Circles.

Layers of ink - Scrap Paper Tag Book Tutorial by Anna-Karin Evaldsson.

Look how well the new inks stamp. That paper came from a failed background experiment.

Layers of ink - Scrap Paper Tag Book Tutorial by Anna-Karin Evaldsson.

Here's another forest scene. The Darkroom Door Sitting Dog came from stamping tests when I made this Wonderful Creature tag.

Layers of ink - Scrap Paper Tag Book Tutorial by Anna-Karin Evaldsson.

Adding just a hint of ground under the trees make it look as if they aren't floating in the background. 

Layers of ink - Scrap Paper Tag Book Tutorial by Anna-Karin Evaldsson.

I think the paper to the left was a paper where I stamped off the black ink from the alphabet stamp from Tim Holtz School Desk set. The star had already been die cut from the paper. The deer comes from Forest Scenery. The tag to the right only needed sentiments, script stamping and the circles.

Layers of ink - Scrap Paper Tag Book Tutorial by Anna-Karin Evaldsson.

The tag to the left came from a scrap which had been watercolored, with a Tim Holtz alphabet stenciled using texture paste. I only added words and a label. The tag to the right is the back cover of the tag book and is canvas colored with Paper Artsy Colored Stains.

Layers of ink - Scrap Paper Tag Book Tutorial by Anna-Karin Evaldsson.

This sentiment comes from Simon Says Stamp Beautiful Butterflies.

Layers of ink - Scrap Paper Tag Book Tutorial by Anna-Karin Evaldsson.

I hope you enjoyed this tutorial and that it will help you to look at your scraps in a new way, even those scraps that came from failed experiments or stamping mess-ups.


Thank you so much for taking the time to stop by here today!

Happy crafting!

Anna-Karin

Supplies:

* Please note: the links are affiliate links, for which I receive a small percentage of sales generated by the link, at no extra cost to you.