Showing posts with label Christmas. Show all posts

Wednesday, December 24, 2025

Many Christmas Greetings

Hi friends! Merry Christmas!! I hope you are having a lovely and peaceful time. We finally got slightly colder weather and a dusting of snow, after having had almost completely grey and wet weather during the entire December. 

Please note: this post has affiliate links, for which I receive a small percentage of sales generated by the link, at no extra cost to you.

Layers of ink - Many Christmas Greetings tutorial by Anna-Karin Evaldsson.

I made a tall card with lots of colorful Christmas greetings. You can do this design with non-Christmas sentiments too of course, or repeat the same sentiment many times. The card is about 9.5 in tall. 

White emboss the sentiments.

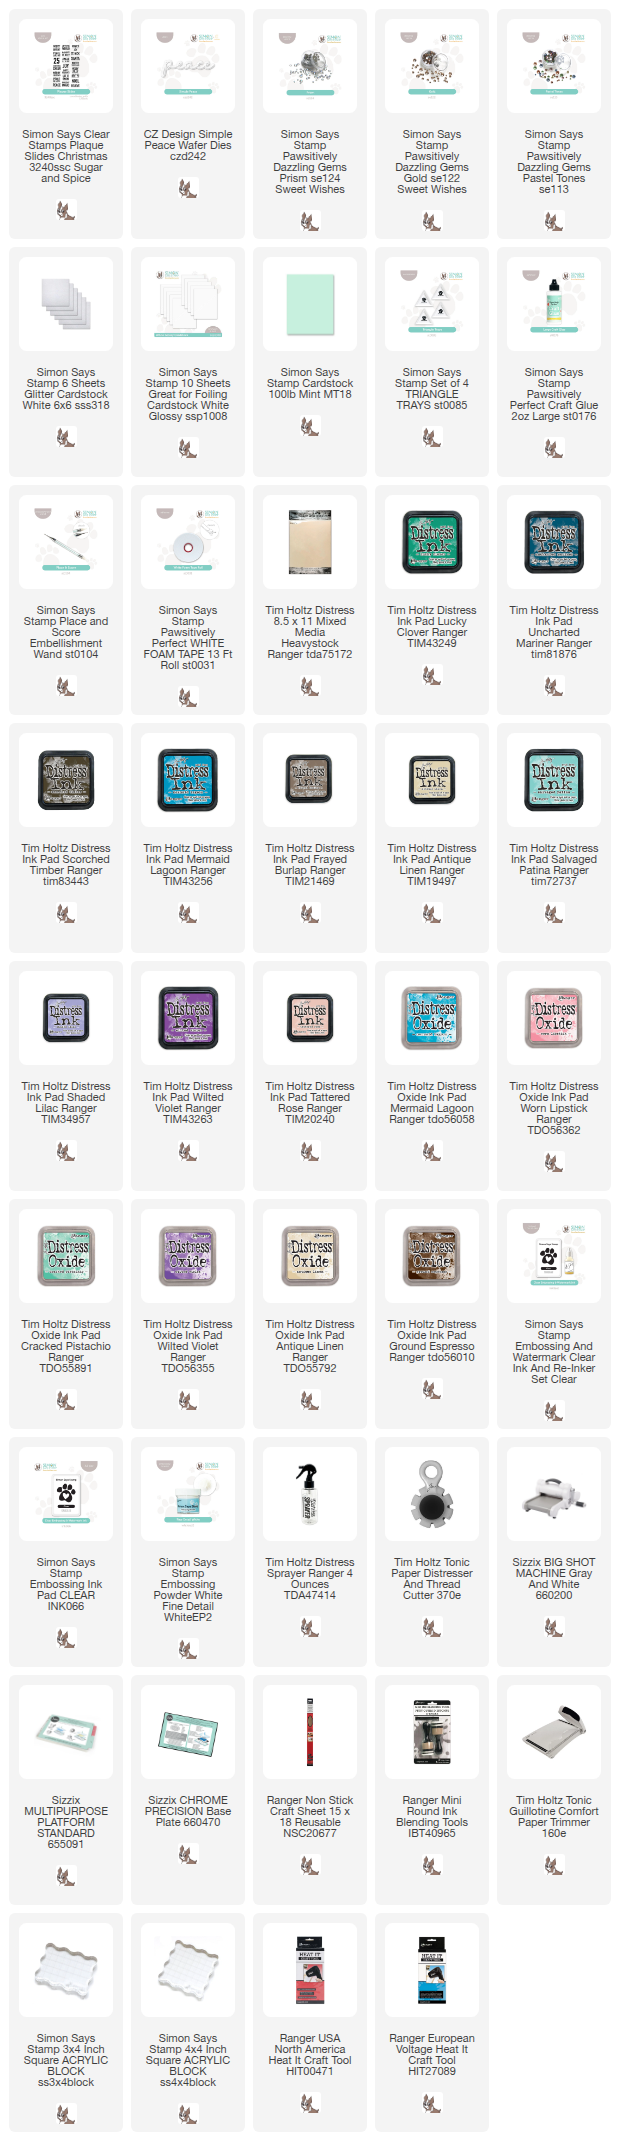
I cut Ranger Heavystock paper into strips and white embossed sentiments from Simon Says Stamp Plaque Slides Christmas on each strip. 

Ink with Distress Ink.

Pick Distress Ink colors, smear on a non-stick craft sheet, mist with water and press the strips into the ink. 

Add more Distress Ink.

Let dry and repeat until you are happy with the look. Add darker shades of ink in the final layers.

Add Distress Oxide Ink.

Repeat with Distress Oxide inks, but this time, just dab the papers into the ink here and there.

Ink and die cut Simon Says Stamp Peace.

Die cut Simon Says Stamp Simple Peace from Simon Says Stamp white glossy cardstock and white glitter cardstock. Ink the gloss cardstock with two shades of Distress Ink.

Cut into squares.

Cut the sentiments into rectangles and plan how you will place them on the background cardstock.


Adhere the squares and distress the edge of the panel. Add Simon Says Stamp Mint cardstock as a mat.


All the inky layers add depth and texture to the sentiment rectangles.

Add Simon Says Stamp Pawsitively Dazzling Gems.

I die cut peace one more time from Simon Says Stamp white glitter cardstock and off-set slightly. Adhere with Pawsitively Perfect Foam tape. I glued three colors of Simon Says Stamp Pawsitively Dazzling Gems under the sentiment.


Use different colors for a different look. Or make all the rectangles the same color.


The sentiments from Simon Says Stamp Plaque Slides Christmas are really great, with a mix of large and small words.

Layers of ink - Many Christmas Greetings tutorial by Anna-Karin Evaldsson.


I hope you enjoyed this post! Merry Christmas!


Thank you so much for visiting today! 

Happy crafting!

Anna-Karin

Supplies:

* Please note: the links are affiliate links, for which I receive a small percentage of sales generated by the link, at no extra cost to you.


Monday, December 22, 2025

Merry Christmas Card

Hello friends! That last Christmas market was yesterday and finally we got some sun here. The first sun in December.

Please note: this post has affiliate links, for which I receive a small percentage of sales generated by the link, at no extra cost to you.


This week we have a Sparkle & Shine theme at the Simon Says Stamp Monday Challenge Blog. This challenge runs for two weeks. I hope you will join us and don't miss the beautiful last project by our December guest designer Carrie Swift.

Layers of ink - Merry Christmas Card by Anna-Karin Evaldsson.

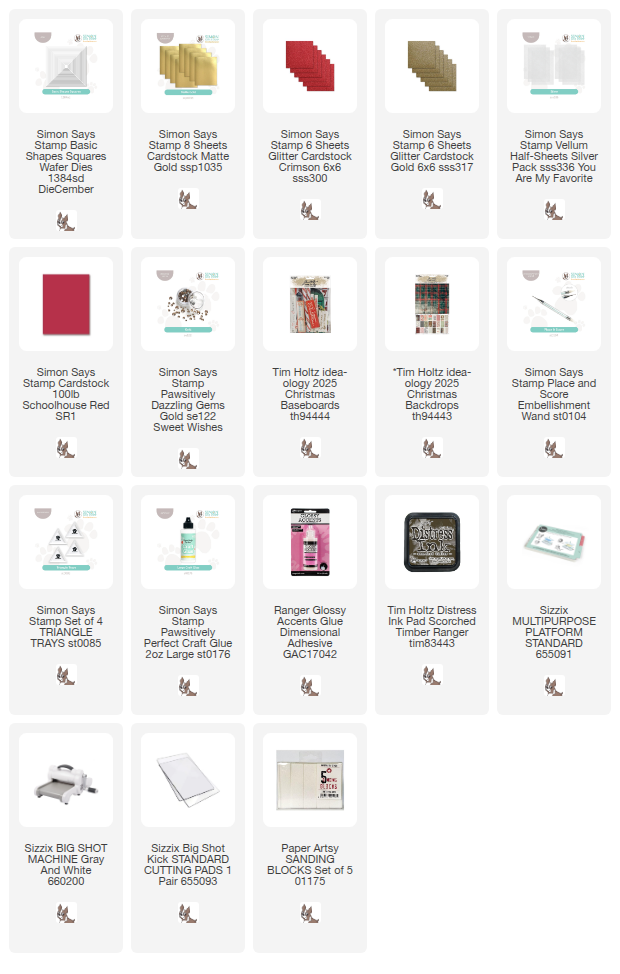
I made a last minute Christmas card using the new Simon Says Stamp Basic Shapes Squares and different types of shiny and glittery papers. I forgot to take step photos of this project, but it is easy and straightforward.

Use Tim Holtz idea-ology Christmas baseboards.

The wreath and sentiment come from Tim Holtz Christmas Baseboards. I sanded the edges and inked the edges of the sentiment. The background paper is from Tim Holtz Christmas Backdrops.

Layer the various papers.

I die cut squares with Simon Says Stamp Basic Shapes Squares. The die set contains 19 square dies in different sizes. Very useful for many types of projects. I turned one of the squares into a frame (the gold glitter one). There is also Simon Says Stamp Silver Vellum, Gold Matte and Crimson and Gold Glitter cardstock.

Add glossy accents and Simon Says Stamp Pawsitively Dazzling gems.

I added Glossy Accents to all the berries and glued Simon Says Stamp Pawsitively Dazzling Gold Gems to the wreath.

Layers of ink - Merry Christmas Card by Anna-Karin Evaldsson.

The card is very shiny, which you can maybe see best on this photo.


Join us this week in our Sparkle and Shine challenge! You have a chance to win a $25 gift voucher to do some fun shopping at Simon Says Stamp. You have until Monday in two weeks time 8am Ohio time. 1pm UK time, 2 pm CET to join in.


Do you use Instagram? If so please add #sssmchallenge so we can see your entries there too.


Thank you so much for visiting today! 

Happy crafting!

Anna-Karin

Supplies:

* Please note: the links are affiliate links, for which I receive a small percentage of sales generated by the link, at no extra cost to you.


Saturday, December 13, 2025

Winter Wonderland

Hi crafters! Today I am happy to have a tutorial on the Simon Says Stamp store blog, for a mixed media winter wonderland. 

It was nice to create a winter project, since the weather here is pretty much the opposite of this project now. Grey and rainy.

Please note: this post has affiliate links, for which I receive a small percentage of sales generated by the link, at no extra cost to you.

Layers of ink - Mixed Media Winter Wonderland tutorial by Anna-Karin Evaldsson.

I had a wooden piece at home and decided to turn it into winter / Christmas décor. You can make a card instead, or do the techniques on a canvas. My piece of wood is 3.8×8.2 in. I used dies from Simon Says Stamp And Everything Nice and DieCember® releases, combined with paint, media and glitter. 

The cute snowmen were made with Simon Says Stamp Jolly Snowmen Embossing Folder and Cutting Dies.

You can see the full project, tutorial and all the details on the Simon Says Stamp store blog. 


Thank you so much for visiting today! 

Happy crafting!

Anna-Karin


Monday, December 8, 2025

Altered Christmas Gift Box

Hello crafters! We are still waiting for winter weather here, after another grey weekend. 

Please note: this post has affiliate links, for which I receive a small percentage of sales generated by the link, at no extra cost to you.


This week we have a Wrap It Up theme at the Simon Says Stamp Monday Challenge Blog. I hope you will join us and don't miss the beautiful project by our December guest designer Carrie Swift.

Simon Says Stamp DieCember

The new DieCember® release is filled with dies, stamps and other great new products. 

Layers of ink - Altered Christmas Gift Box Tutorial by Anna-Karin Evaldsson.

I had a gift box which I got sometime ago, with I believe chocolates inside and decided to alter it into a Christmas gift box. It had a nice floral pattern on the lid, that I didn't want to cover up. I used patterned paper to alter the box, and gesso and paint for the lid. There are sentiments stamped on each side.


This was the original box.

Coat with gesso and glue patterned paper to the box.

I covered the sides of the box with a pretty Poinsettia paper from Tim Holtz Christmas Backdrops and added another piece of backdrops paper to the base. I kept the part that the lid would cover as it was, since it was a tight fit and I was afraid that the box would be difficult to open otherwise. The lid was painted with gesso. 

Paint with Distress Paint.

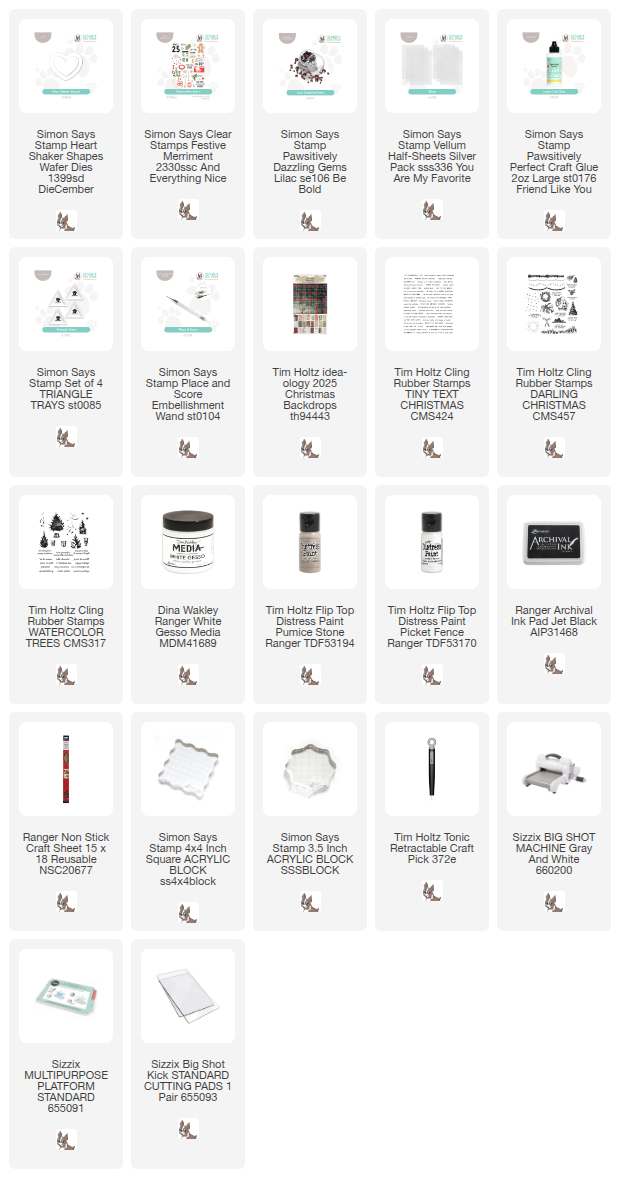
Paint the lid with Picket Fence and then dry brush Pumice Stone, especially on the floral design and the edges.

Stamp with Simon Says Stamp Festive Merriment.

I used a mix of stamps for my sentiments. Many of them come from Simon Says Stamp Festive Merriment. 

Die cut hearts with Simon Says Stamp Shaker Hearts.

Die cut three hearts using Simon Says Stamp Heart Shaker Shapes from the new DieCember® release. One was die cut from a Christmas Backdrops paper and two from Simon Says Stamp Silver Vellum. Fold in the middle and shape.


The lid already had a hole at the top and a ribbon pull. I pierced a hole through the hearts and used the original ribbon. The lid was stamped with two sentiments and I also added Simon Says Stamp Pawsitively Dazzling Lilac Gems. The sentiment at the top comes from Tim Holtz Darling Christmas and the one at the bottom from Tiny Text Christmas.

Assemble the heart.

The vellum hearts gives a nice hint of shimmer.


I positioned the heart die so that I would get a section of the paper that I liked. I used this same paper for my December Journal.

Wrap with ribbons.

Tie ribbons around the bottom of the box. The sentiment on the lid comes from Simon Says Stamp Festive Merriment and the one on the box from Tim Holtz Watercolor Trees.

Altered Christmas Gift Box by Layers of ink.

Each side of the lid and of the box has a different sentiment.


Silent Night comes from Tim Holtz Tiny Text Christmas.


Dry brushing paint on an embossed design, makes the design stand out better.


I sanded the edges of the papers after gluing them to the box.


The patterned paper at the bottom finishes the design, while also covering up the text that was printed there.


Join us this week in our Wrap It Up challenge! You have a chance to win a $25 gift voucher to do some fun shopping at Simon Says Stamp. You have until Monday 8am Ohio time. 1pm UK time, 2 pm CET to join in.


Do you use Instagram? If so please add #sssmchallenge so we can see your entries there too.


Thank you so much for visiting today! 

Happy crafting!

Anna-Karin

Supplies:

* Please note: the links are affiliate links, for which I receive a small percentage of sales generated by the link, at no extra cost to you.