Showing posts with label gel printing. Show all posts

Friday, July 31, 2026

Bicycle Notebook

Hello crafters! I really enjoy making notebooks / sketchbooks and other types of mini books, Today, I have a notebook to share made from a gel printed sheet of paper.

Please note: this post has affiliate links, for which I receive a small percentage of sales generated by the link, at no extra cost to you.

Layers of ink - Bicycle Notebook gel printing tutorial by Anna-Karin Evaldsson.

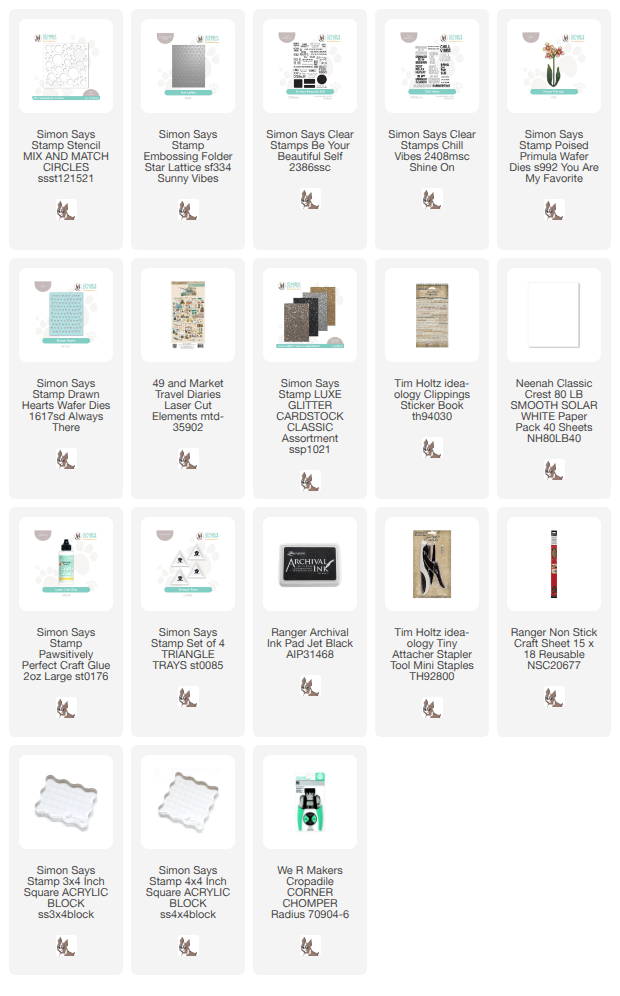
I stitched around the edges and along the spine. The notebook has a travel theme and I added 49 and Market Travel Diaries laser cut images and stamped sentiments from Simon Says Stamp Be Your Beautiful Self which fitted the theme. 

The best thing with making your own notebooks/sketchbooks is that you can use your favorite paper for the inside. Here I used a thin dotted notebook paper.


This is the paper that I started out with, from a recent gel printing session. The printing was done with Simon Says Stamp Mix and Match Circles stencil and Star Lattice embossing folder. 

Stamp with Simon Says Stamp Be Your Beautiful Self.


Stitch around the edges.

Stitch around the edges of the cover. Cut papers for the inside, fold and score. Round the corners. Stitch along the spine with a sewing machine. 


I added a few hearts die cut with Simon Says Stamp Drawn Hearts from Luxe Glitter sheets.
 

The ticket was folded and stapled to the cover. I added a Tim Holtz Clippings Stickers to the ticket. The paper planes come from 49 and Market Travel Diaries Laser Cuts. 


I used more Clippings Stickers and also elements from the Travel Diaries Laser Cut set. 

Add Travel Diaries ephemera by 49 and Market.

I love bicycles and the whole book was inspired by this bicycle from Travel Diaries. 'Live Your Story' from Simon Says Stamp Be Your Beautiful Self was the perfect length for the cover.


I added tiny flowers to the basket. They are the inside part of flowers from Simon Says Stamp Poised Primula.


The back cover was left plain. The original print didn't cover the entire page, but that was okay since I placed that part on the back cover.

Layers of ink - Bicycle Notebook gel printing tutorial by Anna-Karin Evaldsson.

I hope you enjoyed this tutorial and that it inspired you to make your own notebooks. They are also great as gifts. 


Happy crafting!

Anna-Karin

Supplies:

* Please note: the links are affiliate links, for which I receive a small percentage of sales generated by the link, at no extra cost to you.


Monday, July 27, 2026

Adventure Card

 Hi friends! It is Monday again and I hope you had a fun weekend. 

Please note: this post has affiliate links, for which I receive a small percentage of sales generated by the link, at no extra cost to you.


This week we have a Stitch It theme at the Simon Says Stamp Monday Challenge Blog. Don't miss the last project by our July guest designer Rox aka Red Dirt Crafter.

Layers of ink - Fly Adventure Card by Anna-Karin Evaldsson.

I made a card with messy stitching around the edges of the focal panel, which is a quick way of adding interest. The card was made with an embossed paper that I made for my last gel printing session. I also added some ephemera from 49 & Market and stamped and die cut sentiments.

Emboss in Simon Says Stamp hearts folder.

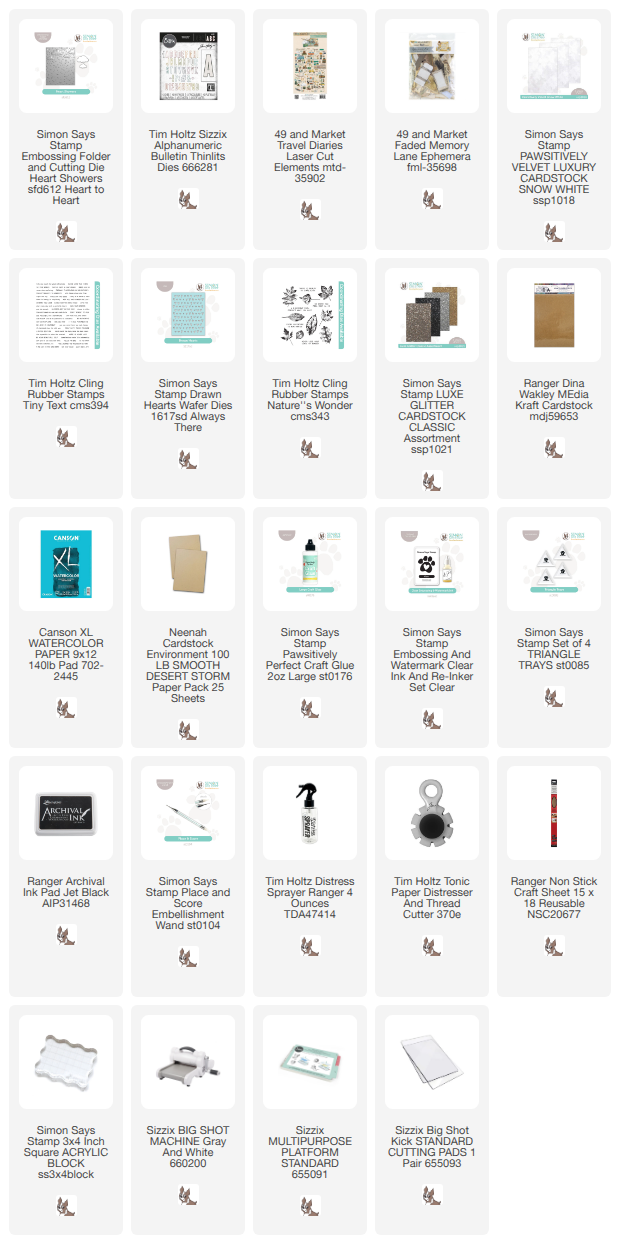
The paper was embossed with Simon Says Stamp Heart Showers, which is such a lovely die. I used in for gel printing and then liked the embossed background so much that I decided to use it for a card. The coordinating clouds were die cut from Simon Says Stamp Pawsitively Velvet Luxury Cardstock Snow. 

Die cut title with Tim Holtz Alphanumeric Bulletin.

The large letters were die cut with Tim Holtz Sizzix Alphanumeric Bulletin letters. I die cut from a piece of 49 & Market Faded Memory Lane Ephemera and from brown cardstock.


The airplane comes from 49 and Market Travel Diaries Laser Cut Elements. The edges were sanded. 


Emboss the edges and stitch around them. The little hearts were die cut with Simon Says Stamp Drawn Hearts from Luxe Glitter. 


I added an additional sentiment stamped with Tim Holtz Nature's Wonder.

Layers of ink - Fly Adventure Card by Anna-Karin Evaldsson.

Stitching is fun and a great way to add a border.


Join us this week in our Stitch It challenge! You have a chance to win a $25 gift voucher to do some fun shopping at Simon Says Stamp. You have until Monday 8am Ohio time. 1pm UK time, 2 pm CET to join in.


Do you use Instagram? If so please add #sssmchallenge so we can see your entries there too.


Thank you so much for visiting today! 

Happy crafting!

Anna-Karin

Supplies:

* Please note: the links are affiliate links, for which I receive a small percentage of sales generated by the link, at no extra cost to you.


Saturday, July 18, 2026

Embossed Gel Print

Hello crafters! Today I have an art journal page to share with a fun gel printing and dry embossing technique. 

Please note: this post has affiliate links, for which I receive a small percentage of sales generated by the link, at no extra cost to you.

Layers of ink - Embossed gel printed page tutorial by Anna-Karin Evaldsson.

I made a page in my Small Creative Journal, but you can also turn the design into a card. I had a gel printing session last week, printing mainly with dry embossed papers and today I used some of those printed papers. I particularly had fun dry embossing and then coloring one of the designs. 

Make the gel print.

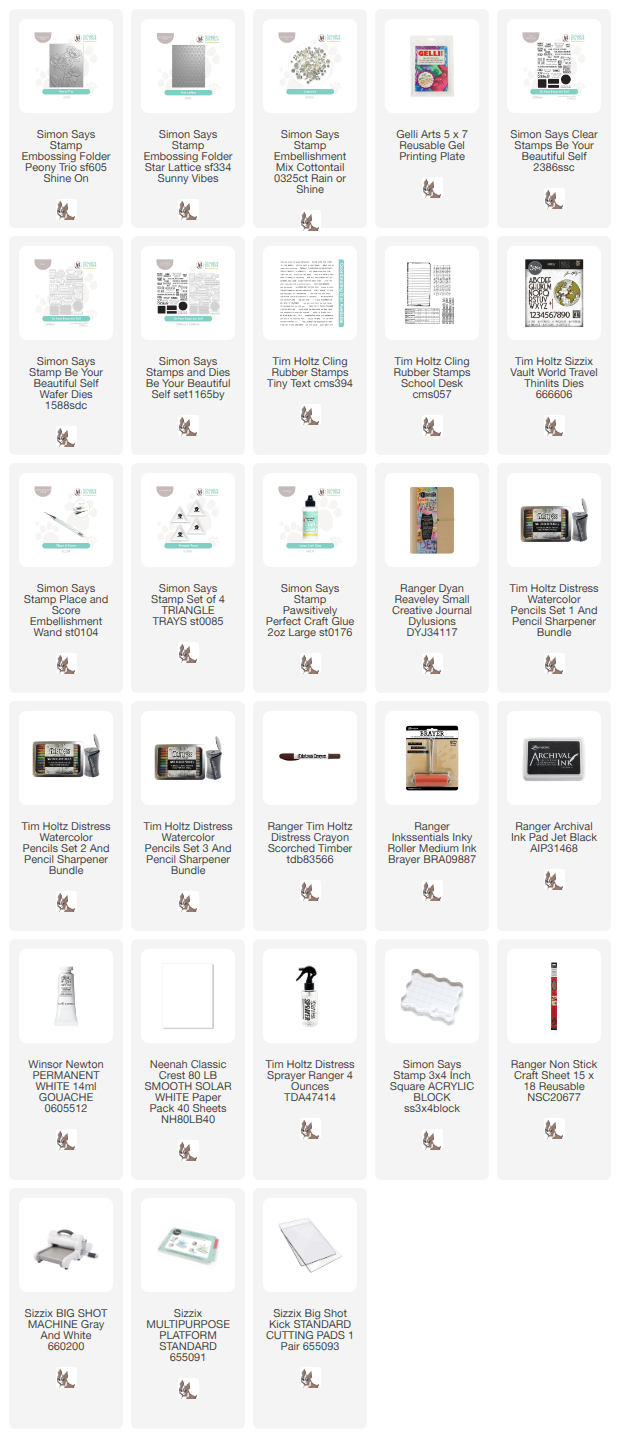
This is the paper I started with. It was gel printed on Gelli Arts 5x7 Gel Printing Plate using a paper embossed in Simon Says Stamp Peony Trio embossing folder. The folder comes from the new Shine On release. The smaller flowers were printed with a paper embossed in Simon Says Stamp Star Lattice folder.

Make print with Simon Says Stamp Peony Trio.

I made four different prints using this dry embossed paper, as well as some other embossing folders. 

Emboss in Simon Says Stamp Peony Trio.

I planned to color directly on to the print, but then I looked at the embossing folder and thought it would be fun to dry emboss the design first. Line it up in the folder and emboss. This brings the design forward and adds interest.

Color with Distress Watercolor Pencils.

I colored with flowers with Distress Watercolor Pencils, picking the color up with a paint brush from the tip of the pencils.

Splatter.

Next. I splattered with Antique Linen and Scorched Timber pencils. Dipp the pencil in water and flick a paint brush against it. 

Splatter with white gouache.

I also splattered the page with Winsor & Newton Permanent White gouache. 

Stamp with Tim Holtz School Desk.

I added just a little bit of stamping with the alphabet stamp from Tim Holtz School Desk. 


Two of the sentiments were stamped on another gel printed paper with Simon Says Stamp Be Your Beautiful Self and die cut with the coordinating dies.

Stamp with Tim Holtz Tiny Text.

The third sentiment comes from Tim Holtz Tiny Text. I also added Simon Says Stamp Cottontail sequins. 


The gel printing is to some extent unpredictable, which adds interest to the flowers.

Stamp with Simon Says Stamp Be Your Beautiful Self.

The title was die cut with Tim Holtz Sizzix Vault World Travel from another piece of gel printed paper.


Leave some of the paper showing, for highlights.


Each flower looks different because of the printing.


The top flower was the faintest and the dry embossing helped to bring it out from the background.

Layers of ink - art journal spread.

I rounded the outer corners and adhered the page into my Small Creative Journal. You can find the tutorial for the page to the right here on the Simon Says Stamp store blog.


Happy crafting!

Anna-Karin

Supplies:

* Please note: the links are affiliate links, for which I receive a small percentage of sales generated by the link, at no extra cost to you.


Monday, July 13, 2026

Gel Printed Dragonfly Page

Hello friends! It is Monday again and I hope you had a great weekend. I had fun crafting and walking this weekend.

Please note: this post has affiliate links, for which I receive a small percentage of sales generated by the link, at no extra cost to you.


This week we have a Play with Paint theme at the Simon Says Stamp Monday Challenge Blog. Fun! Any paint will do: acrylic, watercolor, and so on. Don't miss the project by our July guest Rox aka Red Dirt Crafter.

Layers of ink - Gel Printed Dragonfly Page tutorial by Anna-Karin Evaldsson.

It has been a very long time since I did gel printing so I decided to play with acrylic paint and made a whole lot of gel printed backgrounds. I had fun and created lots of papers for future projects. It is hard to stop! I used three of the printed papers for this art journal page, done in my Dylusions Small Creative Journal.

Gelli Arts gel printing plate.


Emboss papers.

Before printing, I embossed watercolor paper with various Simon Says Stamp Embossing Folders, since that is one of my favorite techniques of adding texture and patterns while gel printing. I forgot to include some of the papers here.

Print the papers on the gel printing plate.

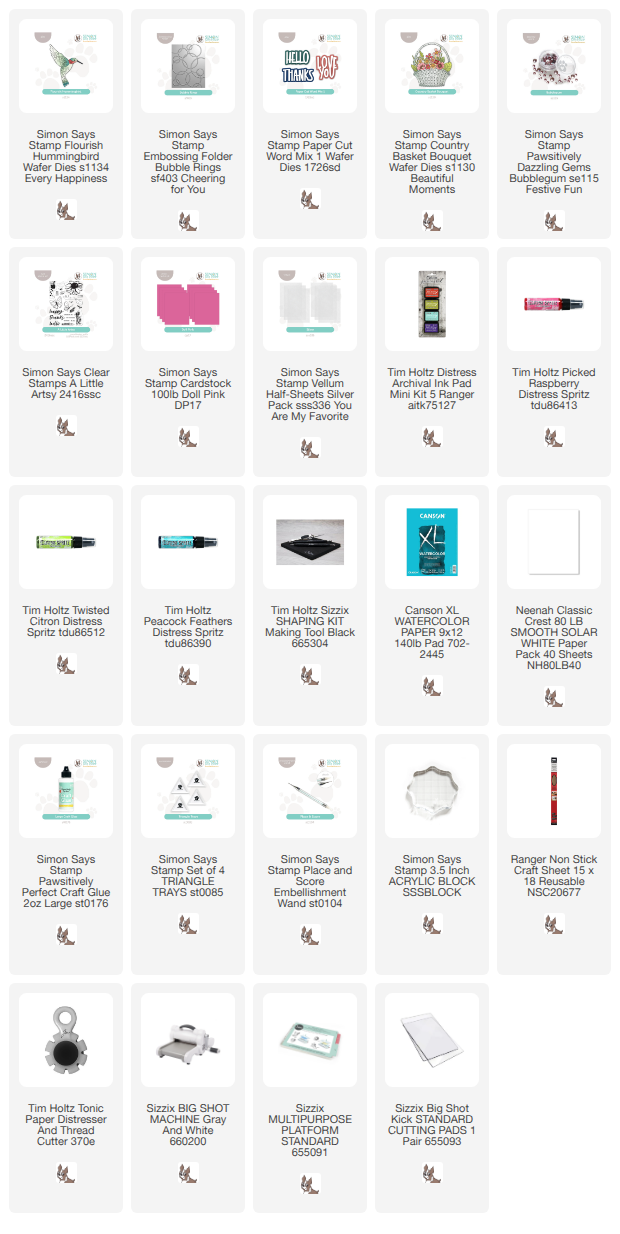
Brayer acrylic paint on the plate, and press the embossed papers into the paint. Repeat with different colors and combine different folders. I used a couple of stencils too namely: Simon Says Stamp Mix and Match Circles and Dot Petal Pattern. 


These are just some of the papers, I made a lot more. 


I had a hard time picking which papers to use and ended up with these two and later an additional paper. Embossing folders used here were Simon Says Stamp Stitching Sampler, Swirled Ridges, Butterfly Burst, Bubble Rings and Everlasting Flowers.

Stamp images on printed paper.

I stamped the dragonfly from Stamper's Anonymous Classics #1 on another gel printed paper, where you can for example see the Simon Says Stamp Star Lattice folder in the background. A small dragonfly from Simon Says Stamp Loving Thoughts was also stamped on the paper.

Die cut Tim Holtz Bulletin.

The title was die cut from the paper with the butterflies and the rings, using Sizzix Tim Holtz Alphanumeric Bulletin letters. I also die cut them from Simon Says Stamp Holographic cardstock. As you can see, the wrong die set ended up in this photo: Tim Holtz Sizzix Picture Show, which was used to die cut the film strip.

Stamp with Tim Holtz School Desk.

The background was stamped with sentiments from Stamper's Anonymous Classics #5 and Tim Holtz Simple Sayings, as well as with my favorite alphabet stamp from Tim Holtz School Desk.


I die cut the film strip from Simon Says Stamp Acetate and colored with alcohol ink: Teakwood and Pitch Black. Paper Hugs comes from Simon Says Stamp Love Letter.


One of my favorite sentiments.

Gel printed letters.

The Bulletin Letters are large and with a thin outline, which gives them so many possible uses. You can also use the outline on its own. 

Die cut using Tim Holtz Picture Show.

I stamped small words and numbers from Simon Says Stamp Big Botanicals and Tim Holtz Correspondence in the openings of the film strip. The sequins are Simon Says Stamp Cream Puffs.

Add Stickles.

I added a little Stickles Star Dust to the dragonflies.

Layers of ink - Art journal pages.


Join us this week in our Play with Paint challenge! You have a chance to win a $25 gift voucher to do some fun shopping at Simon Says Stamp. You have until Monday 8am Ohio time. 1pm UK time, 2 pm CET to join in.


Do you use Instagram? If so please add #sssmchallenge so we can see your entries there too.


Thank you so much for visiting today! 

Happy crafting!

Anna-Karin

Supplies:

* Please note: the links are affiliate links, for which I receive a small percentage of sales generated by the link, at no extra cost to you.