Showing posts with label Clear card. Show all posts

Wednesday, June 24, 2026

Mouse Card Tutorial

Hi crafters! Today I have a cute card to share with you, with an acetate cardbase and see-through elements.

Please note: this post has affiliate links, for which I receive a small percentage of sales generated by the link, at no extra cost to you.

Layers of ink - Mouse Card Tutorial by Anna-Karin Evaldsson.

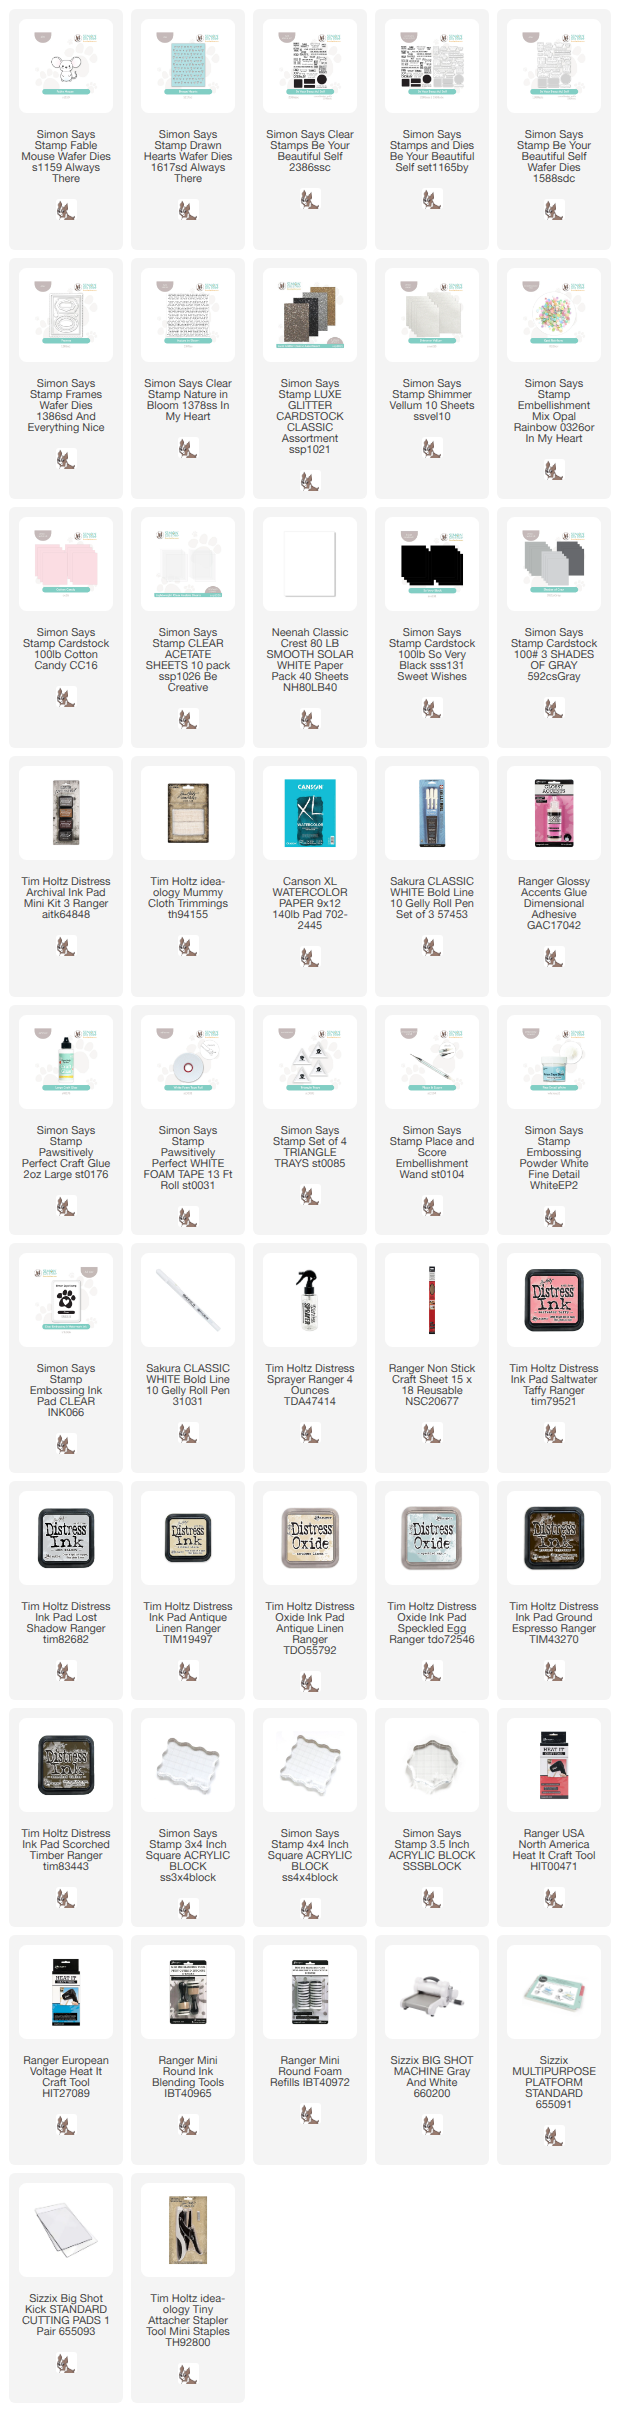
The background has a whole lot of small die cut hearts and was placed on folded acetate, so that you can see through the hearts. Cards with clear elements are such fun to make and a surprise to receive. I used a mix of products by Simon Says Stamp, such as the Drawn Hearts and the very cute Fable Mouse. 

White emboss the text.

White emboss Simon Says Stamp Nature in Bloom on an inky piece of watercolor paper. The paper had been inked with a mix of Distress Ink and Distress Oxide Ink, by first smearing the inks on a non-stick craft sheet, misting with water and pressing the paper into the ink. 

Die cut with Simon Says Stamp Drawn Hearts.

Die cut Simon Says Stamp Drawn Hearts from the background.

Ink the edges.

Ink the edges with two shades of brown Distress Ink.


Adhere to a folded piece of Simon Says Stamp Acetate Sheet. 

Die cut hearts with Simon Says Stamp Drawn Hearts.

Die cut the Drawn Hearts again, but this time from Simon Says Stamp Champagne Luxe Glitter Cardstock. Keep the small hearts in the die and glue some of them on the background. It is easier to pick the right heart if you leave them in the die, since the hearts are different from each other.

Die Simon Says Stamp Frames.

Die cut a frame using Simon Says Stamp Frames from Simon Says Stamp Shimmer Vellum and from heavystock cardstock. Ink the thin frame with brown Distress Ink.

Die cut Simon Says Stamp Fable Mouse.

Die cut Simon Says Stamp Fable Mouse from white Neenah cardstock and from Simon Says Stamp Cotton Candy and black cardstock. Ink the white pieces with Distress Ink.


Glue the mouse together and die cut again from black cardstock. Add a dot to the eyes with a white gel pen.


Adhere to the background with foam tape and add a little cheese cloth underneath.


The sentiments were stamped with Hickory Smoke Archival Ink using Simon Says Stamp Be Your Beautiful Self stamp set. Die cut with the coordinating die and then one more time from grey cardstock. The sequins are from Simon Says Stamp Opal Rainbow.


The Luxe Glitter hearts are very pretty and shiny. You might have noticed that I used them on Monday's At the Beach Mixed Media piece too. 


I also added two pieces of ribbon to the card, with mini staples. 

Layers of ink - Mouse Card Tutorial by Anna-Karin Evaldsson.

Acetate cards are always a challenge to photograph. Here you can see that the hearts shine through the vellum if the light hits the card in a certain way.

Layers of ink - Mouse Card Tutorial by Anna-Karin Evaldsson.

On a white background, the card will get a different look. 


Happy crafting!

Anna-Karin

Supplies:

* Please note: the links are affiliate links, for which I receive a small percentage of sales generated by the link, at no extra cost to you.


Friday, August 30, 2024

Clear Acetate Card Tutorial

Hi friends! Today I have a clear card to share with an alcohol ink background and dimensional paper flowers.

Please note: this post has affiliate links, for which I receive a small percentage of sales generated by the link, at no extra cost to you.

Layers of ink - Blue Peonies and Alcohol Ink Background by Anna-Karin Evaldsson.

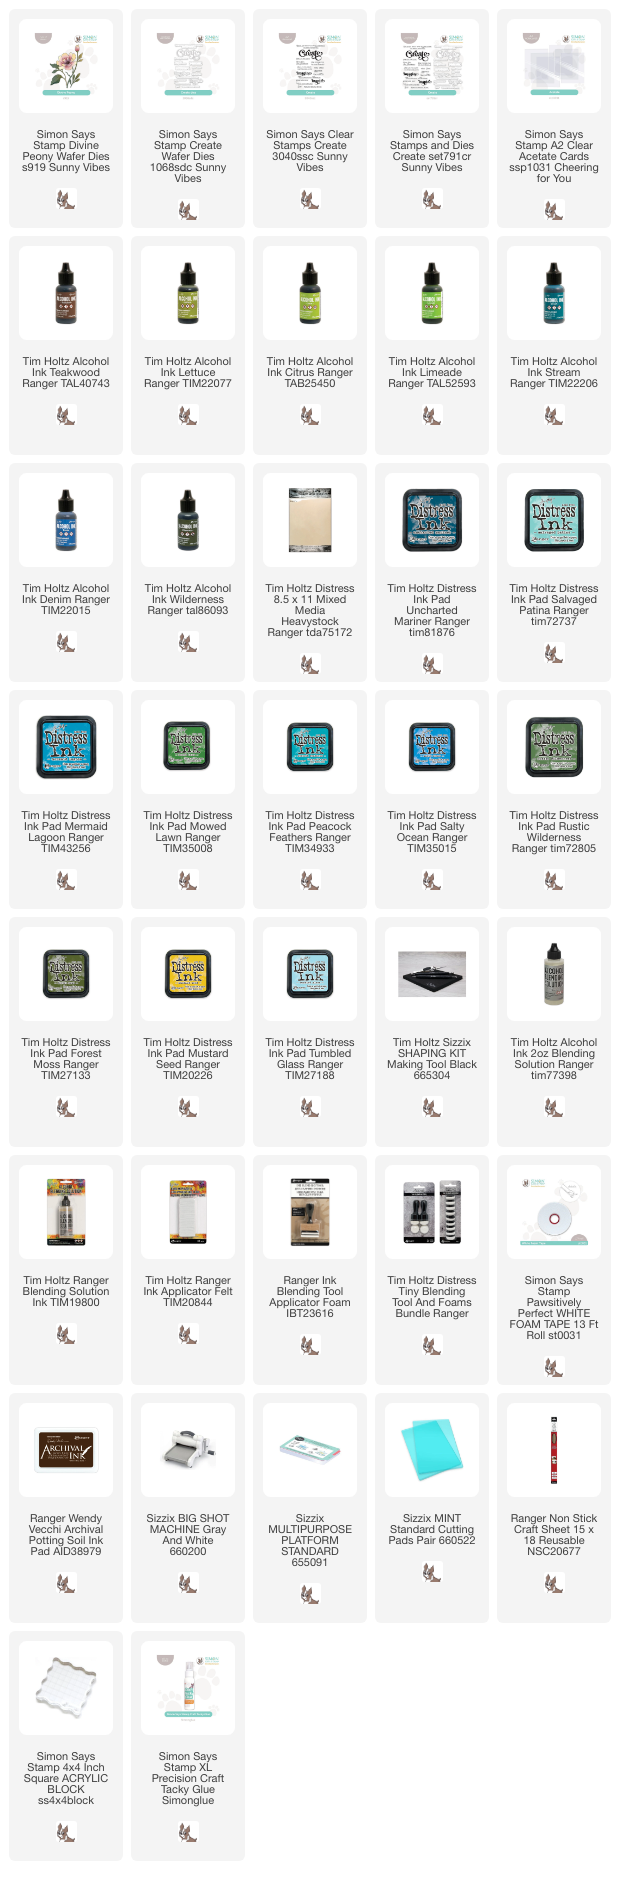
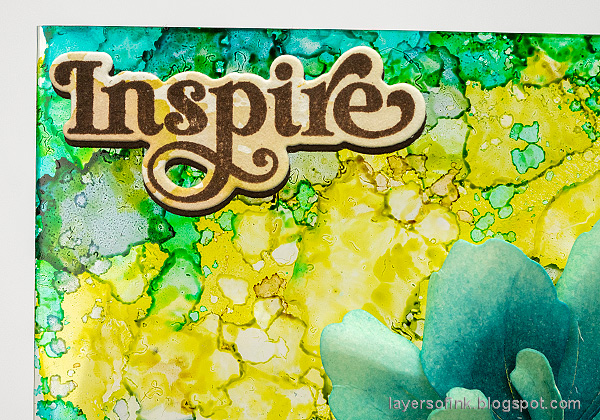
I really like to make cards from acetate. You can make them more or less transparent by adding various media and stamping. Here I colored the card front with alcohol ink, aiming for textures. The flowers were die cut with Simon Says Stamp Divine Peony from the Sunny Vibes release, and inked with Distress Ink.

Layers of ink - Blue Peonies and Alcohol Ink Background by Anna-Karin Evaldsson. Die cut Simon Says Stamp Divine Peony.

Start by die cutting the Divine Peony from heavystock paper. Later, I die cut it one more time.

Layers of ink - Blue Peonies and Alcohol Ink Background by Anna-Karin Evaldsson. Ink with Distress Ink.

Ink with Distress Ink using a Tiny Ink-blending tool.

Layers of ink - Blue Peonies and Alcohol Ink Background by Anna-Karin Evaldsson. Shape the flowers.

Shape with Tim Holtz Shaping kit, to add dimension.

Layers of ink - Blue Peonies and Alcohol Ink Background by Anna-Karin Evaldsson. Assemble the flowers.

Glue the flowers with Simon Says Stamp craft glue. 

Layers of ink - Blue Peonies and Alcohol Ink Background by Anna-Karin Evaldsson. Color acetate with alcohol ink.

Color the Simon Says Stamp Acetate Card with alcohol ink. Dabb on different colors ink with a felt ink-blending tool. To add even more texture, dabb alcohol ink blending solution on the background too.

Layers of ink - Blue Peonies and Alcohol Ink Background by Anna-Karin Evaldsson.

The sentiment was stamped with Simon Says Stamp Create stamp set and die cut with the coordinating Create dies. Die cut it once more from dark brown cardstock for a shadow.

Layers of ink - Blue Peonies and Alcohol Ink Background by Anna-Karin Evaldsson.


Layers of ink - Blue Peonies and Alcohol Ink Background by Anna-Karin Evaldsson.

I like that the Divine Peony set also includes a flower bud.

Layers of ink - Blue Peonies and Alcohol Ink Background by Anna-Karin Evaldsson. Paper flower.

I made one of the flowers mainly blue and the other turquoise.

Layers of ink - Blue Peonies and Alcohol Ink Background by Anna-Karin Evaldsson.

This sentiment also comes from Simon Says Stamp Create and was die cut with the coordinating die. I also added some fibers to the card, as soil. I have had these for a very long time.

Layers of ink - Blue Peonies and Alcohol Ink Background by Anna-Karin Evaldsson.

The card has quite a bit of dimension. The back is entirely clear, but you can add a piece of cardstock to it to write a message.

Layers of ink - Blue Peonies and Alcohol Ink Background by Anna-Karin Evaldsson.

It is hard to photograph clear cards. Here you can see that the card is transparent. 


Thank you so much for stopping by here today! 


Anna-Karin

Supplies:

* Please note: the links are affiliate links, for which I receive a small percentage of sales generated by the link, at no extra cost to you.


Monday, July 24, 2023

Clear Floral Card

 Hello crafters! It is Monday and I hope you had a good weekend. 

Please note: this post has affiliate links, for which I receive a small percentage of sales generated by the link, at no extra cost to you.


This week our theme at the Simon Says Stamp Monday Challenge Blog is We can see clearly now. Fun! I love to use clear elements on projects the the clear Lego pieces were always my favorites (and still are). Don't miss the lovely project by our July guest designer Natasha Vacca aka Natasha's Colorful Creations.

Layers of ink - Clear Floral Card by Anna-Karin Evaldsson.

I have always enjoyed clear cards and thought it was time to make a new one. A fun thing with clear cards is that you can do layering in a different way, since you will see all the layers from the front of the card. I used a tag on the inside of the card, both as a space for a message, but also since it looked nice as a backdrop to the idea-ology Transparent Layer that I used on the front. 

Layers of ink - Clear Floral Card by Anna-Karin Evaldsson. Die cut Tim Holtz Framed Tags.

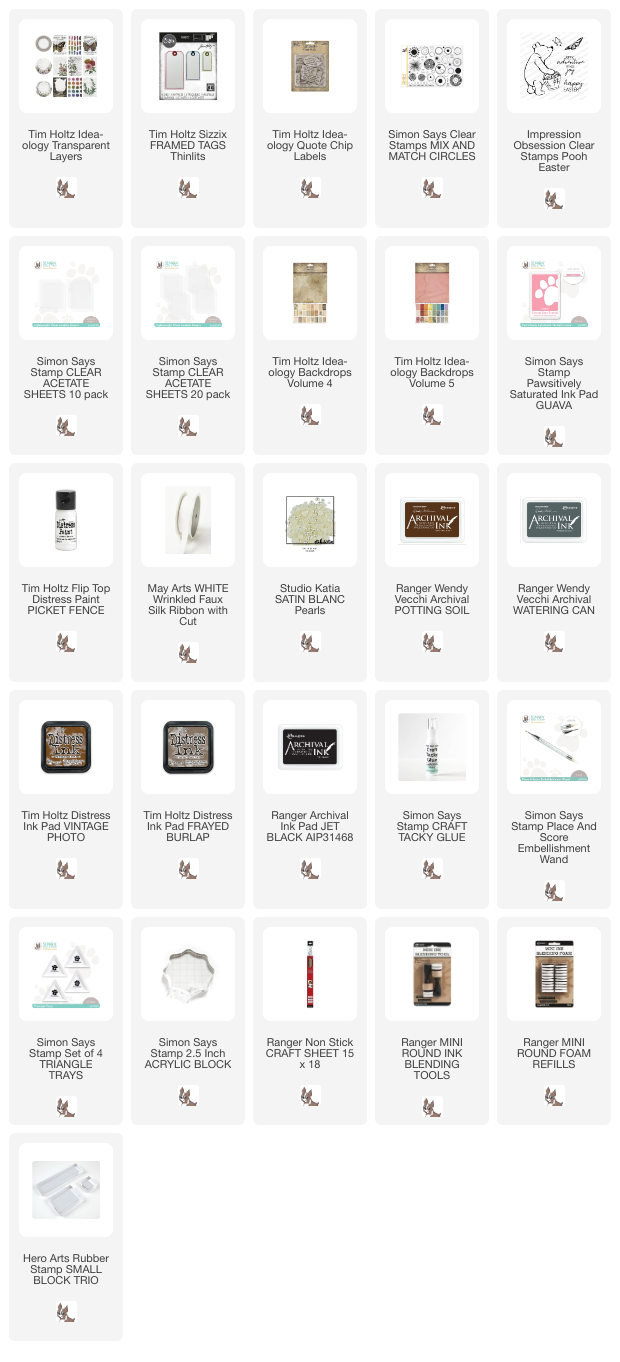
The tag was die cut from a Tim Holtz Backdrops Vol. 4 paper, using the Framed Tags set and Watering Can ink.

Layers of ink - Clear Floral Card by Anna-Karin Evaldsson.

I stamped the circles with brown and pink ink, using Simon Says Stamp Mix and Match Circles.

Layers of ink - Clear Floral Card by Anna-Karin Evaldsson.

For the main sentiment I used a Quote Chip Label and glued it to the front. White paint was applied around the Transparent Layer to create a frame. It was then stapled to a folded Simon Says Stamp Clear Acetate Sheet.

Layers of ink - Clear Floral Card by Anna-Karin Evaldsson.

On the tag, I added lace and a little cheese cloth. It also created space between the tag and the clear front, adding dimension.

Layers of ink - Clear Floral Card by Anna-Karin Evaldsson.

The ribbon was dyed with a little Frayed Burlap.

Layers of ink - Clear card

I also stamped a sentiment on the back of the tag, visible if you turn the card around.

Layers of ink - Clear Floral Card by Anna-Karin Evaldsson.

Clear cards are a challenge to photograph because of the reflections.

I hope you will join us this week in our We can see clearly now challenge. You have a chance to win a $25 gift voucher to do some fun shopping at Simon Says Stamp. You have until Monday 8am Ohio time. 1pm UK time, 2 pm CET to join in.


Do you use Instagram? If so please add #sssmchallenge so we can see your entries there too.


Thank you so much for stopping by here today!

Happy crafting!

Anna-Karin

Supplies:

* Please note: the links are affiliate links, for which I receive a small percentage of sales generated by the link, at no extra cost to you.


Tuesday, August 24, 2021

Embossed Shaker Card Tutorial

Hi friends! Today I have a fun shaker card to share with you, using both dry embossing and stitching, for a different look.

Please note: this post has affiliate links, for which I receive a small percentage of sales generated by the link, at no extra cost to you.
Layers of ink - Dry Embossed Shaker Card Tutorial by Anna-Karin Evaldsson.

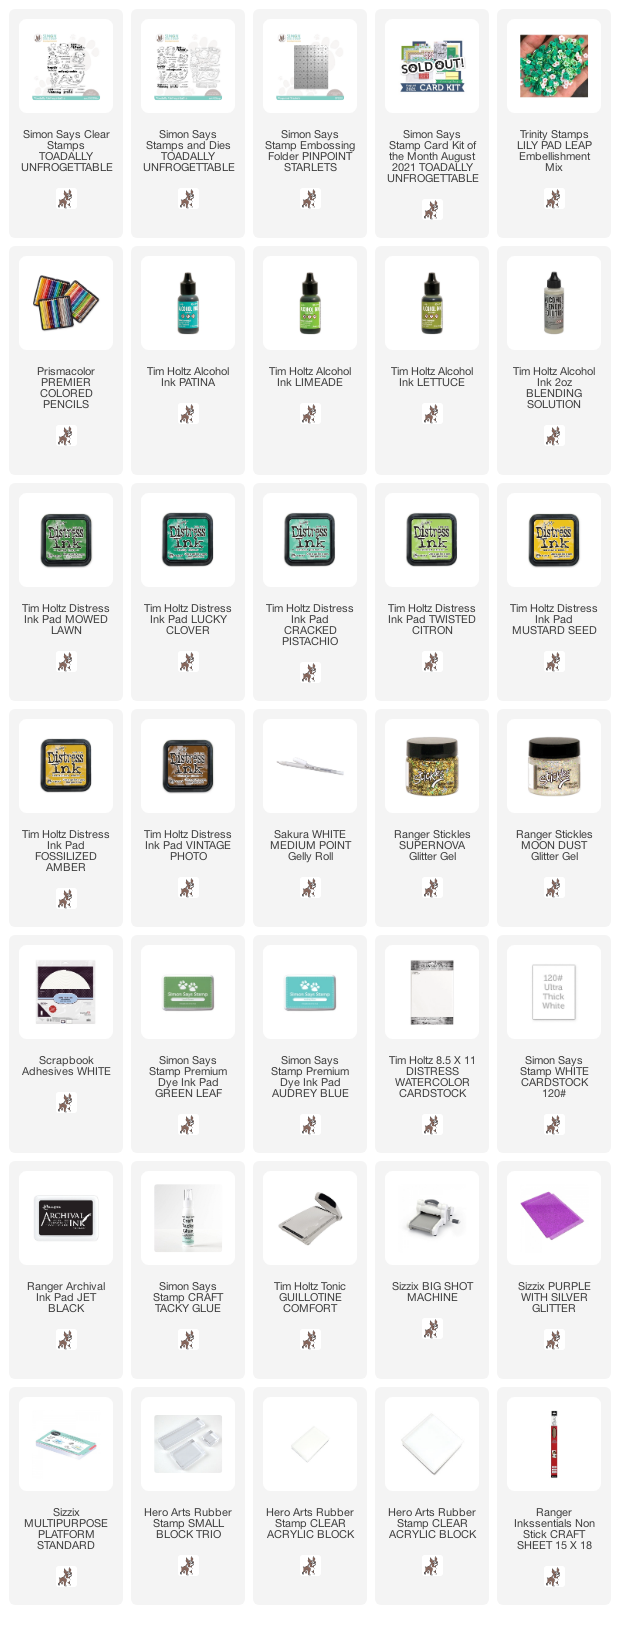
It's been quiet here on the blog lately, since I was very busy packing, moving and unpacking, but now things are starting to settle down. I was in the mood for a fun card and the Simon Says Stamp Toadally Unfrogettable Card Kit was perfect for that. The kit is sold out, but you can still get the parts separately.

Layers of ink - Dry Embossed Shaker Card Tutorial by Anna-Karin Evaldsson. Dry emboss the acetate.

I love the look of dry embossed acetate. The sheet in the kit was folded in half and I embossed the front with the Pinpoint Starlets folder. Acetate embosses differently and it also depends on how detailed the folder is. 

Layers of ink - Dry Embossed Shaker Card Tutorial by Anna-Karin Evaldsson. Color with alcohol inks.

I smooched alcohol ink between the two layers and then added more ink and some drops of blending solution.

Layers of ink - Dry Embossed Shaker Card Tutorial by Anna-Karin Evaldsson.

At the end, I dropped Patina ink in a few areas, to create lily pad leaves.

Layers of ink - Dry Embossed Shaker Card Tutorial by Anna-Karin Evaldsson.

Trinity Stamps very cute Lily Pad Leap embellishment mix was placed in two areas in between the folded acetate sheet. I folded a card base and then stitched the acetate to the front, being careful not to stitch on top of the little embellishments. The embossing folder had a stitched look to it, which I thought worked well with the machine stitching.

Layers of ink - Dry Embossed Shaker Card Tutorial by Anna-Karin Evaldsson.

Frogs and cattails from Toadally Unfrogettable were stamped on watercolor paper. This stamp set has such a fun name.

Layers of ink - Dry Embossed Shaker Card Tutorial by Anna-Karin Evaldsson.

Watercolor with Distress Inks.

Layers of ink - Dry Embossed Shaker Card Tutorial by Anna-Karin Evaldsson.

Then I added details and shading with colored pencils, using my Prismacolor pencils. Highlights were added with a white gel pen.

Layers of ink - Dry Embossed Shaker Card Tutorial by Anna-Karin Evaldsson.

I used Ranger Stickles Super Nova gel on the crown and Moon Dust in a few places on the other two designs.

Layers of ink - Dry Embossed Shaker Card Tutorial by Anna-Karin Evaldsson.

The sentiment was stamped with two colors Simon Says Stamp ink.

Layers of ink - Dry Embossed Shaker Card Tutorial by Anna-Karin Evaldsson.

Since the card is stitched, the pieces inside don't move around as freely as they do in an ordinary shaker, but they do move and the layers of alcohol ink and embellishments give a fun look. I also glued a few pieces to the front of the card, making those inside the shaker look like they are in the water.

Layers of ink - Dry Embossed Shaker Card Tutorial by Anna-Karin Evaldsson.

These frogs are so cute. Here you can also see the bits of glitter.

Layers of ink - Dry Embossed Shaker Card Tutorial by Anna-Karin Evaldsson.

I hope you enjoyed this tutorial and that it inspired you to create some shaker cards. For another card with dry embossed acetate, check out my Clear Floral Card.


Thank you so much for taking the time to stop by here today! 

Happy crafting!

Anna-Karin

Supplies:

* Please note: the links are affiliate links, for which I receive a small percentage of sales generated by the link, at no extra cost to you.