Showing posts with label Metal. Show all posts

Sunday, January 25, 2026

Messy Grid Tag Tutorial

Hi crafters! Today I have a very textured tag to share with metallic elements and fun techniques. 

Please note: this post has affiliate links, for which I receive a small percentage of sales generated by the link, at no extra cost to you.

Layers of ink - Messy Grid Tag Tutorial by Anna-Karin Evaldsson.

I had such fun creating this grungy tag and it is much easier to do than it might look. I used Seth Apter / Sizzix Tracks die set to create the background in combination with gesso, paint and silver embossing powder. The hearts are made from foil tape. 

Die cut with Seth Apter dies.

Die cut a bunch of the designs from Seth Apter's Tracks set. I used watercolor paper.

Glue to tag.

Glue to a tag with matte medium and when dry, add gesso. Overlap the designs to create an irregular grid pattern. Trim the edges. 

Paint with Distress Paint.

When the gesso is dry, paint the tag with Distress Paint and mist with water to blend. Wipe some paint off. 

Add silver embossing powder.

Apply embossing ink here and there on the tag. Don't press to hard as we mainly want ink on the top layer. Emboss with silver embossing powder.

Add more paint.

Dry brush dark Distress Paint here and there on the tag.

Die cut hearts.

Adhere Ranger Foil tape to cardstock and die cut three hearts with Simon Says Stamp Rounded Hearts.

Dry emboss the hearts.

Dry emboss in Seth Apter / Sizzix Dot-Matrix folder.

Paint the hearts with Distress Paint.

Paint the hearts with Distress Paints - the same paints as in the background - mist with water. When the paint is almost dry, wipe some of it off. I also die cut the hearts from black cardstock.

Add beads and charms.

I had looked through some old beads and decided to add beads and charms to the tag. The sentiment and the tag comes from Simon Says Stamp Heart Suite.


Off-set the black heart to create a shadow. This also makes the hearts stand out better from the background.


The combination of the die cuts, paint and silver embossing is pretty cool.

Add Simon Says Stamp Pawsitively Dazzling Gems.


Here's another close-up look on the textured background. 


The sentiments were stamped on inky paper and the edges were also inked black. The stamps come from Simon Says Stamp Plaque Slides Love and Friendship.


Thank you so much for visiting today! 

Happy crafting!

Anna-Karin

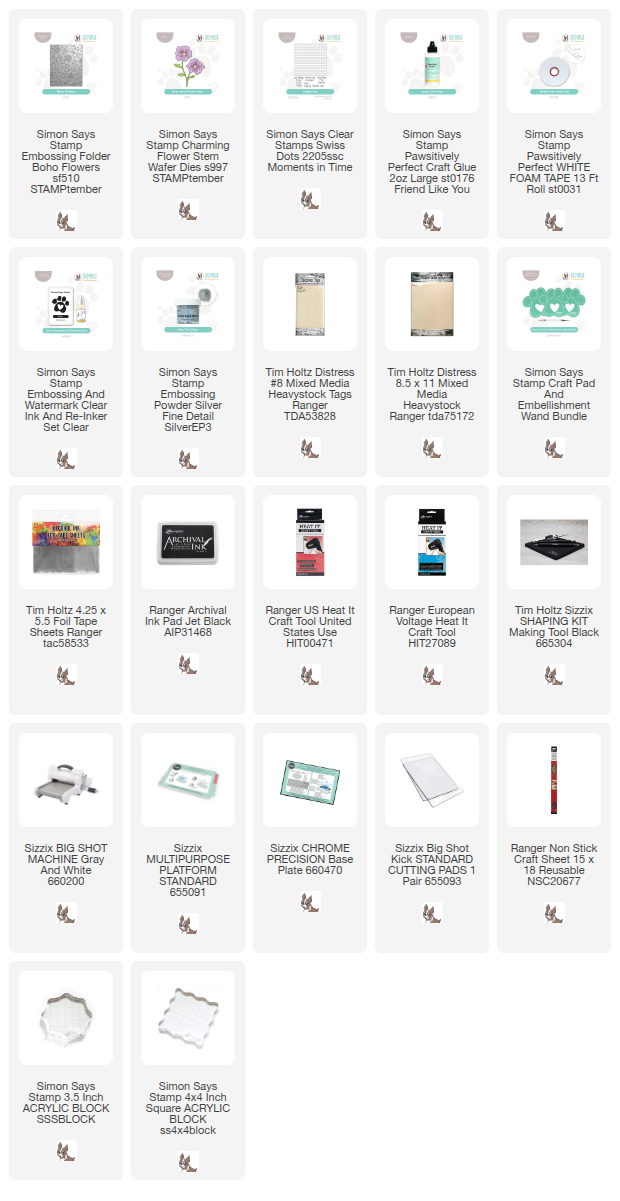
Supplies:

* Please note: the links are affiliate links, for which I receive a small percentage of sales generated by the link, at no extra cost to you.


Monday, September 15, 2025

Embossed Metallic Tag

Hello crafters! It is Monday again and I hope you had a good weekend. We did some second-hand shopping and painted a model airplane. 

Please note: this post has affiliate links, for which I receive a small percentage of sales generated by the link, at no extra cost to you.


It is time for a new Simon Says Stamp Monday Challenge Blog and this week our theme is Add Metal. Fun! It can be real metal or faux metal. Lots of options! During September Carol Gunn is our guest designer. I hope you will visit her blog and look at what she has created for the challenge.


Layers of ink - Embossed Metallic Tag Tutorial by Anna-Karin Evaldsson.

I enjoy using metallic elements or faux-metal on projects and made a tag with lots of metal. The background was covered with metallic tape and dry embossed. I found some old metallic buttons in my stash and used them as flower centers.
Emboss with Simon Says Stamp Boho Flowers folder.

Start by adhering Ranger foil tape to a heavystock tag and then emboss in Simon Says Stamp Boho Flowers folder.

Paint with Distress Paint.

Paint the tag with Distress Paint and leave until it is almost dry. I used Salvaged Patina, Mermaid Lagoon and Scorched Timber.

Wipe off most of the paint.

Before the paint dries completely, wipe with a paper towel to remove quite a lot of the paint.

Silver emboss an hello word.

Die cut Simon Says Stamp Fancy Hello from heavystock paper and emboss with several layers of silver embossing powder. Always be careful when using a heat tool and do not touch the melted powder until it has cooled down completely.

Die cut Simon Says Stamp Charming Flower Stem.

Die cut Simon Says Stamp Charming Flower Stem from kraft cardstock and old book paper. Cut off the stem and shape with Tim Holtz Shaping Tool. 


Die cut the mat for Fancy Hello from Tim Holtz kraft stock, sand slightly and adhere with Simon Says Stamp Pawsitively Perfect Foam Tape. 

Shape the flowers and add buttons.

Layer the flowers and add an old metallic button to the center. 


You can remove more paint if you want too. I usually remove more paint when doing this technique, but this time, I wanted to keep quite a lot of the paint.

Stamp friend with Simon Says Stamp Swiss Dots.

Friend comes from Simon Says Stamp Swiss Dots set and was stamped on a left-over piece of watercolored paper.


I added a bit more brown paint here and there. 

Layers of ink - Embossed Metallic Tag Tutorial by Anna-Karin Evaldsson.

The tag has quite a lot of dimension. If you want even more, adhere the flowers with foam tape.

Layers of ink - Embossed Metallic Tag Tutorial by Anna-Karin Evaldsson.

I tied fibers, twine and organza ribbon to the top of the tag.

Don't miss all the inspiration and daily surprises during STAMPtember. 


Join us this week in our Add Some Metal challenge! You have a chance to win a $25 gift voucher to do some fun shopping at Simon Says Stamp. You have until Monday 8am Ohio time. 1pm UK time, 2 pm CET to join in.


Do you use Instagram? If so please add #sssmchallenge so we can see your entries there too.


Thank you so much for visiting today! 

Happy crafting!

Anna-Karin

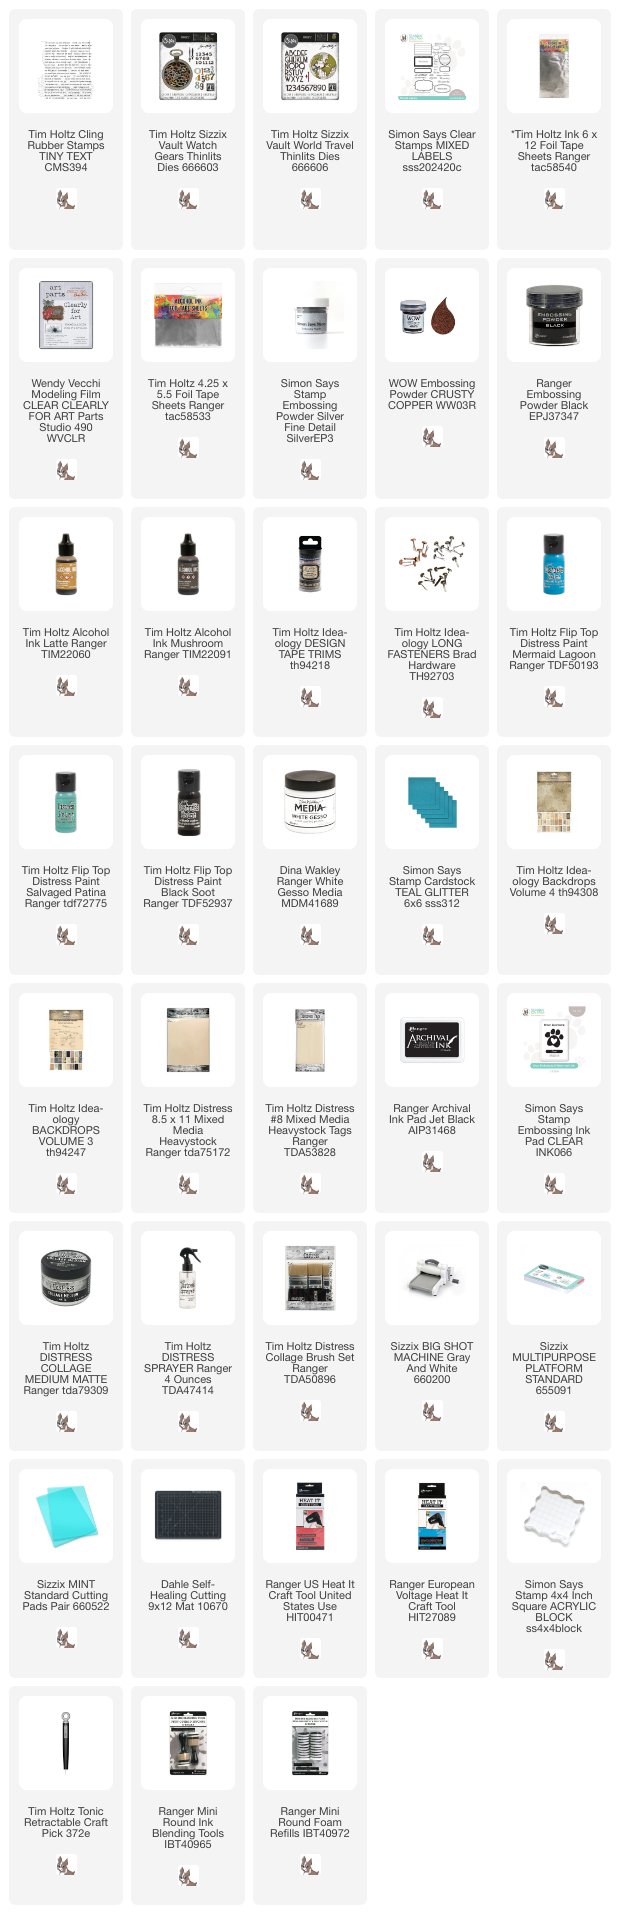
Supplies:

* Please note: the links are affiliate links, for which I receive a small percentage of sales generated by the link, at no extra cost to you.


Sunday, August 18, 2024

Postage Stamp Notebook

Hello crafters! Today I am happy to have a tutorial on the Simon Says Stamp store blog.

Layers of ink - Postage Stamp Notebook Tutorial by Anna-Karin Evaldsson.


Ever since I was a small child, I liked notebooks, sketchbooks and journals. Big ones, small ones, pretty ones, interesting ones and almost any type of notebook. I still like notebooks just as much and often make my own. Today, I am going to share an easy notebook/sketchbook with a stitched spine.

When I saw Tim Holtz Postmarked Sticker Book, I thought it would look great to cover an entire notebook front cover with the colorful stamps. The stamps are so pretty that all you need to add is a title and some sentiments. If you don’t want to make a notebook, you can use the cover design on a card instead.

To see the tutorial and all the details, head over to the Simon Says Stamp Store blog

Thank you so much for stopping by here today! 


Anna-Karin


Monday, June 3, 2024

Vintage Watch Tag Tutorial

Hi friends! I hope you are well and that you had a good weekend with some crafty time. I can't believe that it is already June!

Please note: this post has affiliate links, for which I receive a small percentage of sales generated by the link, at no extra cost to you.


This week we have a Masculine theme at the  Simon Says Stamp Monday Challenge Blog. I hope you will join us. Since it is the first Monday of a new month, the team is showcasing products by a specific company/designer and this week it is Tim Holtz. You can find Tim's fantastic range of products here

We also have a new guest designer and during June Thom Santilla will be joining us. I hope you will visit him on Instagram to see the project he has created this week.

Layers of ink - Vintage Watch Tutorial by Anna-Karin Evaldsson.

I made a tag this week with a grungy gear background and a vintage watch. It was made mainly with Tim Holtz Vault Watch Gears set and lots of Distress Paint. I really like the big watch that comes in the set and used embossing powder, foil tape and Clearly For Art Modeling Film to create it.

Layers of ink - Vintage Watch Tutorial by Anna-Karin Evaldsson. Color with Distress Paint.

Apply gesso to a tag and let dry. The apply Distress Paint to the tag with a palette knife. If you scrape/press relatively hard with the palette knife, you get interesting textures and blends of colors.


Adhere foil tape to cardstock and die cut a die cut a whole lot of gears from it.

Layers of ink - Vintage Watch Tutorial by Anna-Karin Evaldsson. Glue gears to background.

Let dry and cover the whole tag with Distress Matte Medium. Place the gears into the medium. 

Layers of ink - Vintage Watch Tutorial by Anna-Karin Evaldsson. Glue gears to background.

When dry paint with slightly watered-down Distress Paint. 

Layers of ink - Vintage Watch Tutorial by Anna-Karin Evaldsson. Glue gears to background.

Let the black paint dry for a short while and then wipe some of it off. Add more black paint and Salvaged Patina to the gears.

Die cut the clock from Tim Holtz Watch Gears


Layers of ink - Vintage Watch Tutorial by Anna-Karin Evaldsson.

Die cut the watch from Clearly For Art Modeling Film (I cut off the top part to make it easier to glue together the two paper clocks), Backdrops paper and heavystock paper.

Layers of ink - Vintage Watch Tutorial by Anna-Karin Evaldsson.

Ink with shades of grey.

Layers of ink - Vintage Watch Tutorial by Anna-Karin Evaldsson. Emboss the watch.

Apply embossing ink to the watch and emboss with several layers of silver powder. Add darker powders into the silver in the last layer. Be very careful when using a heat gun and do not touch the melted powder until it has cooled down completely.

Layers of ink - Vintage Watch Tutorial by Anna-Karin Evaldsson. Glue numbers to watch.

Die cut the clock numbers from the foil tape sheet and glue to the clock.

Layers of ink - Vintage Watch Tutorial by Anna-Karin Evaldsson. Color with alcohol ink.

Color the Modeling Film with alcohol ink, to give it an aged look.

Layers of ink - Vintage Watch Tutorial by Anna-Karin Evaldsson.

Die cut watch arms and add gears to the clock. Gently shape the Modeling Film slightly by warming it with a heat tool.

Layers of ink - Vintage Watch Tutorial by Anna-Karin Evaldsson.

I stamped sentiments on inky paper and cut into strips. This stamp is from Simon Says Stamp Mixed Labels.

Layers of ink - Vintage Watch Tutorial by Anna-Karin Evaldsson.

The layers of embossing powder and last layer of two additional darker powders give an interesting and dimensional look to the watch.

Layers of ink - Vintage Watch Tutorial by Anna-Karin Evaldsson.

Sandwich the Modeling Film between the Backdrops clock and the embossed clock. It is meant to look like the glass of the watch. The sentiment comes from Tim's Tiny Text.

Layers of ink - Vintage Watch Tutorial by Anna-Karin Evaldsson.

The title was die cut with Tim Holtz Vault World Travel set from Simon Says Stamp Teal Glitter cardstock. I also added some Design Tape to the tag.

Layers of ink - Vintage Watch Tutorial by Anna-Karin Evaldsson.

This sentiment also comes from Simon Says Stamp Mixed Labels.

Layers of ink - Vintage Watch Tutorial by Anna-Karin Evaldsson.

The combination of gesso, paint and the gears gives a lot of texture to the background.

Join us this week in our Masculine challenge! You have a chance to win a $25 gift voucher to do some fun shopping at Simon Says Stamp. You have until Monday 8am Ohio time. 1pm UK time, 2 pm CET to join in.


Do you use Instagram? If so please add #sssmchallenge so we can see your entries there too.


Thank you so much for stopping by here today! 

Happy crafting!

Anna-Karin

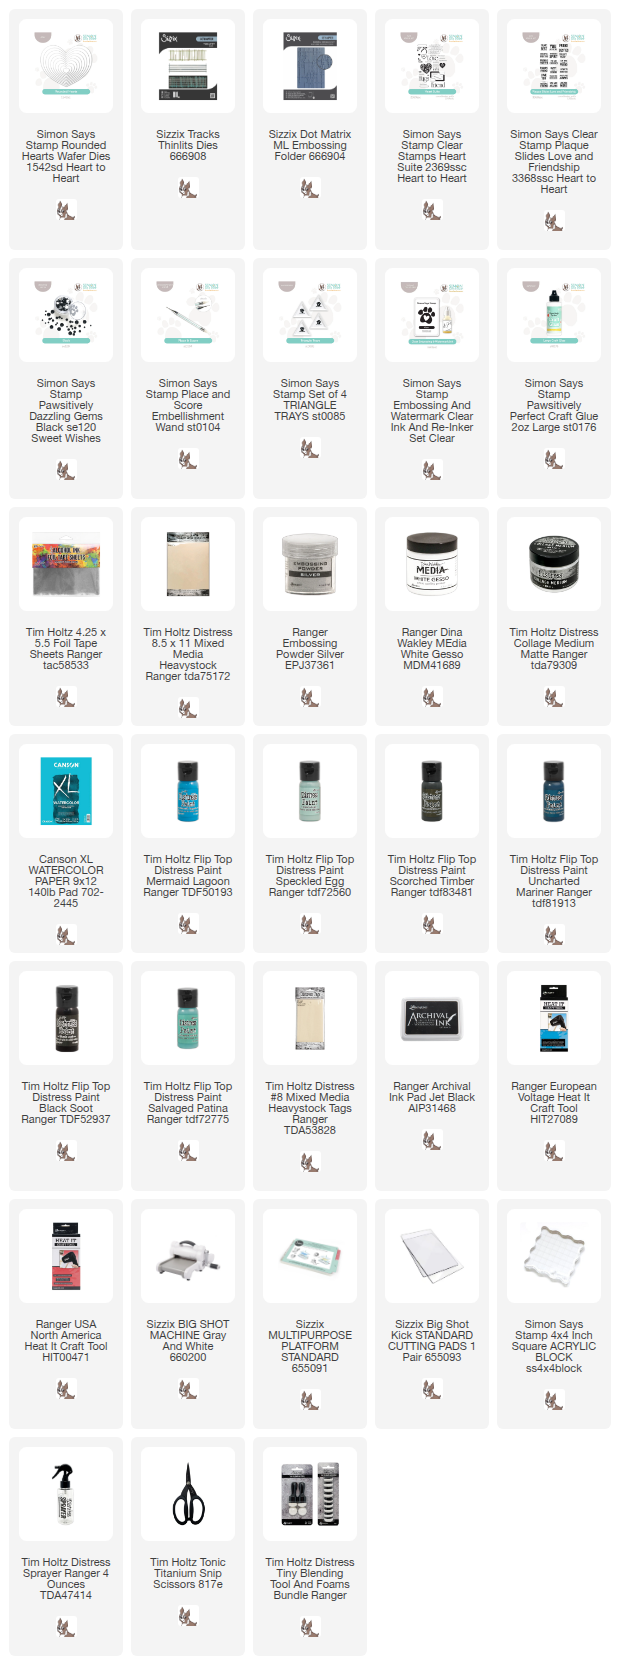
Supplies:

* Please note: the links are affiliate links, for which I receive a small percentage of sales generated by the link, at no extra cost to you.