Wednesday, February 27, 2019

Faux Leather Wrapped Journal Tutorial

Hello crafters! During February, the Eileen Hull Inspiration Team has been sharing projects with hearts, flowers or dragons. Today, I have a wrapped journal tutorial to share with you.

Layers of ink - Faux Leather Wrapped Journal Tutorial by Anna-Karin Evaldsson. With Sizzix dies by Eileen Hull.

I just love to make wrapped journals. They have such a great size, are fun and chunky and also easy to make. Today's journal is made from patent leather - I thought it was faux leather, but Eileen let me know that it is patent leather. And I used it inside out. :) But I liked the texture of the inside much better than the glossy patent texture. I wanted to stick with neutral colors in combination with the blue, and used various textures to create my layered flowers - burlap, canvas, kraft paper and patterned paper. Mixing various surfaces in one dimensional flower is a favorite technique of mine, and it is also a great way to use up scraps. 

I might use this book for flower sketches. 

Layers of ink - Faux Leather Wrapped Journal Tutorial by Anna-Karin Evaldsson.

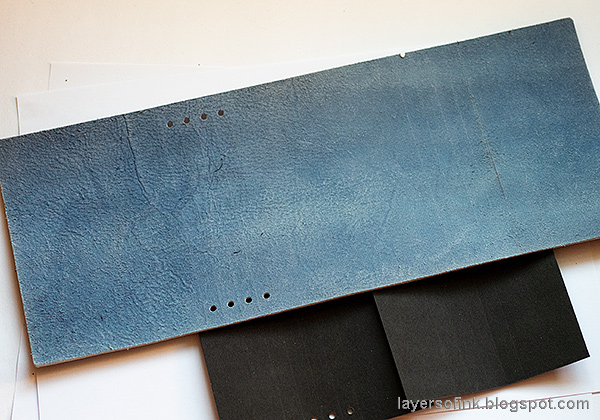
Start by die cutting the cover using the Wrapped Journal die. You need the extended cutting pads, but the die fits perfectly in an ordinary Big Shot or Vagabond. I also die cut two pieces of black Sizzix Paper Leather, to use as extra support along the spine, and where the scorelines are on the second fold. Glue the black pieces to the journal and place under a heavy book.

Layers of ink - Faux Leather Wrapped Journal Tutorial by Anna-Karin Evaldsson. Pansy Flower die.

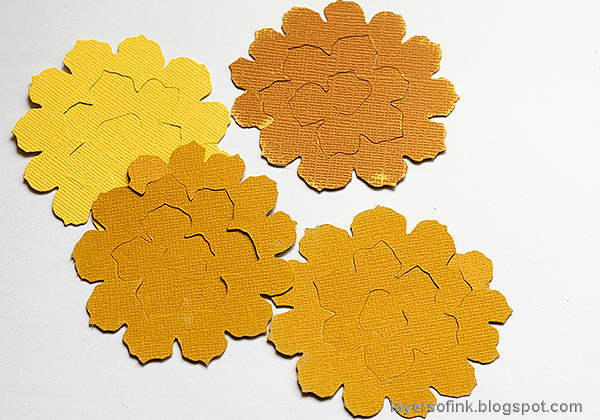
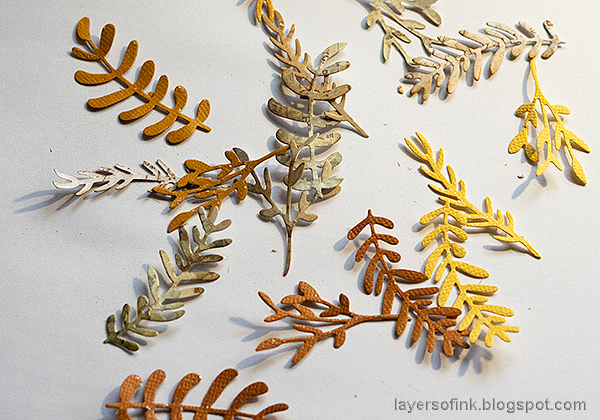
The flowers were die cut with the Pansy Flower die, from burlap, canvas, kraft paper and various patterned papers.

Layers of ink - Faux Leather Wrapped Journal Tutorial by Anna-Karin Evaldsson.

I also die cut some smaller flowers an leaves, using the Caddy Bag die.

Layers of ink - Faux Leather Wrapped Journal Tutorial by Anna-Karin Evaldsson. Stamp the flowers.

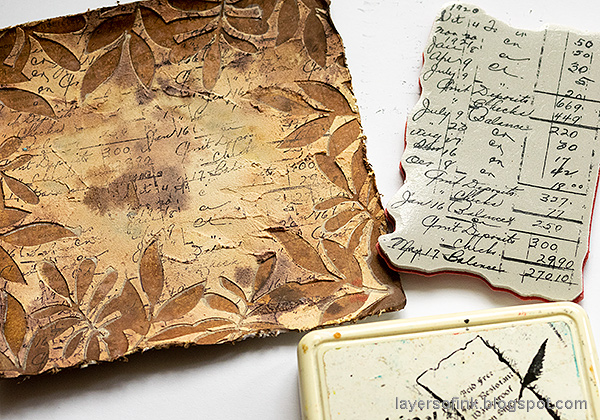
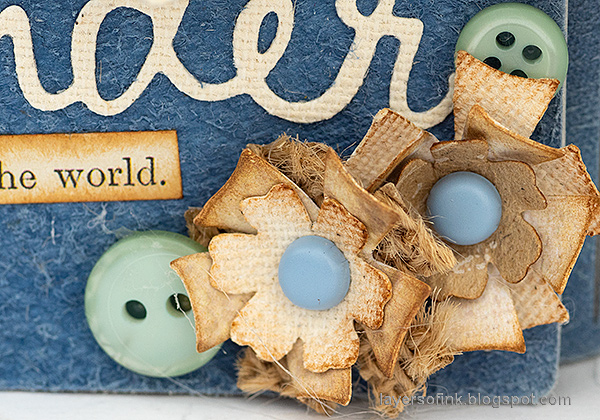
Stamp the kraft pieces with a script stamp and white pigment ink. I used the Darkroom Door French Script Texture stamp, but any script stamp will work, such as their French Script.

Layers of ink - Faux Leather Wrapped Journal Tutorial by Anna-Karin Evaldsson. Dimensional paper flowers.

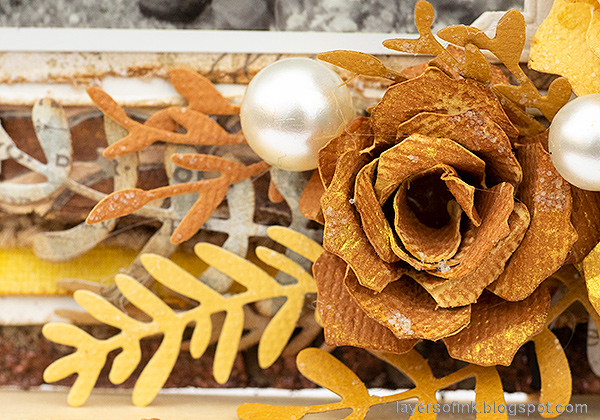
Ink the edges. Give the flowers shape using the Sizzix Paper Sculpting Tool Kit. I used both the ball tools and the pair of tweezers (to roll back the petals).

Layers of ink - Faux Leather Wrapped Journal Tutorial by Anna-Karin Evaldsson. DIY paper flowers.

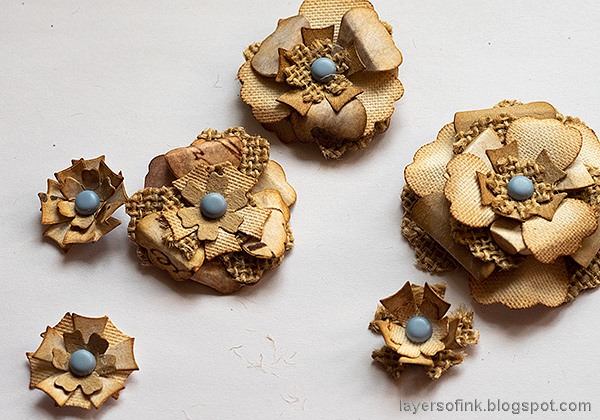
Layer flowers together and place a brad in the center.

Layers of ink - Faux Leather Wrapped Journal Tutorial by Anna-Karin Evaldsson.

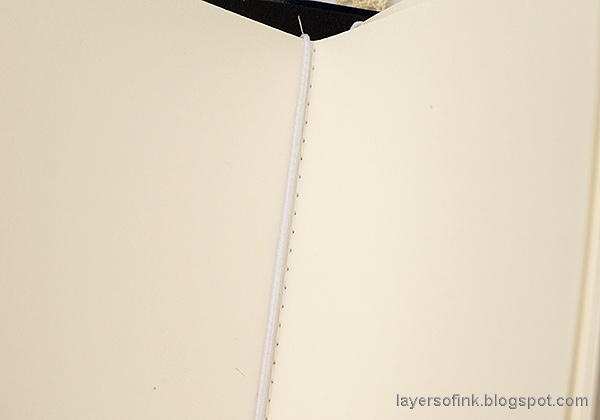
A great thing with making your own journal, is that you can fill it with you favorite paper. For this journal, I used watercolor paper. You need four signatures of about six sheets of papers in each, about 7.1 x 4.8 in (19.5 x 12 cm). Fold and score. I stitched down the center with my sewing machine, but you can also use staples, or even leave the paper lose.

Layers of ink - Faux Leather Wrapped Journal Tutorial by Anna-Karin Evaldsson. Bind the journal.

To bind the journal, use a piece of elastic string, going back and forth.

Layers of ink - Faux Leather Wrapped Journal Tutorial by Anna-Karin Evaldsson.

Just tuck the signatures under the strings and you are done.

Layers of ink - Faux Leather Wrapped Journal Tutorial by Anna-Karin Evaldsson.

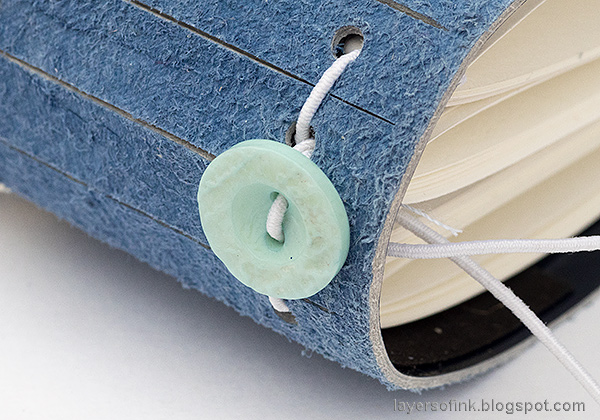
I tied a button to the back for an extra details, before making a knot on the inside.

Layers of ink - Faux Leather Wrapped Journal Tutorial by Anna-Karin Evaldsson.

For an extra touch, tie two beads to the strings. I used to do quite a bit of jewelry, so I have a lot of beads at home, sometimes just a couple of each kind, and they are perfect for this. 

Layers of ink - Faux Leather Wrapped Journal Tutorial by Anna-Karin Evaldsson.

Glue the flowers to the cover. I had quite a few left-over flowers for a future project.

Layers of ink - Faux Leather Wrapped Journal Tutorial by Anna-Karin Evaldsson.

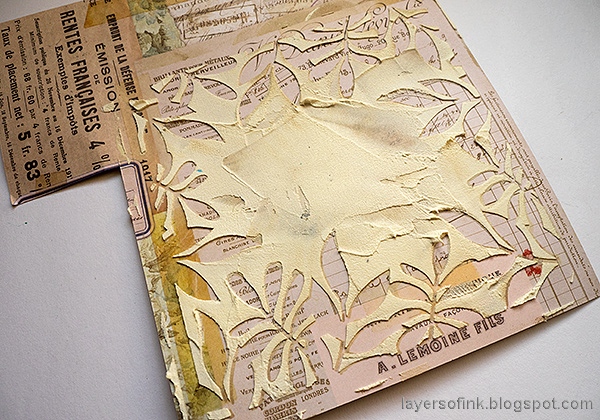
Here you can see the cool texture of the background. This patent leather was sent to me (thank you Eileen!). For another leather journal, check out my Wrapped Leather Journal.

Layers of ink - Faux Leather Wrapped Journal Tutorial by Anna-Karin Evaldsson.

And two small flowers.

Layers of ink - Faux Leather Wrapped Journal Tutorial by Anna-Karin Evaldsson.

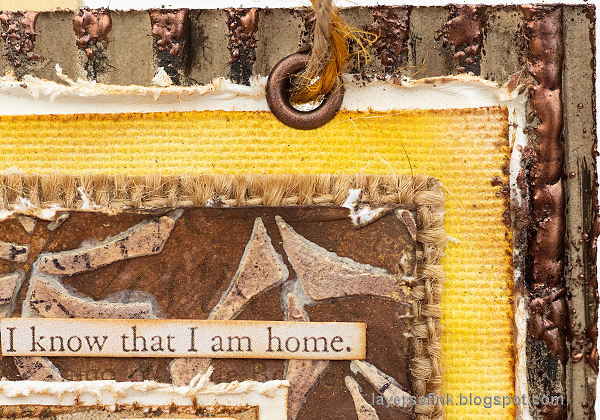
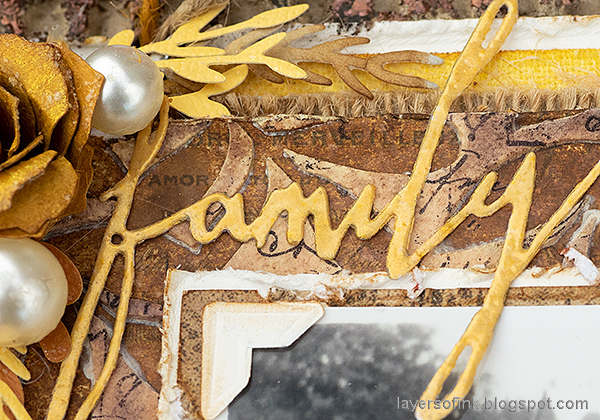
As a title, I used one of the dies from the Journaling Words set, die cut from canvas, and a piece of a Tim Holtz Clipping Stickers.

Layers of ink - Faux Leather Wrapped Journal Tutorial by Anna-Karin Evaldsson. Made with the Wrapped Journal Sizzix die by Eileen Hull.

I tied the journal with a a piece of lace. For alternative ways of closing it, check my Leather Wrapped Journal and my In The Forest journal.

Thank you so much for stopping by here today!

Happy crafting!

Anna-Karin

Supplies:

* Please note: the links are affiliate links, for which I receive a small percentage of sales generated by the link, at no extra cost to you.


Monday, February 25, 2019

Past Times Wall-Hanger Tutorial

Hello friends! I hope you had a good weekend and that you got some crafty time. We had spring in the air here, but the colder weather is probably coming back again. We are also looking forward to celebrating Leo's birthday this week. February is a big birthday month here. He wants to eat tacos and have a fire truck cake.


The theme for this week at the Simon Says Stamp Monday Challenge Blog is Vintage/Past Times, which is of course a favorite team for us all. Don't miss the project by our February guest designer Lucyna Marynowska, with her blog u Luli

Layers of ink - Past Times Wall-Hanger Tutorial by Anna-Karin Evaldsson.

I wanted to do a photo project this week, and particularly something about my paternal grandmother, since I recently met an older relative who shared memories about her. My dad took this photo of my grandmother and one of her brothers-in-law. You can use any type of photo on this vintage style wall-hanger, or use a stamped image as the focal point instead. The wall-hanger is 7 x 7 in and has a lot of layers.

Layers of ink - Past Times Wall-Hanger Tutorial by Anna-Karin Evaldsson. SSS Leafy Frame stencil.

I started out with a patterned paper and the Leafy Frame stencil by SSS.

Layers of ink - Past Times Wall-Hanger Tutorial by Anna-Karin Evaldsson. Applying texture paste

Mix a little paint into paste and apply with a palette knife. I started out using only paint and then changed my mind, which is why you can see a small paint shadow on many of the leaves.

Layers of ink - Past Times Wall-Hanger Tutorial by Anna-Karin Evaldsson. Mist the paper.

When dry, mist with Distress Spray Stain. Use a paper towel to dab off stain from the paste areas.

Layers of ink - Past Times Wall-Hanger Tutorial by Anna-Karin Evaldsson. Stamp the paper.

When dry, stamp with a script stamp. The stamp I used is from a receipt (as was the patterned paper), which works well, since my grandmother ran a shop.

Layers of ink - Past Times Wall-Hanger Tutorial by Anna-Karin Evaldsson. Color the canvas.

Paint natural sticky-back canvas with watered down Mustard Seed Distress Paint. Or you could use yellow cardstock, but I wanted lots of different textures.

Layers of ink - Past Times Wall-Hanger Tutorial by Anna-Karin Evaldsson. With Tim Holtz Sizzix Tattered Pinecone.

The roses were made with Tim Holtz's Tattered Pinecone die. Die cut from various shades of yellow. Sand slightly.

Layers of ink - Past Times Wall-Hanger Tutorial by Anna-Karin Evaldsson. DIY dimensional paper roses.

Use a pair of tweezers to roll the spirals into a rose shape. I used hot glue - if you use hot glue, be very careful not to burn yourself.

Layers of ink - Past Times Wall-Hanger Tutorial by Anna-Karin Evaldsson.

For extra shine, mist with Buttercup Mica Spray. I love the warm yellow shine you get from this mist.

Layers of ink - Past Times Wall-Hanger Tutorial by Anna-Karin Evaldsson. Embossed butterfly and word.

The Mini Detailed Butterfly was die cut from patterned paper and white cardstock. I also die cut a word from white cardstock. Apply embossing ink and emboss with Marigold powder, which has a lovely yellow pearlescent shine.

Layers of ink - Past Times Wall-Hanger Tutorial by Anna-Karin Evaldsson. Funky Floral dies by Sizzix.

Die cut foliage using the Funky Floral 1 and Funky Floral 2 sets, from patterned paper and cardstock. It is a great way to use up scrap patterned paper.

Layers of ink - Past Times Wall-Hanger Tutorial by Anna-Karin Evaldsson.

Distress all the edges and layer together. Add two layers of watercolor paper, for even more dimension. Remove the top layer of a piece of cardboard to use as a base. Glue everything together with Matte Medium. Apply embossing ink along the edges and emboss with the cool Mixed Media Hammered powder.

Layers of ink - Past Times Wall-Hanger Tutorial by Anna-Karin Evaldsson.

I also added a tiny bit of Stickles to the roses, and some baubles.

Layers of ink - Past Times Wall-Hanger Tutorial by Anna-Karin Evaldsson. Textured paper layers.

Here you can see all the layers better. The photo was layered on patterned paper and watercolor paper, then comes the leafy panel, a piece of burlap, the yellow canvas, another piece of watercolor paper and finally the cardboard.

Layers of ink - Past Times Wall-Hanger Tutorial by Anna-Karin Evaldsson.

I added photo corners to the photo, to give it even more of a vintage look. I also used a camera embellishment.

Layers of ink - Past Times Wall-Hanger Tutorial by Anna-Karin Evaldsson.

The Hammered powder gives a really cool effect. I used it on my Typography Tag too.

Layers of ink - Past Times Wall-Hanger Tutorial by Anna-Karin Evaldsson.

I never get tired of using dimensional flowers on projects.

Layers of ink - Past Times Wall-Hanger Tutorial by Anna-Karin Evaldsson.

Here you can see the shine from the mica powder a little better. It is such a quick way of adding shine and texture to a project.

Layers of ink - Past Times Wall-Hanger Tutorial by Anna-Karin Evaldsson.

The detailed butterflies look lovely with the top layer being embossed. I used the same technique on my recent Typography Tag project too.

Layers of ink - Past Times Wall-Hanger Tutorial by Anna-Karin Evaldsson.

I added some journaling to the back of the wall-hanger, about memories of my grandmother.

I hope you will join us this week in our Vintage/Past Times challenge. As always, you have a chance to win a $50 gift voucher to do some fun shopping at Simon Says Stamp. You have until next Monday 8am Ohio time. 1pm UK time, 2 pm CET to join in.


Don't forget to follow Simon Says Stamp on Instagram, they post great stuff daily. 


Do you use Instagram? If so please add #sssmchallenge so we can see your entries there too.


Thank you so much for taking the time to visit my blog today!  

Happy crafting!

Anna-Karin

Supplies:

* Please note: the links are affiliate links, for which I receive a small percentage of sales generated by the link, at no extra cost to you.


Monday, February 18, 2019

Forest Layout

Hello friends! I hope you had a great weekend. My family visited and we had a fun birthday party for Anton. He is getting so big. Spring is in the air and the first snowdrops have made their appearance. I am documenting it in the Signs of Spring notebook that I made last year.


This week at the Simon Says Stamp Monday Challenge Blog, we have a Things With Wheels challenge. How fun! I hope you can join us, and don't miss the project by our February guest designer Lucyna Marynowska, with her blog u Luli

Layers of ink - Forest Layout by Anna-Karin Evaldsson.

My favorite thing with wheels is the bicycle and I found this photo from a couple of years ago, from a forest bike ride. The forest in the photo was extended onto the background, using stamps and Distress Ink. I used almost only shades of green, with just the circles beting red, to repeat the red in the photo (his helmet and the bike). The journaling is on the back. 

Layers of ink - Forest Layout by Anna-Karin Evaldsson. With stamps by Tim Holtz.

The background watercolor paper was in my scrap paper box and had been colored with Distress Inks. I used various pine tree stamps by Tim Holtz and inked them up with four shades of Distress Ink. Mist about four times before stamping. Most of the stamps are from the fabulous Tree Line set.

Layers of ink - Forest Layout by Anna-Karin Evaldsson. Stamping the forest.

Continue adding more trees to fill up the scene. I used four larger trees in the foreground, from the Just Believe set. This is a Christmas stamp set. Don't forget your seasonal stamp sets during the rest of the year, since many of them contain stamps that can be used for non-seasonal projects. Since the photo was going in the middle, I didn't stamp any trees there.

Layers of ink - Forest Layout by Anna-Karin Evaldsson. Stamping texture.

Next, I added texture with a splatter and a grid stamp, using Potting Soil and Fern Green Archival Ink. Add a branch tree here and there with the brown ink. I also stamped a bike and a bunch of sentiments.

Layers of ink - Forest Layout by Anna-Karin Evaldsson. Adding sentiments.

The circles were die cut from red paper with the Simon Says Stamp Circle Loops die. The sentiment comes from Tim's Perspective set.

Layers of ink - Forest Layout by Anna-Karin Evaldsson. Bicycle stamp.

The bike stamp comes from the Purely Random set, and I used one of the great sentiments from the Nature's Wonder set.

Layers of ink - Forest Layout by Anna-Karin Evaldsson. Layered watercolor forest.

The different shades of green makes the forest look alive and also adds dimension.

Layers of ink - Forest Layout by Anna-Karin Evaldsson.

I used the Odds and Ends set and stamped a ticket and a sentiment on an inky paper.

Layers of ink - Forest Layout by Anna-Karin Evaldsson.

The layout was finished with a Spinner Trail border die cut from dark green paper and some Clippings Stickers

I hope you will join us this week in our Things With Wheels challenge. As always, you have a chance to win a $50 gift voucher to do some fun shopping at Simon Says Stamp. You have until next Monday 8am Ohio time. 1pm UK time, 2 pm CET to join in.


Don't forget to follow Simon Says Stamp on Instagram, they post great stuff daily. 


Do you use Instagram? If so please add #sssmchallenge so we can see your entries there too.


Thank you so much for taking the time to visit my blog today!  

Happy crafting!

Anna-Karin

Supplies:

* Please note: the links are affiliate links, for which I receive a small percentage of sales generated by the link, at no extra cost to you.