Monday, April 29, 2019

Mist Resist Tutorial

Hi crafters! I hope you had a good weekend! We were busy with lots of sport related activities, but I also managed to squeeze in a visit to an antique fair. 


This week at the Simon Says Stamp Monday Challenge Blog we have a Tag It challenge. Tags are so fun and versatile. They are a great canvas for an entire project and I love all the inspiration my tags give me. You can also use big or small tags to add journal or sentiments, or why not make a tag book? Don't miss the last project by our April guest designer Sabrina Perna

Layers of ink - Mist Resist Tutorial by Anna-Karin Evaldsson.

I made two tags this week, since I wanted to show two background techniques using Resist Spray and a single stencil. This is the same Gradient Dot stencil by Tim Holtz that I used on last week's project, so for even more inspiration on this stencil you can check out that post. There are also two smaller tags on each tags. Let's start.

Layers of ink - Mist Resist Tutorial by Anna-Karin Evaldsson. With Tim Holtz Ranger Distress Resist Spray.

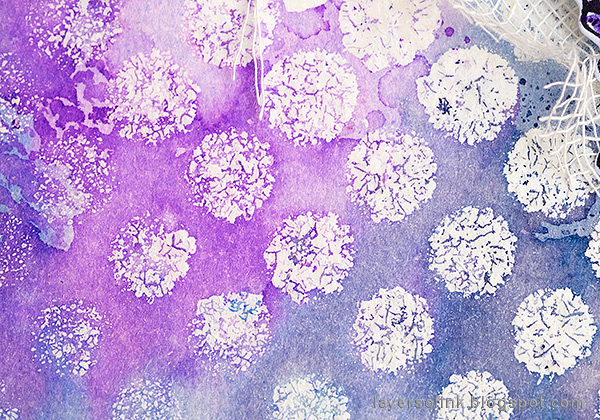
I used Tim's Distress Resist Spray and first misted through the Gradient Dot stencil, onto watercolor paper. Take the stencil up, flip it around, and press it down on another area of the watercolor paper. You can even repeat this step one more time.

Layers of ink - Mist Resist Tutorial by Anna-Karin Evaldsson. Ink with Distress Ink.

Die cut tags from the background. Smear Distress Inks on a craft sheet, mist with water and press the tags into the ink. Watch the resist magic happen. The tag to the right is the first misting from the step above, when misting through the tag. The tag to the left comes from when the stencil was flipped around pressed down on the paper. Both methods give a really cool effect.
Layers of ink - Mist Resist Tutorial by Anna-Karin Evaldsson.

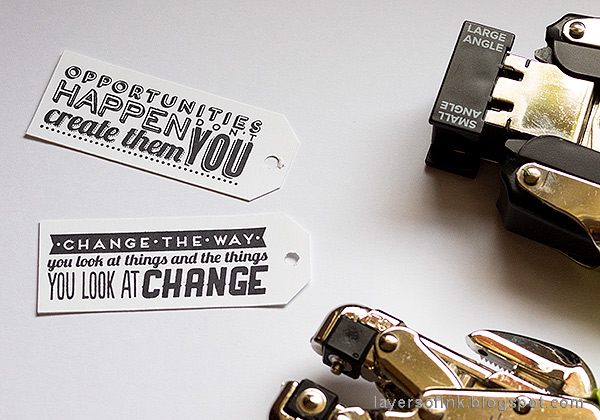
I wanted big, bold sentiments and stamped them with the Mini Motivation set on white cardstock. The We R Memory Keepers Angle Corner Chomper tool make it very easy to do your own tags. It cuts perfect angles in two sizes. For many years, I tried to cut these angles by hand using a ruler and a craft knife, and this method is so much easier. Punch holes with a Crop-a-dile.

Layers of ink - Mist Resist Tutorial by Anna-Karin Evaldsson. Color the flowers.

I misted some Bouquet Flowers, so that they would coordinate with the tags.
Layers of ink - Mist Resist Tutorial by Anna-Karin Evaldsson. Color the butterflies.

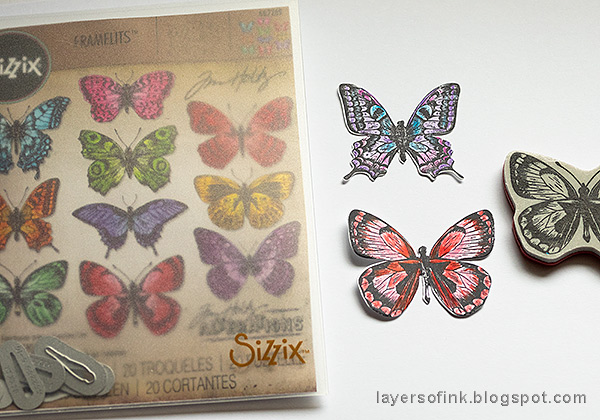
Stamp Flutter butterflies and color them with pencils. I used Prismacolor pencils. Die cut with the coordinating dies.

Layers of ink - Mist Resist Tutorial by Anna-Karin Evaldsson.

The first tag, with the white dots, and a mix of blue, teal and purple.
Layers of ink - Mist Resist Tutorial by Anna-Karin Evaldsson. Mini tag.

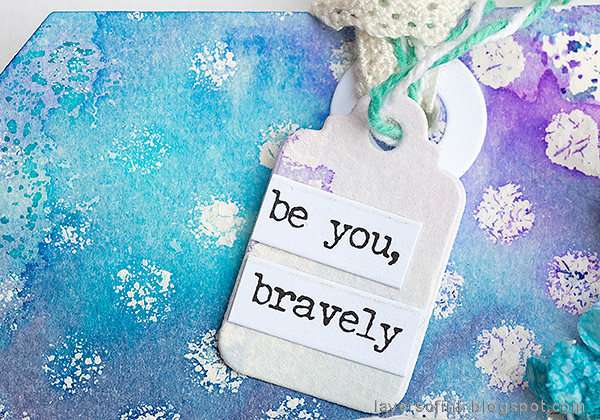
The small tags were die cut with Tim's Gift Tags set, from left-over inked papers.

Layers of ink - Mist Resist Tutorial by Anna-Karin Evaldsson. Colored pencil butterfly.

I wanted pretty bold colors for the butterflies, so that they would stand out. Colored pencils work great for that, and are easy to use for the details.
Layers of ink - Mist Resist Tutorial by Anna-Karin Evaldsson.

Here you can see the cool textured effect from the Resist Spray. I will be back tomorrow with another project using the Resist Spray.

Layers of ink - Mist Resist Tutorial by Anna-Karin Evaldsson.

Here's the pink and red tag, with the flipped pattern on the background. This technique is also great for avoiding to waste left-over mist on a stencils. You can do it with colored mists too.

Layers of ink - Mist Resist Tutorial by Anna-Karin Evaldsson.

The butterfly was colored with the same shades of colors.

Layers of ink - Mist Resist Tutorial by Anna-Karin Evaldsson.

And a close-up of the resist background.

Layers of ink - Mist Resist Tutorial by Anna-Karin Evaldsson.

At the top of the tag, there was more mist on the stencil, which means that the dots aren't as visible. I love the unpredictable nature of this technique.

Layers of ink - Mist Resist Tutorial by Anna-Karin Evaldsson. Red flowers.

Some pretty flowers always give life and joy to a project.
I hope you will join us this week in our Tag It challenge. As always, you have a chance to win a $50 gift voucher to do some fun shopping at Simon Says Stamp. You have until next Monday 8am Ohio time. 1pm UK time, 2 pm CET to join in.


Don't forget to follow Simon Says Stamp on Instagram, they post great stuff daily. 


Do you use Instagram? If so please add #sssmchallenge so we can see your entries there too.


Thank you so much for taking the time to visit my blog today!  

Happy crafting!

Anna-Karin

Supplies:

* Please note: the links are affiliate links, for which I receive a small percentage of sales generated by the link, at no extra cost to you.


Monday, April 22, 2019

May Flowers Tag

Hello friends! I hope you had a lovely Easter! We have had gorgeous weather and have done lots of nice outings. Spring flowers are coming out everywhere and the leaves of the trees will come next. The latter might be my favorite part of spring, because all of a sudden, you have these fantastic shades of green everywhere. Those shades of green also inspired today's project.


This week at the Simon Says Stamp Monday Challenge Blog we have a Going Around in Circles theme. Dots and circles are some of my favorite elements and I am looking forward to seeing all the contributions. Remember to check out the project by our April guest designer Sabrina Perna

Layers of ink - Textured Green Background Tutorial by Anna-Karin Evaldsson. May flowers.

I made a tag inspired by May Flower pins. May Flower pins have been sold in Sweden since 1907, and the proceeds go to children in need. Every year the flowers have new colors, and lots of people collect them. We used to sell them when I was in school, and paper flowers for a good cause is of course a favorite of mine. :) On the tag, this year's flower is the focal point, surrounded by shades of green and bits of golden yellow. 

Layers of ink - Textured Green Background Tutorial by Anna-Karin Evaldsson. Dot Gradient stencil by Tim Holtz.

I started out by smearing embossing paste on a tag, through Tim Holtz's Gradient Dot stencil.

Layers of ink - Textured Green Background Tutorial by Anna-Karin Evaldsson. Paint with acrylic paint.

When the paste is dry, paint with watered-down Distress Paints. Mist with more water if needed.

Layers of ink - Textured Green Background Tutorial by Anna-Karin Evaldsson. Mist with mica spray.

When the paint was dry, I misted the tag with Buttercup mica spray, and did the same to the mulberry paper skeleton leaf. It makes it look like the leaf has been sprinkled with gold.

Layers of ink - Textured Green Background Tutorial by Anna-Karin Evaldsson. Add gold foil.

Apply glue with a glue stick around the edges and press a sheet of vintage gold foil on top, rub to transfer the foil.

Layers of ink - Textured Green Background Tutorial by Anna-Karin Evaldsson. Die cut letters.

The title letters were die cut from SSS Glimmery Sunshine paper, using the Archie Jr Solid die set. The die set is from the newest Blossoms and Butterflies release, and I also used it in two different ways in this post.

Layers of ink - Textured Green Background Tutorial by Anna-Karin Evaldsson. Gold foil.

The circle elements were die cut using a SSS set that I discovered is no longer available, but you can get the same effect by die cutting circles in different shapes with other dies. There are lots of circle designs among the Simon Says Stamp exclusive collections. I applied glue on two of the circles and rubbed with the gold foil. This mimicked the pearl in the center of the flower perfectly.

Layers of ink - Textured Green Background Tutorial by Anna-Karin Evaldsson.

The other circles were colored with Distress Inks.

Layers of ink - Textured Green Background Tutorial by Anna-Karin Evaldsson.

The glimmery yellow numbers and letters were matted on white die cuts, to make them stand out better. I also used a Clippings Sticker.

Layers of ink - Textured Green Background Tutorial by Anna-Karin Evaldsson.

Around the circle, I added pearls and Acrylic Bubbles, through which you can see the leaf.

Layers of ink - Textured Green Background Tutorial by Anna-Karin Evaldsson. Add letters.

The title translates to 'May Flowers'. The best thing with alphabet dies is that you can write any thing you would like, and you never run out of letters.

Layers of ink - Textured Green Background Tutorial by Anna-Karin Evaldsson.

Here you can see the effect of the foil. It looks like gold leaf.

Layers of ink - Textured Green Background Tutorial by Anna-Karin Evaldsson. Majblomma 2019.

This year's flower is green and cream with a yellow center.

Layers of ink - Textured Green Background Tutorial by Anna-Karin Evaldsson.

The tag and the leaf are very shiny, and you might see that better here.

I hope you will join us this week in our Going Around in Circles challenge. As always, you have a chance to win a $50 gift voucher to do some fun shopping at Simon Says Stamp. You have until next Monday 8am Ohio time. 1pm UK time, 2 pm CET to join in.


Don't forget to follow Simon Says Stamp on Instagram, they post great stuff daily. 


Do you use Instagram? If so please add #sssmchallenge so we can see your entries there too.


Thank you so much for taking the time to visit my blog today!  

Happy crafting!

Anna-Karin

Supplies:

* Please note: the links are affiliate links, for which I receive a small percentage of sales generated by the link, at no extra cost to you.


Watercolor Peonies Tutorial

Hello everyone! I am happy to have a new tutorial on the Simon Says Stamp store blog. It went up yesterday, but because of Easter, I totally forgot to post about it here.

Layers of ink - Watercolor Peonies Tutorial by Anna-Karin Evaldsson

Here's a sneak peek of the project, which would make a great Mother's Day gift. I used the Simon Says Stamp Pretty Peonies background stamp, and watercolored it with Distress Inks. It is a real quick and easy technique and you can find all the steps on the Simon Says Stamp Store blog.

Thank you for visiting! I will be back soon with a Simon Says Stamp Monday Challenge post.

Happy stamping!

Anna-Karin

* Please note: the links are affiliate links, for which I receive a small percentage of sales generated by the link, at no extra cost to you.

Sunday, April 21, 2019

Happy Easter

Hello everyone! I hope you are having a beautiful Easter, if you celebrate it. Here we have had lovely spring weather this whole weekend, and did lots of outings. We went to two areas to look at two different rare spring flowers, among other things. Because of the warm weather, the flowers are growing so fast, you can even see changes over night.

Layers of ink - Easter Kiddies Craft

The boys and I also did some Easter crafts, such as these cute sparkly chickens. They were a part of a craft kit my mom sent us. I particularly like the idea of placing a flower as a hat on their heads, I'll remember that for future projects.

This was just a quick post to wish everyone Happy Easter. I will be back tomorrow with my Simon Says Stamp Monday Challenge post.

Happy crafting and thank you for stopping by!

Anna-Karin

Monday, April 15, 2019

Inky Blossoms Tutorial

Hi friends! I hope your weekend was good. We went to the movies, decorated for Easter, and went to a local museum. A big thank you to everyone who left a comment on my SSS Blossoms and Butterflies release blog hop post. If you missed the blog hop, I hope you will have a look at all the inspiration, and there is still a chance to win prizes.


This week at the Simon Says Stamp Monday Challenge Blog, we have a Beautiful Blooms theme. I am looking forward to seeing all the floral projects that will be posted. Adding flowers to projects is a favorite of many of us. Remember to check out the project by our April guest designer Sabrina Perna

Layers of ink - Inky Blossoms Card Tutorial by Anna-Karin Evaldsson.

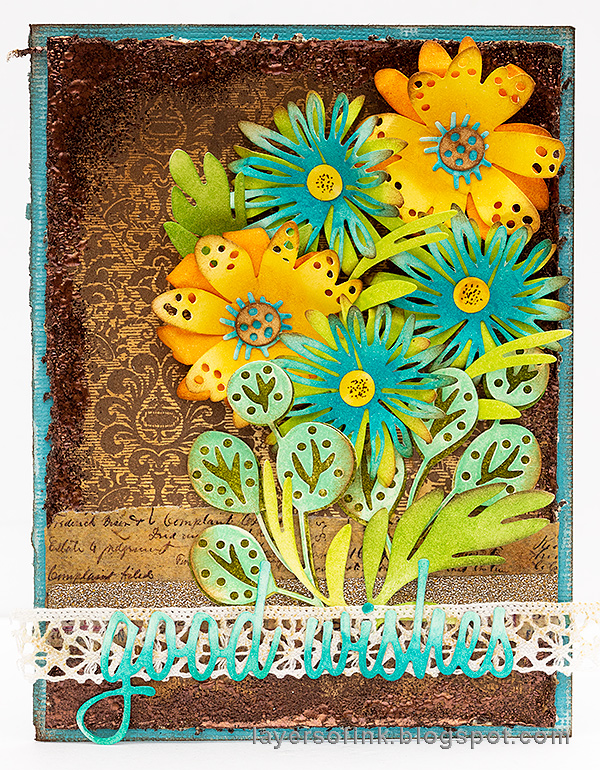
I made a card this week, with a bouquet of inky, dimensional flowers. These flowers are quick and easy to make, and you can use any ink color that you have at home. For the background, I wanted something quite dark, so that the flowers would really stand out, and went with a dark tone-on-tone design with some grungy, metallic edges.

Layers of ink - Inky Blossoms Card Tutorial by Anna-Karin Evaldsson. Die cut Tim Holtz Funky Floral Large.

Start by die cutting flowers from mixed media paper, using Tim Holtz's Funky Floral Large die set.

Layers of ink - Inky Blossoms Card Tutorial by Anna-Karin Evaldsson. Ink the flowers with Distress Ink.

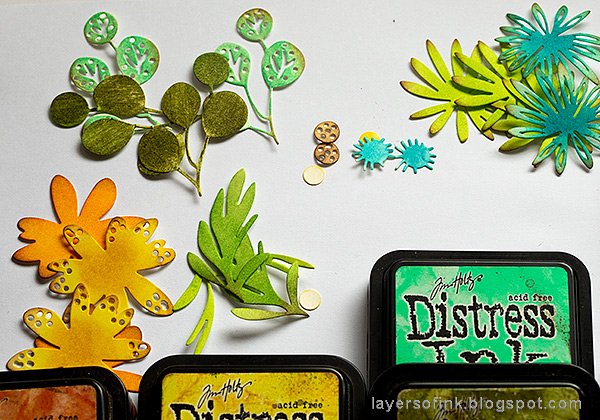
The flowers were first inked using a Mini Round Blending tool, and then darker details were added with Detailed Blending Tools. This is a quick and easy way to add darker ink in some areas only.

Layers of ink - Inky Blossoms Card Tutorial by Anna-Karin Evaldsson. Ink flowers and leaves.

Continue coloring the flowers and leaves, using any color you can think of.

Layers of ink - Inky Blossoms Card Tutorial by Anna-Karin Evaldsson. Shape the paper flowers.

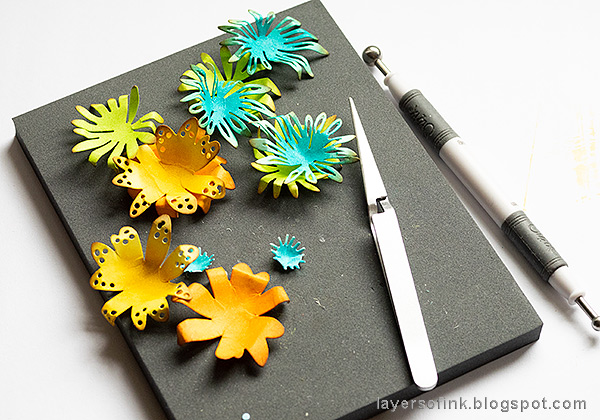
Give the flowers dimension and life with the Sizzix Paper Sculpting Kit. Place the flowers on the foam mat, press and roll with the embossing tools. Bend and roll petals back and forth with the tweezers.

Layers of ink - Inky Blossoms Card Tutorial by Anna-Karin Evaldsson.

The background paper was first inked a pretty dark brown.

Layers of ink - Inky Blossoms Card Tutorial by Anna-Karin Evaldsson. Stamp with Tim Holtz Fragments stamp.

Then I stamped it with Tim's Fragments set, using Ground Espresso Archival Ink. I love the worn wall-paper look of these stamps.

Layers of ink - Inky Blossoms Card Tutorial by Anna-Karin Evaldsson. Emboss the edges.

Distress the edges with an edge distressor. Apply ink to the edges with an Emboss It Dabber and emboss with Ranger's Hammered Mixed Media powder. Don't touch the melted powder until it is completely cool.

Layers of ink - Inky Blossoms Card Tutorial by Anna-Karin Evaldsson. Assemble the paper flowers.s

Layer the flowers together and glue them to the background.

Layers of ink - Inky Blossoms Card Tutorial by Anna-Karin Evaldsson.

I added some dots to the center of the flowers.

Layers of ink - Inky Blossoms Card Tutorial by Anna-Karin Evaldsson.

I just love the shape of these leaves. To give the flowers a base, I layered some Design Tape and a piece of lace trim at the background, forming a table.

Layers of ink - Inky Blossoms Card Tutorial by Anna-Karin Evaldsson.

The Mixed Media powders give a really cool effect.

Layers of ink - Inky Blossoms Card Tutorial by Anna-Karin Evaldsson. Die cut a sentiment.

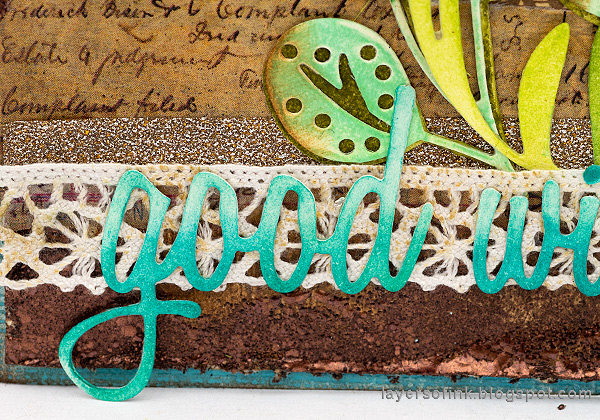
The sentiment was die cut and inked in an ombre fashion with Peacock Feathers and Mermaid Lagoon.
Layers of ink - Inky Blossoms Card Tutorial by Anna-Karin Evaldsson.

Here you can see the dimension of the flowers better.

I hope you will join us this week in our Beautiful Blooms challenge. As always, you have a chance to win a $50 gift voucher to do some fun shopping at Simon Says Stamp. You have until next Monday 8am Ohio time. 1pm UK time, 2 pm CET to join in.


Don't forget to follow Simon Says Stamp on Instagram, they post great stuff daily. 


Do you use Instagram? If so please add #sssmchallenge so we can see your entries there too.


Thank you so much for taking the time to visit my blog today!  

Happy crafting!

Anna-Karin

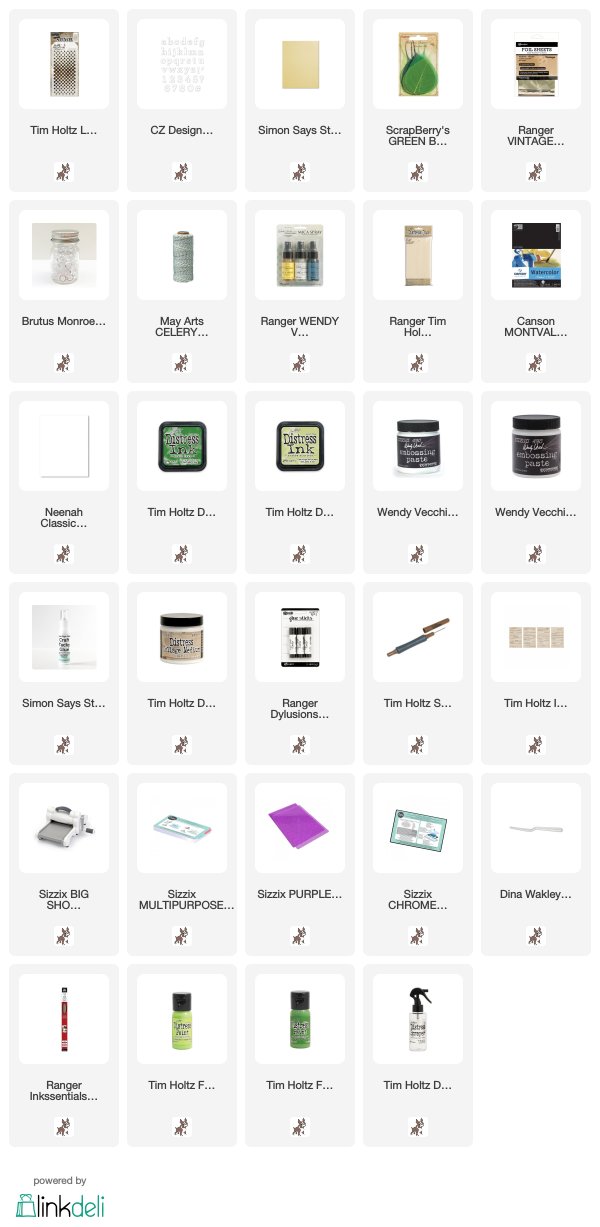
Supplies:

* Please note: the links are affiliate links, for which I receive a small percentage of sales generated by the link, at no extra cost to you.