
Hi friends! I am so happy to take part in the Simon Says Stamp blog hop in celebration of the new Blossoms and Butterflies release. It is is a gorgeous spring day here in Sweden and the new release is perfect for spring and summer crafting. You should have arrived here from the very creative Ankita Gupta.
The Blossoms and Butterflies collection contains a wide range of versatile dies, stamps, stencils, watercolor cards and sequins. You can see the whole collection here.

There is also a free gift for you. If you use the code BLSM999, when you make an order, you will get a free jar of Unicorn Dust Glitter (while supplies last!) with any purchase. The code will expire Sunday, 4/14 at 11:59 pm EDT.
I made two projects, a mixed media panel and a card, and both are tutorials. As usual the techniques can be used on many types of projects.

I loved the Bouquet of Roses stencil so much that I wanted it to be the center piece on a wall-hanger. It's a Mother's Day gift to my Mom. The panel is about 6 x 6.5 in. It might look complicated to make, but it is easy, and just requires a bit of patience to let paints and pastes dry in between layers. Let start.
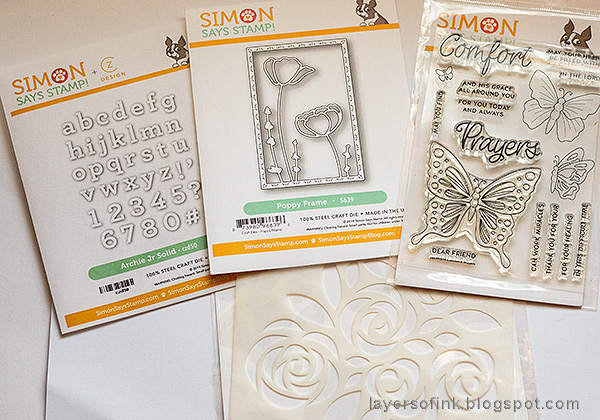
These are the products from Blossoms and Butterflies that I used on my projects: Archie Jr Solid, Poppy Frame, Comfort & Prayers stamp set and Bouquet of Roses stencil.
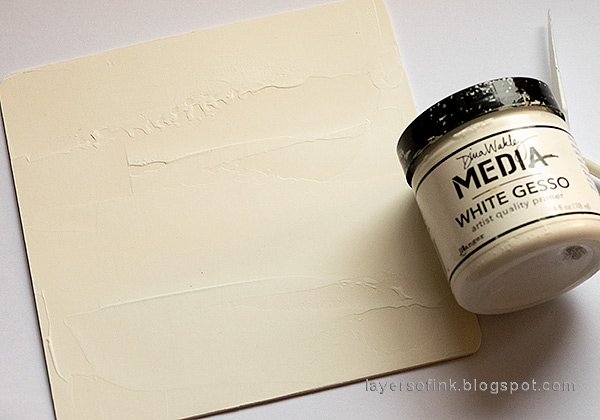
I started with a piece of mat board and coated it with gesso. The edges were rounded with my Corner Chomper.
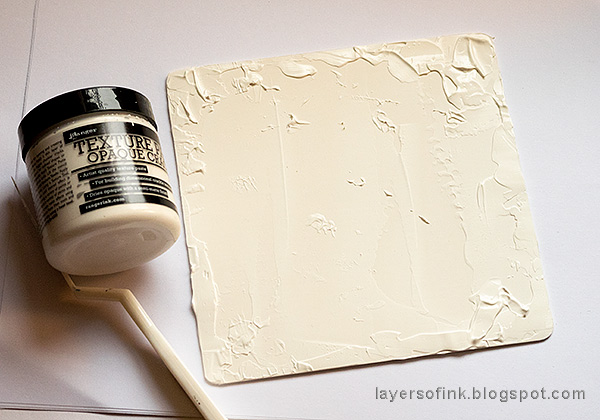
When the gesso is dry, add Opaque Crackle Paste, especially around the edges. Vary the thickness to get both small and large cracks (the thicker the paste, the larger the cracks). Leave to dry.

When the paste was dry, I glued the panel to a second slightly larger panel, which was recycled from old packaging. Leave to dry under heavy books.
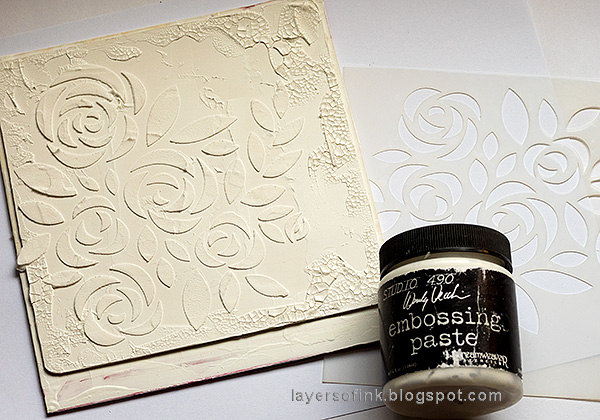
Apply texture paste with a palette knife through the stencil.

When the paste was dry, I painted it with watered-down Distress Paints, starting with Antique Linen. Mist with more water to get the shades to blend, and to get the darker brown to sink into the cracks. You can use quite a lot of water. Leave to dry.
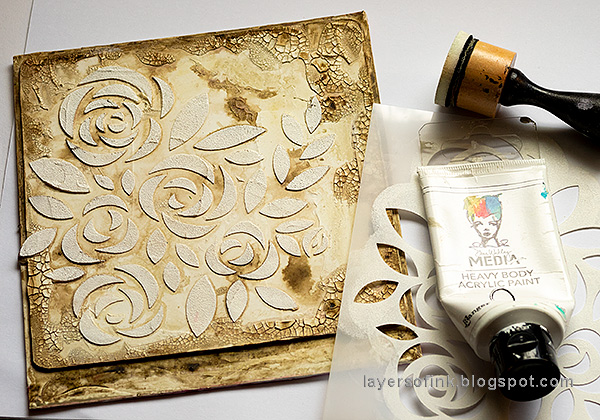
Place the stencil back over the design and sponge with white paint. This gives a lighter base for the painting of the flowers.

Paint the flowers and leaves with Distress Paints and Dina Wakley's Blushing pink. Add a second layer if needed.

Stamp the background here and there with the SSS You Matter background stamp, for more texture.

If you want to, add a shadow with a Black Soot Marker along some of the edges of the flowers. I imagined the light to come from the top left of the panel. You can smear the black out a bit with a Q-tip dipped in water.

Dry brush metallic Rosy paint over the roses, and here and there on the background. This gives a lovely subtle metallic sheen to the panel.

Apply a glue stick randomly here and there and rub a vintage gold foil sheet on top. This gives a worn gilded effect.

I love alpha dies and the ones in the Archie Jr Solid set are fantastic. Such a great font and size, perfect for cardmaking, but also for other types of projects. I die cut them from brown and gold, layering to offset the gold slightly.
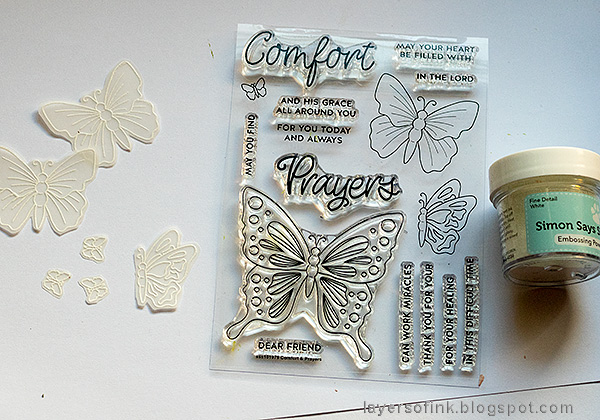
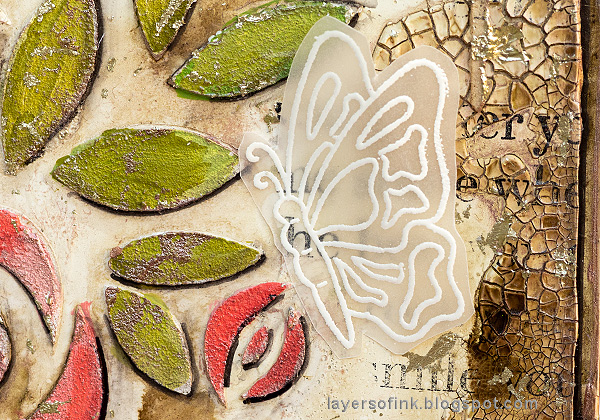
White emboss butterflies from the Comfort & Prayers set on vellum and cut out.

Bend out the wings of the butterflies slightly and glue them only along the body, using Matte Medium, which doesn't show at all.
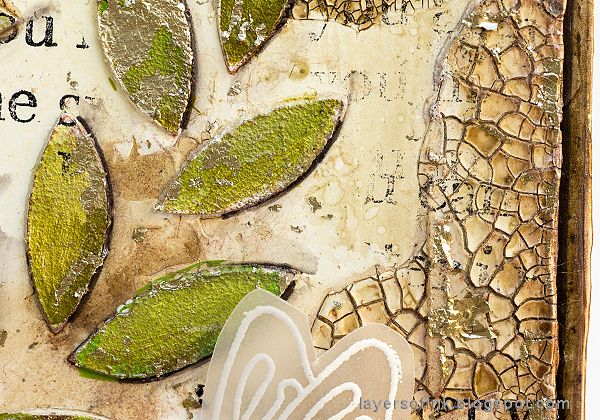
Here you can see the lovely texture created with the crackle, paint, stamping and metallic bits.
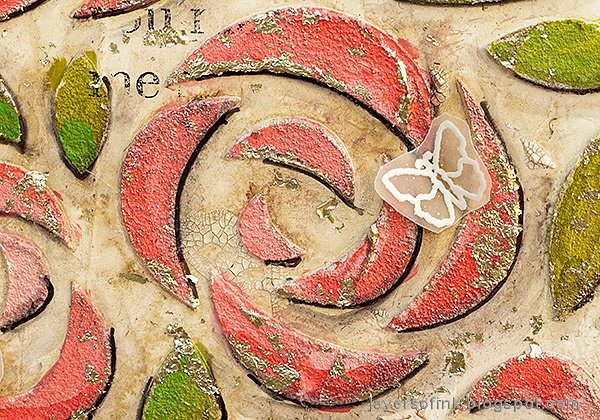
This rose design is so pretty and I love the bits of gold. Up close, some of the shadow lines look a bit harsh, but that makes them stand out a better from a distance.

The gold adds a nice shadow to the letters. I glued a piece of lace to the base and tied some twine around it. The sentiments come from Tim Holtz's Clippings stickers.

You can easily change the colors for a different look, and if you don't want all the grunge and distressing, just skip those steps.
White embossing on vellum is a favorite technique of mine. It looks great on its own, but if you want to, you can also color the vellum on the back.

The second project that I made is a card, using the wonderful Poppy Frame, together with the Archie Jr Alpha dies. I wanted the poppies to be the focal point and left everything else in shades of white.

Start by die cutting the Poppy Frame from watercolor paper.
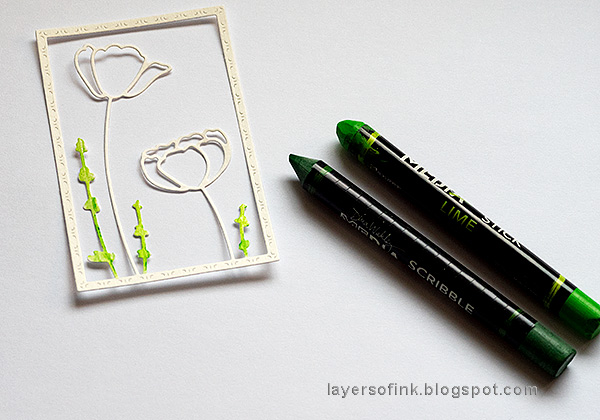
Color the grass with Dina Wakley Scribble Sticks and turn to watercolor with water and a paint brush. I used both Scribble Sticks and Scribble Sticks 2.

Color a piece of watercolor paper with Scribble Sticks and use water to turn them into watercolor.
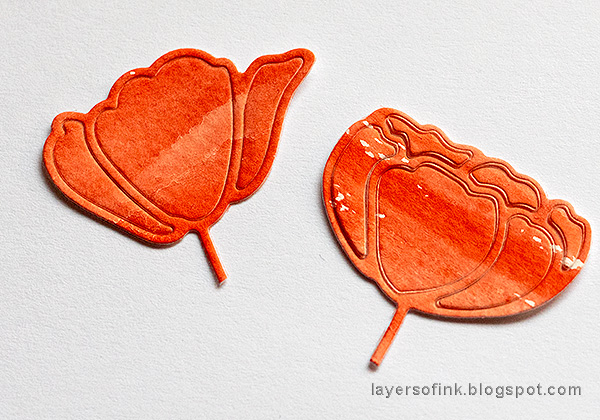
Die cut the poppies from the red paper.

If needed add some more shading to the petals.

For the background, I just cut a piece of watercolor paper and colored it with Distress Inks.
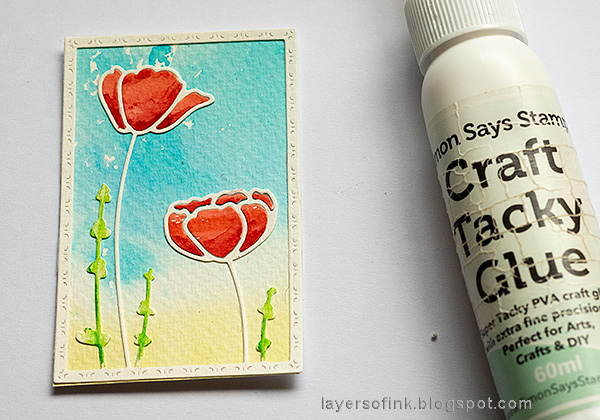
Glue the red pieces into the poppies.
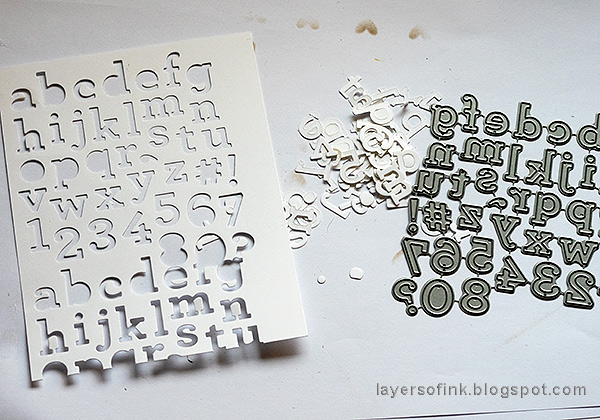
I kept the alpha dies intact for now, not separating them, so that I can use the for background elements. Die cut from a white piece of card.
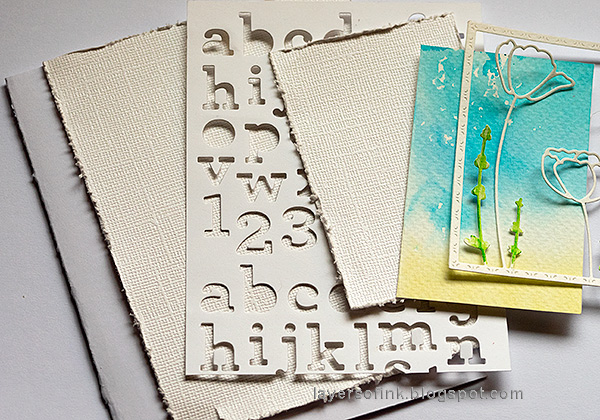
For the layers, I used a white folded cardstock, two pieces of SSS Glimmery White Diamond cardstock, and the alpha panel. Distress some of the edges.
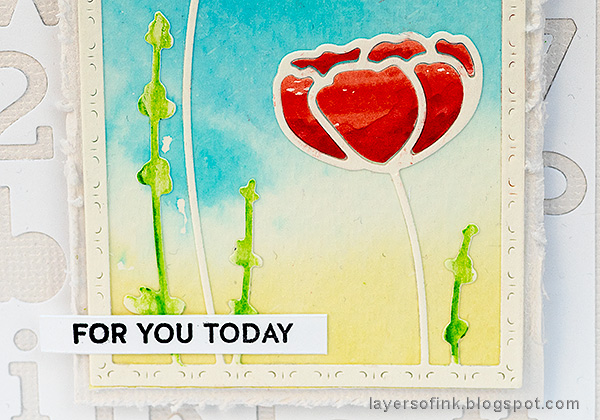
I used part of a sentiment stamp from the Comfort and Prayers set. The poppy panel was attached with foam tape.

You can also color the outlines black, but I liked the lighter look of the white. Check out the lovely detailed frame of the Poppy Frame.

Using various shades of white gives dimension and interest without taking the focus away from the poppy panel.
There are of course prizes to be won, and at each stop on the hop SSS is giving away a $25 coupon, randomly drawn from those who leave a comment. The winners will be posted post on the Simon Says Stamp store blog on Wednesday, the 17th of April.
Your next stop on the hop is Gayatri Murali. Don't miss the inspiration you will be sure to find there.
Here are all the stops along the hop:
Anna-Karin Evaldsson (you are here)
Thank you so much for visiting today and I hope you will have a lovely weekend!
Happy crafting!
Anna-Karin
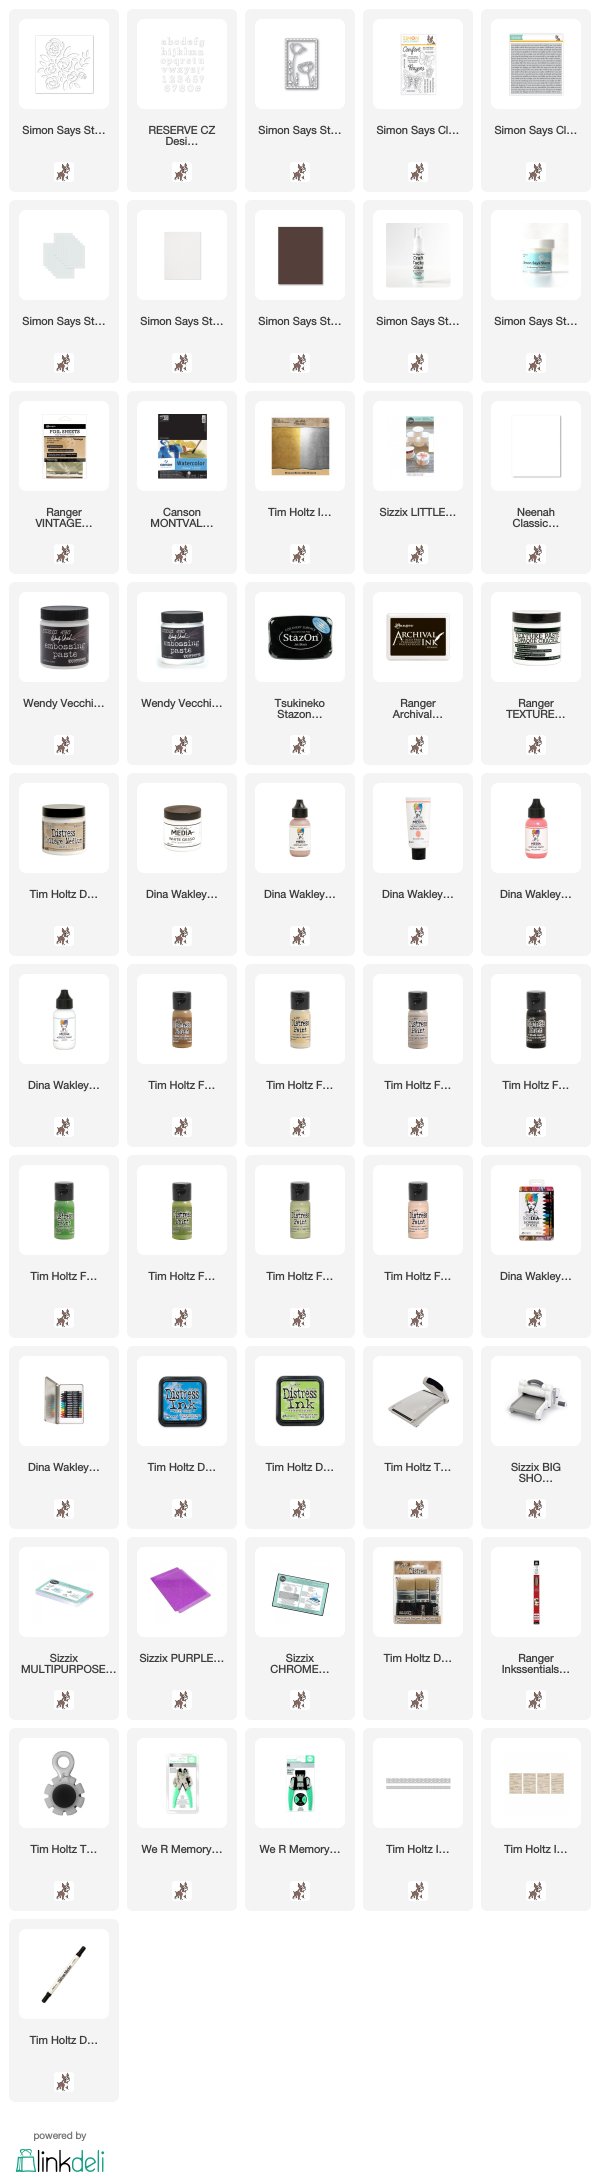
Supplies:
* Please note: the links are affiliate links, for which I receive a small percentage of sales generated by the link, at no extra cost to you.
Love all the texture and depth you get with your gesso. So much fun and so many things to use and so little time to experiment. Thanks for your beautiful pieces.
ReplyDeleteWow such creative techniques..
ReplyDeleteHi, just come over from the blog hop and very excited to see so many new ideas for myself. Amazing texture and techniques. I’ve got a lot of inspiration. Many thanks ;)
ReplyDeleteYour card and panel are so beautiful! Thank you for sharing how you made them.
ReplyDeleteOH MY GOODNESS! I have been wanting to do a panel like this for a Tim Holtz frame I got.... This came out WONDERFULLY, Anna-Karin! I LOOOVE how you used ALL of the product! Your panel came out BEAUTIFULLY!!!! AND your card, SO CREATIVE the way you used the Alphabet Dies! FABULOUS WORK!!!! ;) LOVE EVERY BIT of your post!!! ;)
ReplyDeleteOh wow --- such gorgeous creations! I especially like that first mixed-media piece, I think it's my absolute favorite from the entire hop!
ReplyDeleteI do admire people that can do mixed media! Amazing.
ReplyDeleteThese are beautiful! :)
ReplyDeleteYour mixed media creations are so gorgeous!
ReplyDeleteGorgeous and so different. Thanks for sharing these!
ReplyDeleteBeautiful creations! Both are really little works of art and impressive. This SSS release can be used in so many ways as shown here! Thanks for a lovely different perspective!
ReplyDeletethe mixed media project is gorgeous.
ReplyDeleteLove the vellum butterflies.
the card is wonderful. Great
use of the die cuts. thanks for
sharing. txmlhl(at)yahoo(dot)com
You have created an amazing mixed media hanger, Anna-Karin, and I'm sure your Mum will just love it! SO many elements and steps, you explained so simply all the way. It made me feel like giving it a go! Thanks so much for sharing your wonderful inspiration!
ReplyDeleteWhat a wonderful work of art! Your panel is lovely and I am sure your mother will love it! Your card is awesome, the details you add are amazing!
ReplyDeleteBeautiful! I love the mixed media uses
ReplyDeleteI often wonder how mixed media art is done so thanks for showing us step by step and surprised to read that it's just in layers, allowing to dry in between. Love both of your gorgeous projects. Thanks for sharing and posting.
ReplyDeleteso much I need to learn
ReplyDeleteOh my goodness--my jaw dropped when I saw your first project! Absolutely my favorite of all I've seen! I put that stencil on my wishlist & now it's gotta be in my next order! Thank you so much for the wonderful tutorial, as always!
ReplyDeleteYour "beautiful" panel is exactly that! Very inspiring!
ReplyDeletelove love your mixed media art work - so creative:)
ReplyDeleteWow Anna-Karin what a great post. I love your stunning mixed media panel and what a good work description. Your card is awesome, gorgeous all those layers.
ReplyDeleteThank you so much for all the time and effort to make these beautiful projects to inspire us. Have a great Sunday.
I am very afraid of mixed media projects! Your panel and card are stunning and SO unique! This looks like great fun. Thanks so much for the detailed decrisptions of your creations. I’m thinking I could actually tackle this!
ReplyDeleteBeautiful projects. I especially love the wall hanging. So gorgeous!
ReplyDeleteOMG!! These projects are fabulous!
ReplyDeleteboth gorgeous and so creative, however, that first mixed media piece is just stunning!!
ReplyDeleteSome exception projects here. Your Mom will be thrilled with the wall hanging. Love them all.
ReplyDeleteNot only are your designs beautiful, they are true works of art!
ReplyDeleteAmazing projects! Your Mom is sure to love your mixed media wall hanging!
ReplyDeleteWow - love the mixed media! So many textures and elements! Love your card! This is a fun release!
ReplyDeleteWow that mixed media project that you made for your mother is SPECTACULAR! That is so great that you shared each step with us! You make it look so easy! I love the different layers that you put on it and how the colors just seem to glow. Your card is fantastic tok and gain thanks for sharing your step by step process. Great projects!!!
ReplyDeleteWow! Both projects are absolutely stunning! Really love the vintage vibe of the first one.
ReplyDeleteWOW!! Love all the texture and depth you made with fabulous products! So much fun and so many things to use and so little time to experiment. Fabulous creations!
ReplyDeleteWow! These are both beautiful!!
ReplyDeleteWonderful mixed media project. Great texture and layers thanks for sharing your inspiration!
ReplyDeleteBeautiful card! The project with the rose stencil is gorgeous! Thanks for the step-by-step so we can see all the layers that went into this.
ReplyDeleteGorgeous projects. The wall hanging is amazing -- I have to give your techniques a try!
ReplyDeleteSimply beautifulwal hanging and card!
ReplyDeleteYour step out photos and directions are truly some of the best I have ever come across in blog land. I appreciate so much the time you take to put these posts together, not to mention your amazing projects! These are gorgeous!
ReplyDeleteI absolutely adore the shabby look and feel of the lovely floral piece you have first shown. The simplicity of the card and the way the poppies stand out on the second project is just stunning.
Thank you for the inspiration! :)
I love your projects! Especially the wall hanging!
ReplyDeleteI love that rose stencil. I love the texture you created! Just WOW
ReplyDeleteThis is beautiful!
ReplyDeleteLove, love, love the wall hanging!
ReplyDeleteAmazing!!! Your Mom is a very lucky lady!
ReplyDeleteBeautiful projects!
ReplyDeleteAbsolutely gorgeous projects!!
ReplyDeleteYour work is just lovely. That mixed media panel is just stunning. And the card is very pretty also. Everyone is submitting such pretty work today. Thank you so much for sharing. I hope you are enjoying a wonderful weekend. Hugs!
ReplyDeleteGorgeous!!
ReplyDeleteAmazing and I love the idea of recycled products. Waste not, want not as my Gram used to say.
ReplyDeleteWow, gorgeous projects! Love the wall hanging!
ReplyDeleteYour mixed media panel is gorgeous (love that stencil). Thank you for sharing your cards also they are all beautiful.
ReplyDeleteYour wall hanging is beautiful. I just love the grunge look. The card is so cheerful with the pretty poppies.
ReplyDeleteWow! That first project is a real work of art!
ReplyDeleteLove th panel!!! Thank you for lying out all the steps!!!! Can’t wait to give it a try!!!
ReplyDeleteAs everyone else has said before me - your mixed medial panel is simply stunning! Love everything about it. And, you card is very pretty also.
ReplyDeleteha, you know I've forgotten all about that crackle stuff. Mine's probably all dried up lol. Lovely multi media work.
ReplyDeletewonderful projects. Thanks for reminding us of the versatility of these products.
ReplyDeleteWhat great techniques. Lovely job. Great use of the SSS products. Thanks for sharing your creativity!
ReplyDeleteWow, your cards are beautiful. The first one is so unusual and I just love them all. Am loving this whole new SSS release - all the products are a "must have" - all so beautiful! Thanks so much for sharing your talent with us. It's appreciated.
ReplyDeleteWow!! Really Fabulous projects!!!
ReplyDeleteI love crackle and the colors you chose. The mixed media project is fabulous!
ReplyDeleteDelightful projects! I enjoyed seeing how you created the mixed-medium art piece and how you got such great color shading on the card with flowers.
ReplyDeleteAwesome release, awesome creations! I absolutely love the mixed media piece!
ReplyDeleteSo beautiful! I am always in awe of the mixed media paces I see. Yours is wonderful!
ReplyDeleteThe butterflies look so cute! And the flowers are very pretty. Your cards are always so nice...
ReplyDeleteLovely projects! Love the colors and textures of your mixed media piece!
ReplyDeleteI really enjoy your creativity! Thank you for sharing it.
ReplyDeleteYour first panel was truly an inspired work of art. I had forgotten how creative using gesso and paste can be. Truly an inspiration for all.
ReplyDeleteBoth of your projects are lovely but I do especially like the shabby chic look of the first one.
ReplyDeleteOh WOW!!! I'm always stunned by your wonderful projects!! Love, love, LOVE the mixed media home decor panel, your Mum will be amazed by it!! Any detail is a joy for the eyes! Very inspiring!! I would have a try with these techniques! Your step by step tutorial is precious, thanks for sharing!
ReplyDeleteThe watercoloured card is a delight too, how sweet and impressive!! The colours you used matches so well together and LOVE the fresh and vibrant feel!! Amazing mix of diecuts!
Two masterpieces!
OMG I guess they directed me to the wrong page or something... took forever to find the place to leave a comment!!!!!!!!
ReplyDeleteLove your two projects!!! all that Texture Goodness!!!! those font dies look amazing on all these cards!! tfs!!
Oh MY! So lovely!! Really loving that rose stencil!!
ReplyDeleteloved this
ReplyDeleteYour projects are wonderful! I absolutely love that wall hanging. I love grunge and distressing. This also has a vintage vibe-which I also like.
ReplyDeleteso pretty! so many wonderful techniques!
ReplyDeleteLove the rustic feel and crackle effect on the first project.
ReplyDeleteGorgeous projects!
ReplyDeletegorgeous !
ReplyDeletelove it!
Love your wall panel, so pretty and a perfect gift.
ReplyDeleteWow!!!!! Beautiful artwork !
ReplyDeleteSooo..... pretty !! Thank you for sharing a great idea
ReplyDeleteGreat mixed media piece and I love your card - it is so vibrant!
ReplyDeleteWow, amazing! Your mixed media piece is simply breathtaking, and the card is also lovely!
ReplyDeleteWow! Fabulous work!! I love the mixed media one so much! :)
ReplyDeleteLove the mixed media art and the
ReplyDeletecard was is gorgeous! Thanks for sharing...
This look like such messy fun!
ReplyDeleteI LOVE the colors you chose for your creations they truly stand out and Simon Says offering Unicorn Dust Glitter Free and a $25 chance for shopping - Whoo Hoo.....
ReplyDeleteSQUEAL!! I LOVE LOVE LOVE these!! Such BEAUTIFUL Designs!! THANKS SO MUCH for sharing and have a FABULOUS WEEKEND!!
ReplyDeleteWow, great techniques!
ReplyDeleteI love your projects!! Wow!! They are awesome!! So creative!! Thank you for sharing!!
ReplyDeleteLove all the projects. The wall hanging is gorgeous. Your mom will love it.
ReplyDeleteThanks for sharing your gorgeous cards and amazing multi-media art work-your Mom is going to love it!
ReplyDeleteA.M.A.Z.I.N.G. as anything I have ever seen! Wowzers! Thanks for sharing!
ReplyDeleteooooo! really luv your mixed media panel. I luv how adding the background stamp subtly filled in blank spaces
ReplyDeleteFantastic projects! I love your mixed media panel - such great techniques!
ReplyDeleteFabulous card and panel! Love your techniques and all the step-by-step photos.
ReplyDeleteOh wow your projects are amazing!
ReplyDeleteBoth your projects are so lovely! Thank you for your tutorials - they are always so clear and comprehensive!
ReplyDeleteOh wow! Awesome projects!!! Thanks for the useful tutorial!!!
ReplyDeleteWonderful creations! Thank you for the great tutorial!
ReplyDeleteI love what you did with the Rose Bouquet Stencil. In fact, I just ordered it and can't wait to use it! Your work is just beautiful. Thanks for such wonderful inspiration! :)
ReplyDeleteAngie
abcammack@comcast.net
Amazing projects. Thanks for the inspiration
ReplyDeleteI opened my email, and your mixed-media panel jumped out at me. So here I am loving it. You always do such wonderful work; I should have known it was yours. Your card is also very beautiful. Thank you for the tutorials for both projects. Daria
ReplyDeleteI love seeing what mixed media artists do with products. You have such a different perspective from me, so I always learn a lot from your posts. Thanks for sharing with us!
ReplyDeleteVery interesting mixed media project.
ReplyDeleteWOW...your Mom is going to LOVE her Mother's Day gift! That wall hanging gorgeous! Your poppy card is really beautiful, too! Thanks for the great tutorials explaining how you made each project step-by-step!
ReplyDeletethis is amazing. Thanks for the step by step instructions. I always look at these amazing distress items, and wonder how they even do them! Doesn't look near as hard with all your photo's and explanations. Although I have no idea how you were able to do the background word stamp set after colouring in the flowers and not getting it on top?
ReplyDeleteWow! Great projects!! I really like the way you used the positive and negative aspects of the Archie Jr dies. That alphabet is fantastic... so bold and "crisp" (for lack of a better word). I also like the different floral elements from this release and the You Matter background stamp from a previous release. (Those words are so good! We need to see that stamp used more often.)
ReplyDeleteBeautiful--I am sure you mom will love this. Wonderful card too.
ReplyDeleteSo beautiful and unique! Love it!
ReplyDeleteVery different creations, love that vellum butterflies on the first one.
ReplyDeleteWhat fun projects you created...love the detail and texture you created on both with so many unique products.
ReplyDeleteI missed this the first time around - but wow! Love it!
ReplyDelete