Monday, October 29, 2018

Butterflies and Dragonflies Tutorial

Hi friends! The first snow is falling outside my window as I type this and autumn is turned into winter. We also switched over to winter time this weekend, so it gets dark even later in the evening. Personally, I would prefer a darker morning and more light in the afternoon. This weekend, my eldest also went to a fun Halloween party. Leo had a cute Halloween day at school last week and was a lion, but lost his tail, which was his favorite part of the outfit. So I'll have to figure out a way to make a new tail, unless it reappears. 


This week at the Simon Says Stamp Monday Challenge Blog we have a Take Flight theme. Don't miss the last project of our wonderful October guest designer Tenia Nelson, aka Jazzy Paper Designs.

Layers of ink - Butterflies and Dragonflies Tutorial Art Journal Page by Anna-Karin Evaldsson, with AALL & Create stamps by Tracy Evans

I made an art journal page, with a take flight theme, about daring to dream both big and small dreams. The stamps are by AALL & Create, designed by Tracy Evans. The dragonflies were inspired by a day spent at a lake during a summer bike ride. There were many blue and silver dragonflies, called Eurasian Bluets, and Anton and I tried to draw them in my sketchbook.

Layers of ink - Butterflies and Dragonflies Tutorial Art Journal Page by Anna-Karin Evaldsson, white embossing the stamps.

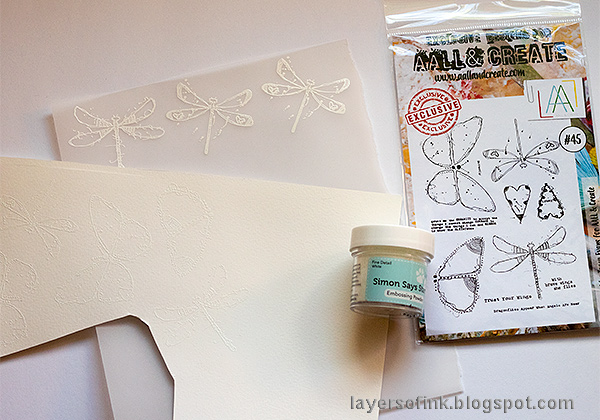
I started out by white embossing the dragonflies and butterflies from the #45 set on watercolor paper and vellum.

Layers of ink - Butterflies and Dragonflies Tutorial Art Journal Page by Anna-Karin Evaldsson, watercoloring stamped images.

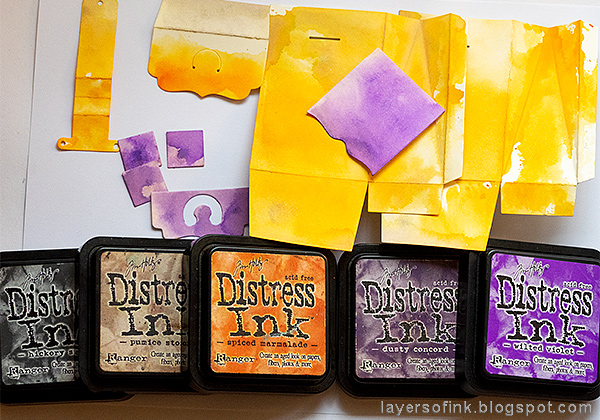
Smear Distress Ink on a non-stick craft sheet, mist with water and use as watercolor paint. I ended up not using the butterfly to the upper left. The vellum dragonflies were colored on the back with a blue and a silver Prismacolor pencil.

Layers of ink - Butterflies and Dragonflies Tutorial Art Journal Page by Anna-Karin Evaldsson. Background with Paper Artsy Infusions.

I worked on one of the cotton-rag watercolor pages in my Dina Wakley Media Journal. Mist water on the page, sprinkle with Paper Artsy Infusions Colored Stains, add more water and Infusions until you are happy with the result. I was aiming for a lake inspired background and used: A Bit Jaded, Sleight Blue and In the Navy.

Layers of ink - Butterflies and Dragonflies Tutorial Art Journal Page by Anna-Karin Evaldsson. Coloring with colored pencils and white gel pen.

When dry, stamp flowers from the #44 set on the background with Archival Ink. I extended some of the stems with a black pen. Color the flowers with colored pencils and add some scribbles with a white gel pen.

Layers of ink - Butterflies and Dragonflies Tutorial Art Journal Page by Anna-Karin Evaldsson.

Stamp hearts and sentiments from set #45 here and there on the page. I love the tiny size of these sentiments - and see how perfectly they stamped, even though the letters are so small. Color the hearts roughly with the colored pencils.

Layers of ink - Butterflies and Dragonflies Tutorial Art Journal Page by Anna-Karin Evaldsson. Dragonfly.

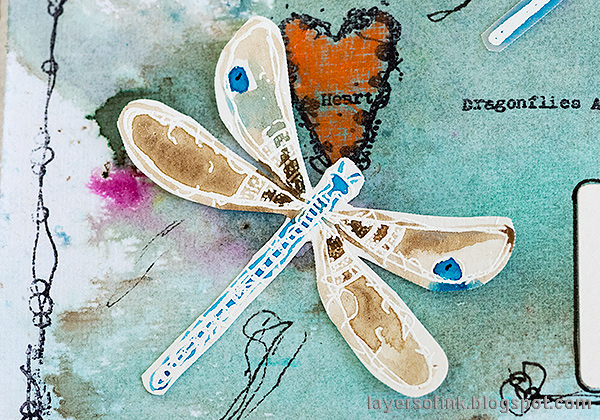
Stamp a border around the page with the scribbly border stamp from set #44. I also added some extra circles and scribbles here and there on the page. This is a watercolor paper dragonfly.

Layers of ink - Butterflies and Dragonflies Tutorial Art Journal Page by Anna-Karin Evaldsson. Vellum dragonfly.

And here is a vellum dragonfly. The silver shine on the wings doesn't show well in the photos. You can of course pick just the one kind of paper for the dragonflies.

Layers of ink - Butterflies and Dragonflies Tutorial Art Journal Page by Anna-Karin Evaldsson, with Tim Holtz Sizzix Letterboard.

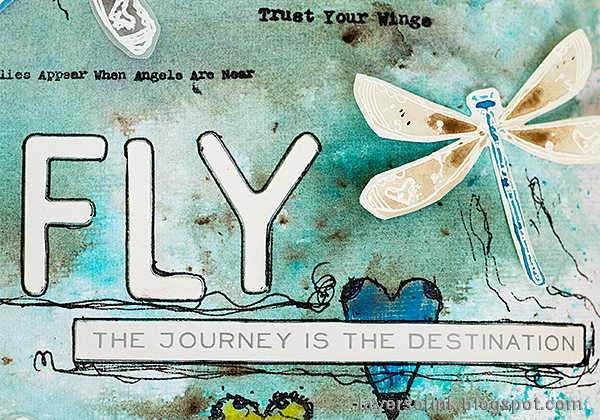
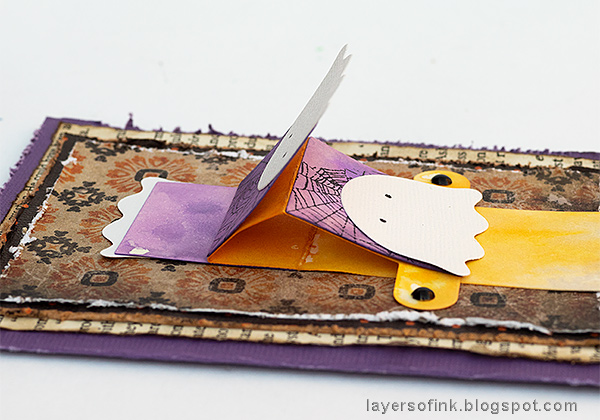
The title was die cut with Tim Holtz Letterboard die. I planned to color it orange, but changed my mind, since I thought the page needed more white. Outline the letters and sentiment stickers with a black marker, to add more scribbles. If you are a cardmaker, be on the look out for areas on an art journal or scrapbooking page that can easily be turned into a card - such as the photo above. You could also use an orange butterfly instead of the dragonfly.

Layers of ink - Butterflies and Dragonflies Tutorial Art Journal Page by Anna-Karin Evaldsson. Watercolor butterfly.

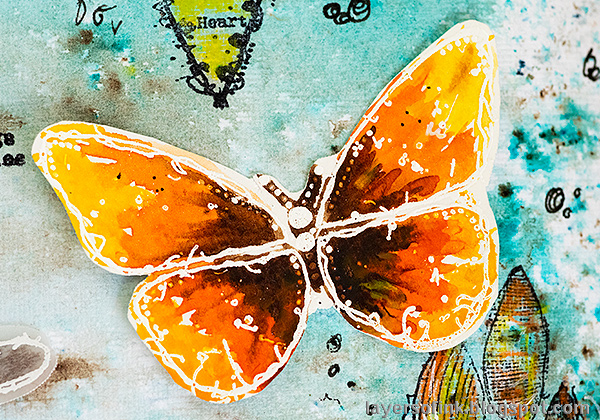
The butterflies and doodled circle trails. I love the scribbly look and fine details on these stamps.

Layers of ink - Butterflies and Dragonflies Tutorial Art Journal Page by Anna-Karin Evaldsson.

When stamping with very small stamps, such as these sentiments, try to use an acrylic block that is as small as possible. Using an acrylic block that is as small as possible, is a great tip for any stamping, but it is even more important for small stamps. It makes it much easier to get a good impression, than if you try to use a large block together with a tiny stamp. This Hero Arts set of three small blocks, is my favorite to use with small stamps.

Layers of ink - Butterflies and Dragonflies Tutorial Art Journal Page by Anna-Karin Evaldsson.

Don't worry about perfection when coloring these stamps, just scribble on different colored pencils and add some white marks.

Layers of ink - Butterflies and Dragonflies Tutorial Art Journal Page by Anna-Karin Evaldsson.

I grounded the flowers to the page with darker colored pencils and more grass-looking scribbles.

Layers of ink - Butterflies and Dragonflies Tutorial Art Journal Page by Anna-Karin Evaldsson.

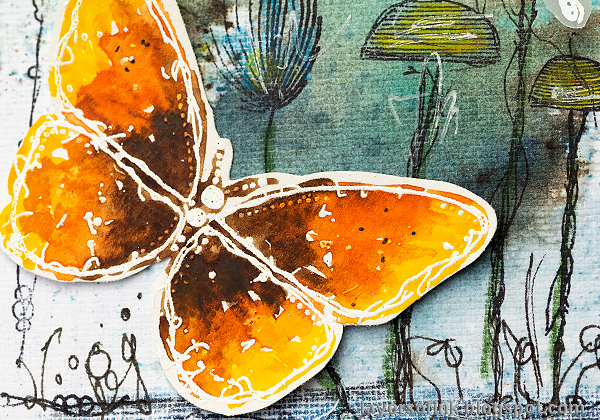
And the second butterfly, stretching its wings to fly into the page.

I hope you will join us this week in our Take Flight challenge. As always, you have a chance to win a $50 gift voucher to do some fun shopping at Simon Says Stamp. You have until next Monday 8am Ohio time. 1pm UK time, 2 pm CET to join in.


Don't forget to follow Simon Says Stamp on Instagram, they post great stuff daily. 


Do you use Instagram? If so please add #sssmchallenge so we can see your entries there too.


Thank you so much for taking the time to visit my blog today!  

Happy crafting!

Anna-Karin

Supplies:

* Please note: the links are affiliate links, for which I receive a small percentage of sales generated by the link, at no extra cost to you.


Friday, October 26, 2018

Waterfall Card Video Tutorial

Hello friends! Today I have a tutorial to share with you, which also includes a video. I made two Halloween gift bags and a card, but they can very easily be done for any theme. In fact, the Sizzix dies that I used are not at all meant for Halloween. There is a fun, interactive waterfall on each project.

Layers of ink - Waterfall Video Tutorial by Anna-Karin Evaldsson, with Sizzix dies by Lori Whitlock.

I started out making the two gift bags for my sons, and then realized that the waterfall would be easier to show in a video. I hadn't done a video in quite some time, and I will try to do more of them. They do take quite a lot longer and if the choice is between two step-by-step tutorials, or one video tutorial, I tend to go with the first option. But I will do my best to do more videos. The tutorial starts with steps and the video comes a little later into the post.

Layers of ink - Waterfall Video Tutorial by Anna-Karin Evaldsson, with Favor Bag with Bracket Flap die set.

I used two die sets by Lori Whitlock for the bags. This is the Favor Box w/ Bracket Flap. Die cut from Heavystock paper and score along the lines. I used the new Big Shot Foldaway die-cutting machine, which saves space, is easy to take a long, and comes with a bunch of extras. But you can also die cut the bags with a Big Shot or Vagabond.

Layers of ink - Waterfall Video Tutorial by Anna-Karin Evaldsson, with Favor Bag with Scallop Top Sizzix die set.

The second set is called Favor Bag w/Scallop Top. Again die cut using Heavystock paper.

Layers of ink - Waterfall Video Tutorial by Anna-Karin Evaldsson, inking paper with distress inks.

Smear Distress Inks on a craft sheet, mist with water and press the papers into the ink.

Layers of ink - Waterfall Video Tutorial by Anna-Karin Evaldsson, stamping papers with Halloween stamps.

When dry, stamp with various Halloween stamps. I used stamps by Tim Holtz: Mini Halloween, Mini Halloween 3 and Haunted House.

Layers of ink - Waterfall Video Tutorial by Anna-Karin Evaldsson.

Die cut a waterfall construction piece and three squares and fold along the score lines. These pieces are a part of the Favor Bag with Scallop Top set. For the card in the video, I used the larger Celebration Waterfall set.

Layers of ink - Waterfall Video Tutorial by Anna-Karin Evaldsson, turning ice-cream scoops into ghosts.


Die cut ice-cream scoops from Simon Says Stamp White Diamond glimmery paper and add eyes to turn them into little ghosts. If you rather want to do keep them as scoops - die cut them in various colors, and die cut the small triangle in the set, for the cone.

Layers of ink - Waterfall Video Tutorial by Anna-Karin Evaldsson, assembling the waterfall.

Color and stamp the waterfall pieces as before. Apply adhesive as shown. I used Wonder Tape. Glue the ghosts to the squares, letting them overlap the lower edge slightly.

Layers of ink - Waterfall Video Tutorial by Anna-Karin Evaldsson.

Start with the bottom square, lining it up with the score line.

Layers of ink - Waterfall Video Tutorial by Anna-Karin Evaldsson,small waterfall..

And then the second ghost.

Layers of ink - Waterfall Video Tutorial by Anna-Karin Evaldsson, ghost waterfall.

Finally, the third ghost.

Layers of ink - Waterfall Video Tutorial by Anna-Karin Evaldsson, turning ice-cream scoops into ghosts.

Tie a piece of string through the hole in the waterfall.

Layers of ink - Waterfall Video Tutorial by Anna-Karin Evaldsson, turning ice-cream scoops into ghosts.

Flip the waterfall over and attach with brads - you can see this particular step much better in the video below.


Here's the video, with a couple of mistakes here and there, and pretty inky fingers (I almost always have inky fingers), but it does show you how to make the waterfall.

Layers of ink - Waterfall Video Tutorial by Anna-Karin Evaldsson, Halloween gift bags.

The boys are going to get these on Halloween. I just need to decide what to put in them first. Last year, I made them Halloween bags too, and we use them as decorations this year. You can find them in this Inky Halloween Tutorial.

Layers of ink - Waterfall Video Tutorial by Anna-Karin Evaldsson, Favor Bag with Bracket Flap.

Assemble the bags by applying tape along the flaps. This is the Favor Box w/Bracket Flap.

Layers of ink - Waterfall Video Tutorial by Anna-Karin Evaldsson, with Tim Holtz Halloween side-order.

Ink the edges of the bags. I also die cut the sentiment using the Tim Holtz Halloween Side-Order set.

Layers of ink - Waterfall Video Tutorial by Anna-Karin Evaldsson, turning ice-cream scoops into ghosts.

Here is the cute little ghost/ice-cream waterfall.

Layers of ink - Waterfall Video Tutorial by Anna-Karin Evaldsson, Halloween favor bag.

You can see the shape of the bag better here.

Layers of ink - Waterfall Video Tutorial by Anna-Karin Evaldsson, diy Halloween gift bag.

The back of the bag just contains some stamping.

Layers of ink - Waterfall Video Tutorial by Anna-Karin Evaldsson, Favor Bag with Scallop Top.

The second bag has a cute scalloped top.

Layers of ink - Waterfall Video Tutorial by Anna-Karin Evaldsson, Favor Bag with Scallop Top.

Tie the bag with strings.

Layers of ink - Waterfall Video Tutorial by Anna-Karin Evaldsson, Favor Bag with Scallop Top.

Here's the back of the scalloped bag.

Layers of ink - Waterfall Video Tutorial by Anna-Karin Evaldsson, Favor Bag with Scallop Top.

You see the waterfall effect better in the video, because of the moving parts.

Layers of ink - Waterfall Video Tutorial by Anna-Karin Evaldsson, Halloween Waterfall Card.

I also made a card, mainly to use for the video. For the video, I used a larger version of the waterfall from the Celebration Waterfall set, to make it easier to see. Apart from that, the procedure is the same as for the small waterfalls.

Layers of ink - Waterfall Video Tutorial by Anna-Karin Evaldsson, Halloween Waterfall Card.

The card is simple with just some layers of distressed old book paper, kraft core paper and patterned paper.

Layers of ink - Waterfall Video Tutorial by Anna-Karin Evaldsson, Halloween Waterfall Card.

My eldest still thought the ghosts looked a bit like ice-cream scoops. The Celebration Waterfall sets contain a bunch of fun shapes you can use, such as a cupcake, birds, stars and more.

Layers of ink - Waterfall Video Tutorial by Anna-Karin Evaldsson, Halloween Waterfall Card.

Pull the string to make the waterfall move.

Layers of ink - Waterfall Video Tutorial by Anna-Karin Evaldsson, Halloween Waterfall Card.

The second ghost moves.

Layers of ink - Waterfall Video Tutorial by Anna-Karin Evaldsson, Halloween Waterfall Card.

And the third ghost.

I hope you enjoyed this tutorial and the video! Remember that these projects will work just as well in a birthday theme or in any other theme. How about a Christmas card with little Santas, baubles or gifts?

Thank you so much for taking the time to stop by today! Have a lovely weekend!

Happy Crafting!

Anna-Karin

Supplies:

* Please note: the links are affiliate links, for which I receive a small percentage of sales generated by the link, at no extra cost to you.