Showing posts with label Die cut. Show all posts

Saturday, November 7, 2026

Simon Says Stamp Joy for You Blog Hop

Hello and welcome to my blog! I am so happy to take part in the Simon Says Stamp Blog Hop to celebrate the new Joy for You release. If you are following along in the hop, you should have come here from the fantastic Alberto Gava.

Please note: this post has affiliate links, for which I receive a small percentage of sales generated by the link, at no extra cost to you.


The Simon Says Stamp Joy for You release is filled with of a great variety of new and versatile stamps, embossing folders, stencils, dies, ink and sequins. Perfect for winter and holiday crafting, but also for many other themes. You can find the entire Joy for You release here.


The not-yet-released Simon Says Stamp The Joy of Snow 3x4 stamp is automatically added to your cart that contains any purchase from our exclusive Joy for You collection! This gift with purchase will expire 11/8 at 11:59 pm EST or while supplies last.

Layers of ink - Winter Deer Tag tutorial by Anna-Karin Evaldsson.

I made a Christmas tag with combining dry and heat embossing for the background. It is one of my favorite techniques with embossing folders. The deer and trees were die cut from various interesting surfaces to add texture, shine and glitter to the tag.

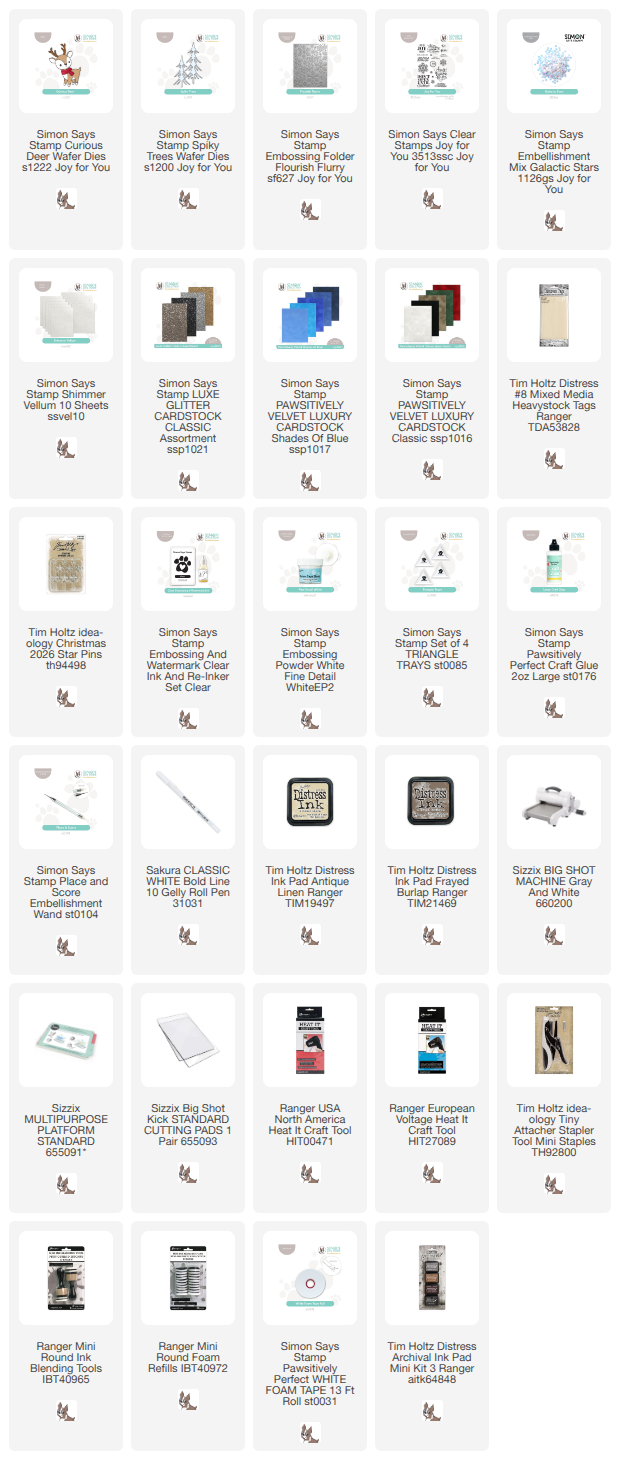
Emboss Simon Says Stamp Flourish Flurry.

I used a heavystock tag by Ranger. Apply embossing ink on the Simon Says Stamp Flourish Flurry folder. Emboss the tag and sprinkle with white embossing powder. Remove the excess and melt with a heat tool. Never touch the melted powder until it has cooled down completely. Repeat the process one more time, to get a thicker layer of embossing powder. 

Dry and heat embossing combined.

The tag becomes very shiny from all that embossing powder. The Flourish Flurry is a gorgeous embossing folder.

Ink with Distress Ink.

Leave as it, or ink the snowflakes. I used Antique Linen and Frayed Burlap for a soft brown shade.

Simon Says Stamp Spiky Trees die cut trees.


Die cut Simon Says Stamp Curious Deer.

Die cut Simon Says Stamp Curious Deer from Shimmer Vellum, Pawsitively Perfect Velvet paper and white cardstock.

Assemble the curious deer.

Glue the pieces of the deer together and add highlights to the eyes and nose with a white gel pen.

Simon Says Stamp Mixed Galactic Stars glue to the background.

Glue the new Simon Says Stamp Galactic Stars here and there on the tag.

Stamp Simon Says Stamp Joy for You.

The sentiments come from Simon Says Stamp Joy For You and were stamped on Tim Holtz Backdrops paper with Vintage Photo Archival Ink. The sentiment was adhered with foam tape. There are also coordinating dies to the Joy For You stamp set.

Add a Tim Holtz star.

I also added a Tim Holtz Star Pin embellishment to one of the trees.


The deer is so cute and fuzzy. I stapled to pieces of lace trim at the bottom of the tag, almost like snow.


The ears are shiny since that part is die cut from Shimmer Vellum.


It is hard to capture the shiny background, the shimmer from the vellum and that gorgeous Luxe Glitter.

Layers of ink - Winter Deer Tag tutorial by Anna-Karin Evaldsson.

Thank you for stopping by here today, next stop is is my friend Lorraine Aquilina.

Don't miss all the inspiration along the hop! There are of course prizes to be won too, and at each stop on the hop Simon Says Stamp is giving away a $25 coupon, randomly drawn from those who leave a comment. The winners will be posted post on the Simon Says Stamp store blog.

Here are all the stops along the hop:


For more inspiration, remember to check out the Joy for You gallery at Simon Says Stamp, and if you make something with products from the range, it is fun if you post it in the galleries too. There are galleries for all releases, and for the card kits, full of inspiration.

This is the second Joy for You blog hop, don't miss blog hop number day number 1, which was yesterday.


Thank you so much for stopping by here today! 


Anna-Karin

Supplies:

* Please note: the links are affiliate links, for which I receive a small percentage of sales generated by the link, at no extra cost to you.

Wednesday, November 4, 2026

Snowdrop Card

Hi friends! I hope you had a good weekend! I had a few days off, which was nice. 

Please note: this post has affiliate links, for which I receive a small percentage of sales generated by the link, at no extra cost to you.

This week we have a Thinking of You theme at the Simon Says Stamp Monday Challenge Blog. I hope you will join us! Since it is the first Monday of a new month, the team is showcasing products by a specific designer/company and this week it is AALL & Create. You can see all of their wonderful products here. You don't have to use AALL & Create products to join, but it is fun if you do. 

We also have a new guest designer and during November Thom Santilla will be joining us again. Don't miss the stunning project he has created. 

Layers of ink - Snowdrop Card by Anna-Karin Evaldsson.

I made a ticket-shaped card with a thinking of you theme. Winter is on the way here and maybe that is why I was in the mood for a snow drop card, a sign of spring, which is still far away. 

Somewhere along the line of making the card, I forgot to use AALL & Create products, partly since the stamp set I planned to use was no longer available. I am sorry about that. 


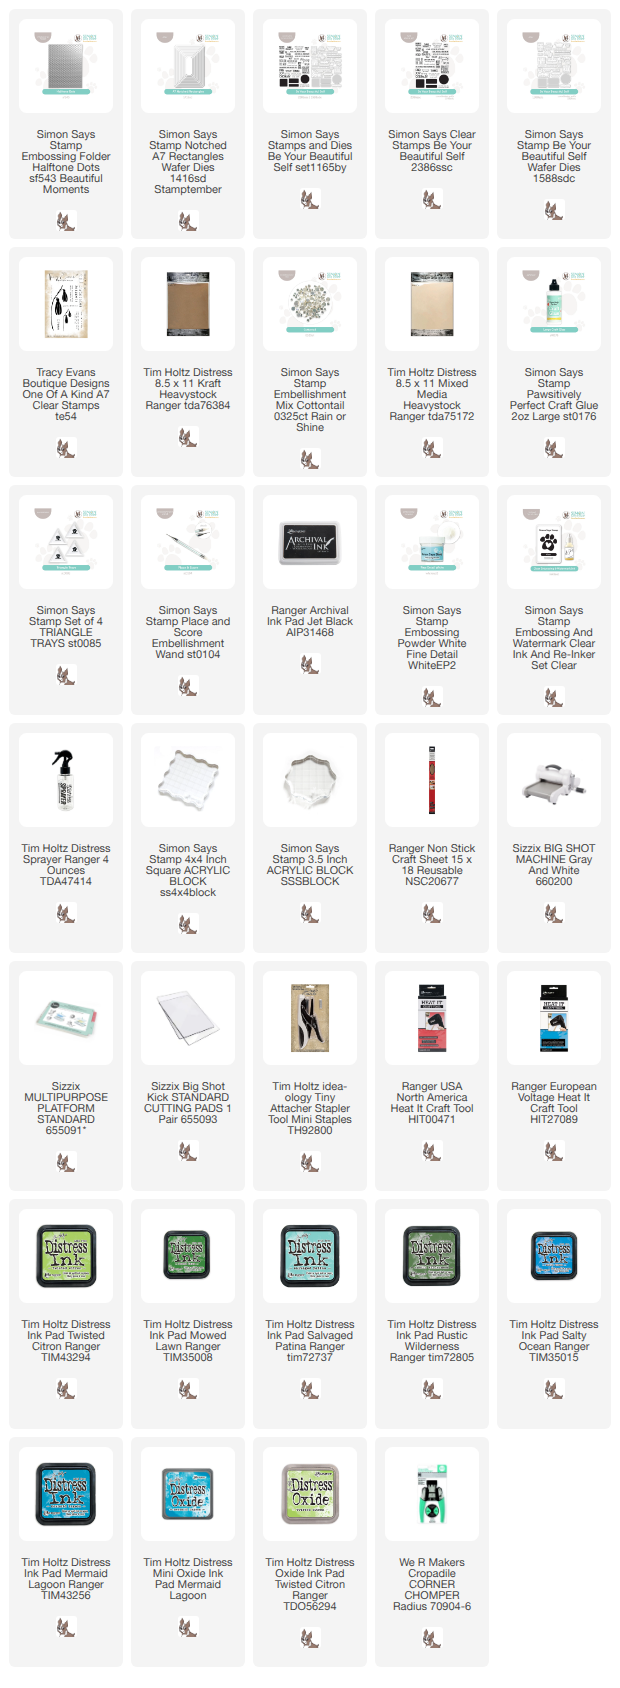
I used Tracy Evans pretty One of a Kind stamp set. White emboss the two flowers on heavystock paper.

Ink with Distress Ink.

Smear Distress Ink on a non-stick craft sheet and mist with water. Press the paper into the ink. 

Die cut Simon Says Stamp A7 Notched Rectangles.

I repeated the inking process until I was happy with the background. Use darker inks for the top layers. The sentiment also comes from Tracy's One of a Kind set. Round the corners. I picked a piece of old book paper where you could see the words 'snow conditions' just above the dry embossed panel.  


I used a little Distress Oxide Ink as my last ink layer, giving that almost cloudy look that you can see here. I also added Simon Says Stamp Cottontail sequins. 

Dry emboss with Simon Says Stamp Halftone Dots.

The sentiment comes from Simon Says Stamp Be Your Beautiful Self and was die cut with the coordinating die. 


The background layers were die cut with Simon Says Stamp A7 Notched Rectangle set. The kraft layer was dry embossed in Simon Says Stamp Halftone Dots.


Join us this week in our Thinking of You challenge! You have a chance to win a $25 gift voucher to do some fun shopping at Simon Says Stamp. You have until Monday 8am Ohio time. 1pm UK time, 2 pm CET to join in.


Do you use Instagram? If so please add #sssmchallenge so we can see your entries there too.


Thank you so much for visiting today! 

Happy crafting!

Anna-Karin

Supplies:

* Please note: the links are affiliate links, for which I receive a small percentage of sales generated by the link, at no extra cost to you.


Wednesday, October 28, 2026

Wheat dry embossed card

Hello friends! I hope you are well! Today I have a autumn card to share with dry embossing. 

Please note: this post has affiliate links, for which I receive a small percentage of sales generated by the link, at no extra cost to you.

Layers of ink - Wheat dry embossed card tutorial by Anna-Karin Evaldsson.

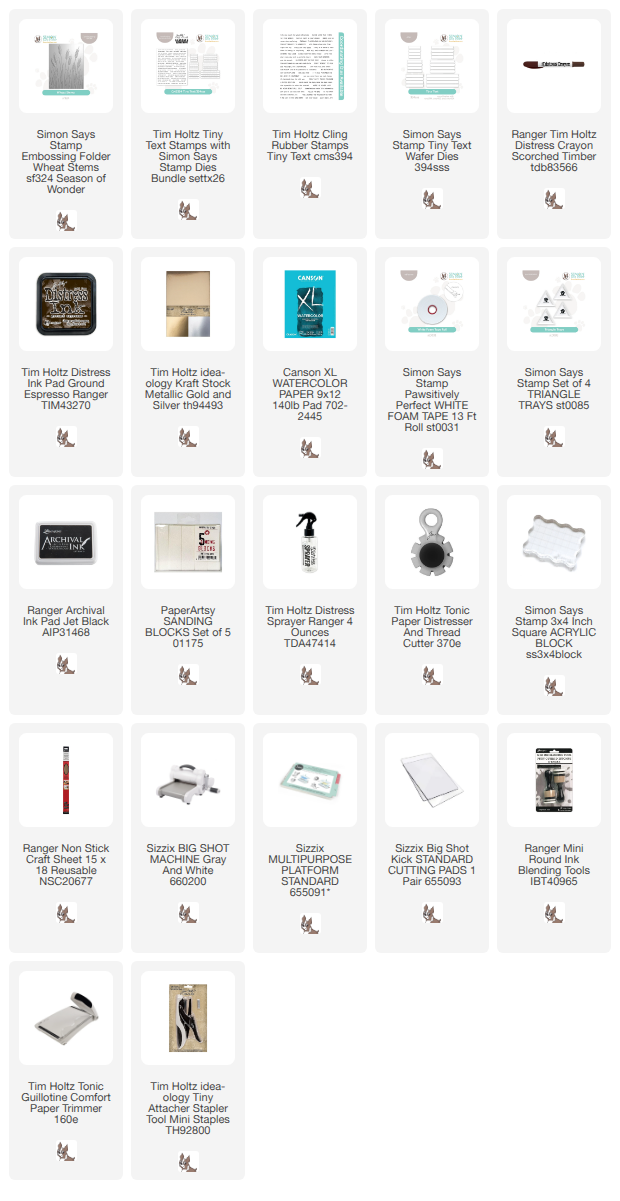
I used Simon Says Stamp Wheat Stems for the background and just embellished the card with stamped sentiments, buttons and a few ribbons. The gold paper matting also makes a big difference. 


I started with a sheet of watercolor paper where I had tested a mix of watercolor paint some weeks ago. The color reminded me of wheat and I liked the ombre look of the paper. Mist the back with water and emboss in Simon Says Stamp Wheat Stems.

Splatter with Distress Watercolor pencil.

I carefully sanded the design once it was completely dry, to reveal the white of the paper. Ink the edges and splatter the card with a little Distress Watercolor Pencil.

Simon Says Stamp Tiny Text coordinating dies.

Tim Holtz Tiny Text is one of my all-time favorite stamp sets and I used it very much. Simon Says Stamp has a Tiny Text die set which coordinates with Tiny Text - and with Tiny Text Christmas and Tiny Text Halloween. I decided to use two large banner dies to be able to fold them.


Fold the banners to create dimension. Add Simon Says Stamp Pawsitively Perfect Foam Tape behind the middle part of the banner. 


Distress the edges of the watercolor panel and mount on gold kraft stock. Adhere to folded teal card.


Pierce holes through the card and tie the buttons to the card with DMC floss. Add lace trim and organza and glue the larger sentiment banner on top.


Sanding works good for these designs with thin lines, which were very difficult to ink (I tried).

Layers of ink - Wheat dry embossed card tutorial by Anna-Karin Evaldsson.

Thank you for stopping by today!


Happy crafting!

Anna-Karin

Supplies:

* Please note: the links are affiliate links, for which I receive a small percentage of sales generated by the link, at no extra cost to you.


Monday, October 26, 2026

Discover the forest art journal

Hello crafters! It is Monday and I hope you had a nice weekend. Bit rainy and windy here, but perfect weather for crafting.

Please note: this post has affiliate links, for which I receive a small percentage of sales generated by the link, at no extra cost to you.


This week we have a Trees theme at the Simon Says Stamp Monday Challenge Blog. I love trees and am looking forward to seeing all the tree projects. Don't miss the last project by our October guest designer Fiona Whitehead.

Layers of ink - Discover the forest art journal page by Anna-Karin Evaldsson.

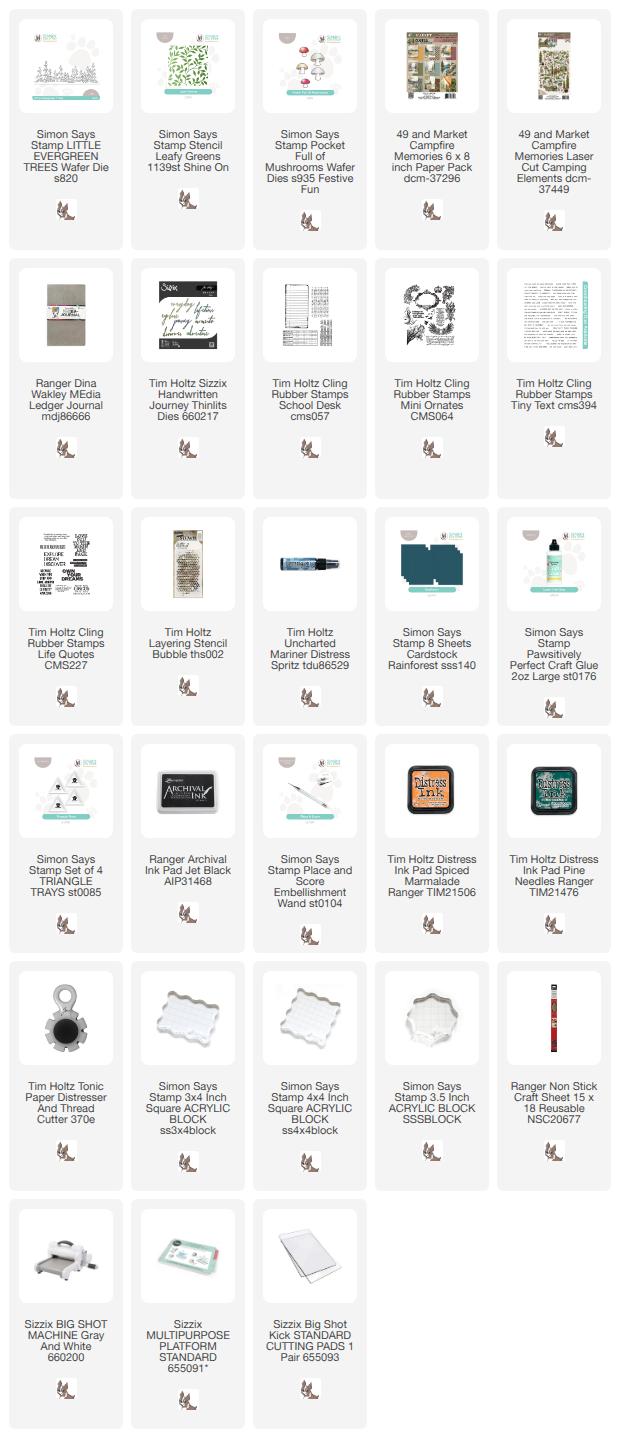
The forest is one of my favorite places and I made an art journal page dedicated to forests in my Ledger Journal. I built a scene with patterned paper, ephemera, stencils, stamps and die cuts and had fun using some very pretty paper products by 40 and Market. 

Ink leaves with Distress Ink.


Mist Distress Spritz through Tim Holtz Bubbles stencil.

Mist Uncharted Mariner Distress Spritz through Tim Holtz Bubble stencil.

Die cut Simon Says Stamp Little Evergreen Trees.


Simon Says Stamp Pocket full of mushrooms.

Die cut Simon Says Stamp Pocket Full of Mushrooms. I ended up only using the brown one.

Stamp birds.

Birds stamped with Tim Holtz Mini Ornates.

Add 49 and Market Campfire Memories elements.


Die cut Tim Holtz Script Words.


Sentiment stamped with Tim Holtz Life Quotes.

Use 49 ad Market Campfire Memories 6x8 in paper.

More die cut sentiments. Isn't the Campfire Memories background paper pretty? 


Glue the Evergreen Trees and add a little mummy cloth. Glue more ephemera. These berries are one of my favorite berries.


A little squirrel and more ephemera. 


Glue two pine trees from Campfire Memories


And the third die cut sentiment.

Stamp with Tim Holtz Tiny Text.

I also stamped some sentiments from Tim Holtz Tiny Text. The alphabet stamp is from Tim's School Desk set.

Layers of ink - Discover the forest art journal page by Anna-Karin Evaldsson.

I hope you enjoyed this post! Add a photo or two and you have a scrapbooking layout. Or turn it into a card by creating a smaller design.


Join us this week in our Trees challenge! You have a chance to win a $25 gift voucher to do some fun shopping at Simon Says Stamp. You have until Monday 8am Ohio time. 1pm UK time, 2 pm CET to join in.


Do you use Instagram? If so please add #sssmchallenge so we can see your entries there too.


Thank you so much for visiting today! 

Happy crafting!

Anna-Karin

Supplies:

* Please note: the links are affiliate links, for which I receive a small percentage of sales generated by the link, at no extra cost to you.