Tuesday, May 31, 2022

Bird Song Vintage Art Journal Page

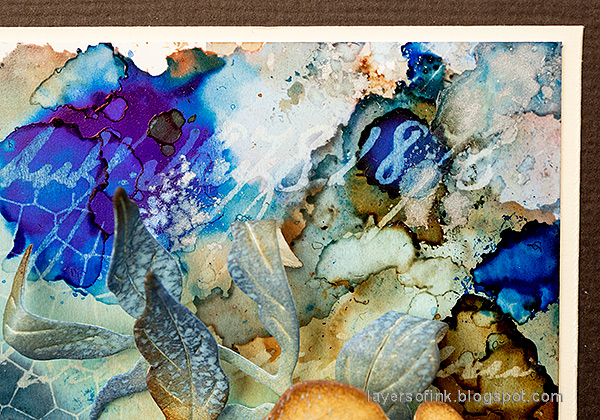
Hi friends! Today I have an art journal page to share using a lot of pretty vintage papers and ephemera.

Please note: this post has affiliate links, for which I receive a small percentage of sales generated by the link, at no extra cost to you.

Layers of ink - Bird Song Vintage Art Journal Tutorial by Anna-Karin Evaldsson.

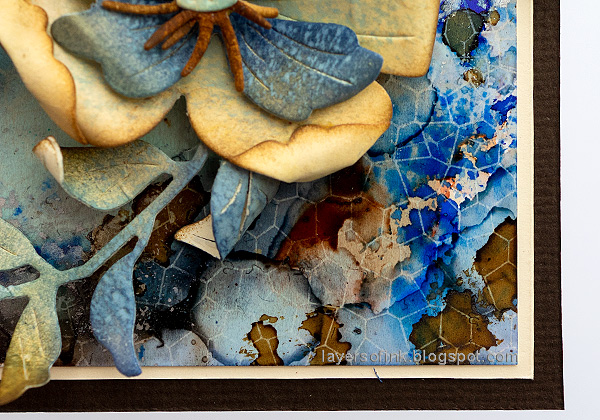
During my walks at this time of the year, the forest greets me with a choir of bird song and this art journal page is about that. A whole bunch of little birds are chatting to each other. I used mainly Tim Holtz ephemera, Pocket Cards and Design Tape to build this background, made in my large Dylusions Journal.

Layers of ink - Bird Song Vintage Art Journal Tutorial by Anna-Karin Evaldsson.

I started out with this page, where I had used up left-over ink and paint from some previous project.

Layers of ink - Bird Song Vintage Art Journal Tutorial by Anna-Karin Evaldsson.

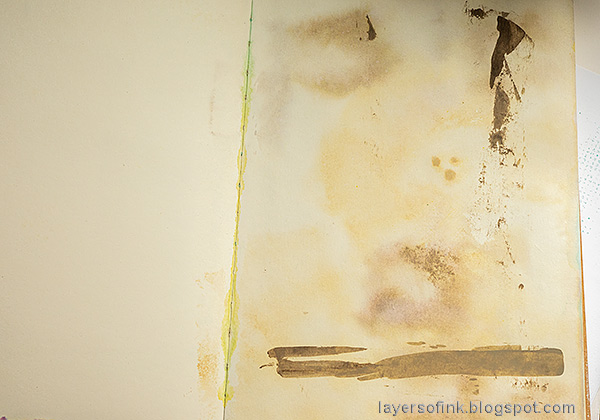
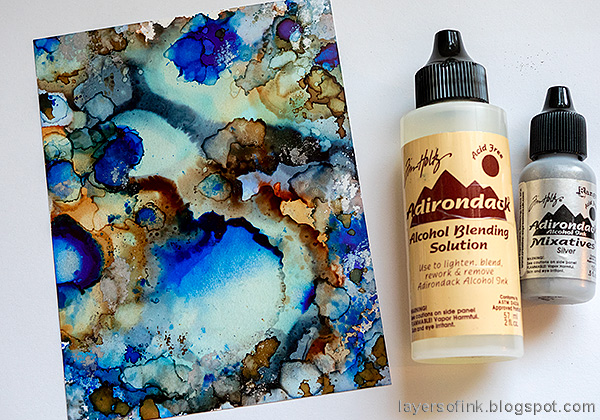
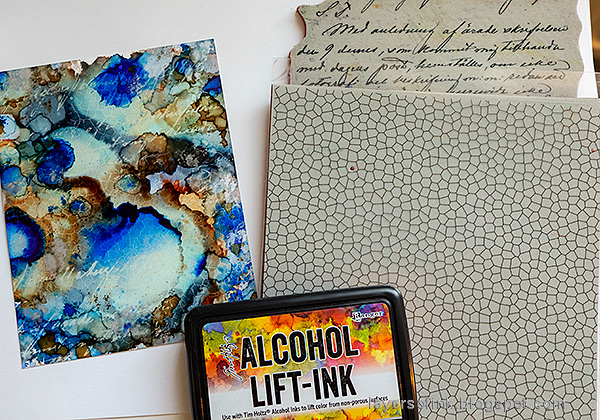
Ink through Tim's Latticework stencil with Saltwater Taffy and Vintage Photo.

Layers of ink - Bird Song Vintage Art Journal Tutorial by Anna-Karin Evaldsson.

Tim's Pocket Cards are absolutely gorgeous and I had a hard time picking which ones to use, but went mainly for those with a bird theme. I also used some Memoir Ephemera and Number Strips. Sand, fold and ink the edges.

Layers of ink - Bird Song Vintage Art Journal Tutorial by Anna-Karin Evaldsson.

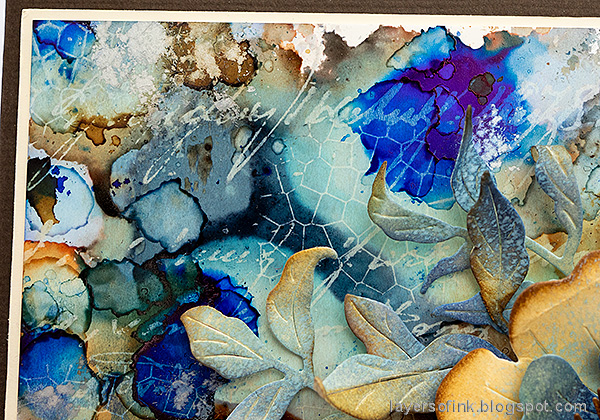
Adhere the paper pieces and then add some more stenciling over them, to unify them with the background.

Layers of ink - Bird Song Vintage Art Journal Tutorial by Anna-Karin Evaldsson. Stamp with Simon Says Stamp Old Letter.

Stamp with Simon Says Stamp Old Letter Background.

Layers of ink - Bird Song Vintage Art Journal Tutorial by Anna-Karin Evaldsson. Die cut with Tim Holtz Silhouette Birds.

Die cut Tim Holtz Silhouette Birds from a dark piece of Backdrops paper.

Layers of ink - Bird Song Vintage Art Journal Tutorial by Anna-Karin Evaldsson.

Sand the edges of the birds slightly and place them here and there, facing into the page.

Layers of ink - Bird Song Vintage Art Journal Tutorial by Anna-Karin Evaldsson.

I stamped sentiments from Simon Says Stamp Forest Scenery, All Seasons Tree, Mixed Labels and Laugh in Flowers. I also added Tim Holtz Trims Design Tape.

Layers of ink - Bird Song Vintage Art Journal Tutorial by Anna-Karin Evaldsson.

Ink the white sanded areas of some of the birds, but not all of them, for variety. 

Layers of ink - Bird Song Vintage Art Journal Tutorial by Anna-Karin Evaldsson.

Ink a piece of Simon Says Stamp white glossy cardstock with Saltwater Taffy and die cut the title with Tim Holtz Alphanumeric Script.

Layers of ink - Bird Song Vintage Art Journal Tutorial by Anna-Karin Evaldsson.

Glue the letters to the page, letting them overlap the birds.

Layers of ink - Bird Song Vintage Art Journal Tutorial by Anna-Karin Evaldsson.

'Spring' from Simon Says Stamp All Seasons Tree is stamped here and there.

Layers of ink - Bird Song Vintage Art Journal Tutorial by Anna-Karin Evaldsson.

Each bird stands on a number, as if they are documented in a nature journal.

Layers of ink - Bird Song Vintage Art Journal Tutorial by Anna-Karin Evaldsson.

I really like these thin Design Tape Trims.


I hope you enjoyed this project! Thank you so much for taking the time to stop by here today!

Happy crafting!

Anna-Karin

Supplies:

* Please note: the links are affiliate links, for which I receive a small percentage of sales generated by the link, at no extra cost to you.

Monday, May 30, 2022

Hot Air Balloon Tag

Hi friends! I hope you had a good weekend! It is Monday and I am here with a Simon Says Stamp Monday Challenge Blog project.

Please note: this post has affiliate links, for which I receive a small percentage of sales generated by the link, at no extra cost to you.


This week we have an It's Up In The Air theme at the Simon Says Stamp Monday Challenge Blog. I hope you will join us and don't miss the last project by our May guest designer Ann Chuang aka Ann Chuang Crafts

Layers of ink - Hot Air Balloon Tag Tutorial by Anna-Karin Evaldsson.

I can't believe May is almost over. We had a long weekend here and had fun spending it with family at the Astrid Lindgren theme park. I particularly enjoyed the miniature houses with all the vintage and retro details.

For this week I made a tag with a dimensional hot air balloon, using some favorite techniques. The balloon was stamped on Wendy Vecchi Clearly For Art Modeling Film, which keeps its shape perfectly and gives great dimension.

Layers of ink - Hot Air Balloon Tag Tutorial by Anna-Karin Evaldsson.

Start by stamping the balloon from Tim Holtz Stamper's Anonymous Remnants set with permanent ink on Clearly For Art Modeling Film.

Layers of ink - Hot Air Balloon Tag Tutorial by Anna-Karin Evaldsson.

Cut the balloon out and turn it around. Color at the back with alcohol inks. I forgot to take a photo of the next step. Gently heat the balloon with a heat tool and shape it. It will keep its shape perfectly once it has cooled down. Be careful not to burn yourself.

Layers of ink - Hot Air Balloon Tag Tutorial by Anna-Karin Evaldsson.

Coat a tag with gesso and let it dry. Paint with Distress Paint and mist heavily with water to blend.

Layers of ink - Hot Air Balloon Tag Tutorial by Anna-Karin Evaldsson. Apply paste through a cloud stencil.

Place Simon Says Stamp Clouds For Days stencil over the tag and apply Texture Paste through it with a palette knife. 

Layers of ink - Hot Air Balloon Tag Tutorial by Anna-Karin Evaldsson.

When my paste was dry, I got the idea of adding some shine to the clouds, which would glitter through the balloon. I placed the stencil back and applied Matte Medium through it. Then it was sprinkled with Distress Mica Flakes.

Layers of ink - Hot Air Balloon Tag Tutorial by Anna-Karin Evaldsson.

Stamp the background randomly with Simon Says Stamp Stained Glass background stamp and Simon Says Stamp Pawsitively Saturated Marine and Royal ink.

Layers of ink - Hot Air Balloon Tag Tutorial by Anna-Karin Evaldsson.

Here you can see the dimension of the balloon better. I stapled it to the background. The Clearly For Art Modeling Film will keep its shape perfectly.

Layers of ink - Hot Air Balloon Tag Tutorial by Anna-Karin Evaldsson.

The tag was finished with Clippings Stickers and Vintage Design Tape. I love using Clippings Stickers to find sentiments. 

Layers of ink - Hot Air Balloon Tag Tutorial by Anna-Karin Evaldsson. Add Tim Holtz Design Tape.

The Mirrored Stars were colored with alcohol ink.

Layers of ink - Hot Air Balloon Tag Tutorial by Anna-Karin Evaldsson.

The mica flakes give a very nice shine to the clouds and you can see it through the balloon too.

Layers of ink - Hot Air Balloon Tag Tutorial by Anna-Karin Evaldsson.

I hope you will join us this week in our It's Up In The Air theme . You have a chance to win a $25 gift voucher to do some fun shopping at Simon Says Stamp. You have until Monday 8am Ohio time. 1pm UK time, 2 pm CET to join in.


Do you use Instagram? If so please add #sssmchallenge so we can see your entries there too.


Thank you so much for visiting my blog today! 

Happy crafting!

Anna-Karin

Supplies:

* Please note: the links are affiliate links, for which I receive a small percentage of sales generated by the link, at no extra cost to you.

Friday, May 27, 2022

Alcohol Ink on Yupo Paper

Hello stampers! I have another card to share today using alcohol ink on yupo paper, combined with dimensional flowers.

Please note: this post has affiliate links, for which I receive a small percentage of sales generated by the link, at no extra cost to you.

Layers of ink - Alcohol ink on yupo paper tutorial by Anna-Karin Evaldsson.

I really like the look of alcohol ink on yupo paper, but haven't had any yupo paper at home for quiet a while. After making a bright card a couple of weeks ago, I was in the mood for darker colours and more texture. 

Layers of ink - Alcohol ink on yupo paper tutorial by Anna-Karin Evaldsson.

I used Simon Says Stamp Yupo paper and started layering down alcohol inks, both with an ink-blending tool and by adding drops of ink or Alcohol Ink Blending Solution on the paper. 

Layers of ink - Alcohol ink on yupo paper tutorial by Anna-Karin Evaldsson.

I finished with a tiny bit of Silver Mixative.

Layers of ink - Alcohol ink on yupo paper tutorial by Anna-Karin Evaldsson. Stamp with Simon Says Stamp Stained Glass background.

Next, I used Alcohol Lift-Ink with Simon Says Stamp Old Letter and Stained Glass stamps. Wipe with a soft cloth.

Layers of ink - Alcohol ink on yupo paper tutorial by Anna-Karin Evaldsson.

Die cut Simon Says Stamp Etched Magnolia Blossom from heavystock paper. My paper had already been colored with Antique Linen and a little Frayed Burlap Distress Ink, giving it this tinted look.

Layers of ink - Alcohol ink on yupo paper tutorial by Anna-Karin Evaldsson.

Ink with Distress Ink first and then add just a little Speckled Egg Distress Oxide ink, using an ink blending brush for the latter to get a speckled effect.

Layers of ink - Alcohol ink on yupo paper tutorial by Anna-Karin Evaldsson.

Shape the pieces with Tim Holtz Shaping Kit.

Layers of ink - Alcohol ink on yupo paper tutorial by Anna-Karin Evaldsson.

Layer the flowers together, adding foam tape for the top layers. I also die cut leaves with the Simon Says Stamp Tattered Leaves die and inked them in the same way.

Layers of ink - Alcohol ink on yupo paper tutorial by Anna-Karin Evaldsson.

I like how every area of the background has a different look and that you can spot new colors and shades where ever you look.

Layers of ink - Alcohol ink on yupo paper tutorial by Anna-Karin Evaldsson.

The ghost effect from the ink-lifting adds even more texture to the background.

Layers of ink - Alcohol ink on yupo paper tutorial by Anna-Karin Evaldsson.

I like the look of the thin stained glass lines.

Layers of ink - Alcohol ink on yupo paper tutorial by Anna-Karin Evaldsson.

The sentiment comes from Simon Says Stamp Mixed Labels and was stamped on a Tim Holtz Halloween 2021 Vault banner die.

Layers of ink - Alcohol ink on yupo paper tutorial by Anna-Karin Evaldsson.

Here you can see some of the specks of silver.

Layers of ink - Alcohol ink on yupo paper tutorial by Anna-Karin Evaldsson.

The Simon Says Stamp Etched Magnolia Blossom die has such interesting details, such as the folded up petal pieces. For another example using this die to make a dimensional flower magnet, check out my Altered Tin tutorial.

Layers of ink - Alcohol ink on yupo paper tutorial by Anna-Karin Evaldsson.

The flowers, leaves and banner have quite a bit of dimension.


I hope you enjoyed this project! Thank you so much for taking the time to stop by here today!

Happy crafting!

Anna-Karin

Supplies:

* Please note: the links are affiliate links, for which I receive a small percentage of sales generated by the link, at no extra cost to you.