
Hi crafters! We have a 'Not a card' theme at the Simon Says Stamp Monday Challenge Blog this week. So many options!
Please note: this post has affiliate links, for which I receive a small percentage of sales generated by the link, at no extra cost to you.

Don't miss the great project by our May guest designer Ann Chuang aka Ann Chuang Crafts.

I altered a circular tin, which I have had for many years. I wanted the tin to be practical, but I also wanted to decorated it with a dimensional paper flower. My eye fell on a magnet on the fridge and I decided to add a magnet to the back of the flower, so that it can be removed from the tin and used as an ornament on its own, making the tin more useful and easier to handle.

The tin has a diameter of about 3.7 in.

I started by coating the lid with two layers of gesso, letting it dry in between.

Apply texture paste through the Simon Says Stamp Mix and Match Circles stencil. I adhered masking tape around the rim of the lid so that the paste would be on the lid only.

Paint the lid with Distress Paints: Cracked Pistachio, Peacock Feathers, Mermaid Lagoon and Twisted Citron. Mist with water to blend and let dry. When dry, stamp with Simon Says Stamp Halftone background and Garden Patina Archival ink. Add some crackles with the Simon Says Stamp Crackle Background.

Die cut the Simon Says Stamp Etched Magnolia from various Tim Holtz Journal Cards. The journal cards are great for die cutting.

Ink lightly with Mustard Seed Distress Oxide and Vintage Photo Distress Ink.
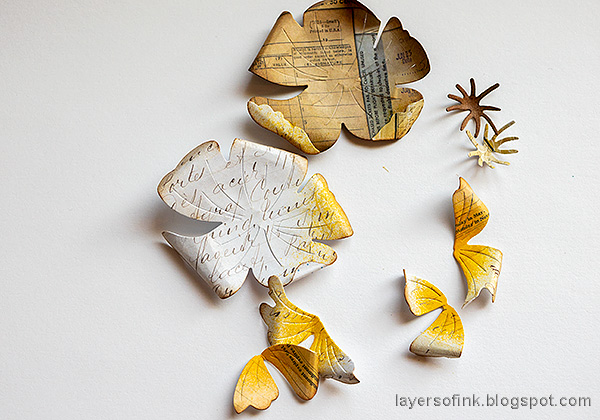
Shape with Tim Holtz Shaping Tool Kit.

Layer the flower pieces and glue together. Add more shape if needed when the glue is dry. Die cut Simon Says Stamp Tender Leaves, ink, shape and glue to the base of the flower.

Glue a magnet to the back. The magnet will stick to the tin.

Stamp a ticket with Simon Says Stamp Mixed Labels and Potting Soil ink. Die cut with the coordinating die and stamp a sentiment. Color Tim Holtz Heirloom Roses lightly with alcohol ink.
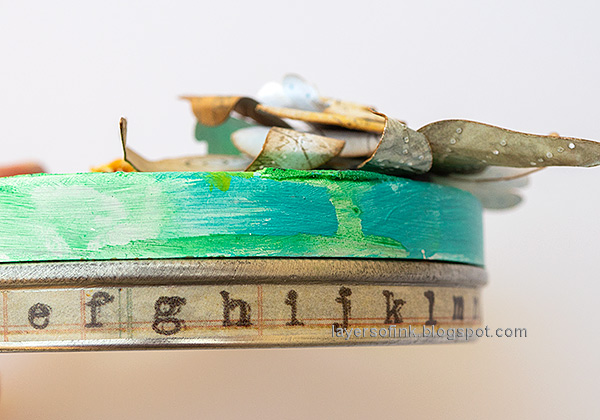
Paint matte medium around the rim of the base tin and adhere a piece of Vintage Design Tape.


The flower can be left on the tin or removed and placed on a fridge or something similar.

The tin is great for storing something small, like beads or sequins and is easier to handle when the flower is off.

I hope you will join us this week in our Not a Card theme. You have a chance to win a $25 gift voucher to do some fun shopping at Simon Says Stamp. You have until Monday 8am Ohio time. 1pm UK time, 2 pm CET to join in.

Do you use Instagram? If so please add #sssmchallenge so we can see your entries there too.


Thank you so much for visiting my blog today!
Happy crafting!
Anna-Karin
Supplies:
* Please note: the links are affiliate links, for which I receive a small percentage of sales generated by the link, at no extra cost to you.
* Please note: the links are affiliate links, for which I receive a small percentage of sales generated by the link, at no extra cost to you.
No comments:
Post a Comment
Thank you so much for leaving a comment! Happy Crafting!