Tuesday, March 31, 2020

Heart mixed media layout

Hi friends. I hope you are well. In these days particularly, we all miss someone. Maybe it is someone you can't meet to protect them or maybe that someone lives far away and traveling isn't possible. My sisters and I don't see our parents at the moment, nor do the grandkids, to protect our parents from the virus. We chat a lot on the phone, but it isn't the same, and when looking through some photos I saw this photo of my dad out walking with the kids.

Layers of ink - Heart Mixed Media Layout by Anna-Karin Evaldsson.

I knew right away that I wanted to use it for a scrapbooking layout. It is from a couple of years ago, since the boys are a lot bigger now. I love the golden light in the photo and wanted to make a warm layout with lots and lots of hearts. You can use the techniques for a card or an art journal page instead.

Layers of ink - Heart Mixed Media Layout by Anna-Karin Evaldsson. Die cut Falling Hearts.

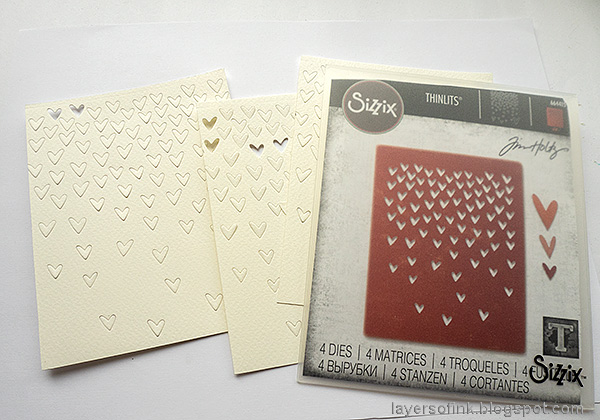
First I die cut three panels from watercolor paper, using Tim Holtz Falling Hearts die. Remove some of the hearts, but not all of them.

Layers of ink - Heart Mixed Media Layout by Anna-Karin Evaldsson.

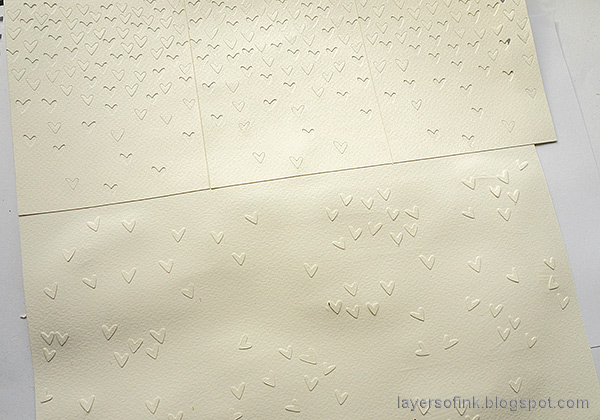
Glue the panels to a 12 x 12 sheet of watercolor paper using matte medium. Glue the left-over hearts here and there.

Layers of ink - Heart Mixed Media Layout by Anna-Karin Evaldsson. Coat with gesso.

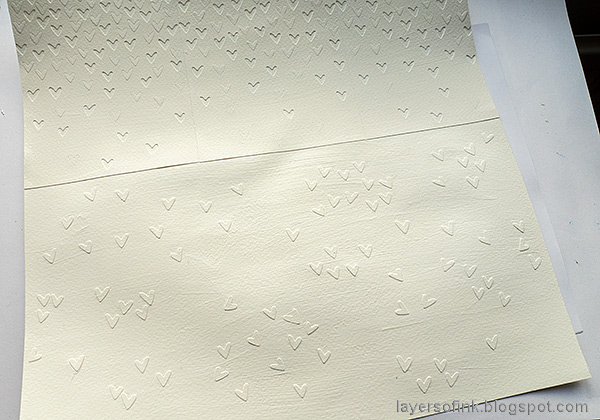
Coat with gesso. Don't worry about the warping.

Layers of ink - Heart Mixed Media Layout by Anna-Karin Evaldsson. Add texture paste through stencil.

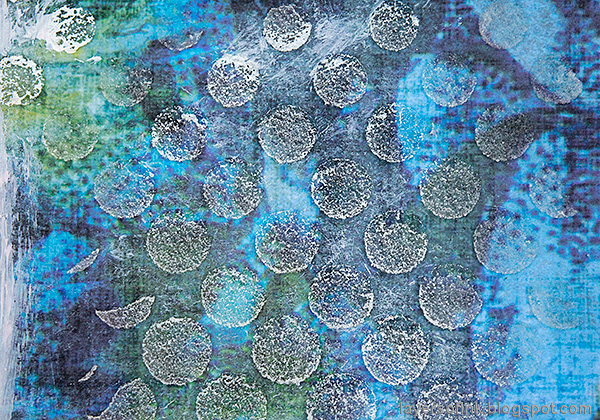
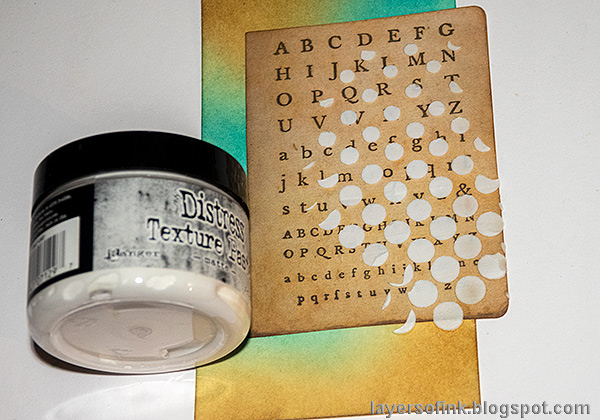
When dry, apply Distress Texture Paste through the Latticework stencil. Let dry.

Layers of ink - Heart Mixed Media Layout by Anna-Karin Evaldsson.

Paint the background with watered-down Distress Paint and mist with more water to help the colors blend.

Layers of ink - Heart Mixed Media Layout by Anna-Karin Evaldsson.

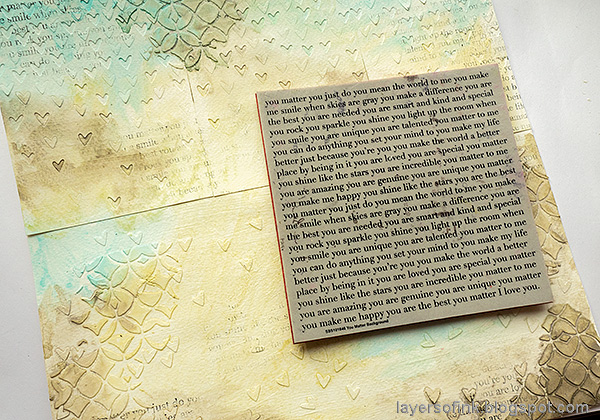
Stamp here and there with the Simon Says Stamp You Matter stamp. I really love this stamp.

Layers of ink - Heart Mixed Media Layout by Anna-Karin Evaldsson.

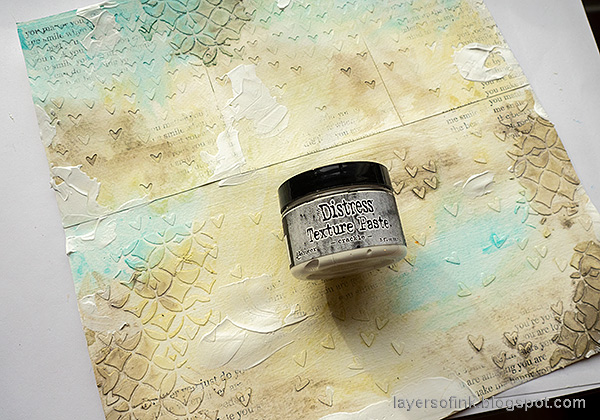
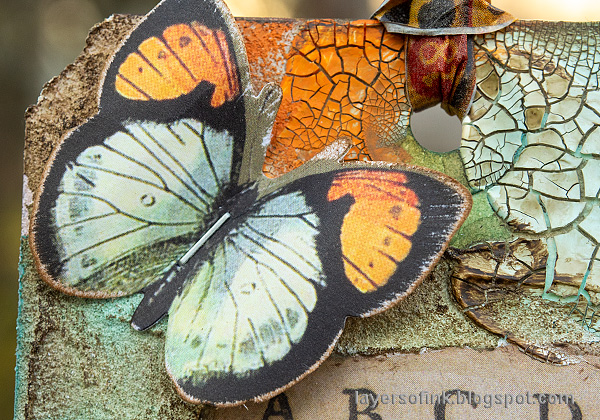
Apply a little Distress Crackle Paste here and there.

Layers of ink - Heart Mixed Media Layout by Anna-Karin Evaldsson.

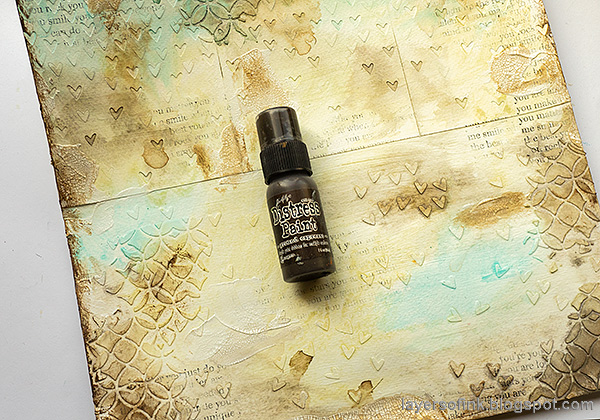
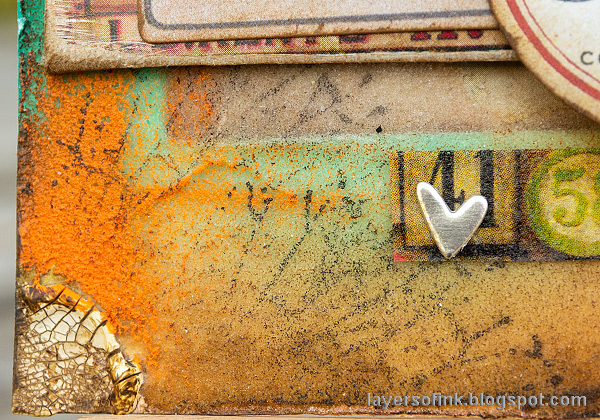
Add more paint to the crackles and here and there on the layout. The paint on the crackle areas was misted with water, while the rest was dry-brushed.

Layers of ink - Heart Mixed Media Layout by Anna-Karin Evaldsson.

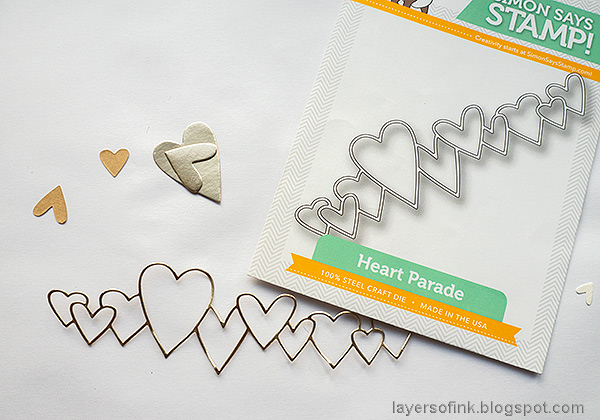
Die cut the Heart Parade from gold metallic paper.

Layers of ink - Heart Mixed Media Layout by Anna-Karin Evaldsson.

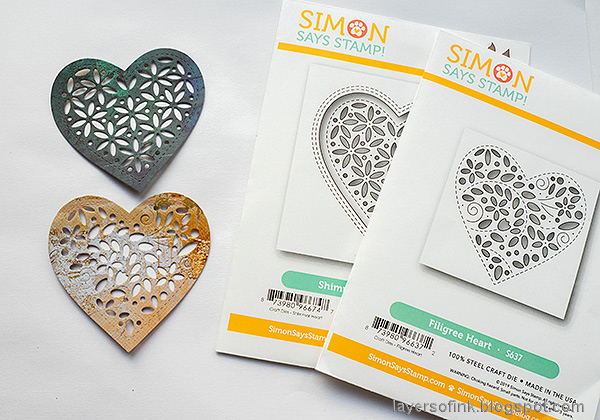
Die cut the Shimmer Heart and the Filigree Heart from Tim's Abandoned Paper Stash.

Layers of ink - Heart Mixed Media Layout by Anna-Karin Evaldsson.

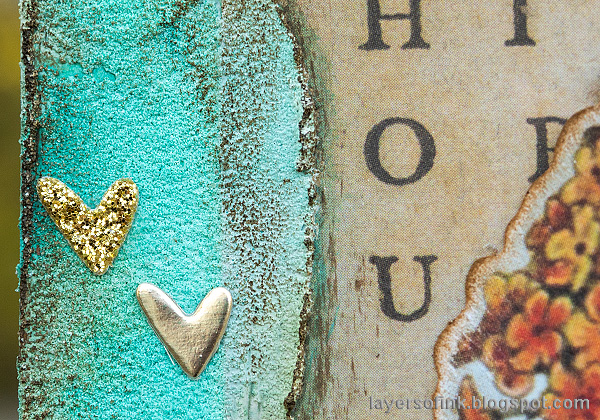
Die cut Falling Hearts from gold metallic and gold glitter paper. I am keeping these in a little jar on my desk so that they are ready to use. Some of them ended up on my Texture Tag from Sunday.

Layers of ink - Heart Mixed Media Layout by Anna-Karin Evaldsson. Die cut Lined You.

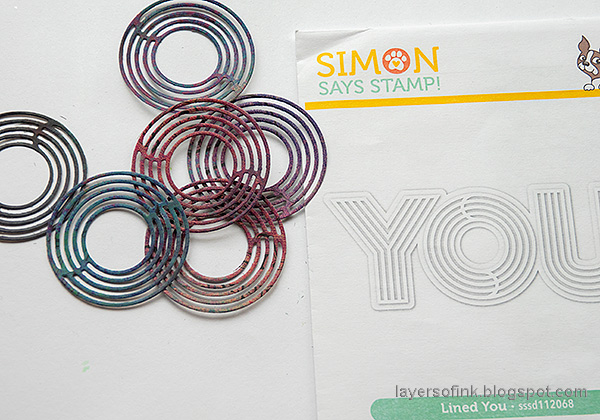
The 'O' in the Lined You also makes a very cool circle element. Die cut it from Abandoned paper. You can see the full die cut being used on my New Year Art Journal Page and You Art Journal Page.

Layers of ink - Heart Mixed Media Layout by Anna-Karin Evaldsson. Big Hugs die cut.

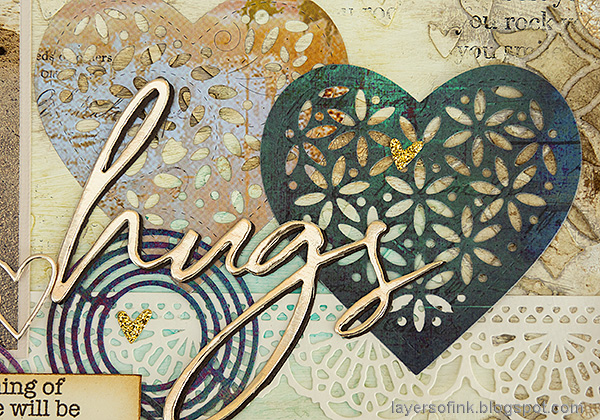
The border was die cut with Tim's Crochet set and the Memory Box Big Hugs was die cut from gold and brown paper. Layer and glue the die cut pieces to the background.

Layers of ink - Heart Mixed Media Layout by Anna-Karin Evaldsson. Die cut Lined You.

Here you can see the texture better. I also like the texture of the brush strokes from the gesso.

Layers of ink - Heart Mixed Media Layout by Anna-Karin Evaldsson. Die cut Lined You.

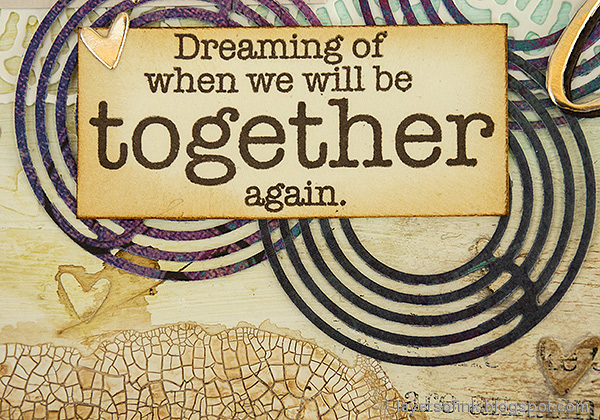
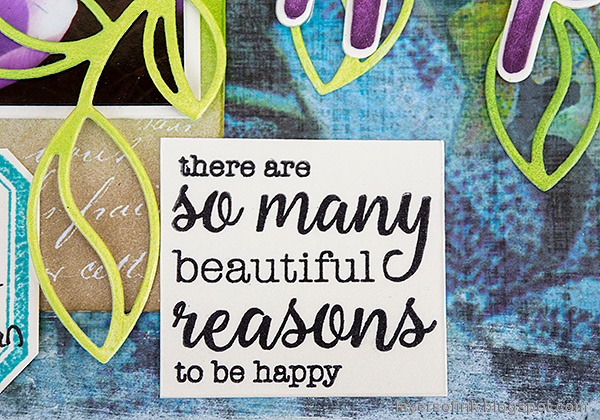
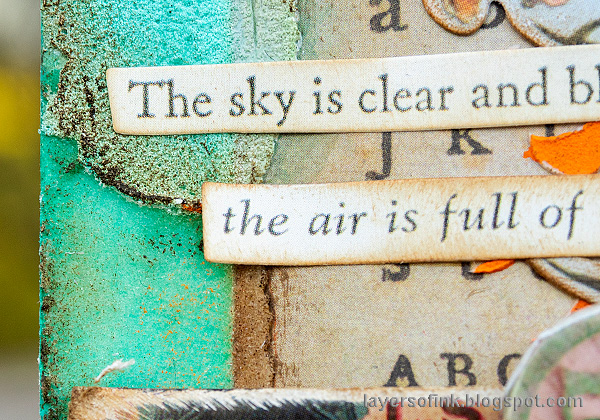
Simon Says Stamp Stronger Together set was created before the virus started to spread across the world, but the sentiments on the stamp set are perfect for these times. They were stamped with brown ink, since I wanted a softer look.

Layers of ink - Heart Mixed Media Layout by Anna-Karin Evaldsson. Die cut Lined You.

I glued the die cut panels a little bit from the upper edge of the layout, since I wanted a visible edge. You can see it here.

Layers of ink - Heart Mixed Media Layout by Anna-Karin Evaldsson. Die cut Lined You.

Here's another close-up of the textures.

Layers of ink - Heart Mixed Media Layout by Anna-Karin Evaldsson. Die cut Lined You.

The Heart Parade was glued on top of the photo.

Layers of ink - Heart Mixed Media Layout by Anna-Karin Evaldsson. Die cut Lined You.

And another wonderful sentiment. Glue the metallic and glitter hearts here and there.

Layers of ink - Heart Mixed Media Layout by Anna-Karin Evaldsson. Die cut Lined You.

This sentiment also comes from Stronger Together. It is a great sentiment for a card to someone you miss. 

Layers of ink - Heart Mixed Media Layout by Anna-Karin Evaldsson. Die cut Lined You.

I like how you can read some of the words, while others are too faint.


Thank you so much for taking the time to visit my blog today!  

Happy crafting!

Anna-Karin

Supplies:

* Please note: the links are affiliate links, for which I receive a small percentage of sales generated by the link, at no extra cost to you.


Monday, March 30, 2020

Spring has sprung

Hello friends. I hope you are well in these difficult times. This weekend I took two long forest walks. More people than normally are out walking, everybody greets each other friendly, but keeps a safe distance. I am so happy to have nature around the corner.


At the Simon Says Stamp Monday Challenge Blog we have a Spring Mood Board challenge. Don't miss the last project by our March guest designer Ann Chuang

 Design team member Macarena has made this gorgeous mood board for our inspiration!


Layers of ink - Spring has sprung scrapbooking layout by Anna-Karin Evaldsson.

The mood board inspired me to do a scrapbooking layout, using some springtime crocus photos from our old garden, where we had a lot of spring flowers. I used a Lost and Found patterned paper by Tim Holtz for the background, which has flower patterns and really gorgeous colors. 

Layers of ink - Spring has sprung scrapbooking layout by Anna-Karin Evaldsson. Tim Holtz Motif cardstock.

The two colorful panels are from Tim's Motif cardstock, which has a pattern that resists ink. I love these papers and the gorgeous patterns.

Layers of ink - Spring has sprung scrapbooking layout by Anna-Karin Evaldsson. Apply Translucent Grit-Paste through stencil.

I wanted to add a subtle texture to the background and used Translucent Grit-Paste together with the Gradient Dot stencil. Yesterday, I posted a Textured Tag where I used and compared four different Distress Pastes, if you want to see more paste examples.

Layers of ink - Spring has sprung scrapbooking layout by Anna-Karin Evaldsson.

When the paste was dry, I dry brushed a little white paint on the dots.

Layers of ink - Spring has sprung scrapbooking layout by Anna-Karin Evaldsson.

Here you can see the result better. I like the way the pattern shows through, but with the added texture from the white paint.

Layers of ink - Spring has sprung scrapbooking layout by Anna-Karin Evaldsson. Tim Holtz Scribbly Butterflies.

The butterflies were die cut from scrap pieces of paper using Tim's Scribbly Butterflies set. If you have pieces of paper which didn't turn out as planned, try using them for die cutting. The results are usually surprisingly wonderful.


The sentiments comes from Memory Box Springtime Typewriter Sentiments.

Layers of ink - Spring has sprung scrapbooking layout by Anna-Karin Evaldsson. Outline Clustered Leaves and Big Happy.

I also die cut the Simon Says Stamp Outline Clustered Leaves from glossy cardstock and inked with the same two shades of green used for the resist panels. Big Happy was die cut from Distress Cracked Leather Cardstock and then inked with an ombre effect.

Layers of ink - Spring has sprung scrapbooking layout by Anna-Karin Evaldsson.

You can see the leather effect better here.

Layers of ink - Spring has sprung scrapbooking layout by Anna-Karin Evaldsson.

I also used a stamp from the SSS Uplifting Thoughts set, which is such a great stamp set. The label for the journaling was stamped with the new Darkroom Door Lots of Labels set.

Layers of ink - Spring has sprung scrapbooking layout by Anna-Karin Evaldsson.

And another butterfly to bring spring and hopefully new times.

I hope you will join us this week in our Spring Mood Board challenge. You have until next Monday 8am Ohio time. 1pm UK time, 2 pm CET to join in.

As you may know, the Simon Says Stamp Store is accepting new orders, but have longer shipping times for the moment due to the coronavirus. With this in mind we have made the difficult decision to suspend the $50 voucher for this challenge.

We know that many people are staying safe at home and we would love it if you would continue to enter the challenges and have fun! We are all in this together!


Don't forget to follow Simon Says Stamp on Instagram, they post great stuff daily. We also have a new hashtag #SSSUnitedWeCraft


Do you use Instagram? If so please add #sssmchallenge so we can see your entries there too.


Thank you so much for taking the time to visit my blog today!  

Happy crafting!

Anna-Karin

Supplies:

* Please note: the links are affiliate links, for which I receive a small percentage of sales generated by the link, at no extra cost to you.


Sunday, March 29, 2020

Texture Paste Tag

Hello friends! I hope you are well and staying healthy. And that you are able to do some crafting, since that helps to deal with the situation. I have a tag tutorial to share with you today made as a bit of an experiment. I recently got a bunch of Tim Holtz's new pastes and I wanted to try all of them at once. 

Layers of ink - Texture Paste Tag Tutorial by Anna-Karin Evaldsson. With Distress Pastes by Tim Holtz / Ranger.

I used four pastes on the tag: Distress Texture Paste Crackle, Distress Texture Paste Matte, Opaque Grit-Paste and Translucent Grit-Paste. I didn't have much of plan for the tag and after having done the background, I added bits and pieces from Tim's Field Notes Ephemera and Junk Drawer Baseboards. There are also some shiny hearts, since I think that at this time, you can't use too many hearts.

Layers of ink - Texture Paste Tag Tutorial by Anna-Karin Evaldsson.

Start by inking a tag or a card with Distress Ink, using an ink-blending tool.

Layers of ink - Texture Paste Tag Tutorial by Anna-Karin Evaldsson.

Glue an ephemera card to the tag and apply Distress Texture Paste Matte through the Gradient Dot stencil. Let dry.

Layers of ink - Texture Paste Tag Tutorial by Anna-Karin Evaldsson. Translucent grit-paste

At the bottom of the tag, I used Translucent Distress Grit-Paste.

Layers of ink - Texture Paste Tag Tutorial by Anna-Karin Evaldsson. Opaque grit-paste

Next came the Opaque Distress Grit-Paste.

Layers of ink - Texture Paste Tag Tutorial by Anna-Karin Evaldsson. Distress Crackle Paste.

And finally some Crackle Distress Texture Paste. As you might know, I love crackle paste.

Layers of ink - Texture Paste Tag Tutorial by Anna-Karin Evaldsson. Let the pastes dry.

As it dries you see the qualities of the different pastes better. Since I used Distress Ink for the background, some of the color will bleed through into the pastes, which was my plan, since I wanted the areas to coordinate colorwise. If you don't want the color to bleed, use Distress Paint instead. I particularly like the look of the translucent Grit-Paste, with both the paper and the color shining through.

Layers of ink - Texture Paste Tag Tutorial by Anna-Karin Evaldsson. Paint with acrylic paint.

Add some color with Distress Paint, mainly to make the areas into a unified whole. Mist with water, especially on the crackle areas, so that the paint goes into the crackles. I added less paint to the translucent paste.


Layers of ink - Texture Paste Tag Tutorial by Anna-Karin Evaldsson.

Paint the dots orange and add a little orange to the background.

Layers of ink - Texture Paste Tag Tutorial by Anna-Karin Evaldsson.

Distress the tag by dry-brushing dark brown paint.

Layers of ink - Texture Paste Tag Tutorial by Anna-Karin Evaldsson. Crackle paste texture.

The thicker the paste, the larger the crackles, which you can see here. I like a mix.

Layers of ink - Texture Paste Tag Tutorial by Anna-Karin Evaldsson. Field notes ephemera.

The tag was embellished with ephemera pieces from Tim's Field Notes Ephemera pack.

Layers of ink - Texture Paste Tag Tutorial by Anna-Karin Evaldsson.

I love the texture of the opaque Grit-Paste with paint on top. The little hearts were die cut from gold metallic and gold glitter paper using Tim Holtz Falling Hearts die.

Layers of ink - Texture Paste Tag Tutorial by Anna-Karin Evaldsson. Vintage flowers.

I am very much into messages of hope and happiness at the moment. And today the sky really is clear and blue an the air is full of sunlight. I took a beautiful walk in the forest today, enjoying the sun, bird song and signs of spring. The sentiment comes from Tim's Clippings Sticker book. The flowers are also from the Field Notes ephemera pack. The metallic flower is from the Nature Adornments set.

Layers of ink - Texture Paste Tag Tutorial by Anna-Karin Evaldsson.

The sentiment from Simon Says Stamp Just Because Word Mix 2 was stamped on a label from the Field Notes ephemera pack. The baseboard piece in the background and the game piece comes from Tim's Junk Drawer Baseboard set.

Layers of ink - Texture Paste Tag Tutorial by Anna-Karin Evaldsson.

I stamped the translucent grit-paste with a crackle stamp, but didn't press heard enough, so it just added a very faint texture.

Layers of ink - Texture Paste Tag Tutorial by Anna-Karin Evaldsson.

Add a few pieces of Design Tape too.

Layers of ink - Texture Paste Tag Tutorial by Anna-Karin Evaldsson.

Here you can see the difference between the opaque grit-paste on the top, with paint added once it was dry, and the translucent base below it, where the original Distress Ink shows through. Both are very cool.


Thank you so much for taking the time to visit my blog today!  

Happy crafting!

Anna-Karin

Supplies:

* Please note: the links are affiliate links, for which I receive a small percentage of sales generated by the link, at no extra cost to you.