
Hello friends. I hope you are well and healthy. I am looking forward to spring and better times. Today, I am sharing a quick and easy photo display project. Make one for yourself or give it as a gift. This would also be a great project for kids to do. Instead of a photo, they could use a drawing or maybe color in some stamped images.

During March, the Eileen Hull Inspiration Team is sharing spring-themed projects. I used a photo of a field of white anemone flowers in a forest. It is one of my favorite places during the short time in spring when they flower. The whole forest floor is covered with white flowers. I used Eileen's Display Stand die to create this.
There was a time when I used a lot of ribbons while papercrafting, but lately I am no longer reaching for ribbons as often any more. For this project, I wanted soft textures and found a bunch of green and white ribbons and fibers.

Start by die cutting the Display Stand from mat board. As you can see, the scoreboards dies both cuts and scores the material, making assembly easy. This is an XL die so you need the Extended Cutting Pads, but it fits perfectly in an ordinary Big Shot or Vagabond.
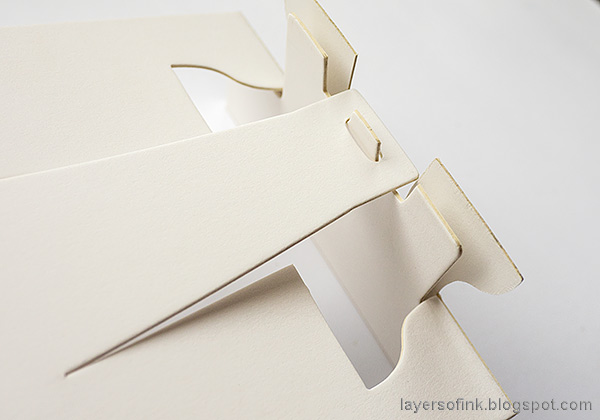
Fold along the various scorelines and attach at the back as shown here.

Here's another view of the back.

Fold the front flap down.

Press it lightly and it will snap into the base. You don't need any adhesive to assemble the Display Stand, and it can be used in both directions, with the bigger or shorter side down. I used the shorter side down.

Apply matte medium on the short front piece and then start gluing down ribbons.

Continue with more ribbons and fibers. Don't be afraid to cover up parts of the first layer.

Although the shape of the petals isn't quite right, I turned some of Tim Holtz Bouquet flowers into white anemones. Color the center yellow with a Distress Marker and use a green Distress Marker for the stem. Add some dots to the center with the green marker too.

The sentiment comes from the Paper Artsy Happiness Edition set by Alison Bomber. It was cut into strips. I find myself wanting to surround myself with positive sentiments at the moment.
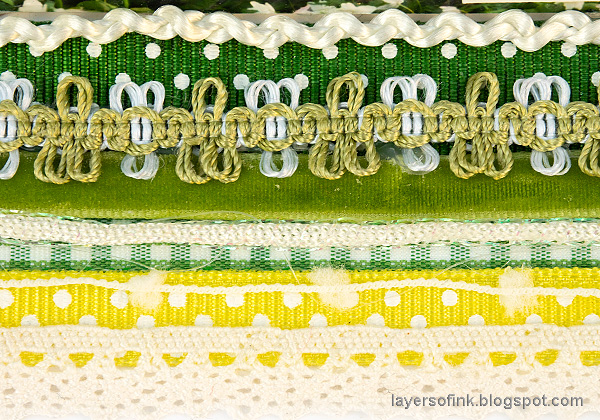
Pick ribbons that fit with your photo and use different patterns and textures for an interesting effect.
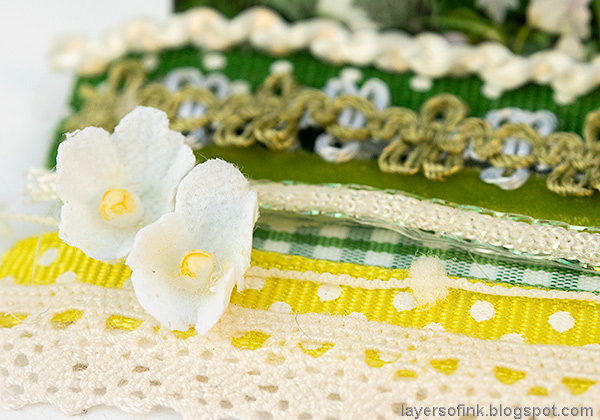
Glue the flowers to the ribbons. I didn't add green to the centers of all of them, as you can see here.

And here's the larger collection of flowers. Now I can't wait for these to come out in real life too.

You might get a better impression of how the display stand looks here. It is very sturdy and such a clever construction.

From the back.

Take care everyone and try to stay positive.

Thank you so much for taking the time to visit my blog today!
Happy crafting!
Anna-Karin
Supplies:
* Please note: the links are affiliate links, for which I receive a small percentage of sales generated by the link, at no extra cost to you.
Additional supplies:
Eileen Hull Sizzix Display Stand XL die.
* Please note: the links are affiliate links, for which I receive a small percentage of sales generated by the link, at no extra cost to you.
Additional supplies:
Eileen Hull Sizzix Display Stand XL die.
What a wonderful photo... and how lovely that all those ribbons came in to their own for this project. Just goes to show you really can't throw anything away in this hobby, even if you think you've moved on from that kind of crafting! Lovely display, and lovely words too, of course!
ReplyDeleteAlison x