Monday, January 31, 2022

Dry Embossed Background Tutorial

Hi stampers! I hope you had a good weekend!

Please note: this post has affiliate links, for which I receive a small percentage of sales generated by the link, at no extra cost to you.


This week we have an 'Use an embossing folder' theme at the Simon Says Stamp Monday Challenge Blog. I hope you will join us and don't miss the last project by our January guest designer Estelle Palumbo aka Atouscrap

Layers of ink - Dry Embossed Background Tutorial by Anna-Karin Evaldsson. With embossing folders by Simon Says Stamp.

I have always loved embossing folders, since I used one the first time years ago, and I am so happy that there are so many new ones out now. Simon Says Stamp's 3-D embossing folders are amazing, with wonderful details and deep embossing. I couldn't pick just one, but instead used nine folders on this scrapbooking layout about some amazing cross-country skiing over ten years ago. I came upon the photos as I was looking through some photos and was inspired to use them. 

Layers of ink - Dry Embossed Background Tutorial by Anna-Karin Evaldsson. With embossing folders by Simon Says Stamp.

Start by cutting watercolor paper into 4x4 in squares and emboss in the folders. You actually see the embossed effect better on this photo than on the main photo. I used these folders: KaleidoscopeWinter TreesGeometric Lattice, Snowflocked Hills, Christmas Floral, Triangle Burst, Vine CanopyFiligree Snowflakes, and Blossom Field.

Layers of ink - Dry Embossed Background Tutorial by Anna-Karin Evaldsson. With embossing folders by Simon Says Stamp. Distress the edges.

Distress the edges.

Layers of ink - Dry Embossed Background Tutorial by Anna-Karin Evaldsson. With embossing folders by Simon Says Stamp.

Adhere to a background paper.

Layers of ink - Dry Embossed Background Tutorial by Anna-Karin Evaldsson. With embossing folders by Simon Says Stamp.

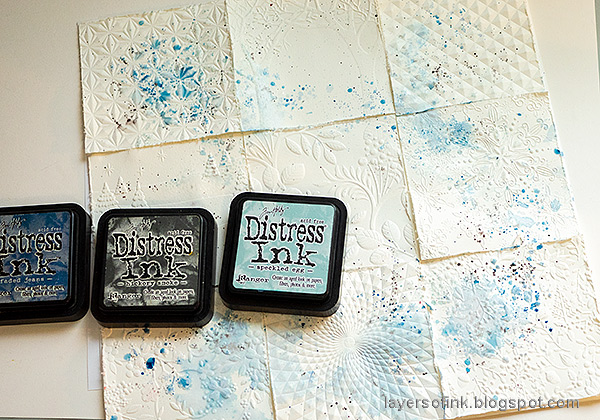
Smear Distress Inks on a non-stick craft sheet, mist with water and press the paper into the ink, here and there. Splatter some more ink on the page.

Layers of ink - Dry Embossed Background Tutorial by Anna-Karin Evaldsson. With embossing folders by Simon Says Stamp. Die cut branches.

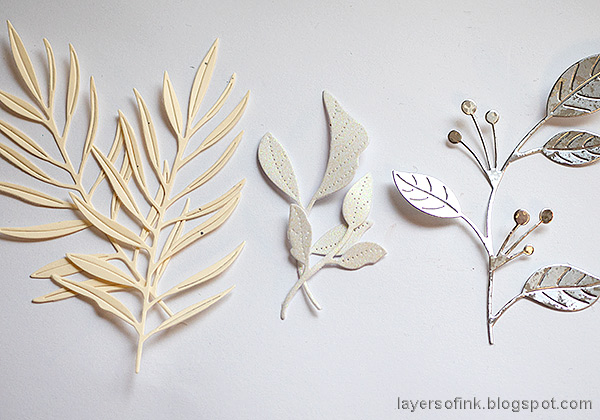
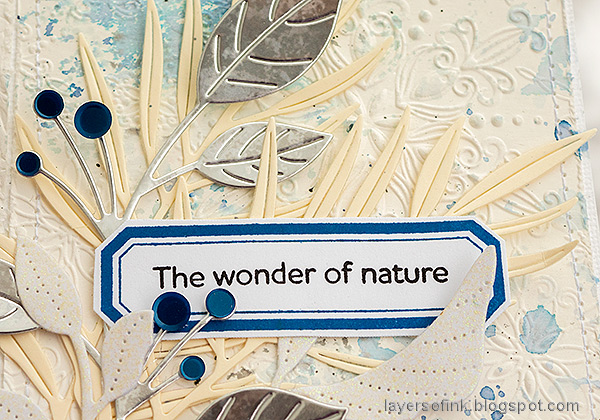
Die cut branches from cream, white glitter and holographic paper using the Simon Says Stamp Etched Delicate Frond, Tender Leaves and Etched Berry Branch die.

Layers of ink - Dry Embossed Background Tutorial by Anna-Karin Evaldsson. With embossing folders by Simon Says Stamp. Stamp labels with Simon Says Stamp Mixed Labels.

Stamp labels from Simon Says Stamp Mixed Labels with Royal ink and add sentiments from Forest Scenery.

Layers of ink - Dry Embossed Background Tutorial by Anna-Karin Evaldsson. With embossing folders by Simon Says Stamp.

I glued sequins to the berries. 

Layers of ink - Dry Embossed Background Tutorial by Anna-Karin Evaldsson. With embossing folders by Simon Says Stamp.

Stitch around all the squares with a sewing machine. The photos don't quite capture how deep this embossing is. 

Layers of ink - Dry Embossed Background Tutorial by Anna-Karin Evaldsson. With embossing folders by Simon Says Stamp.

Glue the branches in three areas of the layout, adding labels in between.

Layers of ink - Dry Embossed Background Tutorial by Anna-Karin Evaldsson. With embossing folders by Simon Says Stamp.

I love this Snowflocked Hills embossing folder. You can find a faux-linen technique using this folder here.

Layers of ink - Dry Embossed Background Tutorial by Anna-Karin Evaldsson. With embossing folders by Simon Says Stamp.

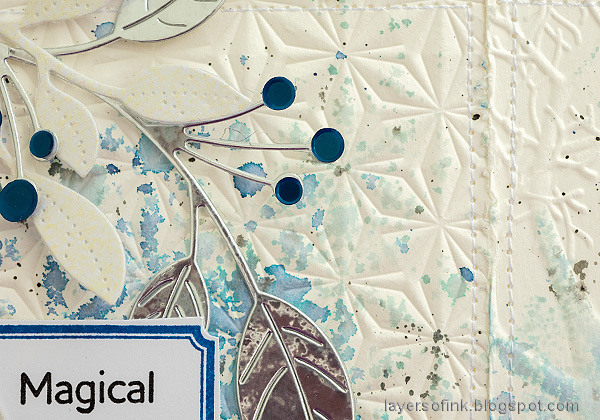
The stitching and distressed edges add even more texture to the background.

Layers of ink - Dry Embossed Background Tutorial by Anna-Karin Evaldsson. With embossing folders by Simon Says Stamp.

The white glittery paper and the holographic paper gives a nice contrast to the matte textures of the background and fits well with the snow theme. 

I hope you will join us this week in our Use An Embossing Folder theme. You have a chance to win a $25 gift voucher to do some fun shopping at Simon Says Stamp. You have until Monday 8am Ohio time. 1pm UK time, 2 pm CET to join in.


Do you use Instagram? If so please add #sssmchallenge so we can see your entries there too.


Thank you so much for visiting my blog today! 

Happy crafting!

Anna-Karin

Supplies:

* Please note: the links are affiliate links, for which I receive a small percentage of sales generated by the link, at no extra cost to you.


1 comment:

Thank you so much for leaving a comment! Happy Crafting!