Hello crafters! Things are starting to settle into our normal routine here and the nights are getting cooler. During August, the Eileen Hull Inspiration Team is sharing projects with an anything goes theme. Don't miss all the very varied inspiration.

As you probably know, I love to make mini albums and mini books of different kinds and I was happy to use the Book Binding die for the first time. It's a fun and easy way to bind a book and all you need are some Planner Mini Discs. I like that you can move pages around, if you change your mind about placement. When looking through a pile of photos I came upon photos from a holiday with my parents in 2009, which I had planned to use in a mini book, but never got to, so I decided it was about time. The cover was painted and stamped with Stampscapes stamps.

Some of the step photos aren't perfect, because my camera is being repaired and my old camera doesn't do so well in low light. I made two lines with a white gel pen on the Book Binding die, as a guide to know where to place my papers. You don't see them here since the paper is exactly lined up with the lines. Use the Movers & Shapers Shuttle and place the die on top. All you need to do is to add one Cutting Pad on top of the paper. If you use larger binding rings, you can die cut the holes further in, to prevent a too big gap between the pages.

I used various shapes of pages, two of them were scalloped pages die cut with Eileen's Flowers & Leaves Journaling Cards, and Heart Journaling Cards. Place the edge of the paper just inside the cutting line on one side, to get a straight edge where the binding will be.
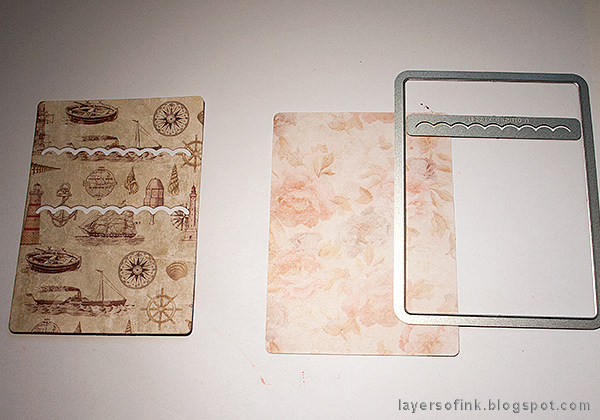
I also made a couple of pocket pages, using the Credit Card Sleeve & Tags set. Place the scalloped die as shown here to die cut the slots - it is easiest to do with the Magnetic Platform. Die cut one paper without the slots. For another example check out my Book Club Chapter 2 Card tutorial.

Apply adhesive along the edges and glue the two pieces together to make a pocket. Die cut tags with the Credit Card Sleeve & Tags set, from the same set.

The covers were die cut with the Passport Book die, from mat board. After coating them with gesso (and letting it dry), they were painted with Distress Paints, forming a very simple beach background.

The covers were stamped with various Stampscapes stamps to create a simple scene. I used my trusted Stamp-a-ma-jig stamp positioner, both for precise placement, but in this case also to hold the stamped plastic sheet over the background to check placement and perspective before stamping. If the kids were placed at the very edge of the water, for instance, they would look gigantic.

After stamping the scene, I added some color and, in particular, shadows with paint.

I used teal Me and My Big Ideas Planner Mini Discs to bind my mini album. It is very easy to do.
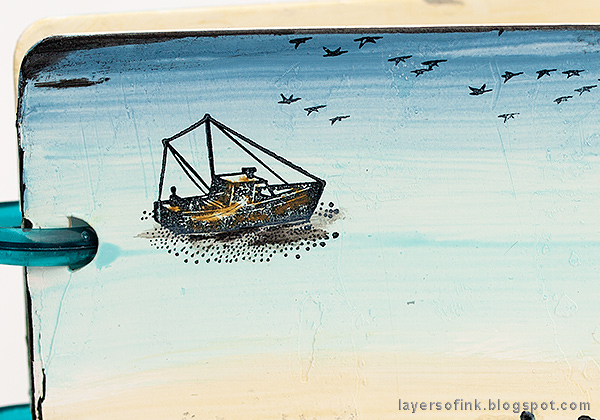
Since we saw lots of different kinds of boats on this coastal holiday, a fishing boat worked well for the cover, especially since the area is an old fishing community.
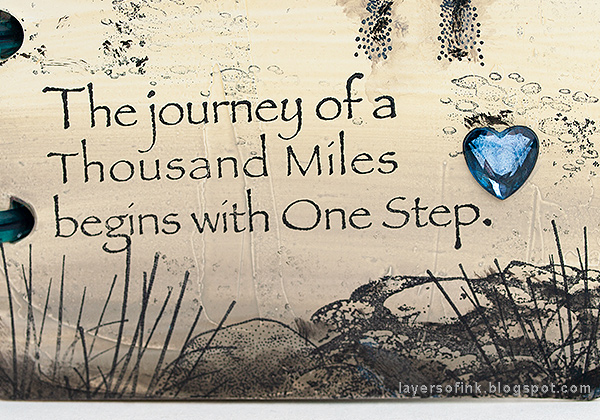
I always like this quote, and it fits for many different themes. The mirrored heart was colored blue with Denim alcohol ink.

Here's the back cover, with another beautiful Stampscapes sentiment stamp.

And a peaceful rowing boat.

I didn't aim for perfect stamping here, since I wanted a textured look to go with the papers I used on the inside. I used a pebble and a flower texture stamp to stamp the texture.

I used to play badminton until I injured my knee and here I had fun playing badminton with some kids from a family we visited.

I used papers by Prima Flowers, especially from their St Tropez line, mainly from the A4 paper pad, but also from the 4 x 6 pad and a couple of pages straight from the 3 x 4 pad (no need to die cut those since they were already of a good size).

I still need to add journaling to the album, and left enough space for that.

You can also die cut pages from photos only. The righthand page is two 2 x 3 photos adhered to the back of a 3 x 4 photo.

I love the look of those colorful houses up against the cliff. It was fun working with these photos again and remembering that special holiday.

The pocket pages were used both for die cut tags with journaling, and for additional photos.
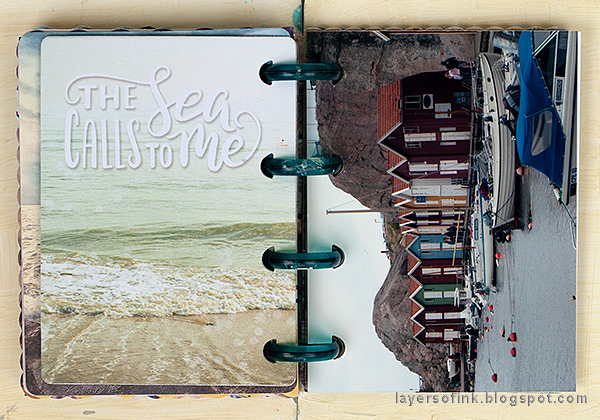
To the right is another photo page. I wanted to use some 3 x 4 photos, and this was a very easy way to do so.

The book is pretty full as it is and I wanted to focus on photos and text, but I might add some flat embellishments later too. I love the page to the right here, and I still use my yellow rain coat.

I used mainly 2 x 3 in photos, and had to cut them a little so that they would fit, but some of them were hard to cut down without affecting the photo too much, and then I just adhered them sideways instead.

As you can see, the book is nice and chunky. There are tiny hearts in the middle of the discs.

This book can easily be made for any topic or theme and would be a great gift too. It is the perfect place to use up some scrap paper. You could also turn it into a notebook or a small planner.
Thank you so much for stopping by here today!
Happy crafting!!
Anna-Karin
* Please note: the links are affiliate links, for which I receive a small percentage of sales generated by the link, at no extra cost to you.
Binding discs: Me & My Big Ideas Planner Mini Discs 9/Pkg - Clear Teal
Stamps: Stampscapes: 164A Fishing Boat, 256A Pebbles, 067B Reeds, 230B Running Kids, 299B 3 Rocks & Grass, 166A Row Boat, 210C Boulders with Lichen Sm., 152D Migrating Birds, Scenic Sentiment Sheet 1, Scenic Sentiment Sheet 4, Nature Sheet 4

I love the journal design that you used for this, I love the colors that you used for this as well. Hope you have a fantastic rest of your day. Keep up the posts.
ReplyDeleteWorld of Animals
Anna-Karin, this is so cute! I love the size you worked with and the soft colors are a great background for the photos. Congrats for getting all those pics in a journal- and so adorable too!
ReplyDeleteI love this Anna-Karin! It is a great memento of a trip. =)
ReplyDeleteThis is beautiful!
ReplyDeleteYour mini album is delightful, I really love how you created the beach and sky and it is lovely to see some of your holiday adventures too! Hugs, Anne xx
ReplyDeleteI just love this little book you made Anna-Karin! the colors and stampings on the covers are just beautiful - and your pages are delightful! a lovely way to remember a lovely holiday! Julia xx
ReplyDeleteAnna Karina, your mini album is so creative and pretty! I love the theme and the colours and papers are perfect. This is so inspiring, as always. Maybe I need to create a special little album of our summer trips to the sea shore this summer. Thank you for always sharing your beautiful work!
ReplyDeleteLove love love this mini Anna-Karin! One of my favorite projects of yours! Barbara
ReplyDelete