
Hi crafters!! I am happy to have my camera back home again, after having been repaired. I missed it when it was away. Today, I have a colorful Sizzix tutorial to share with you.

I made an autumn wall-hanger with vibrant colors, but you can use the techniques for any type of project. And if you don't want an autumn theme, just change the colors. I used a bunch different surfaces here to create texture and a project that you'd want to reach out and touch. The wall-hanger is 7.5 x 6 in and was made with dies by Tim Holtz.
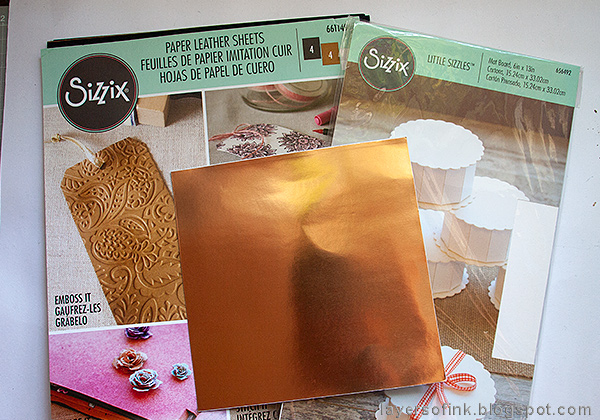
Some of the surfaces I used are: Sizzix Paper Leather, Little Sizzles Mat Board and Foil Adhesive Sheets, all which are fun surfaces which work for a wide range of techniques.
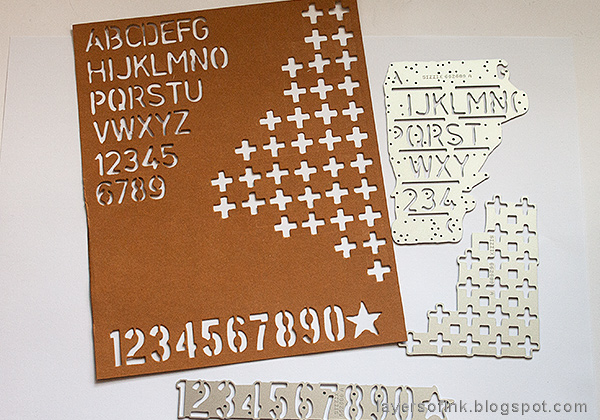
I started out by die cutting the background using brown Paper Leather. You can also use kraft cardstock, for a similar effect. Die cut with Tim Holtz Mixed Media 6 dies.

I cut a piece of mat board the same size as the Paper Leather and painted it black.

When dry, add a little bit of gold paint, which will shine through the negative die cutting. If you wonder about the splotch to the bottom right, it is because there is a star die cut there, and I wanted the star to be gold.
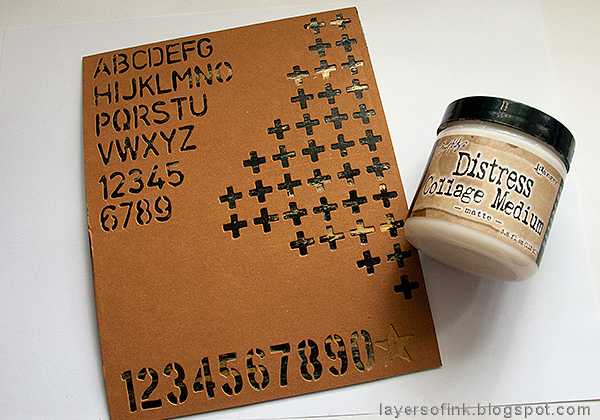
Glue the Paper Leather background on top of the mat board with Matte Medium. Place under a heavy book until it is dry.
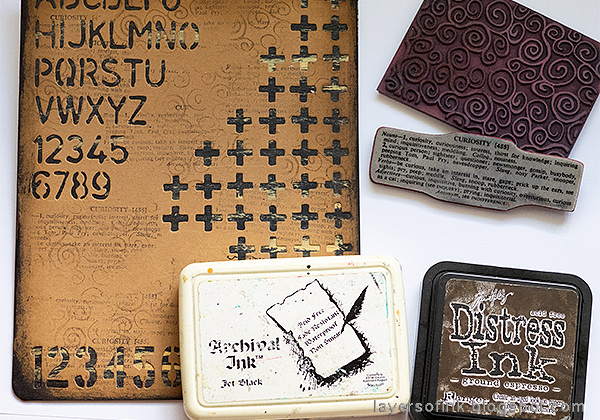
Stamp the background with a swirl stamp and Ground Espresso ink as well as with a text stamp and Jet Black ink. Ink the edges and add some Black Soot paint to make them darker.
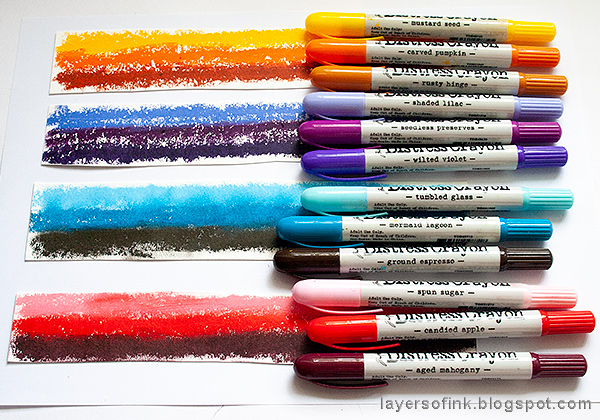
For the Rosettes I used a very fun and easy technique. My rosettes were die cut from white Paper Leather, but you can also use white cardstock. Cut strips and color each one with three shades of Distress Crayons, making them darker on one side and gradually lighter. Blend the crayons with your finger - in the photo, the bottom two are blended and the top two are not, to show you the difference.

The Rosette set has three designs. Die cut using this sandwich: Multipurpose Platform Tab 2, Cutting Pad, paper, die facing down, second Cutting Pad. Place the papers so that the darkest part will be on the inside of the finished rosette - where the straight edge of the die is.

Fold along the perforated lines. If you use ordinary cardstock, place a piece of tissue tape at the back before folding, to make sure the paper doesn't tear along any of the perforated lines. Paper Leather is very strong and if you use it, you can skip that step.

Glue the ends together. You can use hot glue to assemble the rosettes - but be careful not to burn yourself. I used Matte Medium instead. I like to use the largest circle from the Rosette set as a base to glue the rosette upon. Press the rosette down onto the glue and place under a book.

I made four rosettes. Later I decided to leave the purple one for another project, since it looked better with three than four rosettes on the wall-hanger.
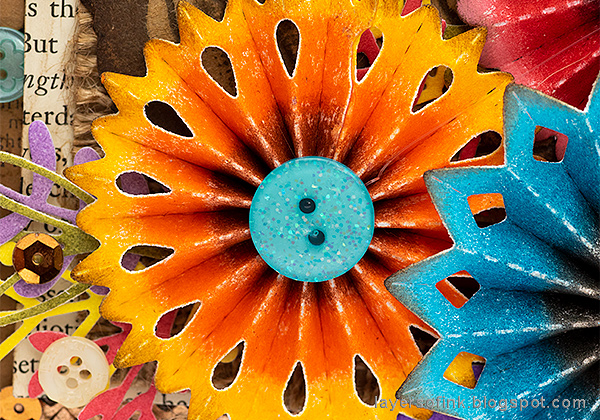
Instead of die cutting a center using the Rosette set, I glued a button to each center. It covered up less of the color and gave a nice extra touch.
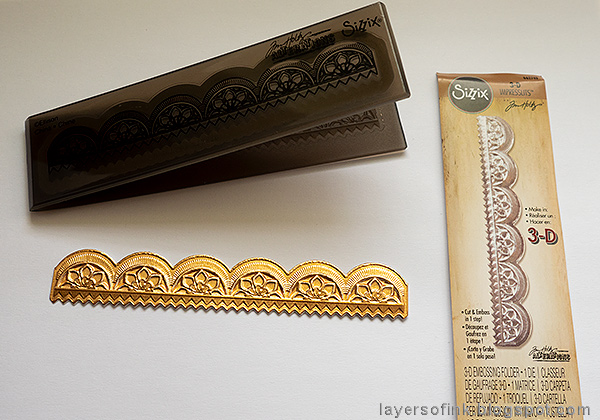
I used the Mini Scallops Impresslits 3-D Embossing folder for the first time, and loved the cool effect. It looks just like German Scraps. Adhere the foil to a piece of paper first and then place in the folder. It cuts and embosses at the same time. Use this sandwich: Multipurpose Platform Tab 1, Impresslits folder with paper inside, Cutting Pad.
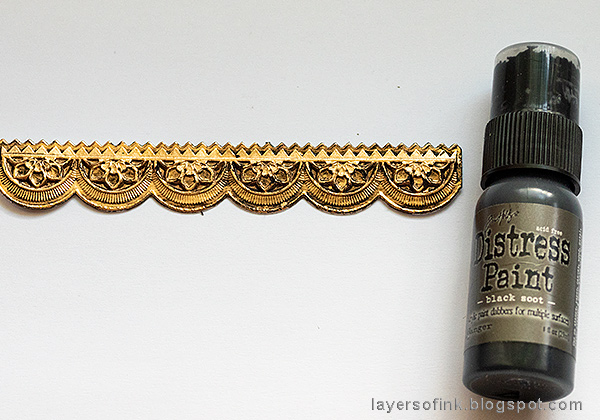
Distress with a little black paint.

I also used the Tree Rings Bigz, which comes with a coordinating embossing folder. Depending on which way you place the paper in the folder, you can get a different wood grain effect, as you can see on the photo. I used the first example.
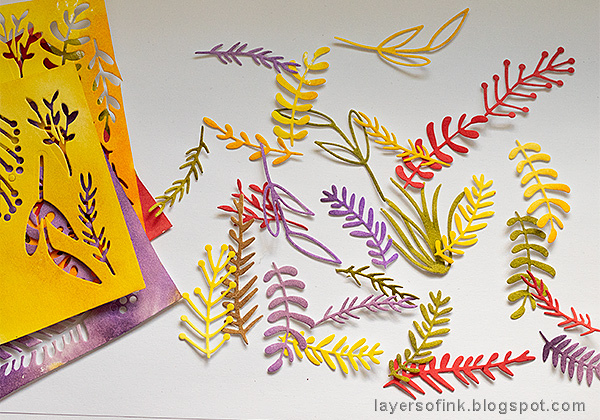
Press Distress Ink on a craft sheet, mist with water and press pieces of white Paper Leather into the ink. You can also use watercolor paper. Die cut with the Funky Floral 1, Funky Floral 2 and Funky Floral 3 sets, picking leaves that you like.
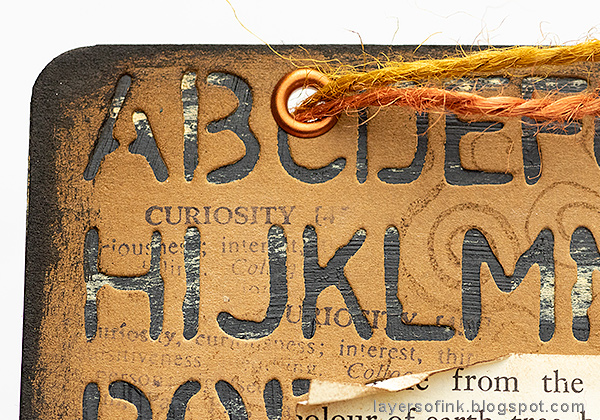
Punch two holes at the top of the wall-hanger and set an eyelet in them. Tie with twine.
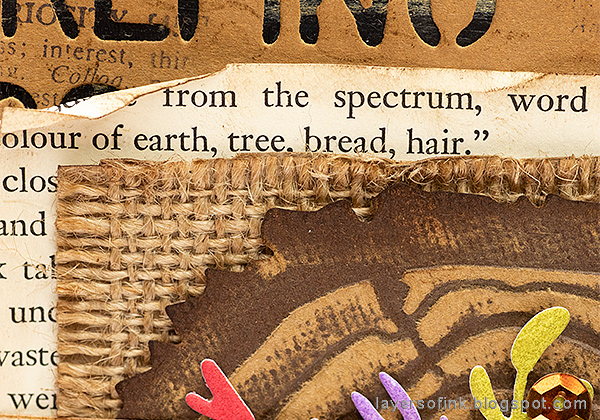
Behind the wood circle, I placed a piece of burlap and a page from an old book. I liked this particular page because of the text about the color of earth, tree, bread and hair.

Stamp a sentiment and cut out.

If you want to cover up the white perforated lines, you can simply use one of the Distress Crayons, but I left mine as they were.
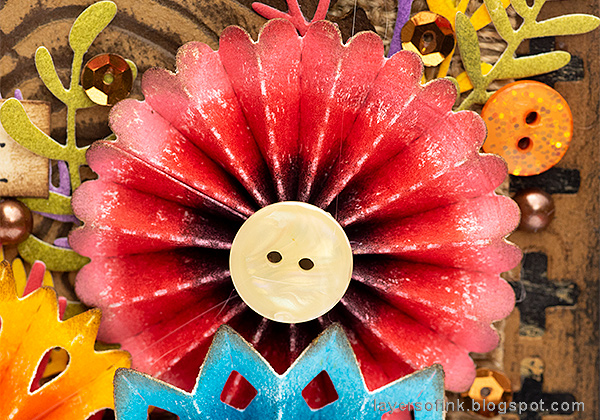
The Distress Crayons give really vibrant colors to the rosettes.

I added extra buttons, pearls and sequins here and there for some shine.
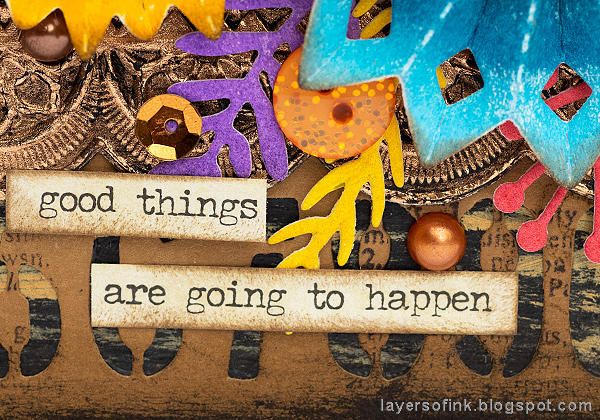
I also used a Small Talk sticker sentiment.

Here you can see the cool look of the embossed metal, as well as how the gold paint peaks through the die cut shapes in the background.
Thank you so much for taking the time to look at this long tutorial! I hope you enjoyed it!
Happy crafting!
Anna-Karin
Supplies:
* Please note: the links are affiliate links, for which I receive a small percentage of sales generated by the link, at no extra cost to you.
This is beautiful, I love how you colored the rosettes, they are so vibrant! The bits of gold peaking through the negative spaces I’d such a nice touch! What an awesome wall hanging, every time I look I notice another detail! Love it!
ReplyDeleteFabulous mixed media with a lot of inspirations! Thanks for sharing!!
ReplyDelete