Tuesday, April 30, 2013

12 tags of 2013 April

Today I am sharing my version of Tim Holtz April tag for 12 Tags of 2013. I've been waiting to the last minute, because I was hoping my distress paints would arrive, but they seem to be having a rest in some postal Bermuda Triangle, when they should really be on my desk.

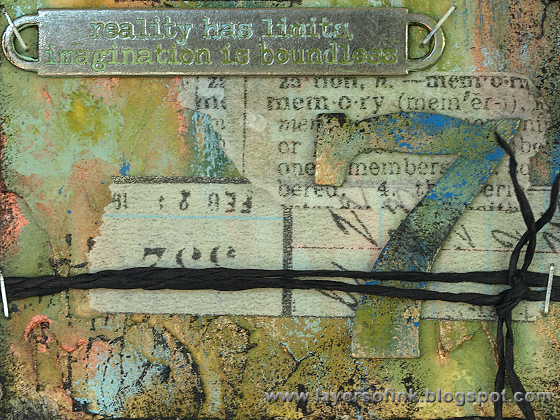
Instead of using the Distress Paints, I used my Adirondack dabbers. I had a tag on my desk that I had covered with Coarse Molding Paste and decided to use that tag since it already had a really cool texture. I used both watered-down dabber paint and some dry brushing to create the background, with a bit of crackle stamping and some black paint around the edges. Because of the Coarse Molding Paste, the background has extra texture and also a rough feel to it, similar to rusted metal.

I was happy to see that Tim used Clearly for Art Modeling Film on his tag, since that has been a favourite product of mine ever since it came out. I used it for a dimensional hot air balloon on my post yesterday. Instead of using the dragonfly, which I have already used together with the modeling film once, I used both the large and the small version of the Blueprint light bulb stamp instead. The base part was coloured on the back with silver alcohol ink. I heated them and shaped them as light bulbs.

The Idea-ology pieces were distressed with the Adirondack paints too.

Here's a close-up of the background texture, with a bit of crackle stamping.

I used the Word Play die to cut a number from grungeboard and painted it black, before giving it the same treatment as Tim gave his plastic number. I added a bit of dry-brushing too.

More background texture, I was having fun with my paints.

Thank you for looking!!

Anna-Karin

Supplies:
Stamps: Stamper's Anonymous Tim Holtz: Industrial Blueprint, Mini Blueprints 3, Ultimate Grunge
Dies: Sizzix: Word Play
Surfaces: Wendy Vecchi Clearly for Art Modeling Film
Paint: Ranger Adirondack: Aqua, Sailboat Blue, Juniper, Lettuce, Pitch Black, Gold, Copper
Alcohol ink: Ranger Adirondack Silver
Stain: Distress Stain Tarnished Brass
Medium: Golden Coarse Molding Paste
Embellishments: Tim Holtz Idea-ology: Game Spinners, Gears, Time Pieces, Crinkle Ribbon, Word Bands, Paper Strings Solids, tissue tape

Monday, April 29, 2013

Fly to Paris Pop-Up

Hi everyone! Monday and time for another Simon Says Stamp and Show challenge. This week we are travelling, with our challenge 'passport to fun', and I took an imaginary inky trip to Paris.

I have never been to Paris, so it was fun to take a trip there with stamps, inks and dies. I wanted to use my new Tim Holtz Paris Memoir and Paris to London sets and thought the Eiffel Tower would look great on a pop-up. I love making pop-ups, they are so much fun and also give more space to embellish. I used the Sizzix 3-D Label die by Karen Burniston for the pop-up. It was die cut from manila cardstock, which was inked with Barn Door, Fired Brick, Salty Ocean, Peacock Feathers and a bit of Black Soot around the edges.

After inking the background, I splattered it with water to create texture and misted with Biscotti Perfect Pearls, since a trip to Paris needs a bit of bling. The background was stamped with a bunch of different stamps using Ranger Archival Jet Black ink and with the fabulous text stamps from Paris Memoir and French Marketplace, using Fired Brick and Broken China.

The man was stamped on Specialty Stamping paper with Archival Jet Black and inked with Barn Door, Antique Linen and Salty Ocean. The Eiffel tower was embossed with Platinum embossing powder on Specialty Stamping paper. I painted it with Pitch Black paint and when it was almost dry, wiped the paint off from the embossing. The combination of the embossing and the matte black paint looks pretty cool in real life.

Love that this hot air balloon stamps now come in a smaller size too (I used the big version on the front of the card). I stamped postage stamps on postage die cuts.

A sentiment from Tim's Simple Sayings was stamped in two parts, so that it could fit onto a mini ticket.

This is the lower part of the inside of the card. You can see the pop-up mechanism better here. Lots more stamping, another postage stamp die cut, another mini ticket and a pen nib pointing to the main sentiment. Bon Voyage was embossed with platinum powder.

The fleur-de-lies was made in the same way as the Eiffel tower. You can see a bit of the Perfect Pearls sparkle on this photo.

This is the front of the card, with the hot air balloon I flew to Paris in. The background was done in the same way as on the inside. Tim Holtz new Postage Stamp Frame was die cut once from Specialty Stamping paper and once from his new 8 x 8 paper pad, using a section with the Eiffel Tower. I cut out only the frame part from the Specialty Stamping paper one, swept it with an Emboss-It dabber and embossed with platinum powder. After embossing, I painted it with black paint and wiped most of it away before it dried completely. The fleur-de-lies was made in the same way.

The balloon was stamped on one of my all time favourite products, Wendy Vecchi's Clearly for Art Modeling Film. I coloured it at the back with Silver and Sailboat Blue alcohol ink and after the ink was dry, the balloon was heated up with my heat gun and shaped. (Don't burn yourself.) It cools down very quickly and keeps its shape perfectly and if you are not happy, just reheat and reshape. I attached it to the card with mini staples.

Did you know that the hot air balloon, which was the first successful human-carrying flight technology, was invented in France 1783. When we were children, we marveled at hot air balloons flying above our house. It was especially cool if there were many at once.

Close-up of the texture on the frame and fleur-de-lies, and another mini ticket, inked with Salty Ocean.

The little Eiffel Tower stamp is from Hero Arts. I tucked another postage stamp die cut behind the balloon.

I hope you will join us on some travels this week! As always, our great sponsor Simon Says Stamp gives a $50 gift voucher to one random participant.


Thank you for stopping by! Happy Stamping!

Anna-Karin

Supplies:
Dies: Sizzix: 3-D Label Pop-Up; Mini Bottle Cap & Stamp, Postage Stamp Frame, Mini Filmstrip & Tickets,
Stamps: Stamper's Anonymous Tim Holtz: Paris Memoir, Remnants, Warehouse District, Paris to London, French Marketplace, Elements of Time, Mini Classics, Artful Voyage, Simple Sayings; Hero Arts: Untitled Heart
Surfaces: Ranger Manila cardstock; Ranger Specialty Stamping paper; Wendy Vecchi Clearly for Art Modeling Film; Tim Holtz Idea-ology Collage Mini 8 x8 paper stash
Ink: Ranger Archival Ink Jet Black; Distress Ink: Salty Ocean, Barn Door, Fired Brick, Black Soot, Tumbled Glass, Gathered Twigs, Peacock Feathers, Broken China; Ranger Emboss-It dabber
Alcohol Ink: Adirondack: Silver, Sailboat Blue
Paint: Adirondack Pitch Black
Mist: Biscotti Perfect Pearls mist
Embossing powder: Ranger Liquid Platinum
Embellishments: Tim Holtz Idea-ology Pen Nibs

Saturday, April 27, 2013

CSI case file #69: My red star bike

Hello! Time for another CSI: Color, Stories, Inspiration case file #69, and it is a fun one:


I did a double pager this week:

From the evidence items I used: houses, trees, circles, circle graph, ledger paper, stripes and jewels. From the testimony items, I did circle graph journaling. There is a lot more journaling on a paper tucked behind the layout, because I ended up writing a lot.

The layout is all about my son's love for his 'red star bike'. I stamped his name and some stars on the bike with Stazon ink, so that he would know that it is his and it made it even more special. I wrote a long piece of journaling about him picking the bike, absolutely wanting a red one, about the stamping on the bike, learning to stop whey I say 'stop', the bike's home in my boot, tears spilled when it was time to put it away and go inside, etc.

Inspired by the case file inspiration photo, I stamped a wacky village along the base of the layout, using Dyan Reaveley's fun Right up your Street stamps, a star stamp from Wendy Vecchi and small people and tree stamps from Hero Arts. I coloured the houses with watercolour pencils.

Love this die cut from the Charming This & That set, it was inked with Jenni Bowlin Speckled Egg. The label comes from the same set.

The title was stamped with different letter stamps using Nautical Blue Memento and Vermillion Red Archival inks. I also had to use the same star stamp as I used on the bike itself. The cool circles are another Wendy Vecchi stamp.

I love these funny houses. I also added some stamped sentiments here and there.

More houses and a little mushroom.

I had the perfect stamp for a graph and stamped it twice on smooth paper. I cut three slices times two off from the one impression and inked all the three parts with different inks (Jenni Bowlin Speckled Egg, Distress Barn Door and Antique Linen). Journaling was added with letter stickers.

This great sentiment comes from an Ali Edwards set.

The houses and photos were separated by a strip of printed masking tape, a road for the bike photos.

A little happy place.

More stamping. This layout is all about the stamping.

Thank you for looking! Have a great weekend!

Anna-Karin

Supplies:
Stamps: Ranger Dyan Reaveley Right up your Street, Doolally Dorris; Stamper's Anonymous Wendy Vecchi: She Created Art, Celestial Art; Stamper's Anonymous Tim Holtz Psychedelic Grunge; Hero Arts: Plano ST518, Special Lace CH318, Stepping Stone Alphabet 330055, Oh Snap 331234, Spread Joy 331232, Heyday Sentiments 330053, Be Silly CL635, Hey Y'All 331073, Playful Flower Letters; Simon Says Stamp: Shoot for the Stars; TechniqueTuesday: Favorite Memories by Ali Edwards
Dies: Sizzix: Charming This & That Thinlits
Ink: Ranger Archival Ink: Jet Black, Vermillion; Jenni Bowlin: Speckled Egg; Distress Ink: Barn Door, Antique Linen, Black Soot; Memento: Nautical Blue
Pencils: Derwent Watercolour pencils
Surfaces: BasigGrey Basics ledger paper
Embellishments: 7Gypsies masking tape
Stickers: Kaiserkraft

Thursday, April 25, 2013

Heart Shadow Boxes Tutorial

Hello everyone! Since Mother's Day is coming up soon, I thought I would use that as a theme for a Sizzix step-by-step tutorial. The first time I saw Eileen Hull's Heart Box die I knew I wanted to use it to make a shadow box wall hanging. This project can be adapted to fit any theme, and you don't have to make three hearts as I did, do just one or how many as you would like.  

This is a tall project and hard to photograph, but I still wanted to give you an idea of how it looks assembled. I made three heart shadow boxes using similar photos of my grandmother and my mom as a baby, my mom and me, and finally me and my son. I was lucky to find photos that were similar and printed them all in black and white. I love how this turned out.

 
To give you a better idea before we start, here is the first heart shadow box, I used a mix of dies to make the flowers.

Start by die cutting three hearts and six sides (three left and three right hand sides) from cream or white mat board. Here you can see that the die both cuts and scores the mat board, which makes assembly very easy.

Cut strips of natural sticky back canvas to fit both inside and outside the sides of the heart boxes (2.5x18.5 cm). Fray the one long edge a bit and adhere to the mat board. I used a glue stick on the mat board first, to make sure the canvas would stick down well. It is good to fold the sides a bit along the score lines, to make sure that you will still be able to get the right shape to attach to the heart. Swipe Picket Fence Distress Paint across the canvas, not covering it completely.

Ink with a bit of Frayed Burlap using an ink blending tool.

Do the same thing on all the other sides, on the inside and outside. The canvas gives a real nice feel to the boxes.

Stamp four of the sides with the long sentiment stamp from Tim Holtz Stamper's Anonymous Stuff to Say set, using Archival Jet Black ink. I was happy to discover how perfectly this stamp fit the hearts, both in size and with the words on the stamp. Don't start stamping at the top all the time, but instead alternate where particular words are situated, for more variation. Make sure that you pair up the sides of the boxes, since there is a left and a right. On the last pair, stamp the three words from one of the other stamps in the same set, masking out the two words you don't want with a piece of scrap paper when inking the stamp. Apply strong adhesive to the flaps. I used Ranger's Wonder Tape, you can see it on the second piece from the left.

Adhere the sides to the heart base. I added a few tiny staples too, but I am not sure if they were really necessary.

Now to the photos. I used 4x6 photos, which are slightly too small for the hearts, but it doesn't matter, since we will cover up that part with flowers. Use one of your mat board negative die cuts and place it on top of the photo to determine where you want the heart to be. You can cut the photo heart with the die, but to make sure I got exactly the part I wanted, I used a pen and then cut the heart out with scissors. You need to make it slightly smaller than the base heart, since otherwise it won't fit.

Die cut three hearts from cardstock and trim them with scissors so that they fit inside the heart boxes.

Distress the edges of the photos slightly, with sandpaper and a needle tool. Adhere first the cardstock heart and then the photo hearts to the boxes.

Punch two holes at the top and base with a Crop-a-dile, except for at the base of the last heart. It might be easier to do this before assemblying the hearts, but I didn't think of it until they were stuck.

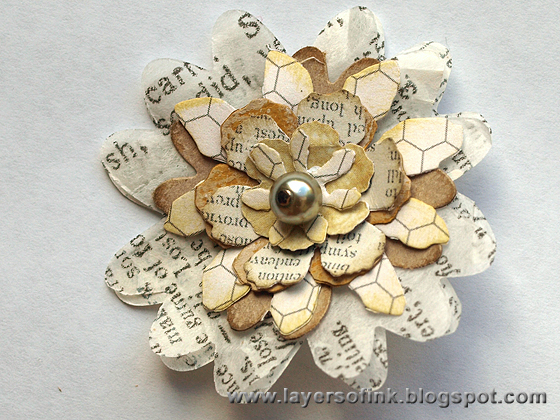
Time to make some flowers. I like mixing different flower dies to make layered flowers. Here I die cut a lot of flowers and leaves with the Flower Layers w/Heart Petals, Bloom w/Leaves 3-D Flower, Rose 3-D Flower, Sweet Treats for You SetHearts & More Set, and Tattered Flower Garland dies. I used tissue wrap, kraft-core cardstock, and patterned paper.
  
Ink the edges with Frayed Burlap, Scattered Straw and Bundled Sage distress ink. The kraft-core and tissue flowers were swept through Picket Fence Distress Stain which had been smeared on my craft sheet.

Shape the edges of the petals of the 3-D flowers a bit and then roll them up with tweezers or a toothpick. I usually only start with tweezers and then remove them and roll the rest with my fingers.

You'll end up with 3-D flowers in two different sizes. Ink the edges a bit.

For something a bit different, I decided to use beads and pearls as flower centers. You could use a brad instead. Place the pearls on head pins.

Layer the flowers into smaller and larger flowers and place a head pin through the center of each one.

Cut the end and make a double loop at the back.

Press it flat with pliers.

Smear a little bit of Antique Linen Distress Stickles on the flowers. I love the subtle, vintage shine from this distress stickles. Fold the leaves in the middle to shape them.

Dye crinkle ribbon with Bundled Sage, Scattered Straw and just a little bit of Frayed Burlap Distress Stain.

I used little pieces of cheesecloth to add a soft feeling to the hearts, as well as some extra beads and pearls. I had some sweet water pearls that aren't of great quality, many of them being flat on one side, which was perfect for this project since they were easy to glue to the heart shadow boxes. I used hot glue for the flowers and Glossy Accents for the pearls. Tuck leaves in where they fit. I didn't use all the leaves and had some flowers left for another project too.

Thread a piece of the crinkle ribbon through the holes at the top and tie a bow, tie another piece to it to hang the wall hanging with. I glued two flowers to the top of the heart.

White paint was rubbed into the sentiment of the Word Band, to make it stand out more. Glue to the heart with hot glue, but only after you have threaded the ribbon through the holes, otherwise that will be pretty tricky. The hearts didn't close completely at the base, and I added a little bit of hot glue there too, pressing the two ends together.

The second heart with me and my mom, I like this photo the best. At the base of the hearts, I used smaller flowers, and the larger ones sit in the 'empty' corners of the photos.

First glue the cheesecloth and then layer the flowers and leaves on top. I tied the Word Stick around one of the flower bead centers.

A close-up of the flowers and pearls at the base of this heart. I glued a little pearl inside the 3-D flower too. I threaded the ribbon through first here, since I saw that I would cover up the holes.

The last shadow box, with the tiniest baby. I found a pearl that looked like a heart and glued it to the photo.

Close-up of the flowers, cheesecloth, leaves and pearls.

This sweet sentiment was the perfect way of finishing the wall-hanging.

I tied the hearts together with the crinkle ribbon, just making simple knots, you could tie bows as well.

Love the look of the stamping on the side of the hearts.

The last heart, time to hang this up on a wall or give away as a gift.

Thank you for looking at this long tutorial!

Happy Crafting!

Anna-Karin

Supplies:
Surfaces: Sizzix Little Sizzles cream mat board 6x13; Claudine Hellmuth natural sticky-back canvas; Tim Holtz Core'dinations kraft-core cardstock; Tim Holtz Idea-ology Terminology tissue wrap; 7Gypsies Off the Wall 8 x 8 paper pad; Studio Calico Classic Vol. 2
Stamps: Stamper's Anonymous Tim Holtz: Stuff to Say
Ink: Ranger Archival Jet Black; Distress Ink: Bundled Sage, Scattered Straw, Frayed Burlap
Stain: Distress Stain: Bundled Sage, Scattered Straw, Frayed Burlap, Picket Fence
Paint: Distress Paint Picket Fence
Stickles: Ranger Distress Stickles Antique Linen
Embellishments: Tim Holtz Idea-ology Word Bands, Word Sticks, Crinkle Ribbon; assorted pearls and beads; head pins; cheesecloth
Adhesive: Ranger Glossy Accents, Ranger Wonder Tape; hot glue