Showing posts with label winter. Show all posts

Monday, January 13, 2025

Wooded Cabin Card Tutorial

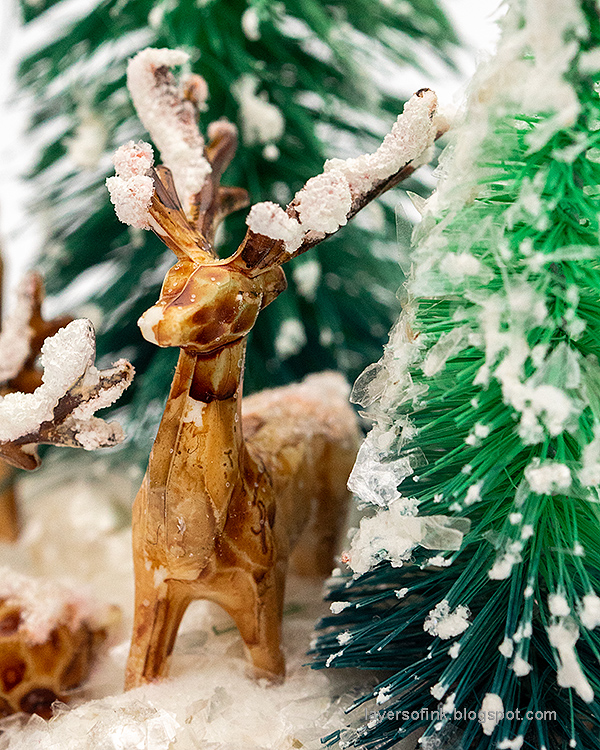
Hello crafters! I hope you are well and had a good weekend! We have a lot of snow at the moment, which also inspired my card for today's post.

Please note: this post has affiliate links, for which I receive a small percentage of sales generated by the link, at no extra cost to you.


This week we have an Add Some Texture theme at the Simon Says Stamp Monday Challenge Blog. Adding texture is definitely one of my favorite things and there are so many options and fun techniques. I hope you will join us! Our January guest, Pauline C has created another beautiful project this week. 

Layers of ink - Winter Cabin Card Tutorial by Anna-Karin Evaldsson.

I made a card where I added texture in different ways: dry embossing, inky resist, a gel pen and some glitter. Simon Says Stamp Wooded Cabin 3-D embossing folder was used for the card, in combination with Distress Ink, colored pencils, Stickles and Micro Glaze. The technique is fun and easy!

Dry emboss Simon Says Stamp Wooden Cabin.

Start by dry embossing watercolor paper in the Simon Says Stamp Wooded Cabin folder. Mist the paper with water before embossing.

Color with Prismacolor Pencils.

Color the trees and the cabin with colored pencils. I used Prismacolors. I also added some shading to the path and the snow. I left some of the white showing on the pine trees, as snow. Next, cover the embossed areas with Distress Micro Glaze. I forgot to add the Micro Glaze jar to this photo. Apply it with your finger. This will protect the colored areas, and the white areas from the ink in the following steps. 

Apply Ranger Distress Micro Glaze and then color with Distress Ink.

Smear Distress Ink to a non-stick craft sheet and mist with water. Press the paper into the ink. Let Dry. 

Add more ink.

Repeat the previous step again, also adding some Hickory Smoke. Let dry and repeat again if you want even more texture.

Add Distress Oxide Ink.

I added a final layer of ink, namely Mermaid Lagoon Distress Oxide ink. Smear on a non-stick craft sheet, mist with water and just lightly touch the paper to the ink here and there. Don't overdo it. 

Add snow with a white gel pen.

Wipe off ink from the Distress Glazed areas. Add snow to the sky with a Sakura Classic White Bold Line Gelly Roll pen. Use the pen to add more snow to the pine trees too.

Add Ranger Stickles.

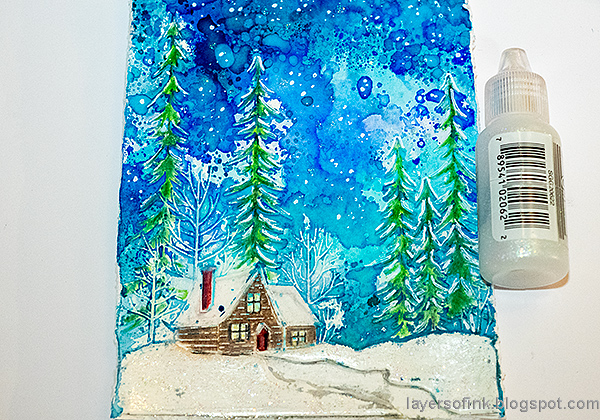
Add dots of Star Dust Stickles to the sky and cover the snow in front of the cabin with the glitter gel. Don't apply it to the path.

Stamp a sentiment.

Stamp sentiments on white paper and cut into strips. This is a favorite sentiment of mine and comes from Tim Holtz Nature's Wonder. Here you can also see all the layers of ink in sky.


I glued Simon Says Stamp Pawsitively Dazzling Dusk Gems here and there, for even more sparkle.


The white gel pen work might look a little messy up close, but it looks great from a distance.

Dry embossed and inked wooden cabin.

My favorite part of this resist technique is that the Distress Micro Glaze will not cover every little bit of paper, but there will be spots without the glaze. In this areas, the ink will stick, adding texture and interest. You can see it clearly on the cabin. 

Stamp a sentiment from Simon Says Stamp Forest Scenery.

Distress the edges of the watercolor paper before mounting on cardstock. 'Winter' comes from Simon Says Stamp Forest Scenery.


I didn't quite capture the glittery effect of the Star Dust Stickles on the photos. 

Join us this week in our Add Some Texture challenge! You have a chance to win a $25 gift voucher to do some fun shopping at Simon Says Stamp. You have until Monday 8am Ohio time. 1pm UK time, 2 pm CET to join in.


Do you use Instagram? If so please add #sssmchallenge so we can see your entries there too.


Thank you so much for visiting today! 

Happy crafting!

Anna-Karin

Supplies:

* Please note: the links are affiliate links, for which I receive a small percentage of sales generated by the link, at no extra cost to you.


Saturday, December 28, 2024

Winter Forest Decoration

Hello friends! I hope you had a wonderful Christmas! Today I am sharing a winter decoration. We have had very little snow so far this season, but hopefully it will come.

Please note: this post has affiliate links, for which I receive a small percentage of sales generated by the link, at no extra cost to you.

Layers of ink - Winter Forest Ornament Tutorial by Anna-Karin Evaldsson.

I like having winter decorations which aren't Christmas themed. When Christmas is over, I keep the winter themed decor items out until spring time. Here is a little family of deer in a snowy forest. The base is a wood slice and I used idea-ology items to create the scene, in addition to my favorite way to make snow.

Color the deer with alcohol ink.

The deer from Tim Holtz Salvaged Reindeer were colored with alcohol ink. I like how the alcohol ink brought out the great texture of the deer. They also stay shiny. You can use Distress Paint instead of alcohol ink.

Paint the trees with acrylic paint.

The three Tim Holtz Woodland Tree Lot were colored in an ombre fashion using Distress Paint. Mist the tree with water. Place the paint in a plastic bag and place the tree in the bag. Press to make sure you get paint everywhere. Let dry.

Add texture paste and glitter for snow.

When the paint and the deer were dry, I applied texture paste mixed with a tiny bit of white paint to the trees and to the deer. Sprinkle with Mica Flakes and then with Rock Candy Glitter.


Apply a thick layer of texture paste to the wood slice and press the deer and the trees into the paste. The paste will act as a glue. Sprinkle with Mica Flakes first and then with Rock Candy Glitter.

Deer in snow.

The snow looks thick since the deer sink into it.

Add idea-ology baubles to the snow.

I also added Tim Holtz Baubles here and there. Apply a little Distress Matte Medium on top and sprinkle with glitter.


You can add even more snow to the trees, but I wanted the ombre colors to still be visible.


I really like the shapes of these Salvaged Reindeer. 


When I took these photos, we did have some snow, but it is all gone again now. 

Layers of ink - Winter Forest Ornament Tutorial by Anna-Karin Evaldsson.

You can of course use a different base and make your forest even bigger.


Thank you for visiting!

Happy crafting!

Anna-Karin

Supplies:

* Please note: the links are affiliate links, for which I receive a small percentage of sales generated by the link, at no extra cost to you.


Friday, December 20, 2024

Glimmering Pines

Hi crafters! Today I have a card to share with a glimmering forest created with an embossing folder, ink, glitter glue, pens and gems.

Please note: this post has affiliate links, for which I receive a small percentage of sales generated by the link, at no extra cost to you.

Layers of ink - Glimmering Pines Tutorial by Anna-Karin Evaldsson.

I just love any embossing folder with trees, and perhaps particularly pine trees. Here I aimed for a light and glittery look, a snowy forest during day time. You can get a totally different look if you use darker inks. I used Simon Says Stamp Feathery Pines for the card.

Emboss Simon Says Stamp Feathery Pines embossing folder.

Start by applying Distress Ink directly to the Feathery Pines embossing folder. Mist the paper with water and emboss. You get a lovely random effect with this technique and you could stop here if you want to.

Paint with Distress Ink.

I smeared Distress Ink on a non-stick craft sheet and dry brushed the trees using a paint brush. Dabb off some of the ink you you get too much on the brush. This way, you will mainly get ink on the embossed parts.

Splatter with distress ink.

Splatter with two shades of Distress Ink, using a paint brush and adding some water to the ink on the craft sheet. 

Stamp with Simon Says Stamp Poinsettia.

Stamp the sentiment on the background with Simon Says Stamp Poinsettia Swag. Add white dots and lines with a gel pen. I added white to the branches of the pine trees with the white pen too.

Add Ranger Moon Dust Stickles.

Apply a little Moon Dust Stickles Glitter Gel to the branches. 


The embossing folder techniques gives a great mottled effect to the ink, which forms a nice backdrop to the forest and all the splattering.

Add Simon Says Stamp Pawsitively Dazzling Gems.


Stamp and die cut with Simon Says Stamp Mixed Labels.

The label was stamped with Tropic Pawsitively Saturated ink using Simon Says Stamp Mixed Labels and die cut with the coordinating die. It was adhered with foam tape.


Thank you for visiting!

Happy Christmas crafting!

Anna-Karin

Supplies:

* Please note: the links are affiliate links, for which I receive a small percentage of sales generated by the link, at no extra cost to you.


Wednesday, December 18, 2024

Frostie Watercolor Snowman

Hi stampers! The snow comes and goes here, but a paper snowman will always stay. Here is another snowman project.

Please note: this post has affiliate links, for which I receive a small percentage of sales generated by the link, at no extra cost to you.

Layers of ink - Mr Frostie Watercolor Snowman Tutorial by Anna-Karin Evaldsson.

I have done quite a few snowman projects this year and for this tag, I wanted to use the larger snowman from Tim Holtz Mr Frostie. He is covering most of the tag, with a dark snowy and sparkly sky as a backdrop. It looks pretty cold!

Stamp Mr Frostie on a watercolor tag.

Start by stamping Mr Frostie on a tag die cut from watercolor paper.

Draw the snowman's body with pens.

Extend his body to the bottom of the tag and add buttons. You need to use waterproof pens for this step.

Stamp on Simon Says Stamp Masking Paper.

Stamp him one more time on Simon Says Stamp Masking paper. Cut out and roughly cut the body too.

Stamp snowflakes.

With the masking paper in place, white emboss the Simon Says Stamp Twinkling Stars on the background. I got some embossing powder on the hat too, but that didn't matter.

Paint the snowman with watercolors.

Paint the snowman and the background with watercolor paint. Don't worry about perfection and leave some of the paper white.

Add Gansai Tambi Starry paint.

I added some shimmer to the sky with Gansai Tambi Starry Colors (the lightest shade).

Add snowflakes with a gel pen.

When dry, add more snow to the background and some white highlights to the snowman.

Add Stickles and Glossy Accents.

Add Glossy Accents to his eyes and Star Dust Stickles to the hat and here and there in the sky.

Mixed Media snowy winter night.


I don't know if you can see the Glossy Accents on his eyes here, but it adds a nice touch. 

Add more shadows and lines.

Add shadows to the snowman and more black linework if needed.


The sentiment also comes from the Mr Frostie set and was cut into two strips to avoid covering too much of the snowman.


Thank you for visiting!

Happy Christmas crafting!

Anna-Karin

Supplies:

* Please note: the links are affiliate links, for which I receive a small percentage of sales generated by the link, at no extra cost to you.