Showing posts with label Perfect Pearls. Show all posts

Sunday, April 30, 2023

Knitting Card Tutorial

Hello crafters! The month is coming to an end and May is starting tomorrow. May is one of my favorite months of the year, particularly since the nature turns bright green in May.

Please note: this post has affiliate links, for which I receive a small percentage of sales generated by the link, at no extra cost to you.

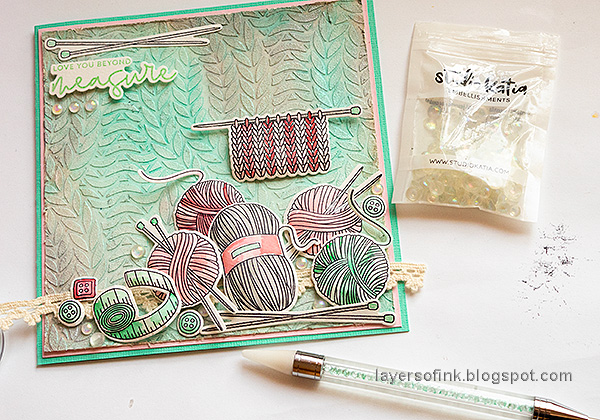
Layers of ink - Knitting Card Tutorial by Anna-Karin Evaldsson.

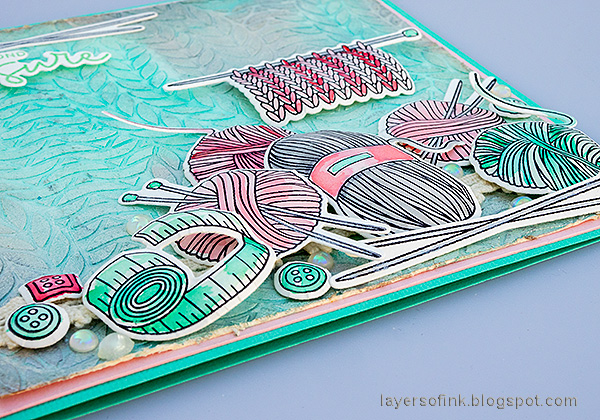
This is a card for someone who loves to knit and it was made with Simon Says Stamp new Beautiful Days release. The background shimmers, which might be hard to see here. I had fun coloring all the yarn and bits and pieces.

Layers of ink - Knitting Card Tutorial by Anna-Karin Evaldsson. Apply Texture Paste through the Simon Says Stamp Chunky Knit stencil.

Working on heavystock paper, start by applying Texture Paste through the Simon Says Stamp Chunky Knit with a palette knife.

Layers of ink - Knitting Card Tutorial by Anna-Karin Evaldsson. Apply Texture Paste through the Simon Says Stamp Chunky Knit stencil. Paint with gesso.

When it is dry, paint with gesso.

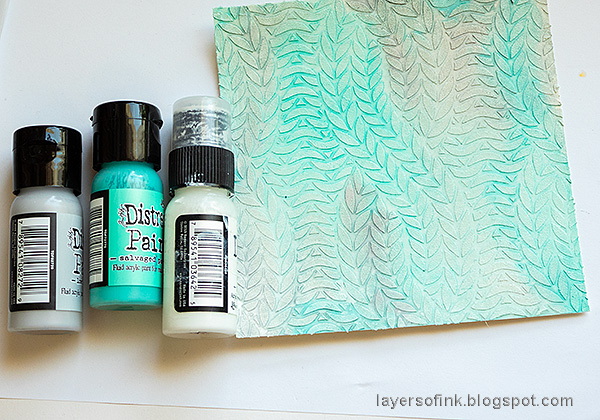
Layers of ink - Knitting Card Tutorial by Anna-Karin Evaldsson. Apply Texture Paste through the Simon Says Stamp Chunky Knit stencil. Paint with Distress Paint.

Paint with Distress Paint and mist with water to blend. Let dry.

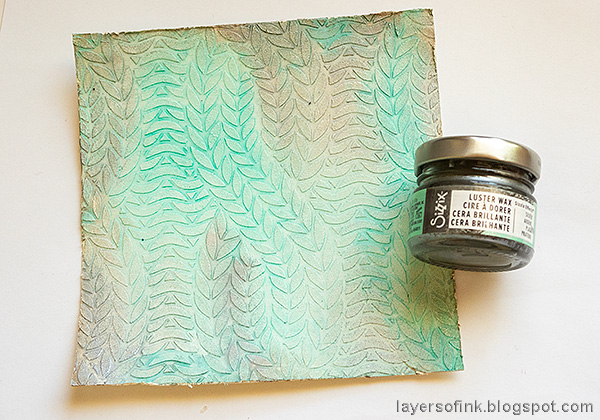
Layers of ink - Knitting Card Tutorial by Anna-Karin Evaldsson. Apply Texture Paste through the Simon Says Stamp Chunky Knit stencil. Apply Sizzix Luster Wax.

Add a little Sizzix Silver Luster Wax around the edges.

Layers of ink - Knitting Card Tutorial by Anna-Karin Evaldsson. Apply Texture Paste through the Simon Says Stamp Chunky Knit stencil.

Dust the background with Turquoise Pearl Powder.

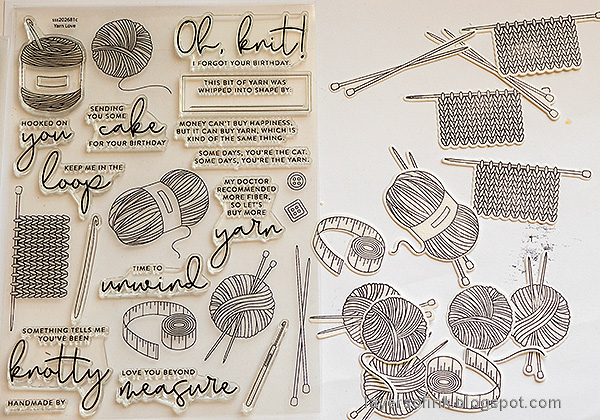
Layers of ink - Knitting Card Tutorial by Anna-Karin Evaldsson. Apply Texture Paste through the Simon Says Stamp Chunky Knit stencil.

Stamp the images from Yarn Love on watercolor paper and die cut with the coordinating dies. This is a stamp set where the coordinating dies are very helpful and speeds up the cutting process a lot. 

Layers of ink - Knitting Card Tutorial by Anna-Karin Evaldsson. Apply Texture Paste through the Simon Says Stamp Chunky Knit stencil.

Watercolor the images with Distress Paint. Use a Tim Holtz Shaping Kit and the new Simon Says Stamp Place and Score Embellishment Wand.

Layers of ink - Knitting Card Tutorial by Anna-Karin Evaldsson. Apply Texture Paste through the Simon Says Stamp Chunky Knit stencil.

Use the white tip of the wand to add the Studio Katia Iridescent Bubbles. The wand works wonderfully for this. 

Layers of ink - Knitting Card Tutorial by Anna-Karin Evaldsson. Apply Texture Paste through the Simon Says Stamp Chunky Knit stencil.

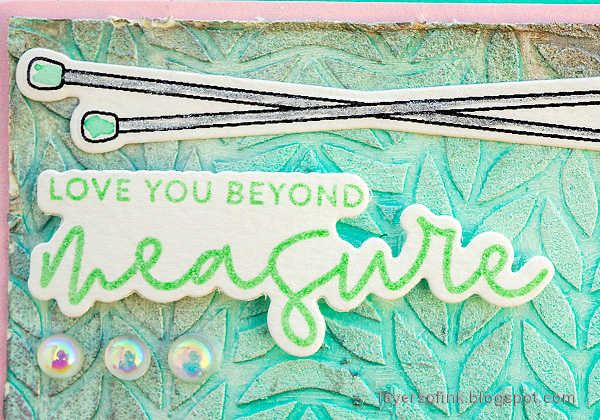
I used a silver gel pen to color the knitting needles. I had to check what that was called in English, in Swedish they are called 'knitting sticks'. The sentiment was stamped with Simon Says Stamp Saturated Spring ink and adhered with foam tape.

Layers of ink - Knitting Card Tutorial by Anna-Karin Evaldsson. Apply Texture Paste through the Simon Says Stamp Chunky Knit stencil.

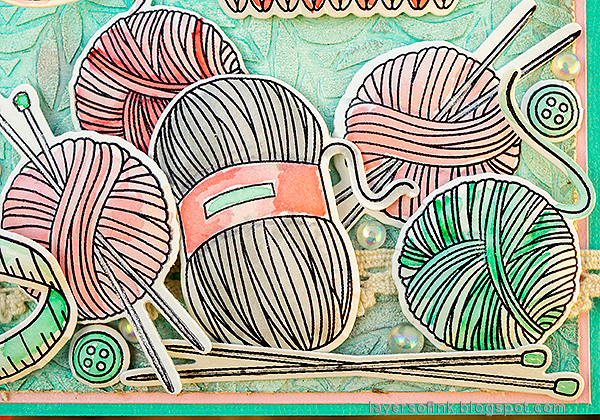
The watercoloring was done loosely. 

Layers of ink - Knitting Card Tutorial by Anna-Karin Evaldsson. Apply Texture Paste through the Simon Says Stamp Chunky Knit stencil.

I placed Simon Says Stamp Pawsitively Perfect Foam tape in the center of the ball of yarn, so that they would keep their rounded shape. Some of have two layers of foam tape, a few even have three layers.

Layers of ink - Knitting Card Tutorial by Anna-Karin Evaldsson. Apply Texture Paste through the Simon Says Stamp Chunky Knit stencil.

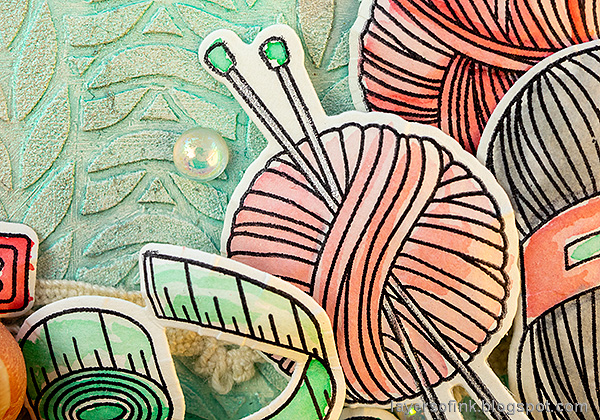
I added Glossy Accents to the tips of the knitting needles.

Layers of ink - Knitting Card Tutorial by Anna-Karin Evaldsson. Apply Texture Paste through the Simon Says Stamp Chunky Knit stencil.

Here you can see the effect of the Luster Wax and the Pearl Powder better. It it is a lot more shimmery in real life.

Layers of ink - Knitting Card Tutorial by Anna-Karin Evaldsson. Apply Texture Paste through the Simon Says Stamp Chunky Knit stencil.

Change the color combo to fit the recipient of the card. 


Thank you for taking the time to visit my blog today!

Happy stamping!

Anna-Karin


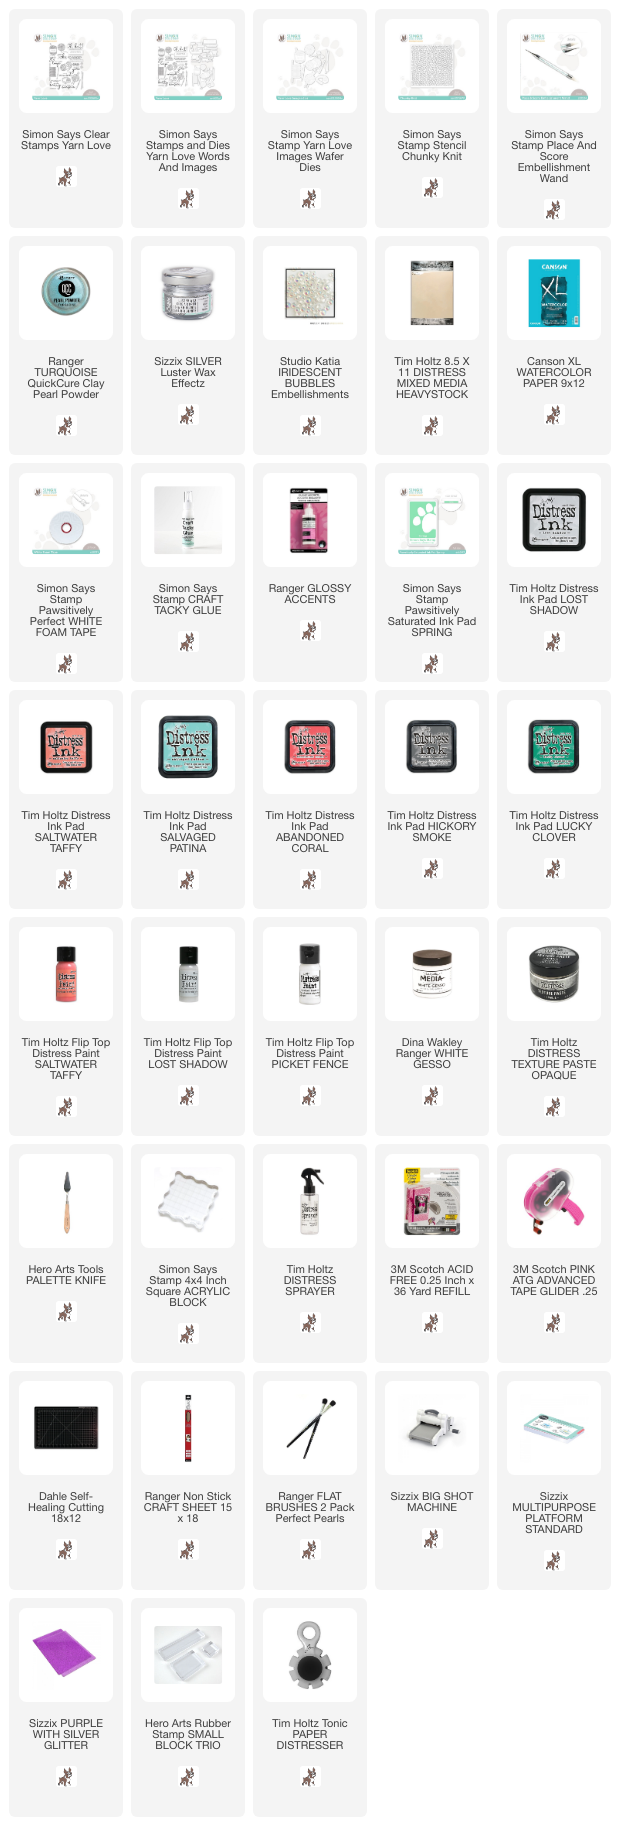
Supplies:

* Please note: the links are affiliate links, for which I receive a small percentage of sales generated by the link, at no extra cost to you.

Saturday, January 23, 2021

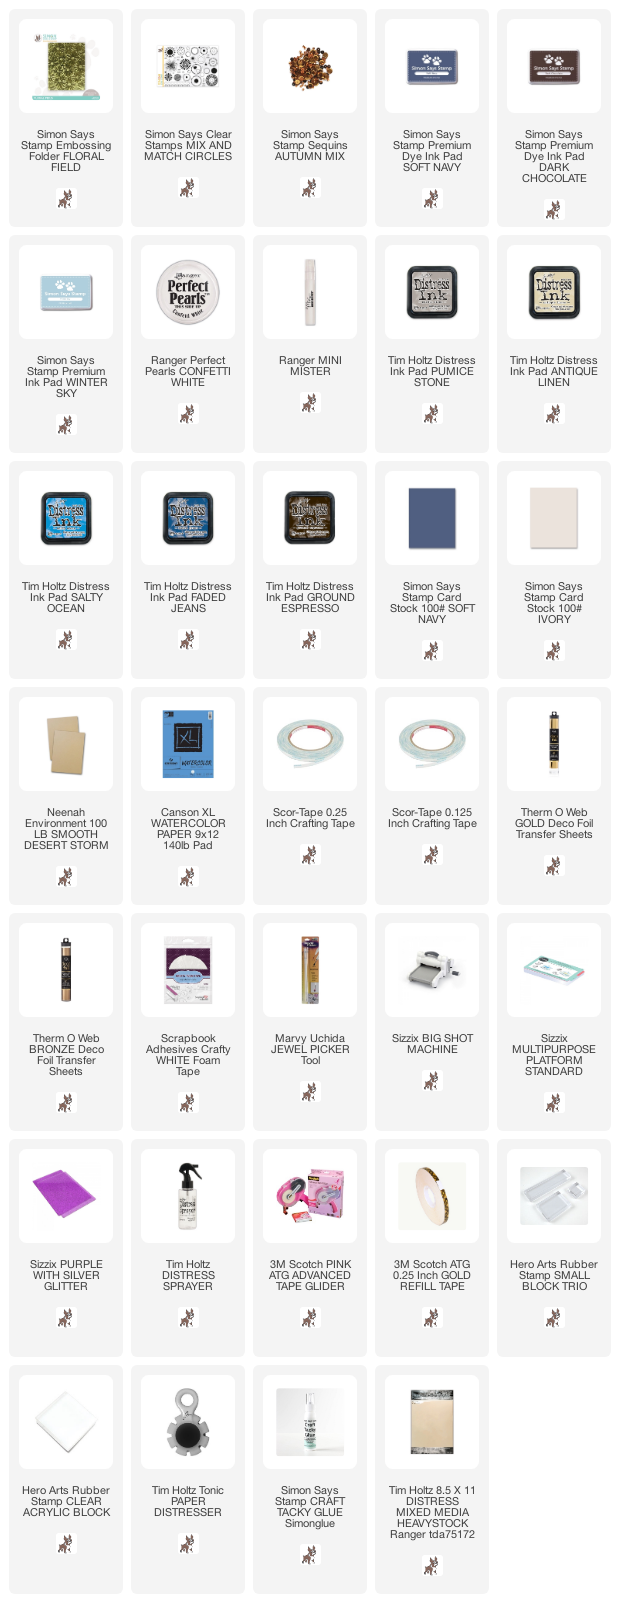
Dry embossed floral card

Hello friends! I hope you are well. The sun was shining here today and I heard more birds than normally on my walk. There is almost a bit of spring in the air. I have a quick and simple dry embossed card to share with you.


Layers of ink - Dry Embossed Floral Background by Anna-Karin Evaldsson.

I have liked embossing folders since I got my very first one long ago. The texture effects is amazing and there are so many techniques that you can do. The 3-D embossing folders by Simon Says Stamp are wonderful and here I used the Floral Field folder. You can do the technique with any embossing folder. We are also going to use some foil on the card, which picks up the texture of the embossing beautifully.

Layers of ink - Dry Embossed Floral Background by Anna-Karin Evaldsson.

Ink the embossing folder with Distress Ink. Mist a piece of watercolor paper with water on both sides and then, if you want to, also add some homemade glimmer mist. Mix a tiny bit of Perfect Pearl powder into a mini mister and fill with water. For my Sizzix Big Shot I used this sandwich: Multipurpose Platform without any tab, embossing folder, one cutting pad. 

Layers of ink - Dry Embossed Floral Background by Anna-Karin Evaldsson.

These are two panels I ended up using on my card. The one to the right was inked with two shades of blue in the center of the folder and Ground Espresso around the edges.

Layers of ink - Dry Embossed Floral Background by Anna-Karin Evaldsson.

Distress the edges of the panel. Place a piece of Scor-Tape on the card.

Layers of ink - Dry Embossed Floral Background by Anna-Karin Evaldsson.

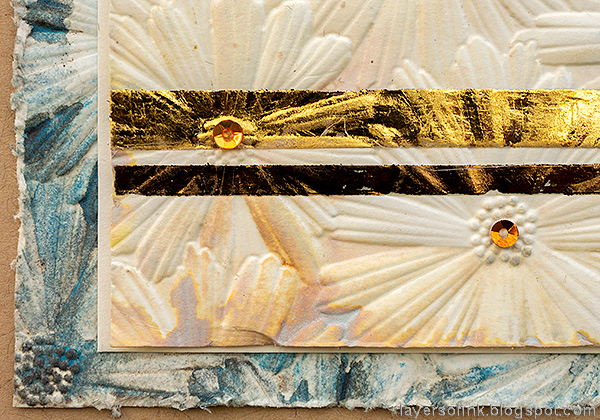
Press the matte side of foil on the tape and press. If you want a second strip, use a thinner piece of tape and a different shade of foil. I used Therm O Web Gold and Bronze.

Layers of ink - Dry Embossed Floral Background by Anna-Karin Evaldsson. Stamp with Simon Says Stamp Mix and Match Circles.

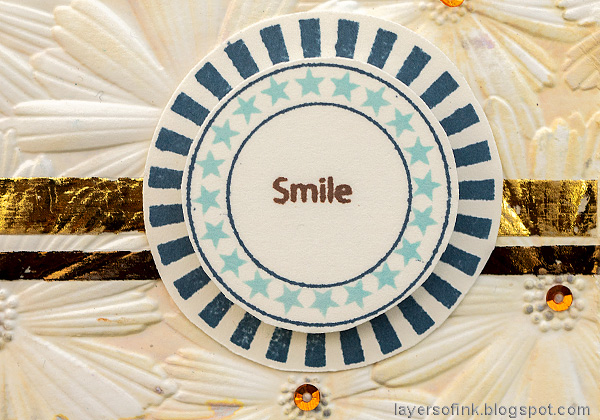
Stamp circles from the Simon Says Stamp Mix and Match Circles on heavystock paper. The circle set is designed so that many of the circles fit into each other and can be combined to create lots of different designs. For example, in the double open circle stamp, some of the other circles can be stamped inside the double circle. So the star circle is stamped between the two frames. The sentiments are also small enough to fit into most of the circles, or you could add a star or an an heart.

Layers of ink - Dry Embossed Floral Background by Anna-Karin Evaldsson.

Layer the circles with foam tape in between. 

Layers of ink - Dry Embossed Floral Background by Anna-Karin Evaldsson.

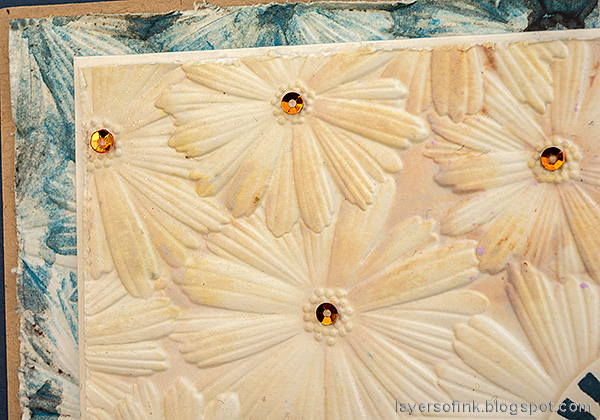
Distress the edges of the panels and mat the top one on cardstock to get even more dimension. Here you can see the Perfect Pearls setting into the embossed areas. The blue panel was matted on kraft paper and then on a folded piece of dark blue cardstock.

Layers of ink - Dry Embossed Floral Background by Anna-Karin Evaldsson.

I glued sequins to all the flower centers for some extra bling. Here you can also see some of the shine from the Perfect Pearls.


Thank you so much for taking the time to stop by here today! 

Happy crafting!

Anna-Karin

Supplies:

* Please note: the links are affiliate links, for which I receive a small percentage of sales generated by the link, at no extra cost to you.

Monday, January 11, 2016

Heart Butterfly Tag Tutorial

Hello again! Today I am also happy to share a tutorial on Ranger's blog, for a Valentine's tag. You'll find my Breathe Mixed Media Canvas tutorial for the Simon Says Stamp Monday Challenge below this post.

Layers of ink - Heart Butterfly Tag Tutorial by Anna-Karin
I used a bunch of fun techniques on this tag, with Alcohol Ink, Perfect Pearls, embossing powder and Distress Paint. The tag really shimmers, which you can't see on this photo. Even though I made a Valentine's tag, you can use the techniques for any theme. At first, I only intended to give the heart wings, but once I placed the heart on top of the layered wings, I thought it looked like a butterfly, and added antennas with wire.

To see the full tutorial and lots of close-ups. you'll have to head over the Ranger's site.

Happy crafting!!

Anna-Karin

Monday, January 13, 2014

Eclectic Elements Clock

Hello everyone! We have an anything goes challenge this week at Simon Says Stamp Monday Challenge blog. I often have a hard time deciding what to do on the anything goes challenges, this week I was drawn towards a Tim Holtz burlap panel.
  
I got the idea of turning the panel into a real working clock and also wanted to use some Eclectic Elements fabric. I was happy to discover that the Pocket Watch Frame die cut with one of the Sized Circles inside to create a frame, fit perfectly together with the clocks on one of the fabric prints. So my clock has a fabric face, which I liked especially together with the UTEE clock frame.
 
I started by smearing gesso on a 4 x 6 burlap panel, without yet having much in mind. I later added a bit more gesso.  
 
The clock frame was die cut from chipboard and covered with three or four layers of clear UTEE. For a tutorial on the technique I used, check out this post. I finished with a layer of Platinum UTEE, inked a stamp with embossing ink and pressed it into the ink. The embossing ink makes it easier to remove the stamp. Wait until the UTEE cools a bit before removing the stamp. You have to work one section at a time, otherwise the UTEE cools down too fast. Always be very careful when working with UTEE since it is very hot. When it was completely cool, I painted it with watered down black paint and rubbed most of the paint off. The paint remains in the stamped impressions. Finally, I mixed a tiny bit of Biscotti Perfect Pearls powder into Perfect Paper Adhesive and painted over the frame to give it a nice shine.
 
The fabric clock was glued to a circle die cut from grungeboard, and placed under a heavy book. Then I glued the frame on top and again placed under a heavy book. I drilled a hole through the centre of the clock as well as through the wood of the burlap panel, so that I could attach a clock mechanism. There is enough space at the back of the panel for the mechanism. 
 
On the background I layered two pieces of fabric, first fraying the edges. I made sure to pick a 'time' definition from the red text fabric, to fit the theme. White paint was rubbed into the word band and it was attached with screw eyes. Since the panels are made of wood, attaching things with screws work very well.
 
The red text fabric was die cut with a scalloped On the Edge die. I also painted some foliage flowers and leaves with Distress Paint. Some of the paint was rubbed off for a distressed look.
 
I like the combination of different materials and textures on this project, the rough burlap, fabric, glimmery and grungy UTEE clock and the painted metals.

I hope you will join us in our anything goes challenge this week. As every week, one random participant wins a $50 gift voucher from Simon Says Stamp.

http://www.simonsaysstamp.com/servlet/StoreFront
 
Happy crafting!!

Anna-Karin

Supplies:
Surfaces: Tim Holtz Idea-ology: Burlap Panel 4 x 6, Grungeboard
Stamps: Stampers Anonymous Tim Holtz: School Desk
Embossing powder: Ranger: Clear UTEE, Platinum UTEE
Embellishments: Tim Holtz Idea-ology: Foliage FlowersLong Fasteners, Observations Word Bands, Screw Eyes
Other: clock mechanism

Monday, December 23, 2013

Merry Christmas Blueprints

Hello everyone! We are not having a challenge at Simon Says Stamp Monday Challenge this week, instead we are going to post some inspiration. Today six members of the team will share inspiration using Tim Holtz stamps.

If you are like me, you might discover that you made too few Christmas cards once again and need some quick cards. Tim Holtz blueprint stamps are perfect for this.

In the past, I used to make different Christmas cards for each recipient. Nowadays, there isn't time for that since I do lots of other types of projects too. In those days, I would only make Christmas cards the last months of the year. Last year, I made quick inky cards, you can see them here. This year there is more variety since I've made quite a few cards at a time, for various tutorials and posts. But I was still lacking.

The blueprint stamps are fun to colour and since they are pretty large, you don't need much more on the card. Here I used a fabulous bauble.

I added some extra sentiments with rub-ons, but you could skip this step, the blueprint stamps don't really need sentiments.

I started out by die cutting eight backgrounds from watercolour paper, using Tim Holtz Cameo Frame and Postage Stamp Frame dies. The blueprint images were stamped with Archival Jet Black ink. It is important to use a waterproof ink since we are going to use water. The images were watercoloured with Distress Ink. Smear Distress Ink on your craft sheet, mist once with water and pick up with a paint brush.

If you work relatively quickly you can drop in a darker colour while the first colour is still wet, which creates nice wet-on-wet effects as you can see here on the ice skate. Don't add in more colour when the previous layer is almost dry, since then you'll get cauliflower effects.

I wanted some more shine and painted around all the images with Biscotti Perfect Pearls. You don't really see the effect on the photos, but it adds a great shimmer.

 I painted a shadow under some of the images with Iced Spruce.

When the Biscotti mist was dry, I splattered the panels with Walnut Stain ink. Press the ink on your craft sheet, mist with water and pick up with a paint brush. Tap the brush with your finger. Remember to protect your clothes and work surface since the splatters fly far.

The edges of the panels were inked with Gathered Twigs. 

I picked out some kraft-core cardstock, which works great for quick cards, since it adds extra detail and texture. The card fronts were embossed in different embossing folders, sanded and inked slightly.

The panels were stapled to the background and finally I also added a piece of Silver Tinsel Twine for that extra festive feeling.

If you use the small blueprint stamps instead, you can easily turn these ideas into quick gift tags.

There won't be a challenge to link up to this week, but of course you can still head over to Simon Say Stamp for some shopping.

http://www.simonsaysstamp.com/servlet/StoreFront

I hope you will all have a very Merry Christmas!! I still have a few Christmas projects to share, so I'll be back tomorrow again.

Anna-Karin

Supplies:
Surfaces: Ranger Watercolor Paper; Tim Holtz Core'dinations Kraft-Core cardstock
Dies: Sizzix: Cameo Frame, Postage Stamp Frame
Embossing folder: Sizzix: Dot-Matrix & Gridlock, Harlequin & Stripes, Holly Pattern & Wreath, Snowflake Pattern & Plaid
Stamps: Stampers Anonymous: Christmas Blueprint, Christmas Blueprint 2,
Ink: Distress Ink: Antique Linen, Frayed Burlap, Gathered Twigs, Iced Spruce, Peeled Paint, Walnut Stain; Ranger Archival Ink: Jet Black
Mist: Ranger Perfect Pearls Biscotti
Embellishments: Tim Holtz Idea-ology: Silver Tinsel Twine, Christmas Time Remnant Rubs
Tools: Sizzix Big Shot; Tim Holtz Tiny Attacher, sandpaper

Sunday, November 10, 2013

Simon Says Stamp Tim Holtz Card Kit 2

Hi everyone! I am back with a second post with cards made with Simon Says Stamp Holiday Card Kit inspired by Tim Holtz. In the first post, I shared four cards, in this one there are three. I still have plenty of leftovers. The kit is full of fabulous stamps, ink, papers and embellishments.
 
Simon Says Stamp Tim Holtz Holiday Card Kit - Layers of ink
I love the stamp set in the kit, which is made up of various Tim Holtz Stampers Anonymous stamps, and they are of a different size than the same stamps in the ordinary sets. The stamps are perfect for building little winter scenes and here I used the sheets of Ranger's watercolour paper, which are also in the kits, as my base. By varying the stamps, placements, orientation of the card and inks you can create a lot of different scenes. 

The kit comes with three seasonal Distress Inks: Iced Spruce, Evergreen Bough and Festive Berries. These are all great colours and they look wonderful together. I started out by smearing Iced Spruce on my craft sheet and misting it with a mix of Perfect Pearls and water. There is a mini mister and a jar of Perfect Pearls in the kit. Simply scoop a few ice cream stick scoops of Perfect Pearls into the mister, fill with water and shake. You have created your own glimmer mist.

I picked up the ink with a paint brush and painted two simple hills and some clouds on the smoother side of the watercolour paper. Leave to dry or dry with a heat gun.

To continue the watercolour look, ink up the trees with Evergreen Bough, mist about three times with water and stamp. Repeat two more times, varying the placement of the trees. You can wipe of the base of the trunks a bit to make it look like they are standing in snow (I forgot this on the trees to the left). Ink the snowflakes with Iced Spruce and stamp twice. Finish with a sentiment stamped and Festive Berries.
 
The stamped ink sinks underneath the shimmer from the Perfect Pearls, giving a cool snowy look to the card. I also added dots of Glossy Accents and sprinkled the Pumice Stone Distress Glitter from the kit on top.

Simon Says Stamp Tim Holtz Holiday Card Kit - Layers of ink
For a second scene, I wanted to use the pretty sleigh stamp. The background was done very simply, by smearing Iced Spruce on my craft sheet, misting with water and the Perfect Pearls mist, and pressing the card into the ink. When the background was dry, the sleigh was inked with Iced Spruce, misted with water and stamped. If it doesn't look great at first, wait a little bit, and the magic happens. The trees were stamped repeatedly using second and third generation stamping - first stamping on a piece of scrap paper. Again, I forgot to wipe the base of the trunks on one impression (to the right).

I gave the sleigh a shadow by picking up some of the leftover Iced Spruce ink on the craft sheet with a paint brush.

The stars were die cut from the piece of mirrored sheet in the kit. Love that they really look like mirrors.

Simon Says Stamp Tim Holtz Holiday Card Kit - Layers of ink
The kit also contains a whole bunch of kraft-core cardstock, something that I use a lot in my crafting. It is one of my favourite papers. One of my favourite things to do with kraft-core cardstock is to dry emboss it, and it makes for a quick and great background. After embossing, I sanded the card to reveal the kraft-core and inked it with Gathered Twigs. Finally, I used the Rock Candy Stickles in the kit and smeared the whole background with a very thin layer.
 
The kit also contains two manila and two kraft tags. Here I used one kraft tag and stamped it with Festive Berries and Evergreen Bough, both of which looks great on the kraft. The tag was embellished with rub-ons from the kit, linen ribbon, a mini paper clip and a sentiment spelled with label stickers (it means 'Merry Christmas').  All of these items are in the kit.

Here you can see the vintage shine of the Rock Candy better.

Thank you so much for looking! For more inspiration, check out my first post using the kit. Hurry so that you can get your kit before they are sold out!

Happy stamping!

Anna-Karin

Supplies:
Card Kit: Simon Says Stamp Holiday Card Kit inspired by Tim Holtz

Supplies not in the kit:
Dies: Sizzix: Crescent Moon & Stars
Embossing folder: Sizzix: Christmas Background & Borders set
Ink: Distress Ink: Gathered Twigs