Showing posts with label Easter. Show all posts

Monday, April 14, 2025

Sweet TreatsTag

 Hello friends! I hope you had a good weekend! Today I have a spring/Easter tag to share.

Please note: this post has affiliate links, for which I receive a small percentage of sales generated by the link, at no extra cost to you.


This week we have a Sweet Treats theme at the Simon Says Stamp Monday Challenge Blog. I hope you will join us! Don't miss the project by our April guest designer Fiona Whitehead.
.
Layers of ink - Sweet Treats Tag Tutorial by Anna-Karin Evaldsson.

I made a tag featuring a bunny who is out for a walk on a bright spring day and sprinkles sweet treats on the ground. Or is he maybe picking the treats up? The background was inked and stamped and the bunny is colored with pencils. 

Stamp Tim Holtz Spring Sprung.

I started out by stamping one of my favorite stamps by Tim Holtz on a tag. It is from the Spring Sprung set. Using my MISTI, I first stamped the bunny with Simon Says Stamp Pawsitively Saturated Violet ink and then again with black ink (avoiding to ink the jacket, apart from the edges). 

Mask the image, ink and stamp the background.

Stamp the bunny again on Simon Says Stamp Masking Paper and cut out. Ink the background with Distress Ink and stamp with the grass stamp from Spring Sprung and a dot stamp from Tiny Textures. Stamp a sentiment.


The smaller sentiments come from Tim's Holtz Tiny Text and were stamped and cut into strips. The sentiment is from Tim's Warehouse District.

Color the bunny with pencils.

The rest of the bunny was colored with Prismacolor pencils. Use the white pencil to blend the colours. 

Sprinkle Simon Says Stamp Pawsitively Dazzling Gems.

Sprinkle Simon Says Stamp Pawsitively Dazzling Gems on the ground as treats. I used a different colors.

Join us this week in our Sweet Treats challenge! You have a chance to win a $25 gift voucher to do some fun shopping at Simon Says Stamp. You have until Monday 8am Ohio time. 1pm UK time, 2 pm CET to join in.


Do you use Instagram? If so please add #sssmchallenge so we can see your entries there too.


Thank you so much for visiting today! 

Happy crafting!

Anna-Karin

Supplies:

* Please note: the links are affiliate links, for which I receive a small percentage of sales generated by the link, at no extra cost to you.


Tuesday, March 25, 2025

Happy Easter Bunny Circle Card

Hi crafters! Today I have a sweet Easter card to share with a circle design. 

Please note: this post has affiliate links, for which I receive a small percentage of sales generated by the link, at no extra cost to you.

Layers of ink - Happy Easter Bunny Circle Card tutorial by Anna-Karin Evaldsson.

The Easter scene was stamped and watercolored and all the papers were die cut into circles and then layered. Circle cards are a fun variation to the normal rectangular or square cards.

Die cut with Simon Says Stamp Basic Shapes Circles.

I used products from Simon Says Stamp Favorite Things release: the Bunny Blessings stamp set and the Basic Shapes Circles. Die cut the circle from watercolor paper and stamp the bunny and flowers with waterproof ink. I used Archival Ink Jet Black.

Paint with watercolor paint.

Watercolor the images, leaving some of the white paper showing for highlights.

Paint the sky.

Watercolor the sky and add shading.

Add highlights with a white gel pen.

Add details with a black pen and highlights with a white gel pen.


Don't worry about perfection when watercoloring.

Layer the circles to create the card.

Distress the edges of the watercolor panel. The cardstock circles were die cut from Simon Says Stamp cardstock. Fold the green cardstock before die cutting and let the folded edge go slightly outside the cutting plate. The Simon Says Stamp Basic Shapes Circles is a very versatile die set. It consists of 18 circle dies.


I also added some sequins to the card.

Layers of ink - Happy Easter Bunny Circle Card tutorial by Anna-Karin Evaldsson.

I hope you enjoyed this project! Easter crafting is so joyful.


Thank you for visiting!

Happy crafting!

Anna-Karin

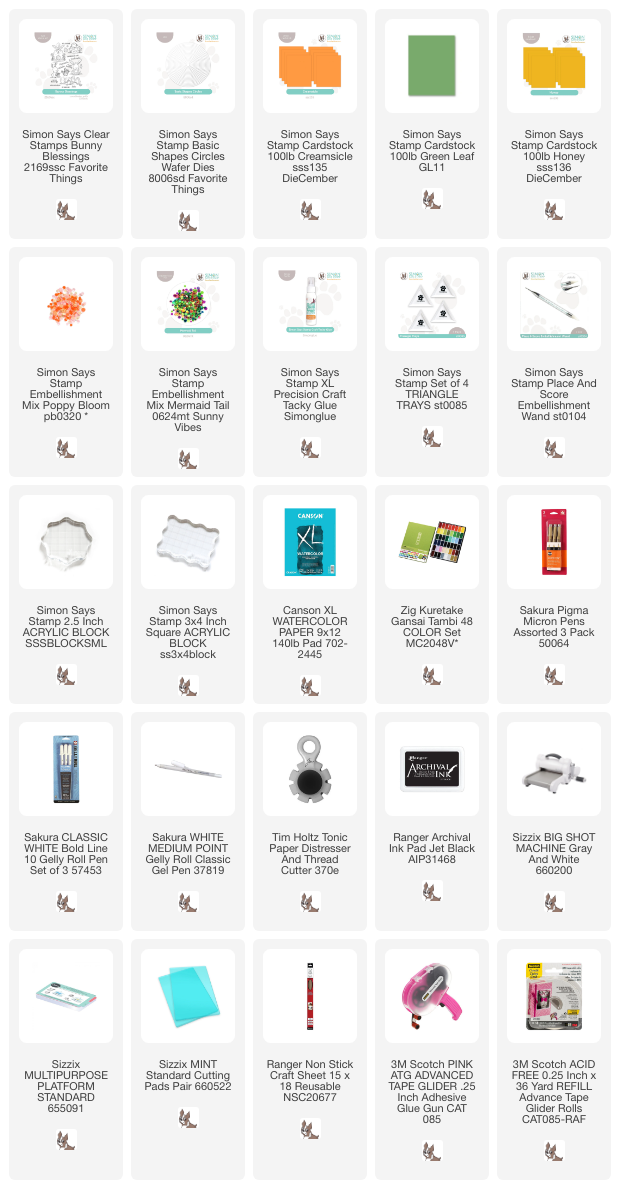
Supplies:

* Please note: the links are affiliate links, for which I receive a small percentage of sales generated by the link, at no extra cost to you.


Saturday, March 30, 2024

Watercolor Daffodils Tutorial

Happy Easter! The sun is shining and this is the warmest day so far this year. I have a no-line watercoloring project to share today.

 Please note: this post has affiliate links, for which I receive a small percentage of sales generated by the link, at no extra cost to you.

Layers of ink - Watercolor Daffodils Tutorial by Anna-Karin Evaldsson.

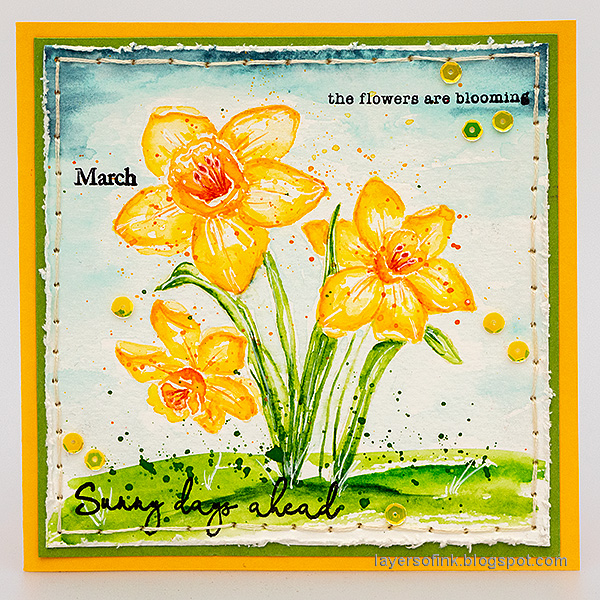
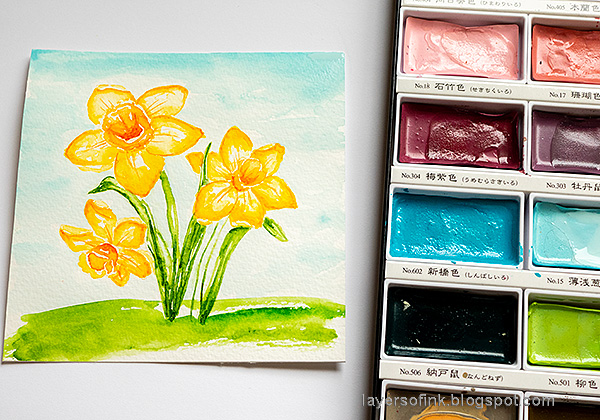
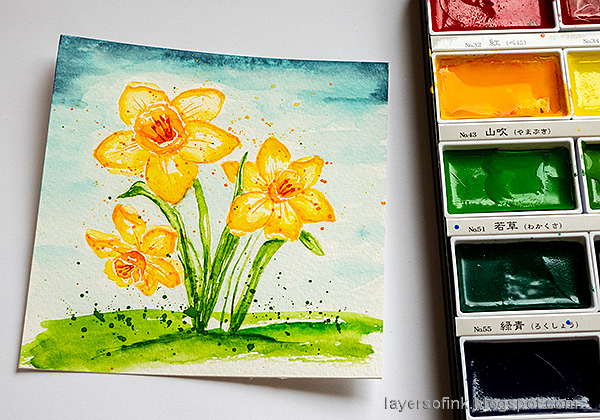
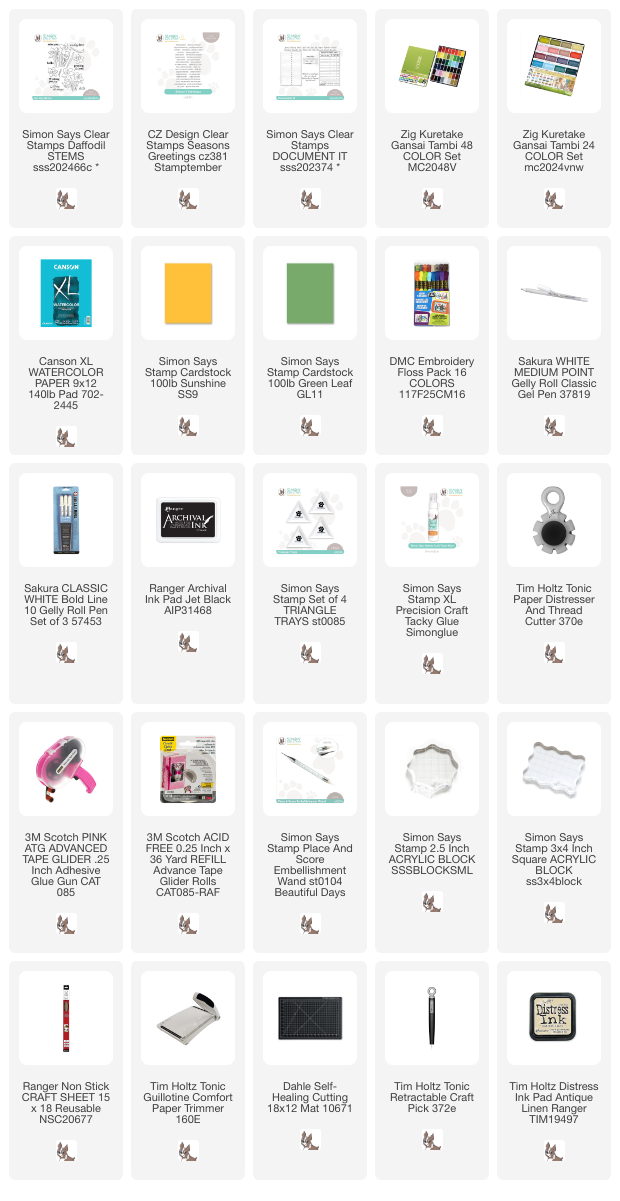
Daffodils are closely associated with Easter and spring here and have such interesting shapes. My daffodils are a little darker than normally, since I wanted them to stand out from the background and not be too pale. The flowers were stamped with a Simon Says Stamp Daffodil Stems stamp and watercolored with Zig Kuretake Gansai Tambi paint.

Layers of ink - Watercolor Daffodils Tutorial by Anna-Karin Evaldsson. Stamp with Antique Linen.

Stamp the daffodils from Simon Says Stamp Daffodil Stems on watercolor paper with Antique Linen ink. Mist a couple of times with water before stamping.

Layers of ink - Watercolor Daffodils Tutorial by Anna-Karin Evaldsson. Paint with Gansai Tambi watercolors.

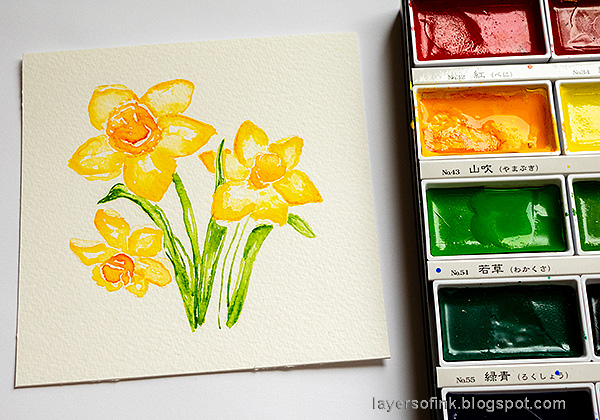
Mix shades of yellow and orange and start watercoloring. Don't worry about perfection. I mixed paint in a palette, as well as used some paint right from the pans.

Layers of ink - Watercolor Daffodils Tutorial by Anna-Karin Evaldsson. Paint the leaves.

Use a couple of shades of green for the leaves and stems.

Layers of ink - Watercolor Daffodils Tutorial by Anna-Karin Evaldsson.

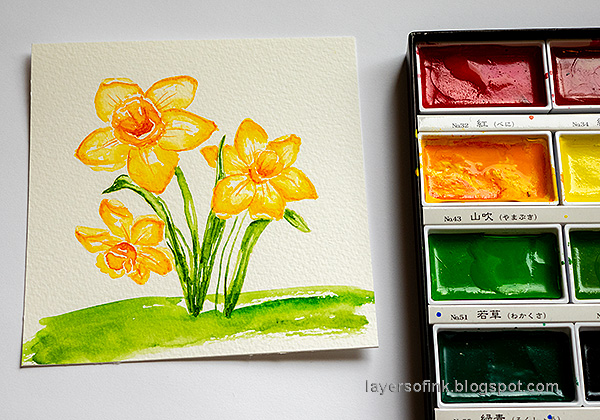
Paint a grassy area for the daffodils to grow from and add shading to the flowers and leaves.

Layers of ink - Watercolor Daffodils Tutorial by Anna-Karin Evaldsson. Paint the sky.

Paint the sky with a soft blue mix.

Layers of ink - Watercolor Daffodils Tutorial by Anna-Karin Evaldsson. Add splatters.

Make the sky a little darker at the top and darken the shadows under the flower. Splatter with green and orange paint.

Layers of ink - Watercolor Daffodils Tutorial by Anna-Karin Evaldsson. Stamp sentiments.

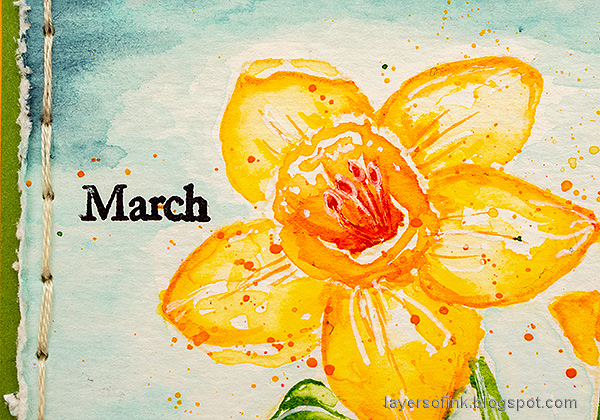
When the splatters were dry, I added some highlights with a white gel pen. 'March' comes from Simon Says Stamp Document It. 

Layers of ink - Watercolor Daffodils Tutorial by Anna-Karin Evaldsson. Add highlights with a white gel pen.

Splatters can add texture and movement. 

Layers of ink - Watercolor Daffodils Tutorial by Anna-Karin Evaldsson.

I distressed the edge and matted the panel on Simon Says Stamp Green Leaf cardstock. The cardbase is folded Simon Says Stamp Sunshine. Pierce holes and stitch a border with three strands of DMC embroidery thread


Thank you so much for stopping by here today! 


Anna-Karin

Supplies:

* Please note: the links are affiliate links, for which I receive a small percentage of sales generated by the link, at no extra cost to you.


Saturday, March 16, 2024

Pastel Easter Decor

Hello crafters! Easter comes early this year and today I am sharing an Easter decor tutorial, with pastel colors and glitter. You can also use the techniques for other themes, it doesn't have to be for Easter.

Please note: this post has affiliate links, for which I receive a small percentage of sales generated by the link, at no extra cost to you. 

Layers of ink - Pastel Easter Decor with Bunnies tutorial by Anna-Karin Evaldsson.

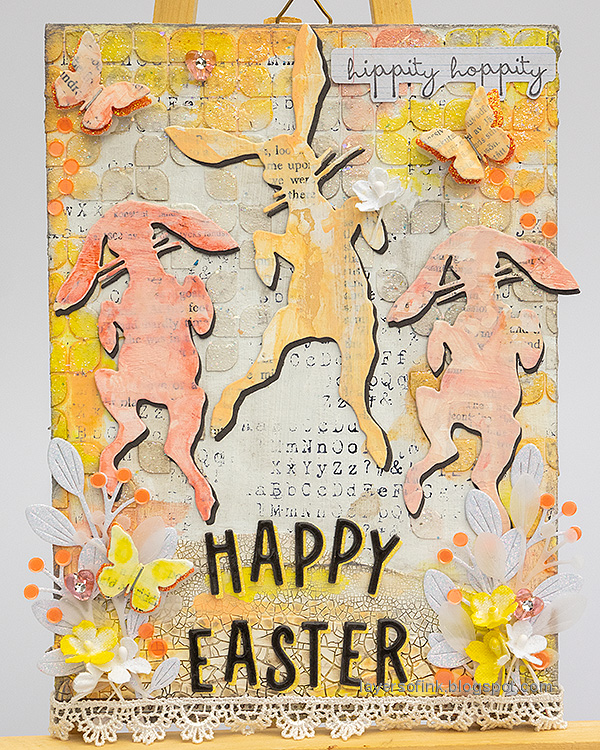
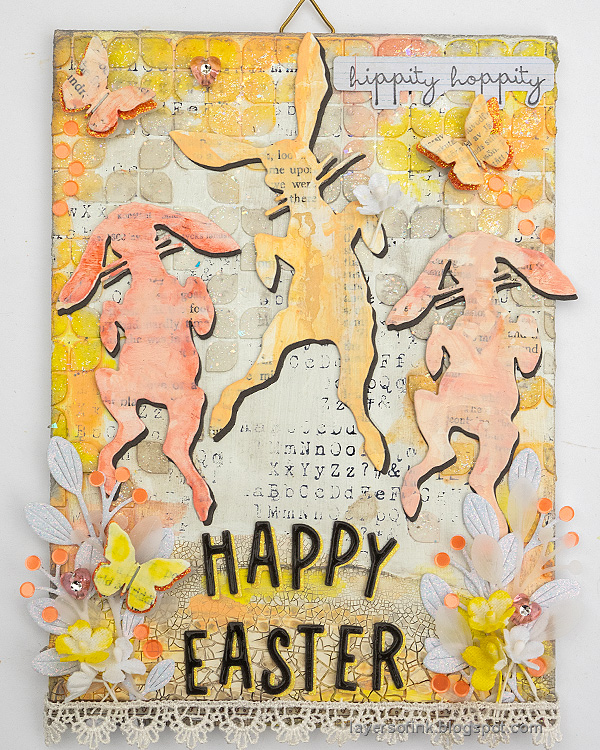
I wanted to make a project with the happy bunnies from Tim Holtz Vault Hippity Hop dies and decided to use an Etcetera panel as my base. The project is about 5.3 x 7 in. The mixed media background can be used for many different projects and you can of course change the colors to get a completely different look. I used both texture and crackle paste for the background, combined with Distress Paint, stamping and Stickles glitter gel.

Layers of ink - Pastel Easter Decor with Bunnies tutorial by Anna-Karin Evaldsson. Coat with gesso.

Paint the Etcetera panel with gesso. I added two coats. Let the gesso dry in between applications.

Layers of ink - Pastel Easter Decor with Bunnies tutorial by Anna-Karin Evaldsson. Stamp with Tim Holtz School Desk.

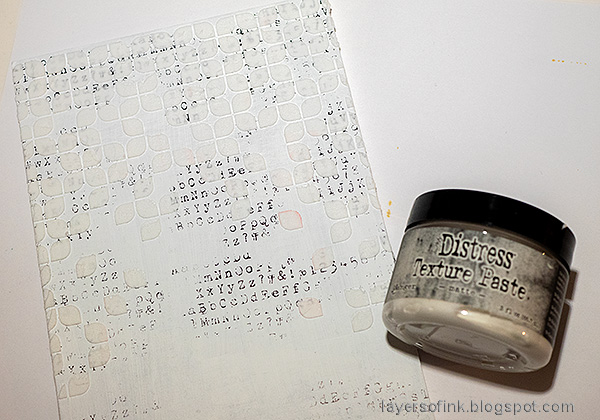
Stamp the background here and there with the alphabet stamp from Tim Holtz School Desk set.

Layers of ink - Pastel Easter Decor with Bunnies tutorial by Anna-Karin Evaldsson. Apply texture paste through Simon Says Stamp stencil.


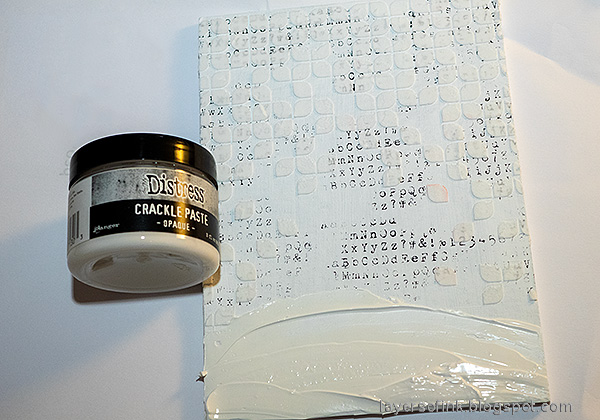
Layers of ink - Pastel Easter Decor with Bunnies tutorial by Anna-Karin Evaldsson. Add Ranger texture paste.

Add Crackle Paste at the base.

Layers of ink - Pastel Easter Decor with Bunnies tutorial by Anna-Karin Evaldsson. Add Ranger crackle paste.

Cracks appear as the paste dries. The thicker the paste, the larger the cracks.

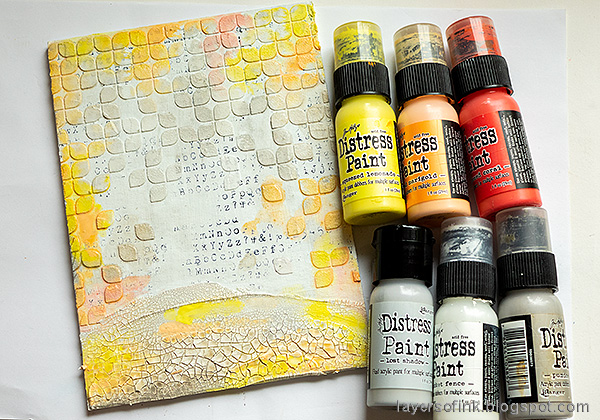
Layers of ink - Pastel Easter Decor with Bunnies tutorial by Anna-Karin Evaldsson. Paint with Distress Paint.

Paint with Distress Paint and add water to blend.

Layers of ink - Pastel Easter Decor with Bunnies tutorial by Anna-Karin Evaldsson.

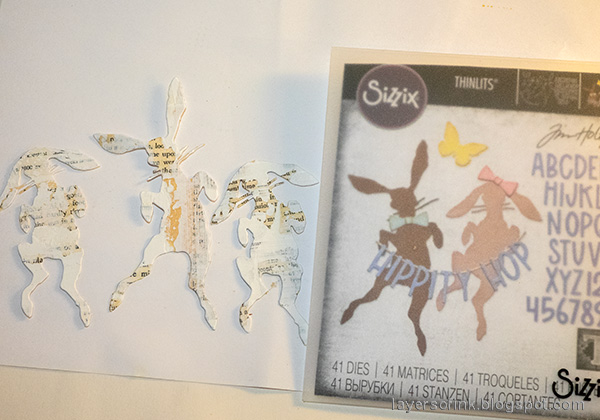
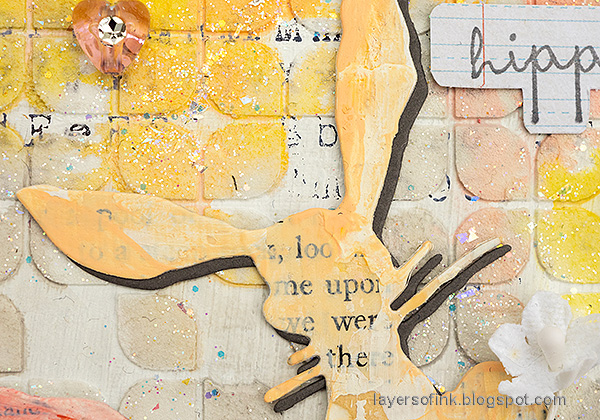
Die cut the Tim Holtz Hippity Hop bunnies from collage paper. I made this paper for a different project and had left-overs. Glue pieces of old book paper to watercolor paper, coat with gesso in an uneven manner. Let dry. It's a great paper to use for many different types of projects.

Layers of ink - Pastel Easter Decor with Bunnies tutorial by Anna-Karin Evaldsson. Paint with distress paint.

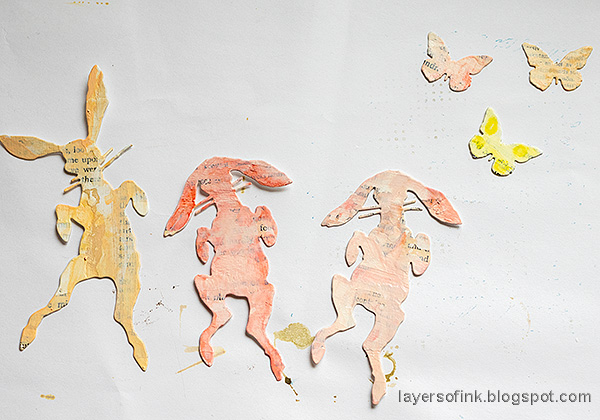
Paint the bunnies with Distress Paint and mist with water. 

Layers of ink - Pastel Easter Decor with Bunnies tutorial by Anna-Karin Evaldsson. Paint the bunnies and butterflies.

I also decided to die cut three butterflies (also from the Hippity Hop set) from the collage paper and paint them.

Layers of ink - Pastel Easter Decor with Bunnies tutorial by Anna-Karin Evaldsson.

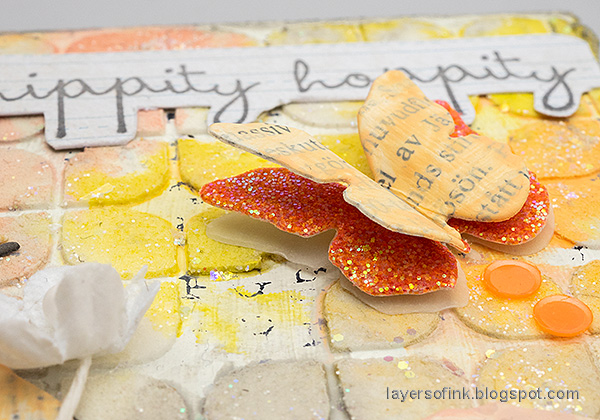
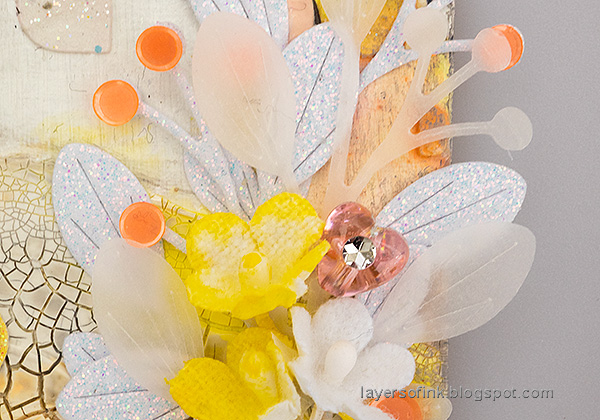
I die cut the butterflies from glitter paper and from vellum too, shaped the wings and layered them. 

Layers of ink - Pastel Easter Decor with Bunnies tutorial by Anna-Karin Evaldsson. Add Ranger stickles glitter gel.

Apply Ranger Moon Dust Stickles Glitter Gel to the background - of course before gluing everything in place (I forgot to take a photo). Let dry.

Layers of ink - Pastel Easter Decor with Bunnies tutorial by Anna-Karin Evaldsson.

Use sequins to create a trail behind the butterflies. Add a Tim Holtz Bouquet Flower to one of the bunnies.

Layers of ink - Pastel Easter Decor with Bunnies tutorial by Anna-Karin Evaldsson. Add a shadow to the bunnies.

To make the bunnies stand out from the background, I die cut them again from Simon Says Stamp Slate cardstock and offset it slightly to create a shadow. 

Layers of ink - Pastel Easter Decor with Bunnies tutorial by Anna-Karin Evaldsson. Die cut foliage from glitter and vellum paper.

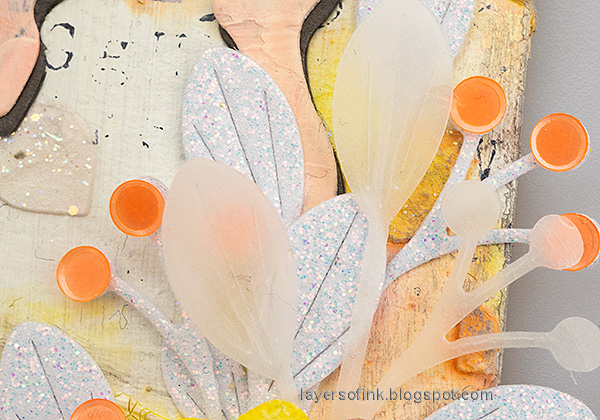
Die cut foliage with Simon Says Stamp Budding Branches, from Simon Says Stamp white glitter cardstock and vellum

Layers of ink - Pastel Easter Decor with Bunnies tutorial by Anna-Karin Evaldsson.

The old book paper, gesso and paint adds an interesting, but still subtle, texture to the bunnies.

Layers of ink - Pastel Easter Decor with Bunnies tutorial by Anna-Karin Evaldsson.

You can mix Distress Paint to get the shade you are looking for.

Layers of ink - Pastel Easter Decor with Bunnies tutorial by Anna-Karin Evaldsson. Add sequins.

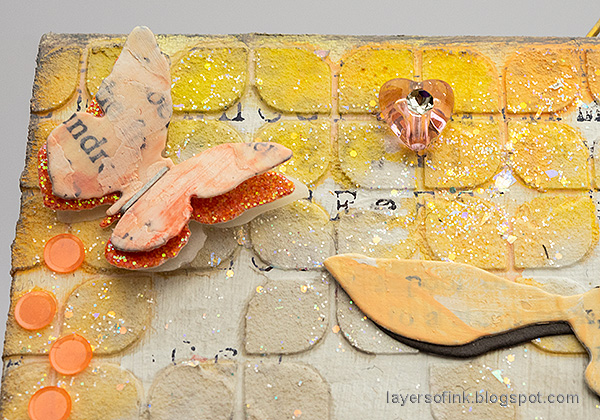
I added sequins to the buds on the glitter die cuts.

Layers of ink - Pastel Easter Decor with Bunnies tutorial by Anna-Karin Evaldsson. Coat the letters with Glossy Accents.

The title was die cut with the alphabet dies from the Hippity Hop set. It was die cut from Simon Says Stamp yellow glitter paper and Slate cardstock. Glue together. Add a layer of Glossy Accents to the letters for a finished look.

Layers of ink - Pastel Easter Decor with Bunnies tutorial by Anna-Karin Evaldsson.

Some of the Bouquet Flowers were colored with yellow shades of Distress Ink. The heart beads have been in my stash for a very long time.

Layers of ink - Pastel Easter Decor with Bunnies tutorial by Anna-Karin Evaldsson.

I added a piece of lace trim at the bottom of the panel. The stamped sentiment at the top comes from Tim's Crazy Talk and was stamped on a Journal Card.


See you soon again! 


Anna-Karin

Supplies:

* Please note: the links are affiliate links, for which I receive a small percentage of sales generated by the link, at no extra cost to you.