Tuesday, August 31, 2021

Resist Circles Art Journal Page

Hi friends! It is the last day of the month. It was an eventful month here, with some major changes which we are still settling into. Today, I have an art journal page to share, with two different resist techniques. 

STAMPtember® starts tomorrow at Simon Says Stamp. It's a month long celebration of stamping with lots of suprices and fun. Don't miss is! Best month of the year for a stamper.

Please note: this post has affiliate links, for which I receive a small percentage of sales generated by the link, at no extra cost to you.
Layers of ink - Inky Resist Circles Art Journal Tutorial by Anna-Karin Evaldsson.

I started out being unsure of what colors to use, but something made me reach for orange and brown shades, which led the whole page into being autumn-themed. Lots of inky texture here and I also used two different resist techniques, one with matte medium and one with embossing powder. Let's start.

Layers of ink - Inky Resist Circles Art Journal Tutorial by Anna-Karin Evaldsson. With Simon Says Stamp Mix and Match Circles Stencil and All Seasons Tree stamp set.

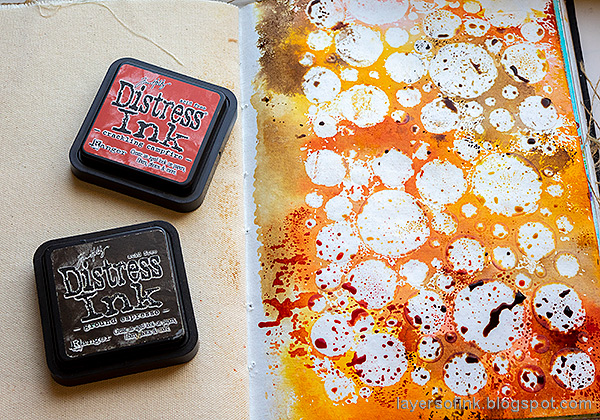
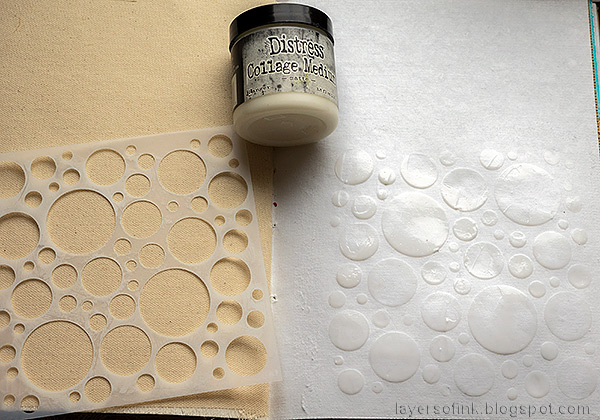
You can use Distress Collage Medium Matte for a resist effect and here I applied it through the Simon Says Stamp Mix and Match Circles stencil, on a cotton-rag watercolor page in Dina Wakley's Media Journal.

Layers of ink - Inky Resist Circles Art Journal Tutorial by Anna-Karin Evaldsson. Apply Distress Medium through the Simon Says Stamp Mix and Match Circles stencil.

When dry, repeat at the top of the page.

Layers of ink - Inky Resist Circles Art Journal Tutorial by Anna-Karin Evaldsson. With Simon Says Stamp Mix and Match Circles Stencil and All Seasons Tree stamp set.

Let dry. Smear Distress Inks on a craft sheet and mist with water. Press the page into the ink. The matte medium will resist the ink.

Layers of ink - Inky Resist Circles Art Journal Tutorial by Anna-Karin Evaldsson. With Simon Says Stamp Mix and Match Circles Stencil and All Seasons Tree stamp set.

I added more layers of ink. You might notice that some of the ink will seep in under the matte medium. I didn't want a perfect look here, so that worked fine for me. If you want to keep the more crisp look, use less water or just one layer of ink.

Layers of ink - Inky Resist Circles Art Journal Tutorial by Anna-Karin Evaldsson. With Simon Says Stamp Mix and Match Circles Stencil and All Seasons Tree stamp set. Ink with Distress Oxide ink.

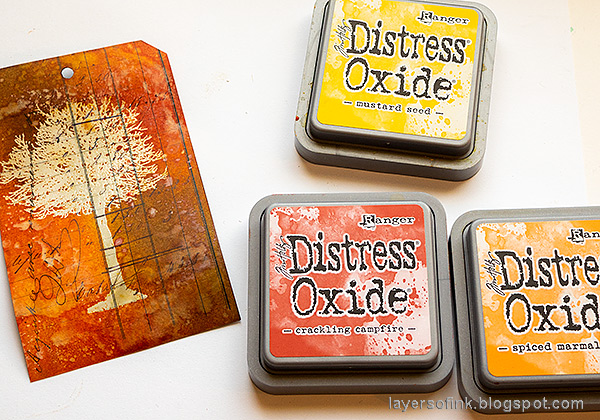
I repeated the process with a little Distress Oxide Ink too.

Layers of ink - Inky Resist Circles Art Journal Tutorial by Anna-Karin Evaldsson. Stamp with the Simon Says Stamp All Seasons Tree stamp set.

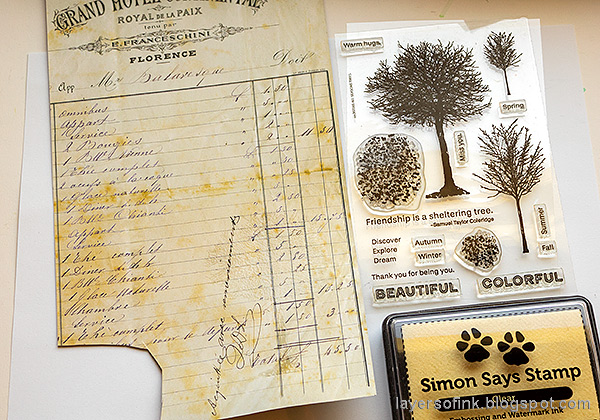
The larger tree from the Simon Says Stamp All Seasons Tree was clear embossed on a Tim Holtz Backdrop sheet. It is a chestnut tree.

Layers of ink - Inky Resist Circles Art Journal Tutorial by Anna-Karin Evaldsson. With Simon Says Stamp Mix and Match Circles Stencil and All Seasons Tree stamp set.

Cut out and use a Crop-a-Dile Angle Corner Chomper to cut the upper corners and create a tag. Ink with Distress Ink - I forgot to take a photo of that step. The embossed image will resist the ink, while also letting the background show through. Then, press the tag into some of the left-over Distress Oxide ink from last step of the background page.

Layers of ink - Inky Resist Circles Art Journal Tutorial by Anna-Karin Evaldsson. With Simon Says Stamp Mix and Match Circles Stencil and All Seasons Tree stamp set.

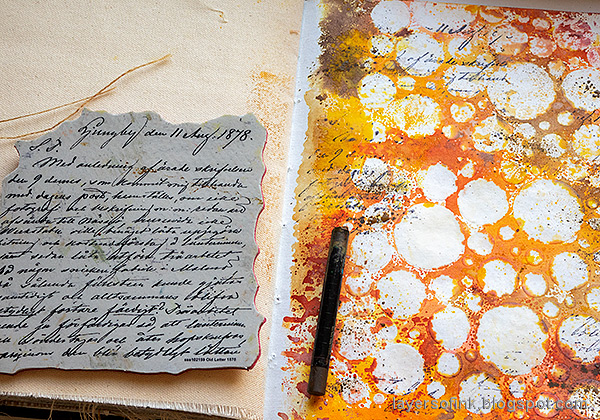
Stamp the Simon Says Stamp Crackle Background as ground on the tag, and the Old Letter Background in a few places.

Layers of ink - Inky Resist Circles Art Journal Tutorial by Anna-Karin Evaldsson. Stamp with Simon Says Stamp Old Letter Background.

I stamped the Old Letter on the background too and splattered it with a brown Scribble Stick. Dip the stick in water and then flick a paint brush against it. 

Layers of ink - Inky Resist Circles Art Journal Tutorial by Anna-Karin Evaldsson. With Simon Says Stamp Mix and Match Circles Stencil and All Seasons Tree stamp set.

Since matte medium was used instead of glossy paste, the dots are more subtle, and some of the ink will dry on them. You can wipe it off with a moist cloth if you want less texture.

Layers of ink - Inky Resist Circles Art Journal Tutorial by Anna-Karin Evaldsson. With Simon Says Stamp Mix and Match Circles Stencil and All Seasons Tree stamp set.

The Simon Says Stamp Leafy Branch was die cut from Memory Box Foil paper. I left some of the leaves inside the outlines.

Layers of ink - Inky Resist Circles Art Journal Tutorial by Anna-Karin Evaldsson. With Simon Says Stamp Mix and Match Circles Stencil and All Seasons Tree stamp set.

A few words from the All Seasons Tree set were stamped on the background.

Layers of ink - Inky Resist Circles Art Journal Tutorial by Anna-Karin Evaldsson. With Simon Says Stamp Mix and Match Circles Stencil and All Seasons Tree stamp set.

I also used Tim Holtz Field Notes ephemera mushrooms. The shiny pieces that you see here are mica flakes, which I found and picked up along one of my favorite walks.

Layers of ink - Inky Resist Circles Art Journal Tutorial by Anna-Karin Evaldsson. With Simon Says Stamp Mix and Match Circles Stencil and All Seasons Tree stamp set.

My favorite part of the tree is that you see the lines and writing of the background through it. It's a detailed stamp, but all the branches stand out beautifully against the background.

Layers of ink - Inky Resist Circles Art Journal Tutorial by Anna-Karin Evaldsson. With Simon Says Stamp Mix and Match Circles Stencil and All Seasons Tree stamp set.

The quote stamp also comes from the All Seasons Tree set.


Thank you so much for taking the time to stop by here today! 

Happy crafting!

Anna-Karin

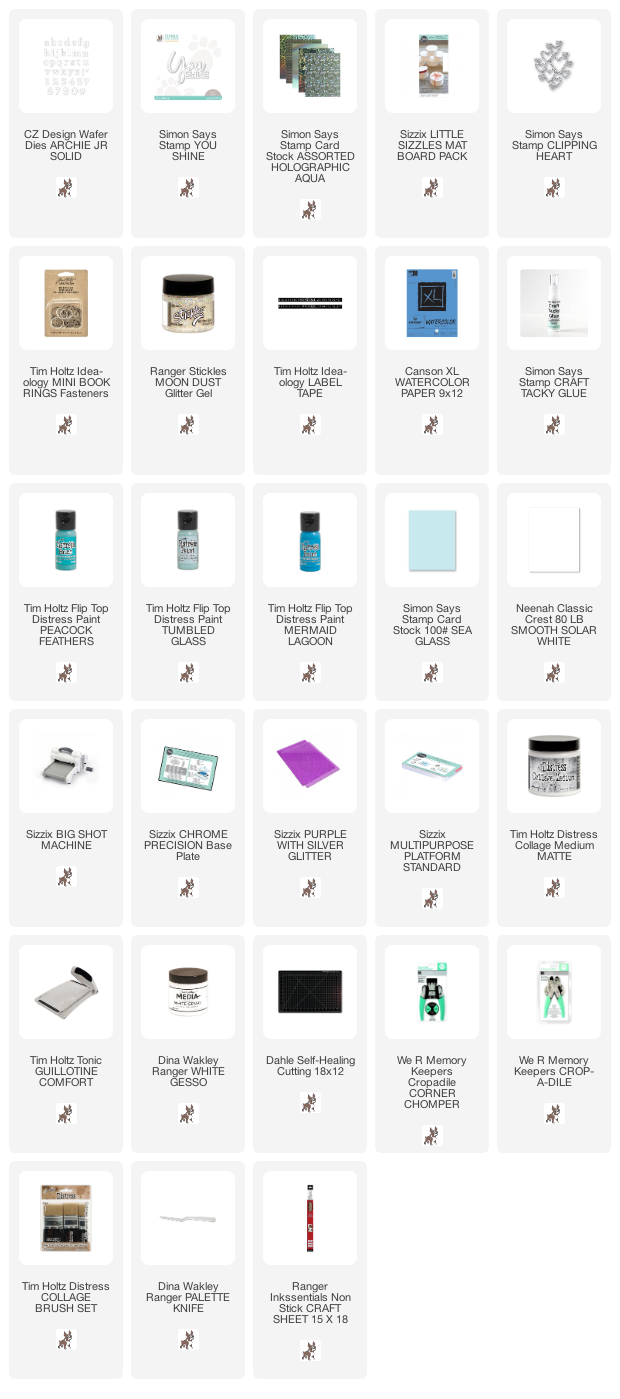
Supplies:

* Please note: the links are affiliate links, for which I receive a small percentage of sales generated by the link, at no extra cost to you.

Monday, August 30, 2021

Glitter Alphabet Notebook Tutorial

Hi friends! I hope you are well and had a good weekend. Today I have a notebook to share with lots of mess-free glitter and shine.

Please note: this post has affiliate links, for which I receive a small percentage of sales generated by the link, at no extra cost to you.

We have a Glimmer and Sparkle theme at the Simon Says Stamp Monday Challenge Blog this week. I hope you will join us! Don't miss the last project by our wonderful August guest designer Anne Redfern. 

Layers of ink - Glittery Alphabet Notebook Tutorial by Anna-Karin Evaldsson.

My youngest has started in the big school and is a little worried that he will struggle to learn to write, so I made him an alphabet notebook so that he can practice writing, or drawing, if he would rather want that. 

Layers of ink - Glittery Alphabet Notebook Tutorial by Anna-Karin Evaldsson. Die cut Simon Says Stamp Archie Jr. Solid.

Start by cutting two covers from Sizzix Little Sizzles Matboard. Cut a piece of watercolor paper to the same size and then die cut the Simon Says Stamp Archie Jr. Solid set. Keep the little pieces.

Layers of ink - Glittery Alphabet Notebook Tutorial by Anna-Karin Evaldsson.

Glue the paper to a cover with matte medium and also glue the inner pieces from 'a', 'e' and so on.

Layers of ink - Glittery Alphabet Notebook Tutorial by Anna-Karin Evaldsson. Coat with gesso.

Coat with a layer of gesso. Let dry.

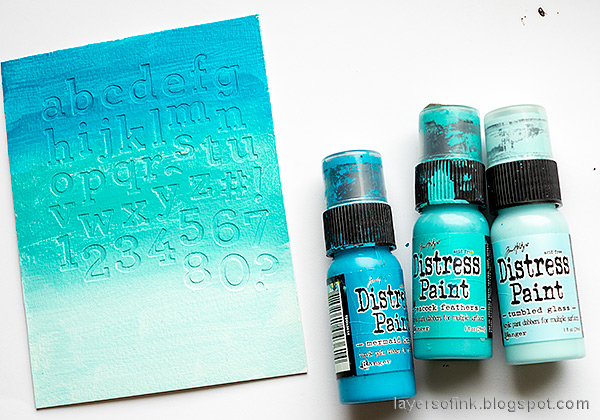
Layers of ink - Glittery Alphabet Notebook Tutorial by Anna-Karin Evaldsson. Paint with Distress Paint.

Paint with three shades of blue/turquoise Distress Inks, in an ombre fashion.

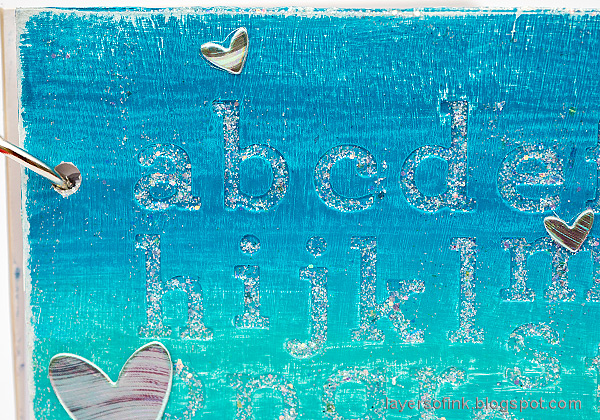
Layers of ink - Glittery Alphabet Notebook Tutorial by Anna-Karin Evaldsson. Apply Ranger Moon Dust Stickles.

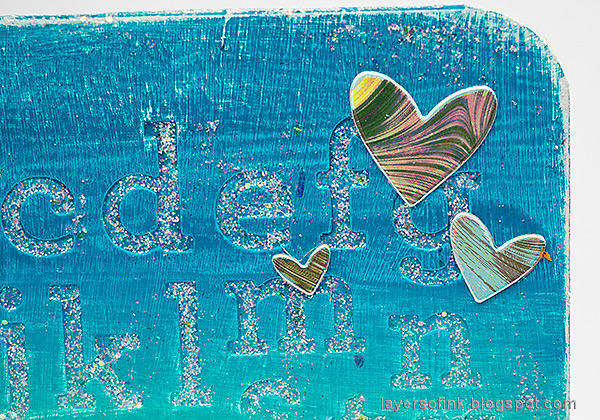
Round the outer corners. Apply Ranger's Moon Dust Stickles with a palette knife, pressing the glitter into the letters, while removing most of the glitter around the letters. I left quite a bit of glitter at the bottom of the cover.

Layers of ink - Glittery Alphabet Notebook Tutorial by Anna-Karin Evaldsson.

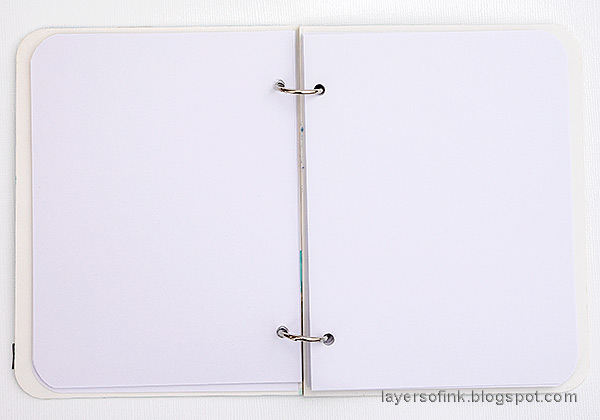
Cut papers for the inside, round the outer corners and punch holes with a Crop-a-dile. I wanted to use lined paper, but I couldn't find it. It is probably still in a box after the move. Once I find the lined paper, I will add it to the notebook.

Layers of ink - Glittery Alphabet Notebook Tutorial by Anna-Karin Evaldsson.

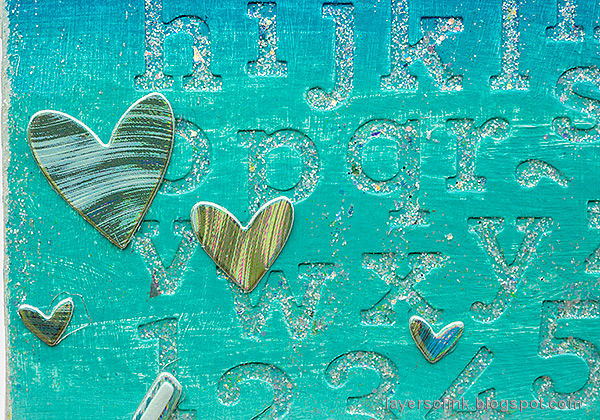
The glittery letters look pretty nice.

Layers of ink - Glittery Alphabet Notebook Tutorial by Anna-Karin Evaldsson.

I die cut Simon Says Stamp Clipping Hearts from Aqua Holographic paper, to add even more shine.

Layers of ink - Glittery Alphabet Notebook Tutorial by Anna-Karin Evaldsson.

The Simon Says Stamp You Shine title was die cut from holographic paper and Sea Glass Simon Says Stamp cardstock. I also added a piece of alphabet Label Tape.

Layers of ink - Glittery Alphabet Notebook Tutorial by Anna-Karin Evaldsson.

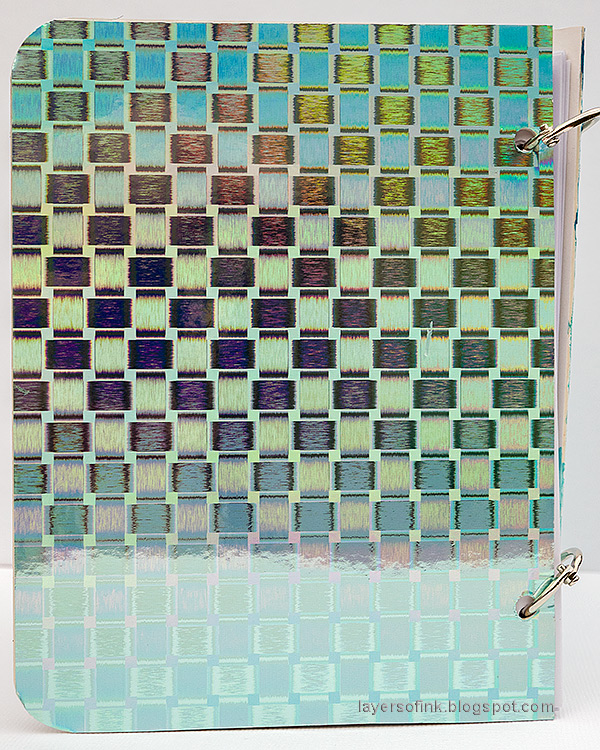
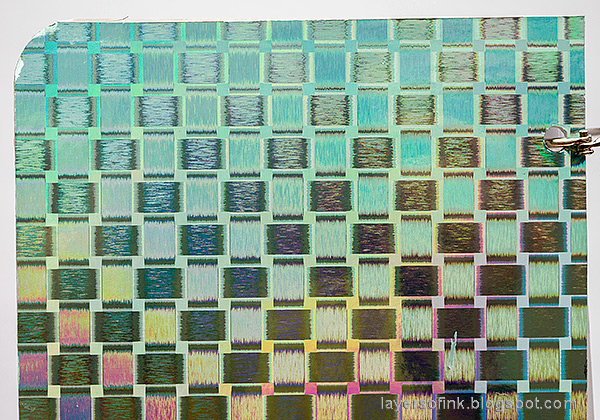
The holographic paper looks different from different angles. The boys love it.

Layers of ink - Glittery Alphabet Notebook Tutorial by Anna-Karin Evaldsson.

The back cover was covered with a piece of holographic paper too.

Layers of ink - Glittery Alphabet Notebook Tutorial by Anna-Karin Evaldsson.

It is hard to photograph, but here you can get a hint of all the shades visible in the paper.

I hope you will join us this week in our Glimmer and Sparkle challenge. You have a chance to win a $25 gift voucher to do some fun shopping at Simon Says Stamp. You have until Monday 8am Ohio time. 1pm UK time, 2 pm CET to join in.


Do you use Instagram? If so please add #sssmchallenge so we can see your entries there too.


Thank you so much for taking the time to stop by here today! 

Happy crafting!

Anna-Karin

Supplies:

* Please note: the links are affiliate links, for which I receive a small percentage of sales generated by the link, at no extra cost to you.
Sunday, August 29, 2021

Silhouette Mixed Media Canvas Tutorial

Hello friends! Today I have an easy mixed media project to share with you. I made a canvas, but you can also do the technique on a card.

Please note: this post has affiliate links, for which I receive a small percentage of sales generated by the link, at no extra cost to you.

Layers of ink - Silhouette Mixed Media Canvas Tutorial by Anna-Karin Evaldsson.

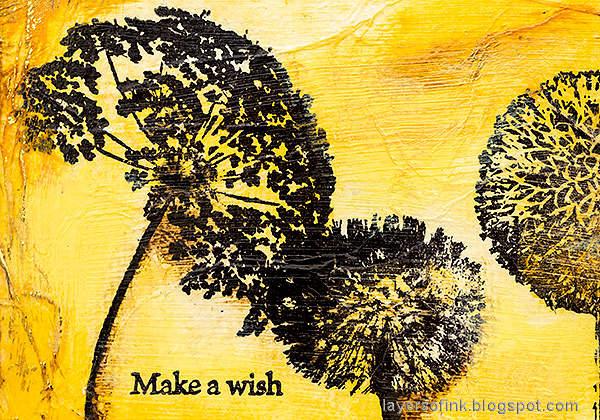
The air is getting colder, especially at night, and autumn is on the way. That made me feel like reaching for warm colors and make a canvas with silhouettes of some flowers, as nature starts to get ready for colder times. I will share an easy way to add stamping to a textured surface, while also giving even more texture. The flower stamps are from one of the Simon Says Stamp sets that I designed, namely Laugh In Flowers.

Layers of ink - Silhouette Mixed Media Canvas Tutorial by Anna-Karin Evaldsson.

I started by coating a 6 x 6 canvas with gesso. When dry, paint with yellow Distress Paints and mist with water to blend.

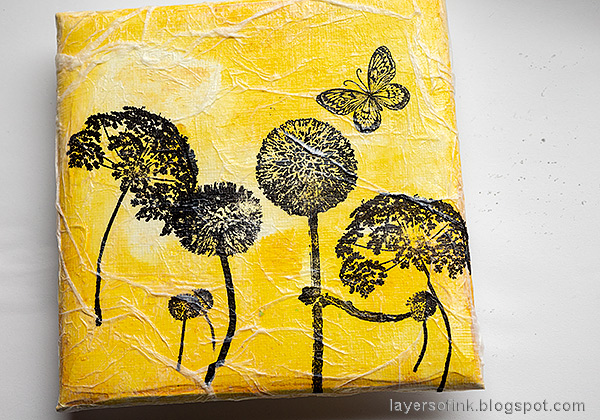
Layers of ink - Silhouette Mixed Media Canvas Tutorial by Anna-Karin Evaldsson. Stamp on tissue paper.

A really easy way of adding stamps to a canvas or another surface which is hard to stamp on, is to use tissue paper. Stamp on the glossy side of the paper. I placed the canvas underneath when planning the design. The flowers are from Laugh In Flowers and the butterfly from Beautiful Butterflies.

Layers of ink - Silhouette Mixed Media Canvas Tutorial by Anna-Karin Evaldsson.

Add a layer of gloss medium over the canvas, place the tissue paper into the medium, adding wrinkles here and there. Finish with a second layer of gloss medium. It is best to use gloss and not matte medium, since it makes the tissue paper more transparent.

Layers of ink - Silhouette Mixed Media Canvas Tutorial by Anna-Karin Evaldsson.

Add more paint. I also used metallic gold shades here and there, and on the butterfly.

Layers of ink - Silhouette Mixed Media Canvas Tutorial by Anna-Karin Evaldsson.

I added a darker shade of brown, since I thought the canvas needed more contrast. The brown was also used to add shading to the flowers.

Layers of ink - Silhouette Mixed Media Canvas Tutorial by Anna-Karin Evaldsson.

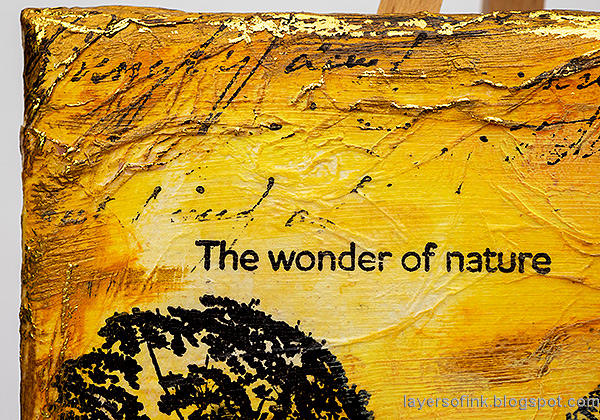
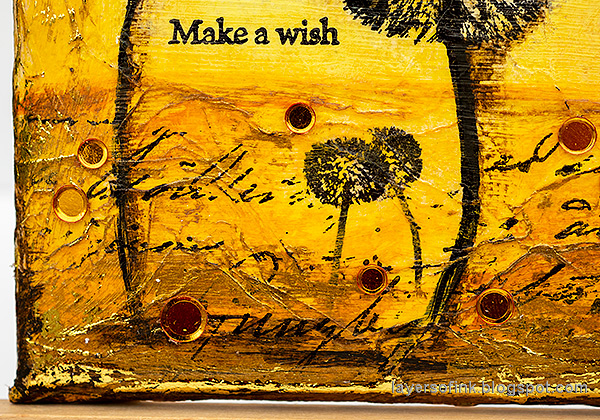
Stamp the canvas with Simon Says Stamp Old Letter Background at the top and in the 'soil' area, to frame the flowers (and because I love this stamp).

Layers of ink - Silhouette Mixed Media Canvas Tutorial by Anna-Karin Evaldsson.

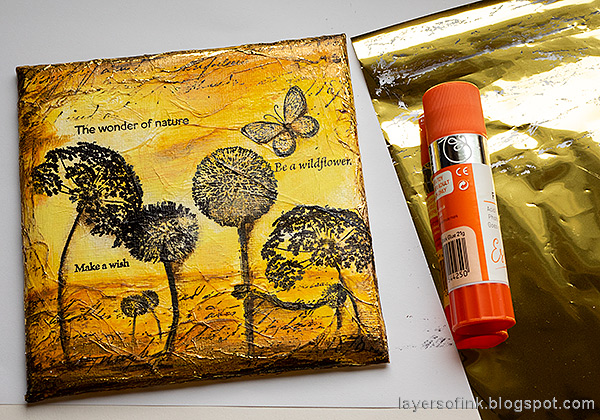
Apply some glue around the edges and on some of the tissue wrinkles. Let dry for a short while and then rub gold foil on top.

Layers of ink - Silhouette Mixed Media Canvas Tutorial by Anna-Karin Evaldsson.

The foil is very shiny and gives a lovely texture to the canvas.

Layers of ink - Silhouette Mixed Media Canvas Tutorial by Anna-Karin Evaldsson.

You can add more paint to the butterfly if you want too, I decided to just give it a hint of gold.

Layers of ink - Silhouette Mixed Media Canvas Tutorial by Anna-Karin Evaldsson.

The globe thistle could also have been colored, but I was aiming for a simple silhouette look, even though this stamp isn't strictly a silhouette.

Layers of ink - Silhouette Mixed Media Canvas Tutorial by Anna-Karin Evaldsson.

I couldn't help myself and also glued some sequins to the canvas.

Layers of ink - Silhouette Mixed Media Canvas Tutorial by Anna-Karin Evaldsson.

The Queen Anne's Lace might be my favorite stamp on this set and it works great as a silhouette. Of the actual flowers themselves, it is also my favorite.

Layers of ink - Silhouette Mixed Media Canvas Tutorial by Anna-Karin Evaldsson.

There are a few tiny dandelions too. 


Thank you so much for taking the time to stop by here today! 

Happy crafting!

Anna-Karin

Supplies:

* Please note: the links are affiliate links, for which I receive a small percentage of sales generated by the link, at no extra cost to you.