Showing posts with label Distress Glitter. Show all posts

Friday, December 2, 2022

Debossed Inky Resist Splitcoaststampers Tutorial

Hi stampers! Today I am happy to have a guest tutorial at Splitcoaststampers, as a part of the Falliday Fest event. The event will run from November 28 - Dec. 9 and there will be tutorials combined with challenges and prizes. Don't miss it!


Layers of ink - Resist Inky Debossing Tutorial by Anna-Karin Evaldsson.

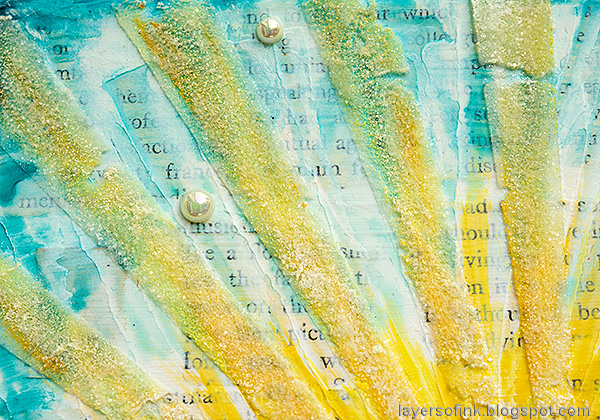
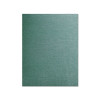
I did a fun debossed inky resist technique, with which you can make a lot of backgrounds quickly. They will all look different and have interesting textures and it is a great way to use embossing folders. 


Here is the video showing you the process. You can also watch it directly on YouTube here. You will also find step-by-step photos and instructions over at Splitcoaststampers.

Layers of ink - Resist Inky Debossing Tutorial by Anna-Karin Evaldsson.

I made a whole bunch of backgrounds and didn't use all of them for cards yet. I used various 3-D embossing folders by Simon Says Stamp. 

Layers of ink - Resist Inky Debossing Tutorial by Anna-Karin Evaldsson.

You can use them both for folders with a lot of details and folders which have a simpler pattern. This is the Simon Says Stamp Scandinavian Christmas

Layers of ink - Resist Inky Debossing Tutorial by Anna-Karin Evaldsson.

Don't aim for a perfect look or remove all stray embossing powder. In fact, this background might be my favorite, because of all the stray embossing powder giving such great texture. This beautiful folder is the Simon Says Stamp Filigree Snowflakes.

Layers of ink - Resist Inky Debossing Tutorial by Anna-Karin Evaldsson.

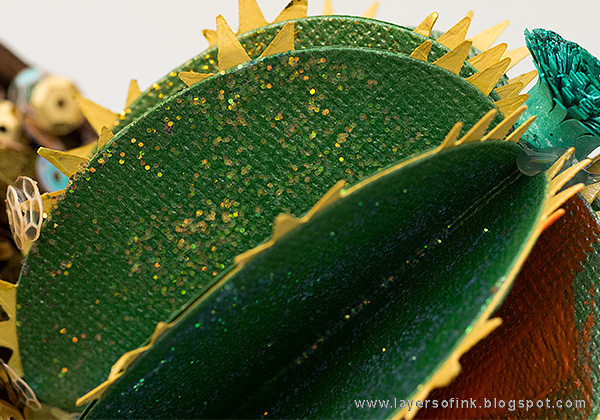
The cards were embellished with foliage and branches which were die cut from various surfaces. 

Layers of ink - Resist Inky Debossing Tutorial by Anna-Karin Evaldsson.

I used a mix of silver metallic, vellum, glitter and kraft paper for the foliage

Layers of ink - Resist Inky Debossing Tutorial by Anna-Karin Evaldsson.

The labels were stamped and die cut with Simon Says Stamp Mixed Labels and this sentiment comes from Let It Snow

Layers of ink - Resist Inky Debossing Tutorial by Anna-Karin Evaldsson.

Test the technique with different folders, colors and embossing powders.

Layers of ink - Resist Inky Debossing Tutorial by Anna-Karin Evaldsson.

I hope you will enjoy this technique and that it will inspire you to use embossing folders in a new way.


Thank you so much for stopping by here today!

Happy stamping!

Anna-Karin


Supplies:

* Please note: the links are affiliate links, for which I receive a small percentage of sales generated by the link, at no extra cost to you.

Thursday, August 27, 2020

Sunny Seascape Tutorial

Hello crafters! I have a mixed media tutorial to share today with easy techniques for how to create a sunny seaside scene. It can easily be adopted to different formats and I made both a wall-hanging and a tag to show that.

Layers of ink - Sunny Ocean and Beach Mixed Media Scene Tutorial by Anna-Karin Evaldsson.

Here is the wall-hanging. It's 6 x 8.5 in. You can use just a few of the techniques on a project or all of them as here. On the tag below, you will see that I simplified the process and skipped some of the steps. I used Distress Paint and various pastes by Ranger/Tim Holtz. The stamps are from the Simon Says Stamp Your Light set.

Layers of ink - Sunny Ocean and Beach Mixed Media Scene Tutorial by Anna-Karin Evaldsson. Coat with gesso. 

I worked on a piece of Little Sizzles mat board, but you can also use chipboard. Apply a layer of gesso. I made wave patterns at the bottom, but later decided to also collage some paper to the background, so you can skip that and just apply a thin layer of gesso.

Layers of ink - Sunny Ocean and Beach Mixed Media Scene Tutorial by Anna-Karin Evaldsson. Collage with old book paper.

Glue torn pieces of old book paper to the background. Add a layer of matte medium on top of the paper too.

Layers of ink - Sunny Ocean and Beach Mixed Media Scene Tutorial by Anna-Karin Evaldsson.

When the matte medium is dry, continue with a layer of gesso. Here I added texture and patterns - both as rays in the sky and as waves in the ocean.

Layers of ink - Sunny Ocean and Beach Mixed Media Scene Tutorial by Anna-Karin Evaldsson. Paint the sun and reflection yellow.

Start painting the sun and its reflection using two shades of yellow.

Layers of ink - Sunny Ocean and Beach Mixed Media Scene Tutorial by Anna-Karin Evaldsson. Paint the sky and the sea.

Continue with the sky and the ocean, with three shades of blue. Water-down the paint a little.

Layers of ink - Sunny Ocean and Beach Mixed Media Scene Tutorial by Anna-Karin Evaldsson. Apply grit-paste.

Apply Opaque Grit-Paste as a sandy beach. Try to create the look of dunes.

Layers of ink - Sunny Ocean and Beach Mixed Media Scene Tutorial by Anna-Karin Evaldsson. Paint the sand.

When dry, paint with Antique Linen and a little Walnut Stain.

Layers of ink - Sunny Ocean and Beach Mixed Media Scene Tutorial by Anna-Karin Evaldsson. Apply translucent grit-paste through the Rays stencil.

When dry, apply Translucent Grit-Paste through Tim Holtz Rays stencil. Let dry.

Layers of ink - Sunny Ocean and Beach Mixed Media Scene Tutorial by Anna-Karin Evaldsson.  Paint the sun rays.

Dry brush yellow and white paint on the rays to make them stand out more.

Layers of ink - Sunny Ocean and Beach Mixed Media Scene Tutorial by Anna-Karin Evaldsson. Add Rock Candy Glitter.

Place the stencil back and apply a layer of Matte Medium to the rays. Sprinkle Rock Candy Distress Glitter on top. 

Layers of ink - Sunny Ocean and Beach Mixed Media Scene Tutorial by Anna-Karin Evaldsson. Add mica flakes.


Dye Mica Flakes with Butterscotch alcohol ink and glue to the background with Glossy Accents. Also add some Mica Flakes which aren't dyed.

Layers of ink - Sunny Ocean and Beach Mixed Media Scene Tutorial by Anna-Karin Evaldsson. Acrylic paint, paste and glitter sun rays. Mica flakes for the sun.

The mix of gesso rays, paint, translucent grit-paste, glitter and mica makes for an interesting looking sun.

Layers of ink - Sunny Ocean and Beach Mixed Media Scene Tutorial by Anna-Karin Evaldsson.

The text can be seen partially through some of the paste and glitter rays, but is mainly visible in between the rays, adding depth. I also glued some pearls to the background.

Layers of ink - Sunny Ocean and Beach Mixed Media Scene Tutorial by Anna-Karin Evaldsson.

Stamp a part of the sentiment just below the horizon line. 

Layers of ink - Sunny Ocean and Beach Mixed Media Scene Tutorial by Anna-Karin Evaldsson. Simon Says Stamp Your Light.

Stamp the ship from Your Light on white cardstock and color lightly with colored pencils. Cut out and glue to the background. The second part of the sentiment was stamped below the ship.

Layers of ink - Sunny Ocean and Beach Mixed Media Scene Tutorial by Anna-Karin Evaldsson.

I added the yellow mica flakes to the areas with sunshine or sun reflections and used the normal flakes in the blue and sand areas. I really like how they all glimmer in the light.

Layers of ink - Sunny Ocean and Beach Mixed Media Scene Tutorial by Anna-Karin Evaldsson.

The tag is very similar to the wall-hanger, just on a smaller scale. I also skipped the grit-paste and glitter rays in the sky. That made the gesso and paint rays more visible. The scene was left peaceful, with just two sentiments and some pearls.

Layers of ink - Sunny Ocean and Beach Mixed Media Scene Tutorial by Anna-Karin Evaldsson. Tim Holtz mica flakes.

Here you can see the gesso rays better. Don't forget that you can make patterns and texture with gesso. It makes for an interesting background element.

Layers of ink - Sunny Ocean and Beach Mixed Media Scene Tutorial by Anna-Karin Evaldsson.

Stamp the sentiment in the sea.

Layers of ink - Sunny Ocean and Beach Mixed Media Scene Tutorial by Anna-Karin Evaldsson. Grit-paste sandy beach.

By dry-brushing the sand with a dark brown, you make the grit-paste textures more visible.

Layers of ink - Sunny Ocean and Beach Mixed Media Scene Tutorial by Anna-Karin Evaldsson.

I hope you enjoyed this tutorial. It is a great way of keeping the memories and warmth of summer for the colder seasons. You can of course also use the techniques for other types of projects and themes.


Thank you so much for taking the time to visit my blog today!  

Happy crafting!

Anna-Karin

Supplies:

* Please note: the links are affiliate links, for which I receive a small percentage of sales generated by the link, at no extra cost to you.

Thursday, August 24, 2017

Glittery Cactus

Hi friends! Today's project is done by Anton, who wanted to participate in the Simon Says Stamp Summer Vacation Kid's Challenge. The challenge theme is Anything Goes with Glitter.


The challenge is open for kids age 2-16. Kids have until 31 August to join.

Layers of ink - Glittery Cactus

Anton (age 7) wanted to make his own version of the Watercolor Cacti in a Box tutorial of mine from a couple of weeks ago, since he really liked this round cactus and wanted one for his room. I helped with the die cutting and assembly of the cactus, but he picked all the materials and did everything else on his own. The cactus was die cut from Simon Says Stamp Glittery Paper.

Layers of ink - Glittery Cactus

After having picked a lot of bottles of Stickles and Liquid Pearls, he smeared different colors between each 'leaf' of the cacti, giving it a great multi-colored shine. It looks different from all directions.

Layers of ink - Glittery Cactus

Shades of gold and to the right, Pumpkin Liquid Pearls.

Layers of ink - Glittery Cactus

Here you can see some red Stickles.

Layers of ink - Glittery Cactus

And Royal Blue Liquid Pearls.

Layers of ink - Glittery Cactus

The glitter added a really nice effect to the cactus.

 Layers of ink - Glittery Cactus

I had a pink quilled fringed flower at the top of my cactus, but Anton wanted a blue one and he dyed a piece of white quilling paper with Peacock Feathers Distress Ink. I helped him with cutting the fringes. He wanted some dry glitter too and smeared Glossy Accents on the fringes and dipped into glitter. In the process, much of the floor was glittered too.

Layers of ink - Glittery Cactus

Here you can see the cactus from the top. The glittery flower is Anton's favourite part of the project. We used the Dry Fine Stickles glitter by Ranger (I don't think it is available anymore), but any dry glitter will work well.

Layers of ink - Glittery Cactus

Anton filled a Tim Holtz Vignette Box with crumbled up printer paper and misted with a whole lot of Distress Spray Stain. The cheesecloth was dyed in the same way. He added sequins on top, for even more shine. Using spray ink is a fun exercise in color mixing and he, for instance, tested whether misting a lighter shade on top of all that dark ink would make a difference. He also mixed mist into water to see the effect - and added glitter too. :)

Layers of ink - Glittery Cactus

Anton hopes you will like his project and has placed it on his bedside table so that he can look at it whenever he wants to. This cactus box was a more peaceful project, than the very spooky Halloween house that he made for last year's Summer Vacation Challenge.


If you know any kids who wants to join the challenge, I hope they will. Glitter is always fun, and there are three prize hampers to be won (drawn randomly).

Happy crafting from Anton!

Supplies (affiliate links):