Showing posts with label Chipboard. Show all posts

Monday, April 3, 2017

Bright Words in a Frame

Hello friends! I hope your weekend was good. I try to spend a lot of time outdoors over the weekends and this one was no exception, especially since we had lovely spring weather. Today, it is colder again, nature can't quite make up its mind. 


This week at the Simon Says Stamp Monday Challenge Blog with have a Rainbow theme. How fun! Don't miss the explosion of color on the challenge blog. Since this is the first Monday of a new month, the team is showcasing a specific designer/company, and this month the turn has come to the very inventive Tim Holtz

Our guest designer during April is Amy Bethke from Amy's Card Obsession. Don't miss her lovely project for this week. 

Layers of ink - Bright Words in a Frame by Anna-Karin with Tim Holtz idea-ology

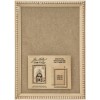
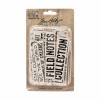
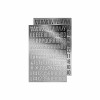
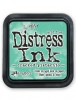
I recently got a big batch of photos printed, and finally have some new photos to use. I don't print photos at home since I never had a printer which could print as good photos as the professional printers. But it was a while since I had photos printed and is fun to have new ones. Here's a recent one of Leo. As you know, I love words, and I got the idea of covering the entire background with Tim Holtz's Quote Chips. I love these chipboard words and phrases and the sizes are great too. They were inked with Distress Inks to create the bright multi-colored effect. Very easy and quick. 

Layers of ink - Bright Words in a Frame by Anna-Karin with Tim Holtz idea-ology

I worked in the larger Framed Panel (6.5 x 9 in) and moved the words around until I was happy with the look, almost like a puzzle. I took a photo of this before moving on, so that I knew where everything would go.

Layers of ink - Bright Words in a Frame by Anna-Karin with Tim Holtz idea-ology

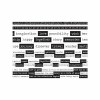
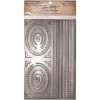
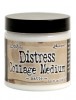
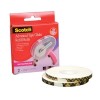
The frame was painted with several coats of gesso. I glued the frame to the back piece and then added Chatter Design Tape along the edges, to get even more words on my projects. Use Matte Medium under and on top of the tape to make sure it is stuck down well.
  Layers of ink - Bright Words in a Frame by Anna-Karin with Tim Holtz idea-ology

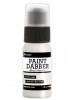
The frame was dry-brushed with Mermaid Lagoon, and then I painted the whole thing with Ranger's Pearl Metallic paint, which gives a wonderful shine too it. I didn't want the frame to be too busy, but I also didn't want it to be plain white and the pearl gave just the right amount of interest to it.

Layers of ink - Bright Words in a Frame by Anna-Karin with Tim Holtz idea-ology

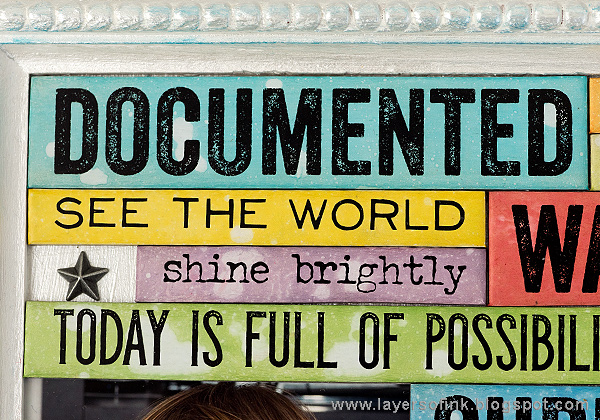
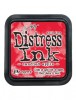
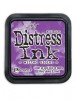
The Quote Chips were inked with Distress Inks and misted with water to create subtle texture. They were all adhered with Matte Medium.

Layers of ink - Bright Words in a Frame by Anna-Karin with Tim Holtz idea-ology

I just love all these words and phrases and picked pieces that I wanted to say to Leo as important life lessons.

Layers of ink - Bright Words in a Frame by Anna-Karin with Tim Holtz idea-ology

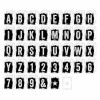
I left an open spot for an Alpha Transparent Tile number (his age), and also added a silver L. In the remaining gaps, I glued metallic Stars Adornments

Layers of ink - Bright Words in a Frame by Anna-Karin with Tim Holtz idea-ology

There was a little bit of space at the bottom of the frame, but not enough for more chipboard words. I adhered an Industrious Sticker border there.

Layers of ink - Bright Words in a Frame by Anna-Karin with Tim Holtz idea-ology

And another look at the Design Tape border. It also hides the joint between the frame and the back piece.

I really hope you will join us in our Rainbow challenge. As every week, you have a chance to win a $50 gift voucher from Simon Says Stamp. You have until Monday 8am Ohio time. 1pm UK time, 2 pm CET to join in.


Don't forget to follow Simon Says Stamp on Instagram, they post great stuff daily. 


new-instagram-icon22

Do you use Instagram? If so please add #sssmchallenge so we can see your entries there too.


Thank you so much for stopping by here today!

Happy crafting!

Anna-Karin

Supplies:


Friday, September 26, 2014

Lucky Dog Accordion Card

Hello everyone! Today I have a quick post to share of a Sizzix mini accordion card, perfect for someone who likes dogs.
 
I used the pretty Graphic 45 Raining Cats & Dogs Collection, as well as the new Sizzix Mini Heart Album by Jillibean Soup. The vintage dog stickers are so cute, and were given central stage on this card. The base was die cut from patterned paper and since these papers are double-sided they were perfect for the card. There is a flap that folds down behind the die cut shapes (the heart, label and butterfly), so the paper you see through the die cut openings is the back of the text paper. This is an XL die so you need the extended cutting pads.
 
I glued the positive heart shape on top of the negative die cut and added some dimension by folding the heart in the middle. I also added some word stickers and printed chipboard shapes.

The 'My Dog' sticker was placed on top of a chipboard button.
 
The card is only 2 in high and it is fun to work in this small format now and then.

On the front, I added the die cut label from the inside, another chipboard shape and a sentiment.
 
Thank you so much for looking!
 
Anna-Karin
 
Supplies:
Dies: Sizzix: Mini Heart Album
Surfaces: Graphic 45: Raining Cats & Dogs 12 x 12 paper pad
Ink: Ranger Distress Ink: Gathered Twigs
Embellishments: Graphic 45: Raining Cats & Dogs: Chipboard 1, Chipboard 2, Cardstock Stickers; rhinestones

Saturday, April 21, 2012

Card Patterns Sketch #162

Another post for today, my card for this week’s Card Pattern’s sketch. This week the team is sponsored by Sparkle Creations. Here’s the sketch designed by Tracy:


I turned the sketch vertically to make it fit better with the stamp I was using. Here’s my card:


The boy was stamped with Archival Jet Black in on watercolour paper and coloured with watercolours. Originally he was holding an apple, but I gave him a chipboard butterfly to hold instead and he also got a little crown. Both pieces were painted with Adirondack dimensional Pearls Paint (Stream and Butterscotch). The crown was too big, so I cut off a bit on each side.

The background is dry embossed and sanded Core’dinations cardstock, and two pieces of patterned paper. For the sentiment, I cut a Tattered Banner and added a crown and the word ‘special’ with rub-ons. I need a lot of kiddies birthday cards and this one will fit perfectly.

A close-up:


Thank you for visiting! I hope you can play along with us. You might win a guest designer spot!

Anna-Karin

Supplies: Sparkle Creations Backpack Oliver stamp; Sizzix Tattered Banners Sizzlits die and Checkerboard texture fade; Daler & Rowney watercolours; Core’dinations Ranger cardstock; Maya Road and Heidi Swap chipboard; Adirondack dimensional pearls paint Stream and Butterscotch; Creative Café rub-ons; Ranger manila cardstock; Kaisercraft rhinestones.