Wednesday, March 31, 2021

Foil and flowers tag

Hi friends! It is the last day of this month and I have a tutorial with a whole bunch of fun technique to share with you. I made a mixed media background with dies, acrylic paint, pencils and foil.

Layers of ink - Foil and Flowers Tag Tutorial by Anna-Karin Evaldsson.

This is a pretty busy tag with lots of things going on. It also sparkles and shines, making it a challenge to photograph. The shiny background contrasts nicely with the muted colors on the flowers.You can also pick just one of the techniques in this tutorial to use on a project. 

Please note: this post has are affiliate links, for which I receive a small percentage of sales generated by the link, at no extra cost to you.

Layers of ink - Foil and Flowers Tag Tutorial by Anna-Karin Evaldsson.

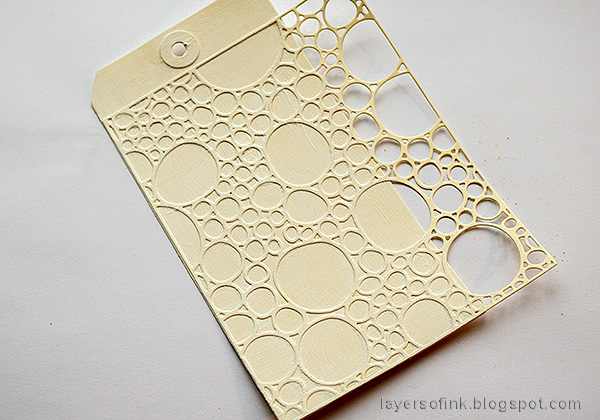
Start by die cutting Tim Holtz Bubbling from heavystock cardstock and adhere it to a tag with matte medium. When dry, add a layer of gesso on top.

Layers of ink - Foil and Flowers Tag Tutorial by Anna-Karin Evaldsson.

Paint with Distress Paint and mist heavily with water.

Layers of ink - Foil and Flowers Tag Tutorial by Anna-Karin Evaldsson.

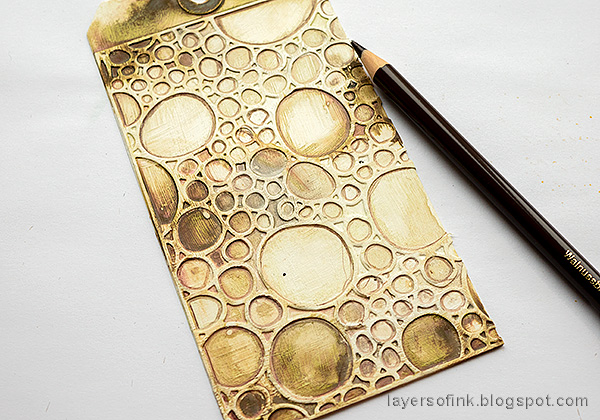
Add shading inside the circles with a brown colored pencil. You could leave the background like this, but I felt like doing some foiling. For another example using the Bubbling die, check out my Funky Forest.

Layers of ink - Foil and Flowers Tag Tutorial by Anna-Karin Evaldsson.

Apply a glue stick to the raised parts of the design. It doesn't need to get everywhere. Leave for about a minute so that the glue gets tacky.

Layers of ink - Foil and Flowers Tag Tutorial by Anna-Karin Evaldsson.

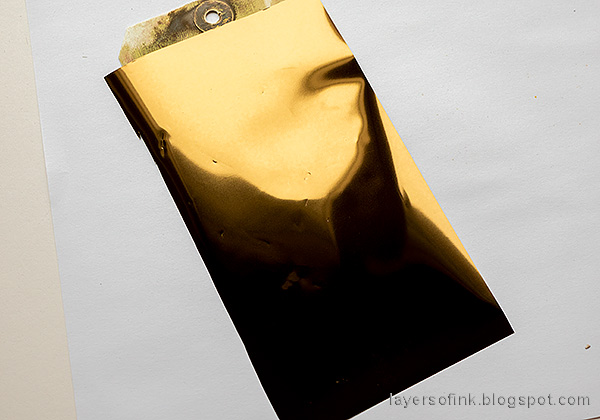
Place a sheet of Therm O Web Bronze foil on top, shiny side up. Run through a Big Shot or another die cut machine, using the same settings that you would use for wafer-thin dies. You can also rub the design with a bone folder.

Layers of ink - Foil and Flowers Tag Tutorial by Anna-Karin Evaldsson. Add Thermoweb bronze foil.

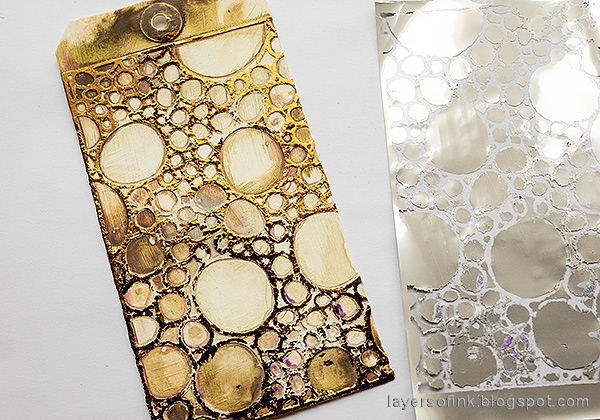
Remove the foil and you get this distressed looking foiled surface. It is pretty cool. 

Layers of ink - Foil and Flowers Tag Tutorial by Anna-Karin Evaldsson. Add Stickles glitter glue.

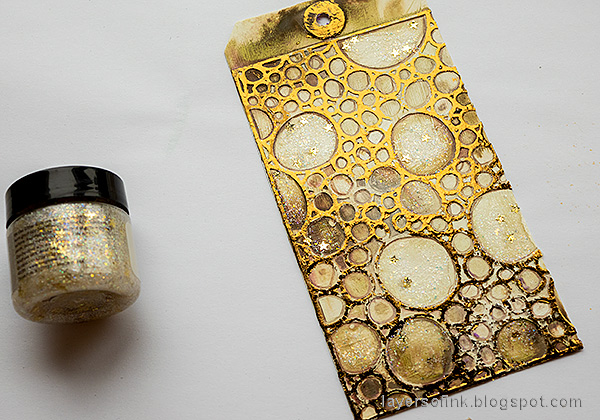
I added some Nebula Stickles to the open circles. It has tiny star sequins inside.

Layers of ink - Foil and Flowers Tag Tutorial by Anna-Karin Evaldsson.

Die cut flowers from Tim Holtz Wildflower Stems 3 from Journal Cards. This gives an interesting background to add color to.

Layers of ink - Foil and Flowers Tag Tutorial by Anna-Karin Evaldsson.

Color the die cuts with colored pencils. I used Faber-Castell Polychromos

Layers of ink - Foil and Flowers Tag Tutorial by Anna-Karin Evaldsson.

The background paper still shows through after you color the flowers. 

Layers of ink - Foil and Flowers Tag Tutorial by Anna-Karin Evaldsson.

Use a white pencil to blend out the colors.

Layers of ink - Foil and Flowers Tag Tutorial by Anna-Karin Evaldsson.

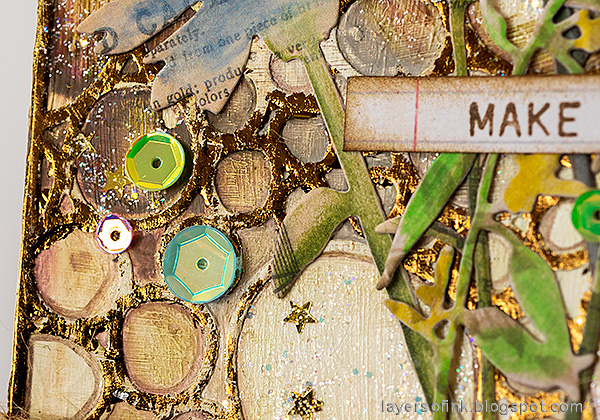
I also glued some sequins to the background. Here you can see the textured effect of the foil.

Layers of ink - Foil and Flowers Tag Tutorial by Anna-Karin Evaldsson.

The shine of the foil is hard to photograph, but here you can see it better. 

Layers of ink - Foil and Flowers Tag Tutorial by Anna-Karin Evaldsson.

Adding foil with this technique gives a nice textured effect to the foil.

Layers of ink - Foil and Flowers Tag Tutorial by Anna-Karin Evaldsson.

The sentiments were stamped on a journal card, using Tim's Tiny Text set.

Layers of ink - Foil and Flowers Tag Tutorial by Anna-Karin Evaldsson.

The third sentiment was used as a border at the bottom of the tag.

Layers of ink - Foil and Flowers Tag Tutorial by Anna-Karin Evaldsson.

Arrange the flowers on the background and tie a piece of twine around them. The 'ribbon' at the top is a folded over piece of design tape.


Thank you so much for taking the time to stop by here today! I will see you again tomorrow.

Happy crafting!

Anna-Karin

Supplies:

* Please note: the links are affiliate links, for which I receive a small percentage of sales generated by the link, at no extra cost to you.

Monday, March 29, 2021

Easter card with no-line coloring

Hello crafters! It is Monday again and I hope your weekend was good. We explored a new-to-us forest, which was lots of fun and pretty muddy. Today, I have an Easter card to share with you, using no-line coloring.


This week at the Simon Says Stamp Monday Challenge Blog we have an Easter or Spring theme. I hope you will join us! Don't miss the last project by our March guest designer Sandra Rupp.

Layers of ink - Easter card with no-line coloring tutorial by Anna-Karin Evaldsson.

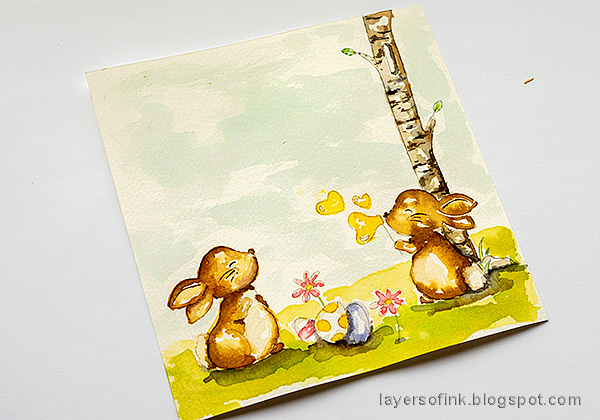
I was in the mood for a cute card and made an Easter card with the Simon Says Stamp Bunny Blessings set. The scene was watercolored with Distress Ink, adding highlights with a white gel pen.

Layers of ink - Easter card with no-line coloring tutorial by Anna-Karin Evaldsson. Stamp Simon Says Stamp Bunny Blessings.

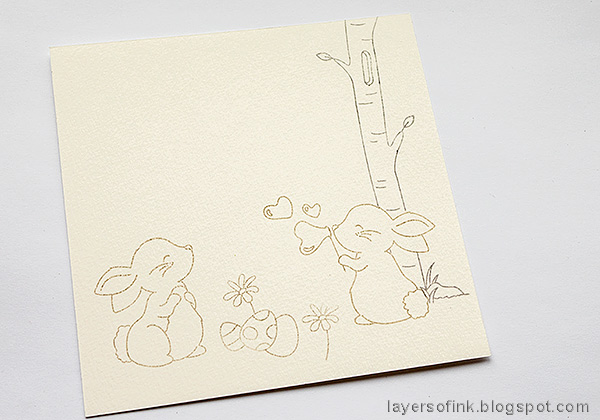
Start by stamping the bunnies with Pumice Stone ink on watercolor paper. You can also use Antique Linen, if you want the lines to be even more invisible. I like how the Pumice Stone adds a shadow effect.

Layers of ink - Easter card with no-line coloring tutorial by Anna-Karin Evaldsson.

Stamp one of the bunnies on Simon Says Stamp Masking paper and cut out. Stamp one of the birch tree trunks behind it using Hickory Smoke.

Layers of ink - Easter card with no-line coloring tutorial by Anna-Karin Evaldsson.

Remove the mask and it looks like the tree is behind the bunny.

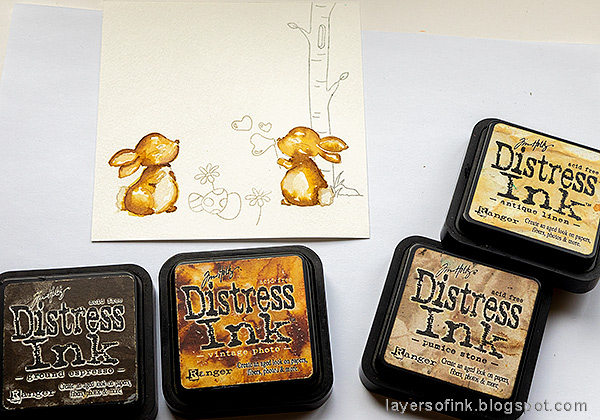
Layers of ink - Easter card with no-line coloring tutorial by Anna-Karin Evaldsson. Watercolor the bunnies with Distress Ink.

Smear Distress Inks on a non-stick craft sheet, mist with water and pick up with a paint brush. By using more or less water, you can get lots of shades. 

Layers of ink - Easter card with no-line coloring tutorial by Anna-Karin Evaldsson.

Continue in the same way with the tree, balloons and eggs. I smeared the yellow ink on one of the bubbles by mistake.

Layers of ink - Easter card with no-line coloring tutorial by Anna-Karin Evaldsson.

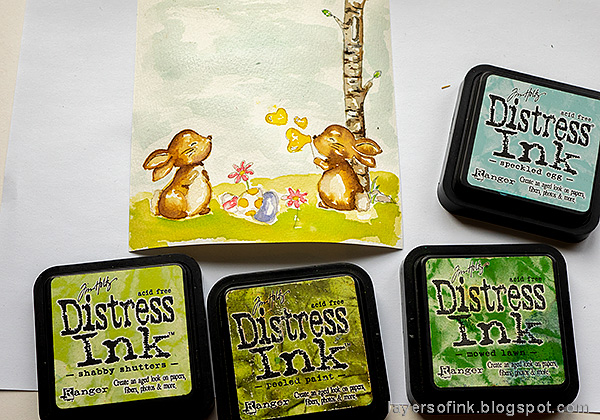
Next, paint the sky and the grass, working quickly and loosely. 

Layers of ink - Easter card with no-line coloring tutorial by Anna-Karin Evaldsson.

Add shadows and shading.

Layers of ink - Easter card with no-line coloring tutorial by Anna-Karin Evaldsson.

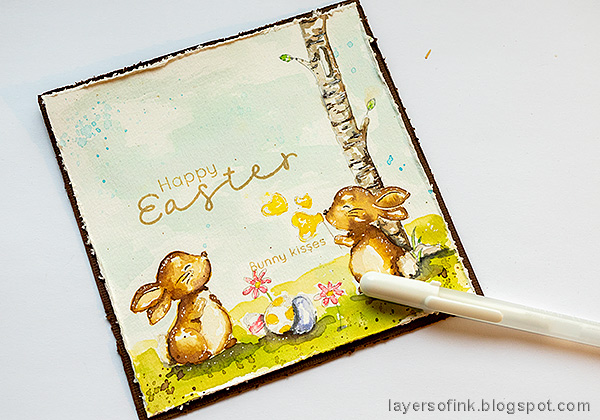
For a little texture, splatter Scribble Sticks on the background. I used a brown stick for the ground and a blue stick for the sky. Dip the stick in water and flick a paint brush against it.

Layers of ink - Easter card with no-line coloring tutorial by Anna-Karin Evaldsson.

Use a white gel pen to add highlights. I also used a Zig Wink of Stella pen on the heart bubbles, eggs and flowers, for subtle shine.

Layers of ink - Easter card with no-line coloring tutorial by Anna-Karin Evaldsson.

The sentiments were stamped with Simon Says Stamp Khaki ink.

Layers of ink - Easter card with no-line coloring tutorial by Anna-Karin Evaldsson.

These bunnies are so sweet. A few blue splatters almost look like the bunny is blowing tiny bubbles.

Layers of ink - Easter card with no-line coloring tutorial by Anna-Karin Evaldsson.

I really like the heart bubbles.

Layers of ink - Easter card with no-line coloring tutorial by Anna-Karin Evaldsson.

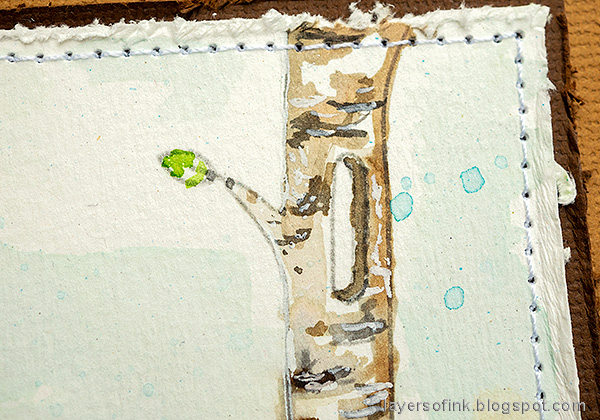
I used several shades of brown and grey on the tree and added extra texture and lines. 

I hope you will join us this week in our Easter or Spring challenge. You have a chance to win a $25 gift voucher to do some fun shopping at Simon Says Stamp. You have until Monday 8am Ohio time. 1pm UK time, 2 pm CET to join in.


Do you use Instagram? If so please add #sssmchallenge so we can see your entries there too.


Thank you so much for taking the time to stop by here today! 

Happy crafting!

Anna-Karin

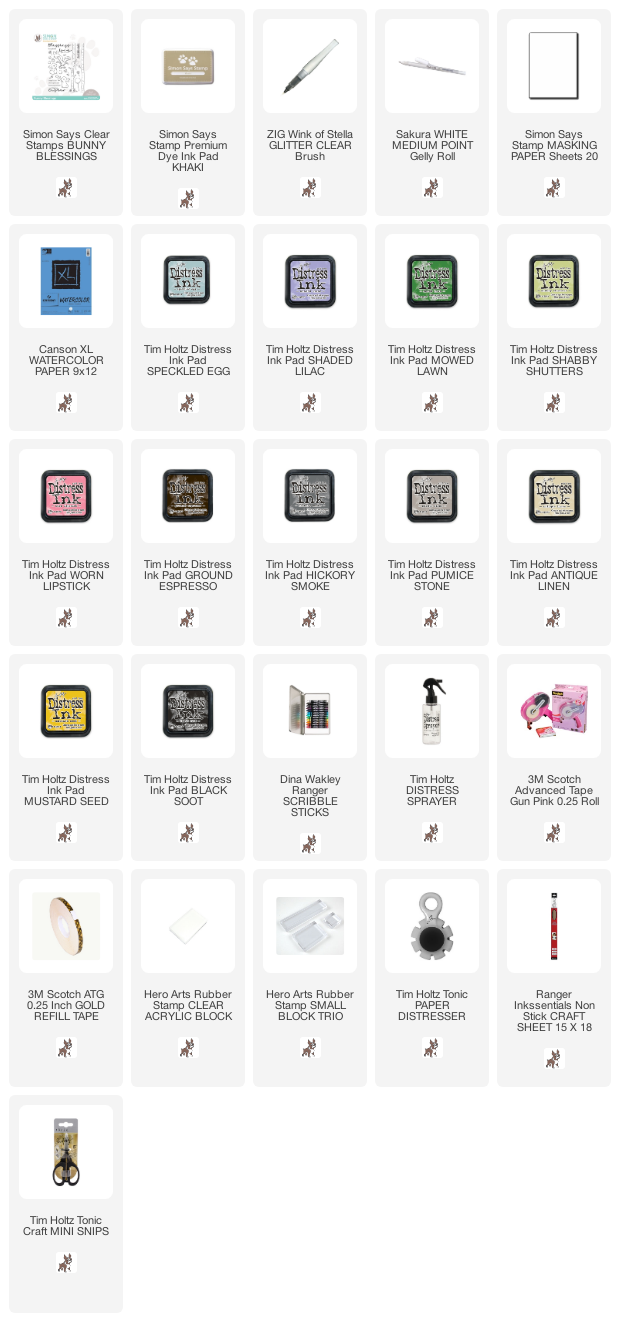
Supplies:

* Please note: the links are affiliate links, for which I receive a small percentage of sales generated by the link, at no extra cost to you.

Friday, March 26, 2021

Crocus with no-line coloring

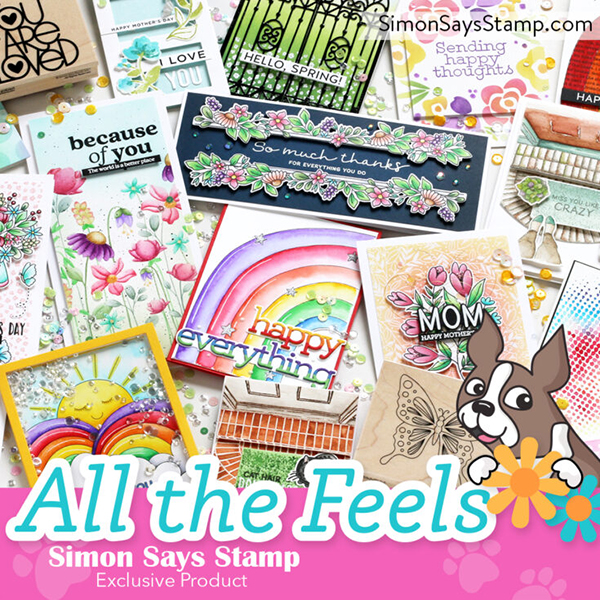
 Hi friends! I hope you are well! The sun is shining and Simon Says Stamp has a new release called All the Feels

Simon Says Stamp All The Feels

All The Feels is full of fantastic stamps, dies, stencils, paper products and sequins, perfect for spring and summer crafting. You can see the full release here. My parcel didn't make it here in time - I just got a notification for it arriving at the start of next week - so I am unfortunately missing the release blog hop. Don't miss today's and tomorrow's blog hop to celebrate the new release. 

Please note: this post has are affiliate links, for which I receive a small percentage of sales generated by the link, at no extra cost to you.
Layers of ink - Crocus in Watercolor and Pencil Tutorial by Anna-Karin Evaldsson. With Simon Says Stamp Thoughtful Flower stamp.

I am very happy to have one of the stamps that I designed turned into a wood mounted stamp, namely the Thoughtful Flower. I don't have that stamp yet, so I used the one on the Thoughtful Flowers set instead. I am also happy to have designed two of the background stamp from All The Feels, namely the Halftone Background and the Halftone Circle Background

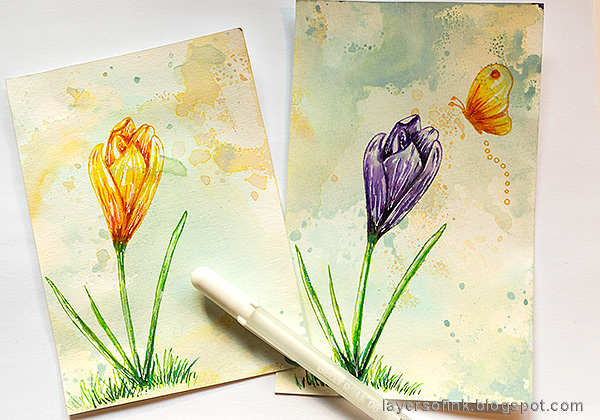
For today's tutorial I used a combination of watercoloring with Distress Ink and colored pencils, to do no-line coloring on the flower.

Layers of ink - Crocus in Watercolor and Pencil Tutorial by Anna-Karin Evaldsson. With Simon Says Stamp Thoughtful Flower stamp.

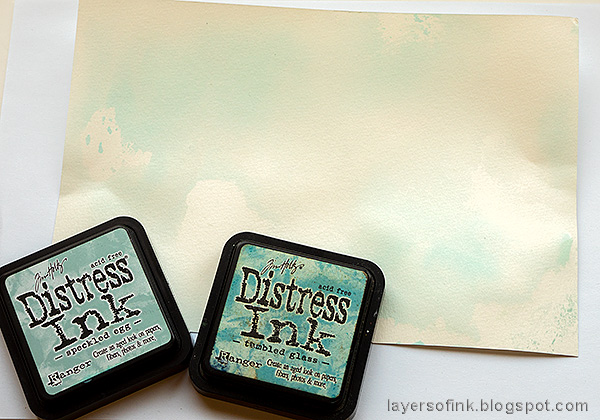
Sometimes I start with a plain paper, sometimes I like to work on a tinted surface and today I did the latter. Press Speckled Egg and Tumbled Glass on a non-stick craft sheet, mist with water and place watercolor paper into the ink.

Layers of ink - Crocus in Watercolor and Pencil Tutorial by Anna-Karin Evaldsson. Ink with Distress Ink and Distress Oxide ink.

Continue with Distress Oxide inks, but don't cover all the background.

Layers of ink - Crocus in Watercolor and Pencil Tutorial by Anna-Karin Evaldsson. With Simon Says Stamp Thoughtful Flower stamp. Stamp the crocus with Distress Ink.

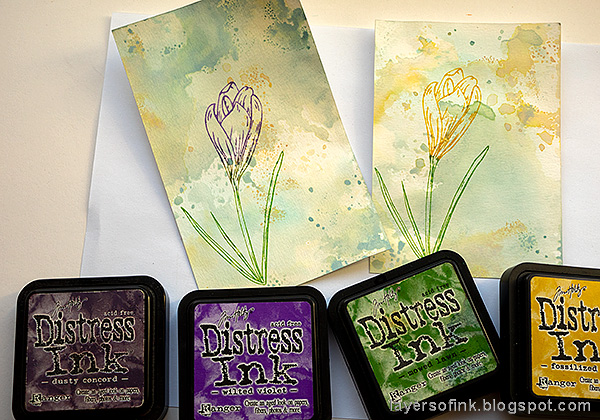
The purple crocus flower was inked with Mowed Lawn, Dusty Concord and Wilted Violet. Mist a couple of times with water before stamping. The yellow flower was inked with Fossilized Amber and Mowed Lawn.

Layers of ink - Crocus in Watercolor and Pencil Tutorial by Anna-Karin Evaldsson. With Simon Says Stamp Thoughtful Flower stamp. Watercolor the flowers with Distress Ink.

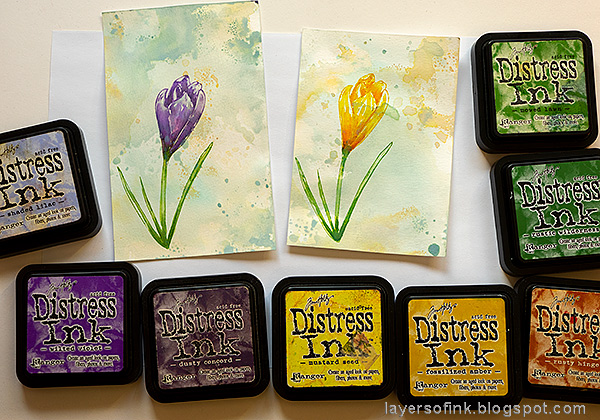
Smear Distress Inks on a non-stick craft sheet and mist once with water. Pick up with a paint brush. By varying the amount of water, you can get lots of tones from one ink pad. Paint the flowers and let the colors run into and blend with each other on the paper. 

Layers of ink - Crocus in Watercolor and Pencil Tutorial by Anna-Karin Evaldsson. With Simon Says Stamp Thoughtful Flower stamp. Add color with colored pencils.

I wanted to add a little more definition to my flowers and decided to use colored pencils too. I used Faber-Castel Polychromos pencils. Add shading and details.

Layers of ink - Crocus in Watercolor and Pencil Tutorial by Anna-Karin Evaldsson. With Simon Says Stamp Thoughtful Flower stamp.

Next, I did one of my favorite things, namely added highlights and white lines with a white gel pen. I also stamped grass around the flower using Mowed Lawn and Rustic Wilderness. The grass and the butterflies also come from the Thoughtful Flowers set

Layers of ink - Crocus in Watercolor and Pencil Tutorial by Anna-Karin Evaldsson. With Simon Says Stamp Thoughtful Flower stamp. Splatter with Scribble Sticks.

For more texture, dip Scribble Sticks in water and flick a paint brush against the tip, to create splatters. I used green, blue, orange and yellow shades.

Layers of ink - Crocus in Watercolor and Pencil Tutorial by Anna-Karin Evaldsson. With Simon Says Stamp Thoughtful Flower stamp. Stamp with Simon Says Stamp Old Letter.

I stamped sentiments with Bunny Blessings, Inside Friendship Messages and Follow the Rainbows. The Old Letter Background was stamped with Mustard Seed Distress Oxide Ink on the yellow card, a both Mustard Seed and Antique Linen for the purple card.

Layers of ink - Crocus in Watercolor and Pencil Tutorial by Anna-Karin Evaldsson. With Simon Says Stamp Thoughtful Flower stamp. Yellow crocus.

I turned the yellow crocus into an Easter card, but it would work for many themes. Both card got a sprinkling of sequins.

Layers of ink - Crocus in Watercolor and Pencil Tutorial by Anna-Karin Evaldsson. With Simon Says Stamp Thoughtful Flower stamp.

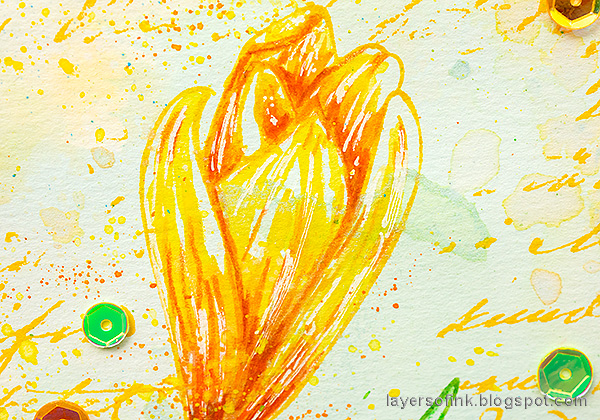
Here you can see the texture from the background ink, script stamping and splatters. The card was mounted on green and yellow Simon Says Stamp cardstock.

Layers of ink - Crocus in Watercolor and Pencil Tutorial by Anna-Karin Evaldsson. With Simon Says Stamp Thoughtful Flower stamp.

If you look closely, you can see the difference between the opaque Oxide ink and the transparent inks.

Layers of ink - Crocus in Watercolor and Pencil Tutorial by Anna-Karin Evaldsson. With Simon Says Stamp Thoughtful Flower stamp.

This is a fun coloring technique, combining the transparent ink watercoloring and the colored pencils.

Layers of ink - Crocus in Watercolor and Pencil Tutorial by Anna-Karin Evaldsson. With Simon Says Stamp Thoughtful Flower stamp.

I love the look of this sentiment.

Layers of ink - Crocus in Watercolor and Pencil Tutorial by Anna-Karin Evaldsson. With Simon Says Stamp Thoughtful Flower stamp.

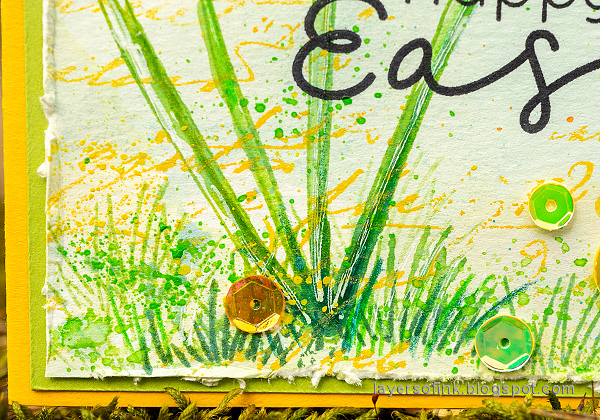
In the grassy area, I added extra splatters.

Layers of ink - Crocus in Watercolor and Pencil Tutorial by Anna-Karin Evaldsson. With Simon Says Stamp Thoughtful Flower stamp.

When I went outside to photograph these cards, the crocuses in the garden was flowering. When I checked a few days ago, they were tiny. So I just had to take a photo of the card together with actual purple flowers.

Layers of ink - Crocus in Watercolor and Pencil Tutorial by Anna-Karin Evaldsson. With Simon Says Stamp Thoughtful Flower stamp.

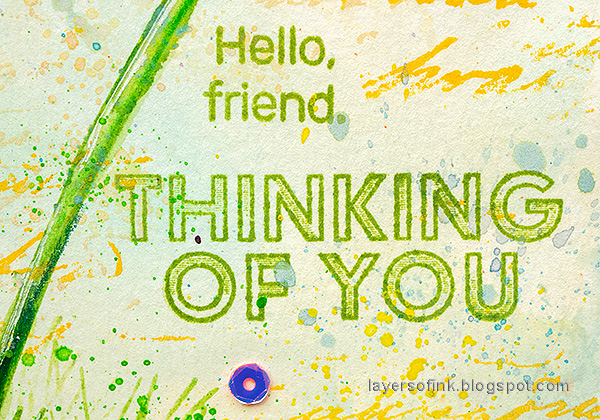
The sentiments were stamped with Simon Says Stamp Leaf Green ink.

Layers of ink - Crocus in Watercolor and Pencil Tutorial by Anna-Karin Evaldsson. With Simon Says Stamp Thoughtful Flower stamp.

The butterfly was colored in the same way as the flower.

Layers of ink - Crocus in Watercolor and Pencil Tutorial by Anna-Karin Evaldsson. With Simon Says Stamp Thoughtful Flower stamp.

I mounted this panel on two shades of purple cardstock and used purple/pink sequins.

Layers of ink - Crocus in Watercolor and Pencil Tutorial by Anna-Karin Evaldsson. With Simon Says Stamp Thoughtful Flower stamp.

My favorite part of this card, is the blue splatters on the flower. The bright blue spots looks so nice against the purple flower.

Layers of ink - Crocus in Watercolor and Pencil Tutorial by Anna-Karin Evaldsson. With Simon Says Stamp Thoughtful Flower stamp.

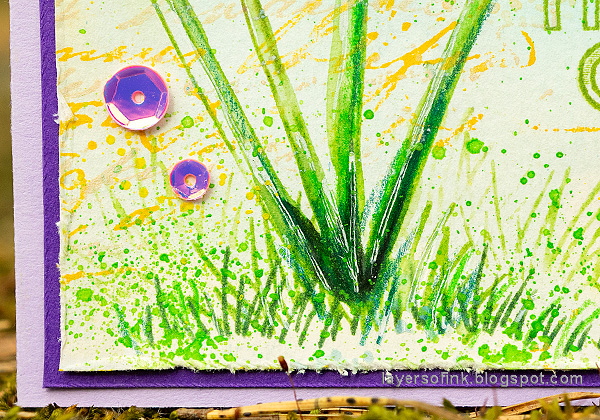
I added some grass with colored pencils too.

Layers of ink - Crocus in Watercolor and Pencil Tutorial by Anna-Karin Evaldsson. With Simon Says Stamp Thoughtful Flower stamp.

We had two little groups of crocuses in the garden. I hope the deer will not eat them, but they might since crocuses are like sweets for them.

Don't miss the inspiration in today's All The Feels blog hop.


Thank you so much for taking the time to stop by here today! I will see you again tomorrow.

Happy crafting!

Anna-Karin

Supplies:

* Please note: the links are affiliate links, for which I receive a small percentage of sales generated by the link, at no extra cost to you.