Tuesday, June 26, 2018

Wrapped Journal Tutorial

Hi everyone! During June, the Eileen Hull Inspiration Team is showcasing projects using Eileen's Book Club Chapter 2 collection. The collection is full of versatile dies: borders, journaling cards, pockets and tags, words and  the wonderful Wrapped Journal.

Layers of ink - Wrapped Journal Tutorial by Anna-Karin Evaldsson with the Wrapped Journal Book Club 2 die by Eileen Hull Sizzix.

As you know, I love to make my own journals, mini-books and notebooks and I was looking forward to using the Wrapped Journal die. It makes such a chunky journal and it is a great size (4.7 x 5.1 in folded). I also like how protected the inserts are, which is great if you are planning to carry the journal around a lot. You can fold it in different ways, or you could simply cut off the part that folds over and make an ordinary notebook. 

Layers of ink - Wrapped Journal Tutorial by Anna-Karin Evaldsson

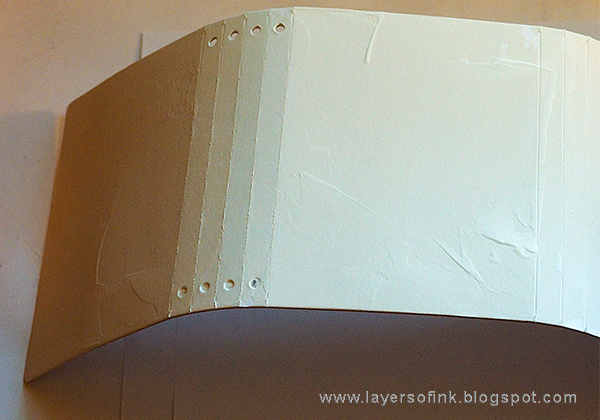
The Wrapped Journal is an XL die, so you need the Extended Cutting Pads. As with all the XL dies, they fit perfectly in the ordinary Big Shot or Vagabond machine. After die cutting, gently fold along the score lines.
Layers of ink - Wrapped Journal Tutorial by Anna-Karin Evaldsson

Coat with a layer of gesso, applied with a palette knife (you can also skip this step for later).

Layers of ink - Wrapped Journal Tutorial by Anna-Karin Evaldsson with Eileen Hull Sizzix Book Club 2

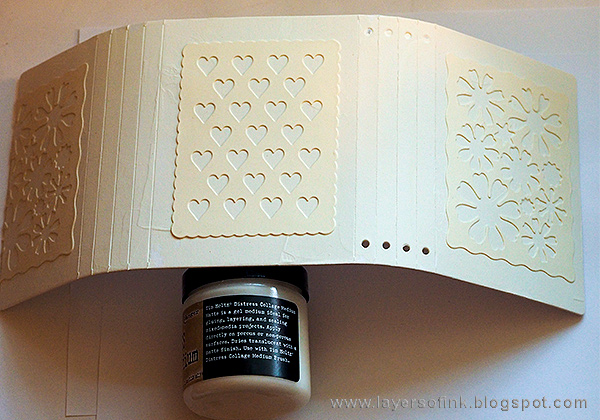
Die cut the gorgeous Journaling Cards Flowers and Leaves and Journaling Cards Hearts and also use the frame that coordinates with the die. These are meant to be journaling cards, but are some of the most versatile dies from Book Club 2. You can use them for backgrounds, or use the individual flowers and hearts. The Flowers & Leaves set also has a background with leaves, and the Hearts one has an additional heart background.
Layers of ink - Wrapped Journal Tutorial by Anna-Karin Evaldsson

I glued them to journal with Matte Medium.
Layers of ink - Wrapped Journal Tutorial by Anna-Karin Evaldsson

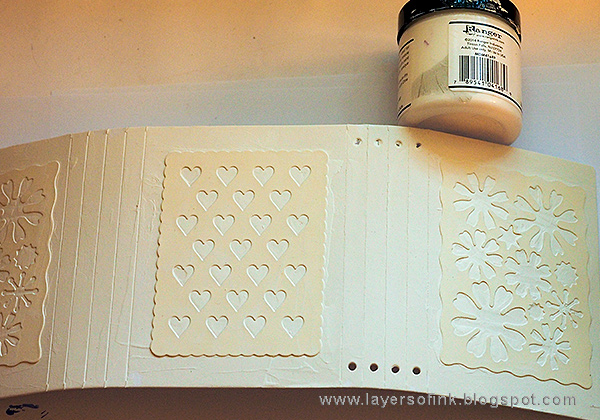
Add a layer of gesso on top - this is why you could have skipped the gesso above, but at that stage I hadn't decided what to do for the background yet.

Layers of ink - Wrapped Journal Tutorial by Anna-Karin Evaldsson

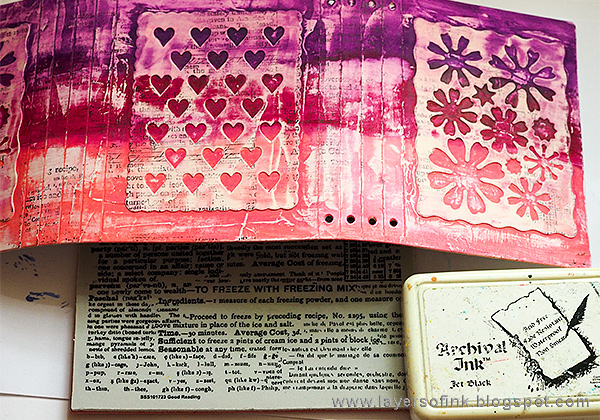
Pick any acrylic colors that you like and paint the journal. I decided to use three Dina Wakley shades of purple/pink and paint in an ombre fashion. Before the paint was completely dry, I rubbed quite a lot of it off with slightly moist paper towels. This step creates nice texture and makes the pattern stand out better.
Layers of ink - Wrapped Journal Tutorial by Anna-Karin Evaldsson

Stamp randomly with a text background stamp.
Layers of ink - Wrapped Journal Tutorial by Anna-Karin Evaldsson

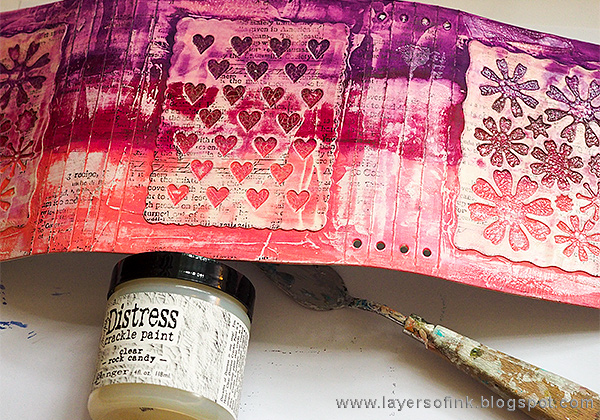
I wanted even more texture and smeared Rock Candy Distress Crackle Paint through the die cut pieces. If you press pretty hard, most of the crackle effect will only be visible inside the shapes. I also added some crackle paint here and there on the rest of the cover. Leave to dry.

Layers of ink - Wrapped Journal Tutorial by Anna-Karin Evaldsson

When it is dry, rub Picket Fence Distress Crayon into the cracks. I love how this makes the cracks visible, while they also add a sense of light to the project. If you want a different look, use a brown or black crayon instead.
Layers of ink - Wrapped Journal Tutorial by Anna-Karin Evaldsson

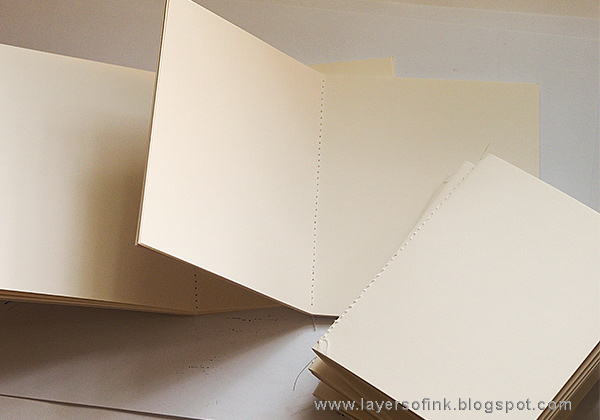
Cut papers for the inserts. Mine are 7.7 x 4.7 in (19.5 x 12 cm) and fold in half. Make four signatures using about six papers in each, depending on how thick the papers are. I like to stitch down the center to hold them together, but you can also leave them lose. Stitching makes it easier if you would want to temporarily remove a signature from the book. You can also staple.

Layers of ink - Wrapped Journal Tutorial by Anna-Karin Evaldsson

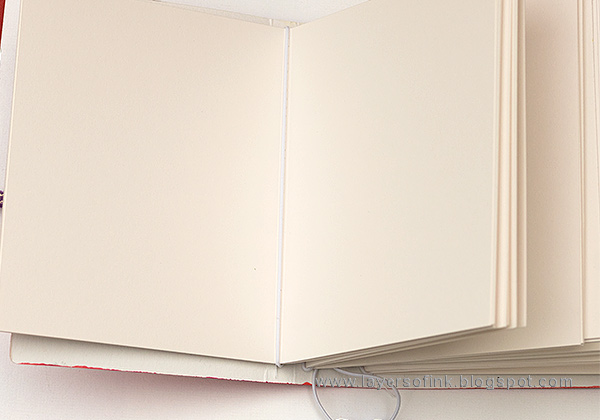
The binding can be done in different ways. I used a piece of elastic and this is what the final result looks like. You can also bind each signature separately.
Layers of ink - Wrapped Journal Tutorial by Anna-Karin Evaldsson

Add the signatures under the elastic.
Layers of ink - Wrapped Journal Tutorial by Anna-Karin Evaldsson

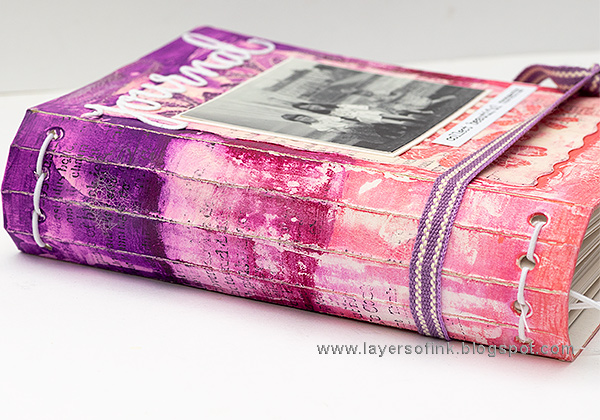
Here you can see what the binding looks like along the spine.
Layers of ink - Wrapped Journal Tutorial by Anna-Karin Evaldsson

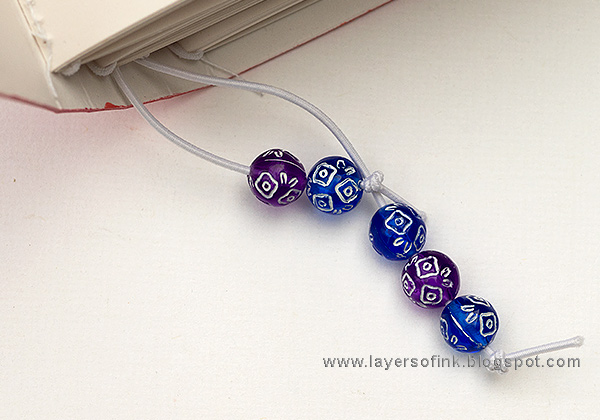
I tied some beads that I found on the floor recently to the ends of the elastic cord (the beads in the kids' bead box have a tendency to end up on the floor). These were pretty, and worked great for this journal.
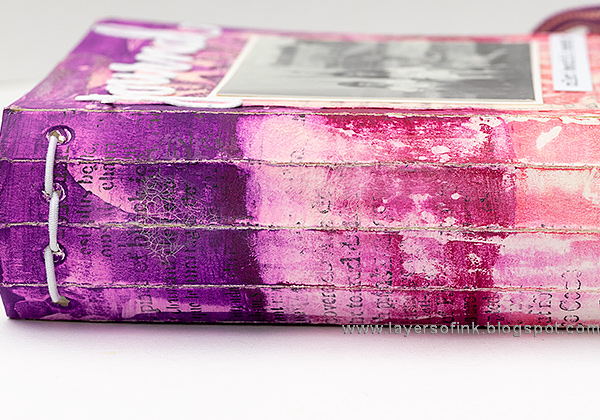
Layers of ink - Wrapped Journal Tutorial by Anna-Karin Evaldsson

Here a better look at the textures from the paint, stamping and crackles.

Layers of ink - Wrapped Journal Tutorial by Anna-Karin Evaldsson

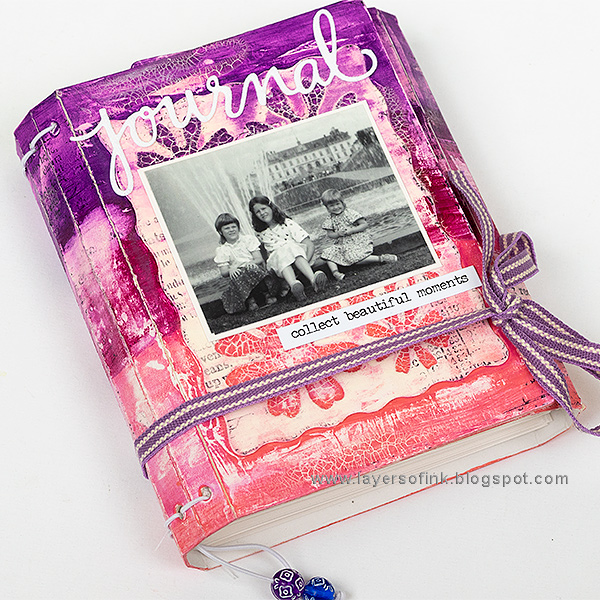
For the front, I used a childhood photo of me and my sisters. You can also wrap the journal the other way around, but since I wanted enough space for the title and the photo, I did it this way.

Layers of ink - Wrapped Journal Tutorial by Anna-Karin Evaldsson

The title was die cut with another Book Club 2 die, namely one of the words from the Journaling Words set.
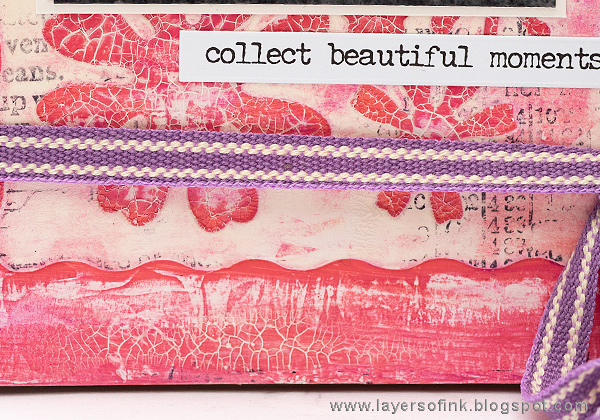
Layers of ink - Wrapped Journal Tutorial by Anna-Karin Evaldsson

I tied my journal with a piece of ribbon, and it happens to be a ribbon that I have had in my stash probably since about the time when the photo on the cover was taken. I found it in my old sewing box.
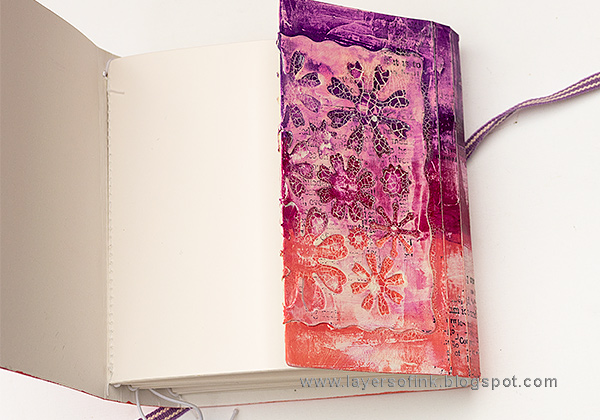
Layers of ink - Wrapped Journal Tutorial by Anna-Karin Evaldsson

Here you can see how the book opens, and how the wrapping works. This side of the journal can be wrapped on top of the front piece, but that didn't work because of the photo I wanted to use.

Layers of ink - Wrapped Journal Tutorial by Anna-Karin Evaldsson

And folded open all the way. I wrapped the edge of the die cut piece around the right had edge, as you can see. But I think it would have looked nicer to cut it off all together. At that stage, I was planning to paint the inside too, but then I decided to leave it plain.

Layers of ink - Wrapped Journal Tutorial by Anna-Karin Evaldsson

Here's the back of the journal, with the pretty heart pattern.
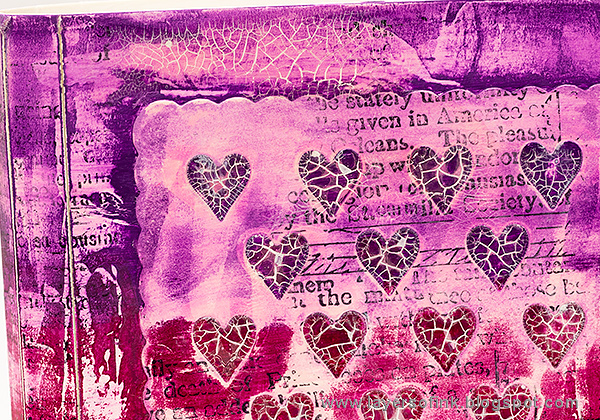
Layers of ink - Wrapped Journal Tutorial by Anna-Karin Evaldsson

The white crayon makes a big difference and makes the cracks much more visible.
 Layers of ink - Wrapped Journal Tutorial by Anna-Karin Evaldsson

You can skip the text stamp, but I like the extra texture it gives and that it kind of promises more words on the inside of the journal.

Layers of ink - Wrapped Journal Tutorial by Anna-Karin Evaldsson

The flowers on this die are really pretty and I am looking forward to making something with the leftover flower pieces.
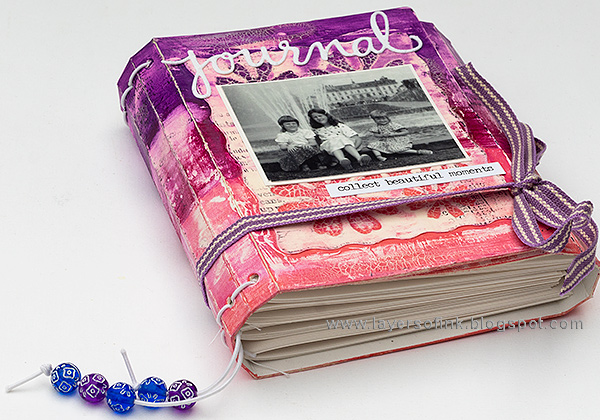
Layers of ink - Wrapped Journal Tutorial by Anna-Karin Evaldsson

As you can see, the journal is nice and chunky.
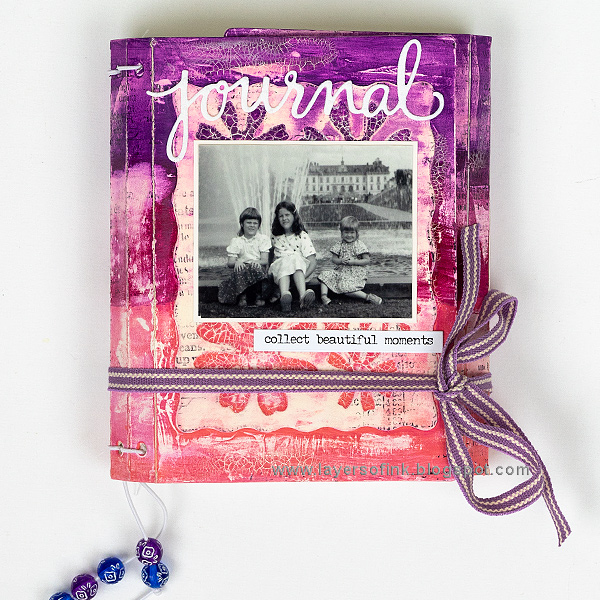
Layers of ink - Wrapped Journal Tutorial by Anna-Karin Evaldsson

The wrapped journal is a great gift and you can personalize it with a photo, or by using different colors, or perhaps by adding someone's name. There will be more wrapped journals on the blog soon, since I really enjoyed making this one.

Thank you so much for stopping by here today!

Happy crafting!

Anna-Karin

Anna-Karin

Supplies:

* Please note: the links are affiliate links, for which I receive a small percentage of sales generated by the link, at no extra cost to you.


Monday, June 25, 2018

Watercolor Apple Cards Tutorial

Hi and welcome to my blog! I hope your weekend was a nice one! We celebrated Midsummer Eve on Friday with traditional maypole dancing. It was lots of fun and the rain stayed away.


This week at the Simon Says Stamp Monday Challenge Blog we have a Food and Drink theme. Don't miss the lovely project by our June guest designer Christine Bedford with her blog Pearshapedcrafting.

Layers of ink - Blueprint Watercolor Apple Cards Tutorial by Anna-Karin Evaldsson

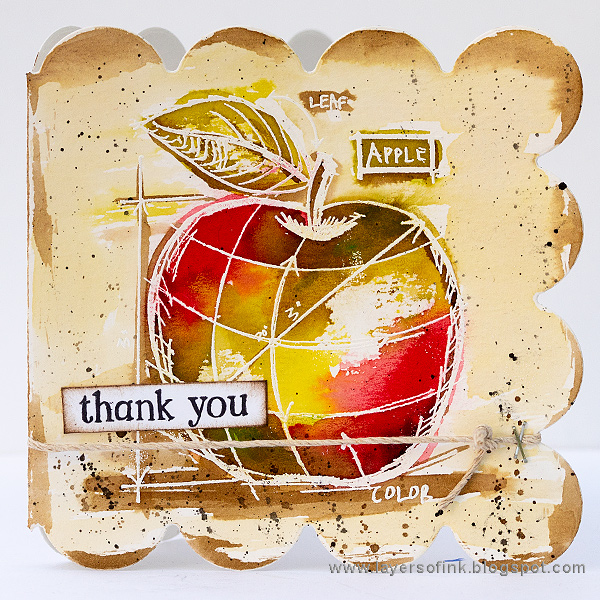
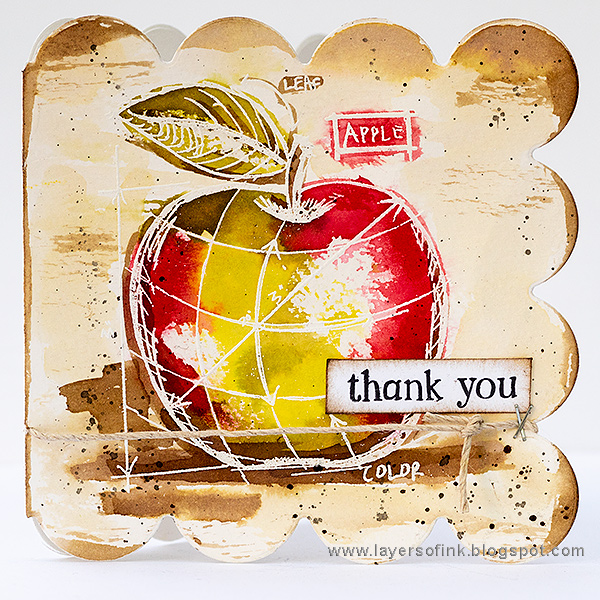
I needed teacher thank you cards this week and made a bunch of blueprint apple cards, using a stamp from Tim Holtz's Schoolhouse Blueprint set. These are quick and easy to make and basically any of the blueprint stamps would work equally well. The cardbase was die cut with the Simon Says Stamp 3 Sided Scallop, which gives instant interest to the card.

Layers of ink - Blueprint Watercolor Apple Cards Tutorial by Anna-Karin Evaldsson

Start by die cutting the cardbase and then white emboss the apple. Watercolor paper works the best for this technique.

Layers of ink - Blueprint Watercolor Apple Cards Tutorial by Anna-Karin Evaldsson

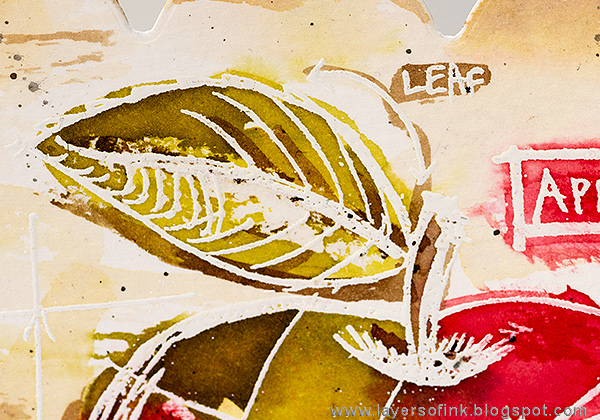
Use a tiny bit of Distress Micro Glaze on the apple and the leaf, in a couple of areas that you want to keep white.

Layers of ink - Blueprint Watercolor Apple Cards Tutorial by Anna-Karin Evaldsson

Smear Distress Inks on a craft sheet, mist with water and pick up with a paint brush. The micro glaze resists the ink. Start with the apple and then do that background and the shadow areas.

Layers of ink - Blueprint Watercolor Apple Cards Tutorial by Anna-Karin Evaldsson

I wanted the red areas of the apple to be more red, and used a Candied Apple Distress Crayon to deepen the shade of red from the watercoloring.

Layers of ink - Blueprint Watercolor Apple Cards Tutorial by Anna-Karin Evaldsson

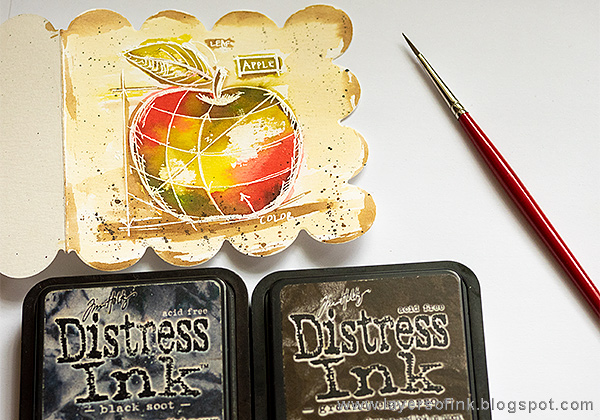
Smear Black Soot and Ground Espresso on a craft sheet, mist with water and pick up with a paint brush. Tap the brush to create fine splatters.

Layers of ink - Blueprint Watercolor Apple Cards Tutorial by Anna-Karin Evaldsson

You can also add shadows to the leaf and parts of the apple itself, which makes it look more dimensional. These cards are quick to make and a whole set of them would work great as a gift.

Layers of ink - Blueprint Watercolor Apple Cards Tutorial by Anna-Karin Evaldsson

Here you can see the resist effect better, as well as the darker red created with the crayon.

Layers of ink - Blueprint Watercolor Apple Cards Tutorial by Anna-Karin Evaldsson

The sentiment comes from the SSS Thank you Teacher set.

Layers of ink - Blueprint Watercolor Apple Cards Tutorial by Anna-Karin Evaldsson with Tim Holtz Blueprint stamps

Don't worry about coloring inside the lines on this project. In fact, I colored outside the lines on purpose, so that the white embossing would be more visible.

Layers of ink - Blueprint Watercolor Apple Cards Tutorial by Anna-Karin Evaldsson

Pierce a hole in the spine of the card and tie a piece of twine across it.

Layers of ink - Blueprint Watercolor Apple Cards Tutorial by Anna-Karin Evaldsson with SSS 3 Sided Scallop die

I made even more of these, but I had to give a couple away before I had time to take the photos.

I hope you will join us this week in our Food and Drink challenge. As always, you have a chance to win a $50 gift voucher to do some fun shopping at Simon Says Stamp. You have until next Monday 8am Ohio time. 1pm UK time, 2 pm CET to join in.


Don't forget to follow Simon Says Stamp on Instagram, they post great stuff daily. 


Do you use Instagram? If so please add #sssmchallenge so we can see your entries there too.


Thank you for taking the time to stop by my blog today!  

Happy crafting!

Anna-Karin

Supplies:

* Please note: the links are affiliate links, for which I receive a small percentage of sales generated by the link, at no extra cost to you.


Monday, June 18, 2018

Scenic Train Card Tutorial

Hi everyone! I hope you had a fun weekend! We had a lovely swim in a lake during a soft summer rain. The water is really warm because the weather has been good for such a long time all ready. There was also the very first sleepover, which went really well, and Leo has been playing with his new airplane and a bunch of spiders. His favorite spider is a green glittery one. 


This week at the Simon Says Stamp Monday Challenge Blog we have a Transport It theme. Don't miss the wonderful transportation project by our June guest designer Christine Bedford with her blog Pearshapedcrafting.

Layers of ink - Scenic Train Card Tutorial by Anna-Karin Evaldsson

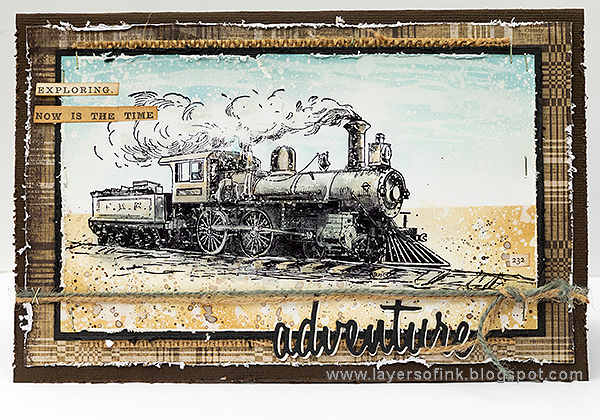
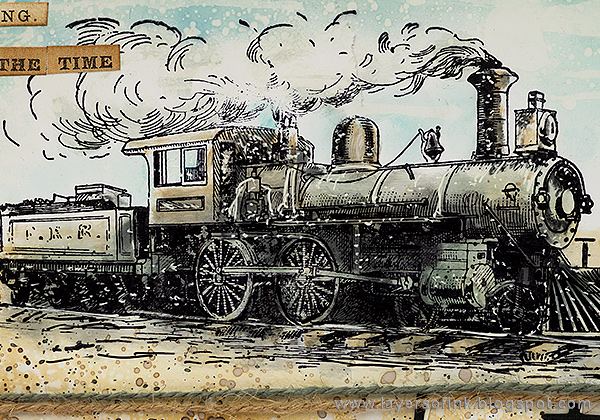
The other day when I needed a card, I realized that my 'general purpose' cards, which work for almost any occasion, were in short supply, so for this week I thought I'd make one. It's a scenic stamping card of a train travelling through an open and empty desert. The train and background were colored with Distress Inks, and it is easy to do. I used Ranger's Specialty Stamping Paper, which is a lovely matte coated paper, but you can also do the same technique on glossy cardstock, and on some white papers (depending on how smoothly the ink blends on the paper).

Layers of ink - Scenic Train Card Tutorial by Anna-Karin Evaldsson with Tim Holtz stamps

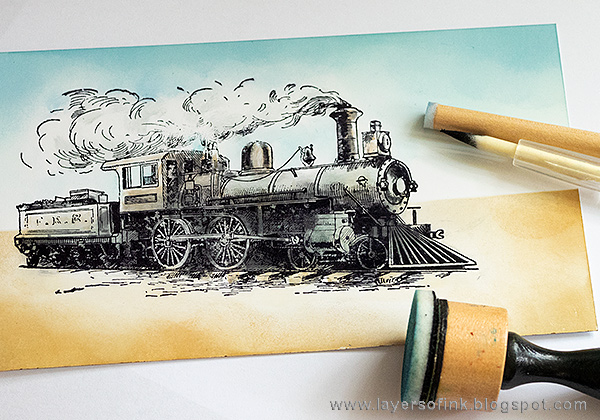
Start by stamping the train from Tim Holtz's On the Railroad set, on Specialty Stamping Paper with Jet Black Archival ink. I used the new Detail Blending tools together with Craft Nibs to color the train, with grey, brown and black shades. Make sure to color some parts of the train darker, to create shadows and dimension. For the background, I placed a piece of printer paper along the horizon line and used that as a mask. Start with the lightest shade of ink and gradually build up darker colors.

Layers of ink - Scenic Train Card Tutorial by Anna-Karin Evaldsson with Ranger Specialty Stamping paper

One of the really nice things with Specialty Stamping paper is what happens when you splatter it with water. Cover the train with a piece of paper and splatter the rest of the background with water. Dab with a paper towel and you will get these lovely white splatters.

Layers of ink - Scenic Train Card Tutorial by Anna-Karin Evaldsson

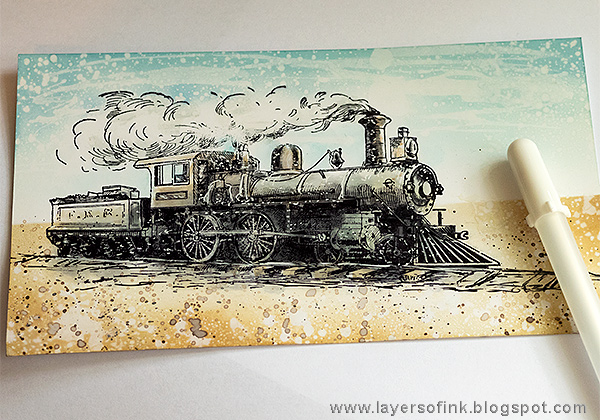
Mask the sky again, smear Ground Espresso and Black Soot ink on a craft sheet, mist with water and pick up with a fine paint brush. Tap the brush to create splatters. I also extended the train tracks with a black pen.

Layers of ink - Scenic Train Card Tutorial by Anna-Karin Evaldsson

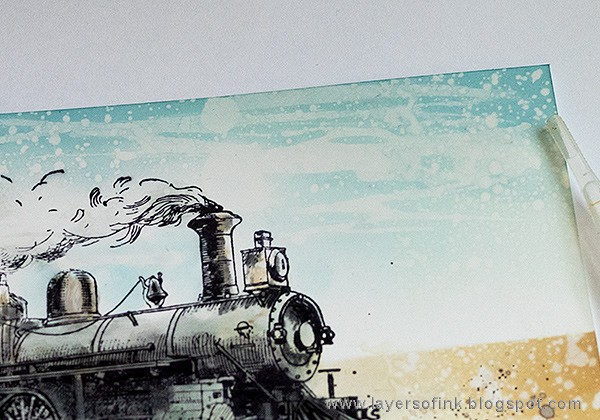
I wanted a wispy cloudy look for the sky and got the idea to drag a pipette filled with water across the paper. It turned out pretty cool.

Layers of ink - Scenic Train Card Tutorial by Anna-Karin Evaldsson

Finally, add highlights to the train with a white gel pen. This step makes a subtle, but big, difference.

Layers of ink - Scenic Train Card Tutorial by Anna-Karin Evaldsson

Here's a closer look at that wispy sky. I am looking forward to using that technique again.

Layers of ink - Scenic Train Card Tutorial by Anna-Karin Evaldsson

I distressed the edges and added a black matte under the main panel. I also added a piece of burlap. Then I layered that on one of Tim Holtz's papers, which reminded me of train tracks.

Layers of ink - Scenic Train Card Tutorial by Anna-Karin Evaldsson

This train stamp is great and I like the combination of an old fashioned train and the sketch look of the stamp. Did you spot that I by mistake tore the paper when I distressed the edges?

Layers of ink - Scenic Train Card Tutorial by Anna-Karin Evaldsson

The sentiment was die cut with the Sizzix Adventure Words Script set, from brown and cream paper.

Layers of ink - Scenic Train Card Tutorial by Anna-Karin Evaldsson

When you splatter Distress Ink on Specialty Stamping paper its gets this cool effect where the ink dries darker around the edges of the splatters. This tiny detail happens to be my favourite part of the card.

I hope you will join us this week in our Transport It challenge. As always, you have a chance to win a $50 gift voucher to do some fun shopping at Simon Says Stamp. You have until next Monday 8am Ohio time. 1pm UK time, 2 pm CET to join in.


Don't forget to follow Simon Says Stamp on Instagram, they post great stuff daily. 


Do you use Instagram? If so please add #sssmchallenge so we can see your entries there too.


Thank you for taking the time to stop by my blog today!  

Happy crafting!

Anna-Karin

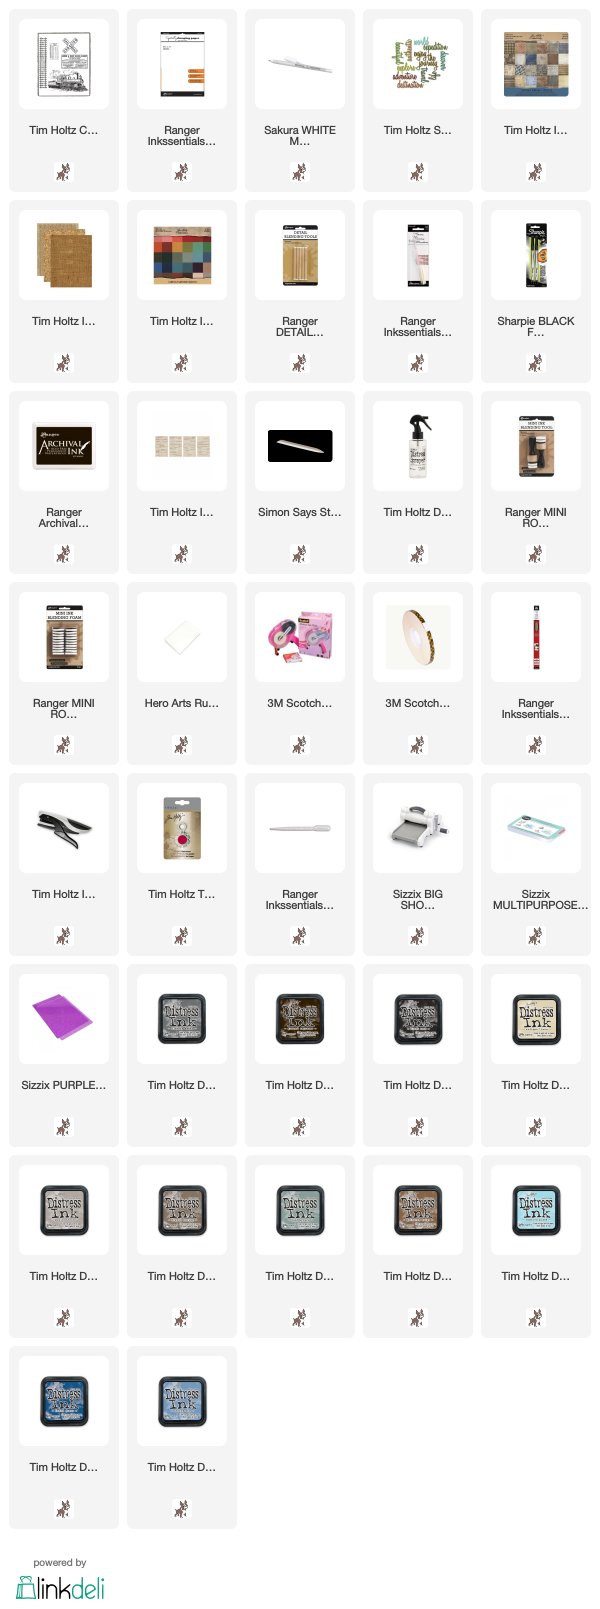
Supplies:

* Please note: the links are affiliate links, for which I receive a small percentage of sales generated by the link, at no extra cost to you.