Friday, May 29, 2020

Flowers on white background

Hello crafters! Today I have a fun tutorial to share, with acrylic flowers on a white background. The flowers were stamped. I got the idea for the tag when I did my Watercolor Flowers on a Black Background recently. This is a similar technique, but the other way around. 
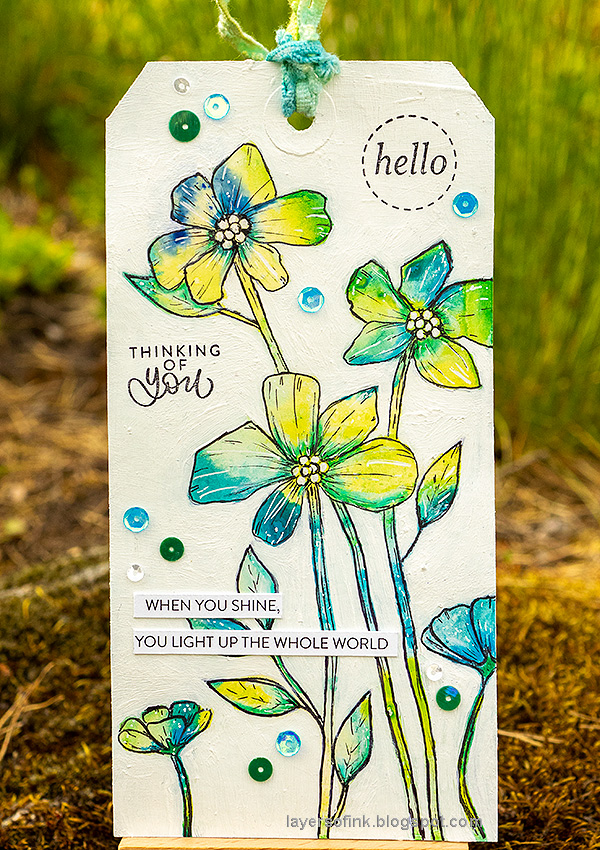
Layers of ink - Flowers on white background tutorial by Anna-Karin Evaldsson. Stamping and acrylic paint.

I used the same stamp sets from Simon Says Stamp as on the black tag, so that you can easily compare them. The technique will also work great with other stamps and you can make a card or use it in an art journal, if you would rather do that. It is also a great way to use acrylic paint backgrounds that you might not be so happy with. All you need is some acrylic paint and stamps.

Layers of ink - Flowers on white and black backgrounds tutorials by Anna-Karin Evaldsson.

Here you can see both tags next to each other. Both techniques give a striking effect and the flowers look bold on the black and white backgrounds. You can find the Watercolor Flowers on Black Background tutorial here. Even though the effect is similar, the techniques for coloring the flowers are different and I used other media on that tag. 

Layers of ink - Flowers on white background tutorial by Anna-Karin Evaldsson.

Start by coating a tag with gesso and when dry paint it with four colors Distress Paint. Mist heavily with water to let the paint run and blend. Set aside to dry. It takes a while, but is well worth the wait.
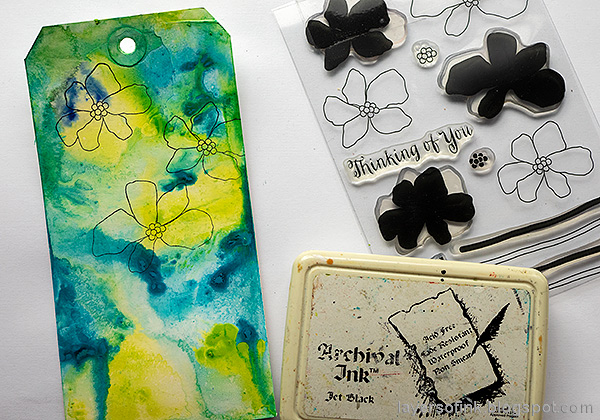
Layers of ink - Flowers on white background tutorial by Anna-Karin Evaldsson. Stamp the flowers.

Stamp the three open flowers from the SSS Artful Flowers set.

Layers of ink - Flowers on white background tutorial by Anna-Karin Evaldsson. Mask and stamp.

Stamp the flowers again on SSS Masking paper and cut out. I used the masks that I made for the black tag. Stamp stems and add leaves and smaller flowers with the Stronger Together set.

Layers of ink - Flowers on white background tutorial by Anna-Karin Evaldsson. Paint the background white.

Remove the masks and start painting the background white. It is best to use an opaque white paint. I used Dina Wakley's white paint. If you use Picket Fence Distress Paint, you might need to add more layers. 

Layers of ink - Flowers on white background tutorial by Anna-Karin Evaldsson.

Continue until you have painted out the entire background. You will probably need to do more than one layer of paint, depending on how dark your background is. Let the layers dry in between. At this stage, the tag might look a little messy, but don't worry, we will fix it.
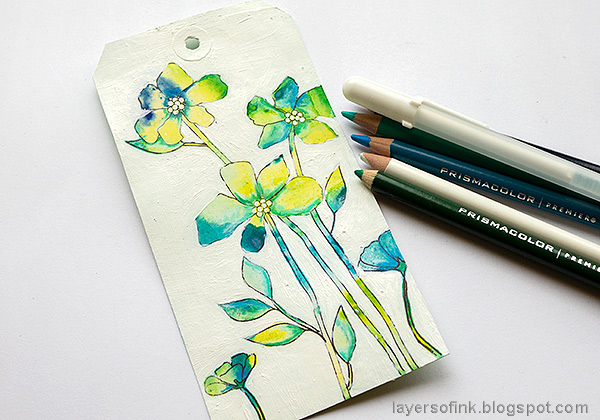
Layers of ink - Flowers on white background tutorial by Anna-Karin Evaldsson. Add details with colored pencils.

Add more color to the flowers with colored pencils. You can also cover up areas which might not look as nice or that need more definition. This gives dimension to the flowers. Blend the colors with a white pencil. I also colored the flower centers with a white gel pen.

Layers of ink - Flowers on white background tutorial by Anna-Karin Evaldsson. Add lines with black pen.

Some of the stamped lines will have been covered when you painted the tag and some will still show, which might look a little messy. Fix it by going over the lines with a black pen. This also gives definition to the flowers and makes them stand out from the background. I added some line work with a black pen and highlights with a white gel pen.

Layers of ink - Flowers on white background tutorial by Anna-Karin Evaldsson.

Here's a close up where you can see the lines a little better. Don't worry about it being perfect.

Layers of ink - Flowers on white background tutorial by Anna-Karin Evaldsson.

I stamped sentiments from the Just Because Word Mix 2 set directly on the background. For an alternative look, leave some of the background unpainted towards the edges, to bring in more color. 

Layers of ink - Flowers on white background tutorial by Anna-Karin Evaldsson.

Sequins were glued to the background, for a little more color. 

Layers of ink - Flowers on white background tutorial by Anna-Karin Evaldsson.

If you look closely you can see the brush-marks from the white painting, but from a distance, you don't think of them, and they also add texture.

Layers of ink - Flowers on white background tutorial by Anna-Karin Evaldsson.

Using colored pencils to add shading and color is quick and easy. This is the third flower from the top and if you scroll up and compare it to the original look, you will see that the colored pencils added life and interest to the flower.
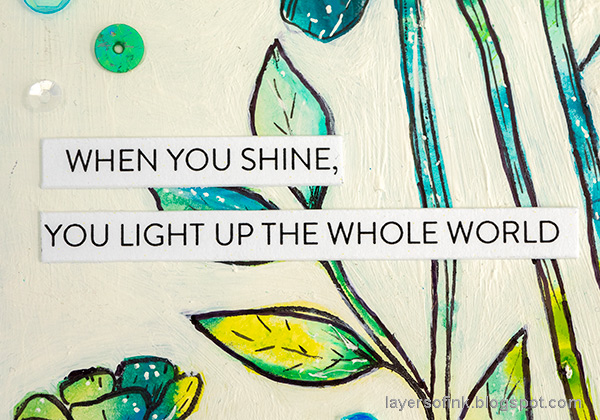
Layers of ink - Flowers on white background tutorial by Anna-Karin Evaldsson.

The sentiment strips were cut from the SSS Sentiment Strips 4 set.

Layers of ink - Flowers on white background tutorial by Anna-Karin Evaldsson.

I hope you enjoyed this tutorial. It is fun to use negative painting to define stamped shapes that would otherwise disappear on a busy background. You don't have to use white paint. This same technique could be done with black paint, or any other color, as long as it isn't exactly the same as the background colors.


Thank you so much for taking the time to visit my blog today!  Have a wonderful weekend!

Happy crafting!

Anna-Karin

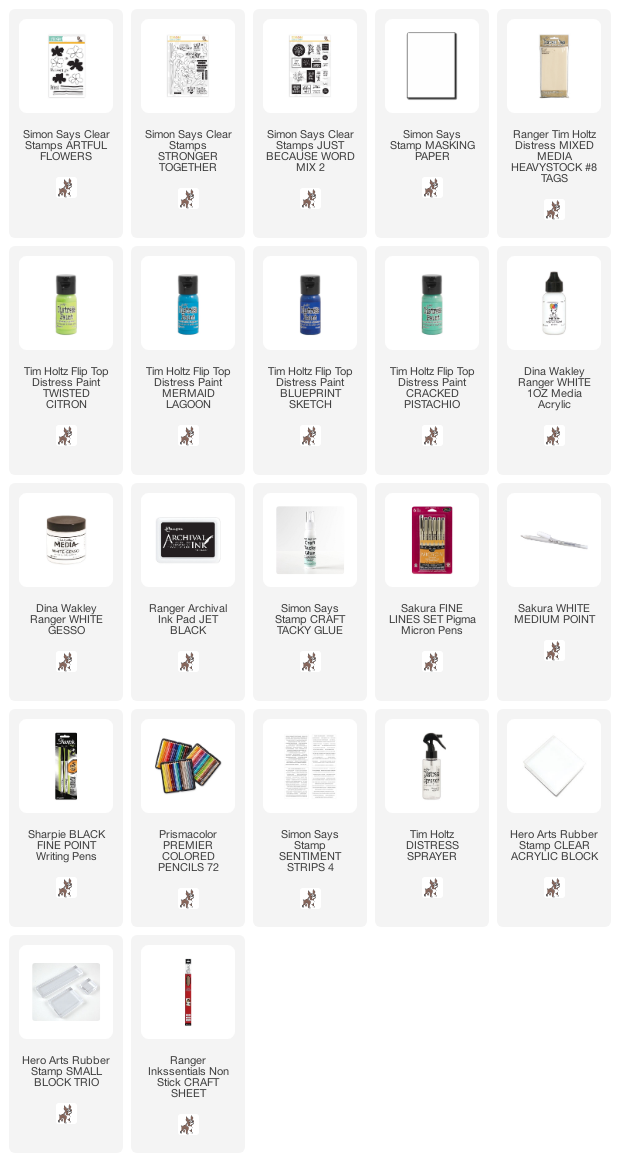
Supplies:

* Please note: the links are affiliate links, for which I receive a small percentage of sales generated by the link, at no extra cost to you.


Monday, May 25, 2020

Circle Shaker Tag Tutorial


Hello friends! I hope you are well! We had a good weekend, with mostly sunny weather. Yesterday, Leo and I went on a partly new walk which included ice cream, cows, a new playground and a fun old fashioned water-pump.

Today I have a shaker tag to share with you, which can easily be turned into a card instead, or you could just use one or two of the techniques and skip the shaker part.


At the Simon Says Stamp Monday Challenge Blog we have a Going Around In Circles theme this week. I love circles, so this was a great theme for me. Don't miss the last project by our May guest designer Cath Wilson, with her gorgeous blog Inky Fingers 

Layers of ink - Circle Shaker Tag Tutorial by Anna-Karin Evaldsson.

I made a circle shaker tag and also included circles in other forms, sequins, doodled circles and stamps. One of the great things about circles is that they can be combined in countless ways, bigger and smaller circles, solid and open circles and circles in any other form. For the background and the windows I used Distress Ink, Distress Oxide Ink and alcohol ink. Let start with the tutorial.

Layers of ink - Circle Shaker Tag Tutorial by Anna-Karin Evaldsson. Die cut with the Repeating Circle die.

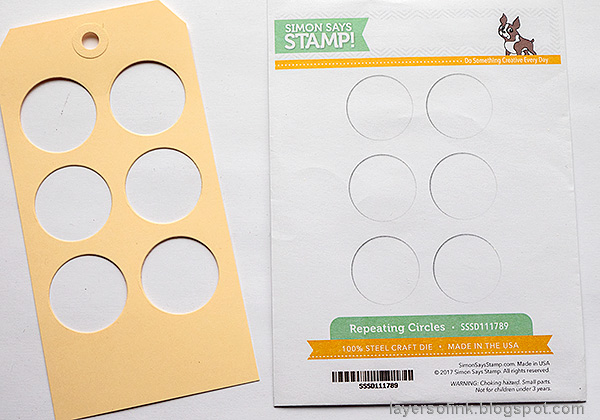
Die cut the SSS Repeating Circles from a tag.

Layers of ink - Circle Shaker Tag Tutorial by Anna-Karin Evaldsson.

Die cut another two tags from Clear Modeling Film or acetate.

Layers of ink - Circle Shaker Tag Tutorial by Anna-Karin Evaldsson. Ink with Distress Ink.

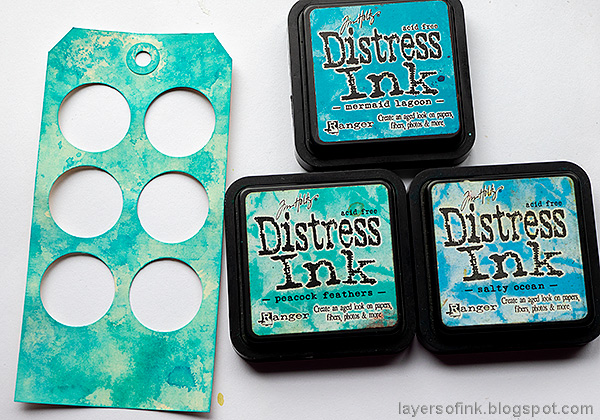
Smear Distress Inks on a non-stick craft sheet and press the tag into the ink. Continue until you are happy with the look.

Layers of ink - Circle Shaker Tag Tutorial by Anna-Karin Evaldsson. Ink with Distress Oxide Ink.

When the Distress Ink is dry, continue in the same way with Distress Oxide ink, but only touching the tag to the ink. Dry the tag in between.

Layers of ink - Circle Shaker Tag Tutorial by Anna-Karin Evaldsson.

Place one of the acetate tags on top of the paper tag so that you see where the window till be. Color with alcohol ink using a felt applicator. Then add a few tiny drops of Alcohol Blending Solution to each circle (this is why we want to see where the windows will be).

Layers of ink - Circle Shaker Tag Tutorial by Anna-Karin Evaldsson.

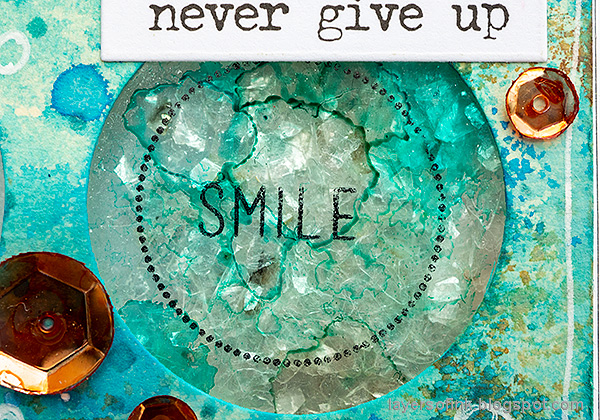
Turn the tag around, place the paper tag on top and stamp circles, flowers and sentiments in the circles.

Layers of ink - Circle Shaker Tag Tutorial by Anna-Karin Evaldsson. Stamp the background.

Stamp the paper tag with a dot stamp and Forget-me-not ink.

Layers of ink - Circle Shaker Tag Tutorial by Anna-Karin Evaldsson.

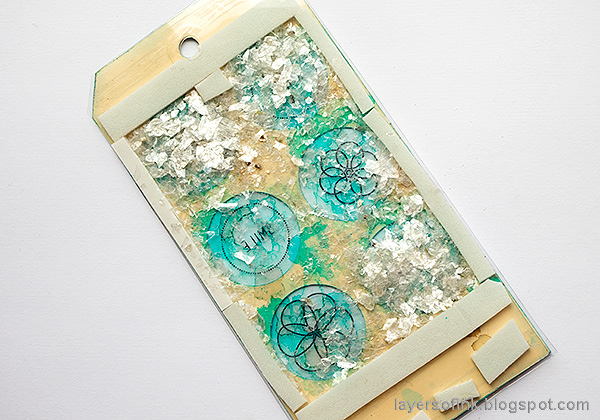
Adhere the colored modeling film tag to the paper tag and then place foam tape around the windows. Fill with Tim Holtz mica flakes and place the second modeling film tag on top to create a sandwich.

Layers of ink - Circle Shaker Tag Tutorial by Anna-Karin Evaldsson.

The tags are backed by a white tag which was misted with homemade glimmer mist. Place a tiny bit of Perfect Pearls into a mini mister and fill with water.

Layers of ink - Circle Shaker Tag Tutorial by Anna-Karin Evaldsson. Color the sequins.

I wanted to repeat the orange from the snail, but didn't have orange sequins. Instead, I colored SSS Moonshine sequins with orange alcohol ink.

Layers of ink - Circle Shaker Tag Tutorial by Anna-Karin Evaldsson.

Doodle circles and dots with a white gel pen.

Layers of ink - Circle Shaker Tag Tutorial by Anna-Karin Evaldsson. Color with Prismacolor pencils.

The cute snail from Under the Sea Animals was stamped on white paper and colored with Prismacolor pencils. Then I added white highlights with the gel pen. Adhere it with foam tape.

Layers of ink - Circle Shaker Tag Tutorial by Anna-Karin Evaldsson.

Doodle a trail for the snail and stamp a sentiment.

Layers of ink - Circle Shaker Tag Tutorial by Anna-Karin Evaldsson.

If you remove the white backing tag, which was just tied to the main tag, the windows are see-through. It looks really cool, but some of the detail is less visible.

Layers of ink - Circle Shaker Tag Tutorial by Anna-Karin Evaldsson. Mica flakes shaker.

With a white surface underneath, you see the inking in the windows better.

Layers of ink - Circle Shaker Tag Tutorial by Anna-Karin Evaldsson.

Shake the tag and the mica flakes move around.

Layers of ink - Circle Shaker Tag Tutorial by Anna-Karin Evaldsson.

The mica flakes gives a really nice shimmer and work great for shakers.

Layers of ink - Circle Shaker Tag Tutorial by Anna-Karin Evaldsson.

If you don't have sequins in the right color, you can always use alcohol ink to color them.  

Layers of ink - Circle Shaker Tag Tutorial by Anna-Karin Evaldsson.

I hope you will join us this week in our Going Around In Circles challenge. You have a chance to win a $25 gift voucher to do some fun shopping at Simon Says Stamp. You have until next Monday 8am Ohio time. 1pm UK time, 2 pm CET to join in.


Don't forget to follow Simon Says Stamp on Instagram, they post great stuff daily. 


Do you use Instagram? If so please add #sssmchallenge so we can see your entries there too.


Thank you so much for taking the time to visit my blog today!  

Happy crafting!

Anna-Karin

Supplies:

* Please note: the links are affiliate links, for which I receive a small percentage of sales generated by the link, at no extra cost to you.


Thursday, May 21, 2020

Rainbow Blocks Page

Hello friends! I hope you are well and getting some crafting time. Today I have a bright and colorful scrapbooking tutorial to share. If you scale it down you can make a card instead.

Here the weather is slowly warming up after a cold May so far. The apple trees are so beautiful with all their flowers.

Layers of ink - Rainbow Blocks Scrapbooking Page by Anna-Karin Evaldsson.

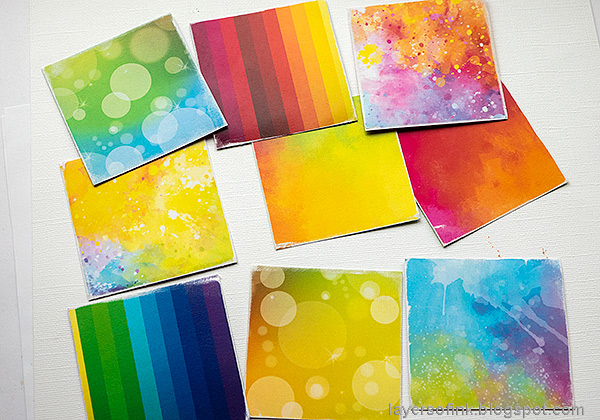
I used double-sided patterned paper from Whimsy Stamps. The set is called Rainbow. They came in the Simon Says Stamp April Card Kit. The kit is sold out, but you can still get the papers. I just love their bright and happy color, the circles, stripes and splatters. When I can't decide which paper to use, I like to do a blocked design so that I can use a lot of papers at once. If you are making a card instead, just use smaller squares.

The journaling is on the back of the layout and is about these corona times, since I felt that I wanted to document it. The photo is from a couple of years ago, but simply happened to be on a my desk, so I used it, even though it wasn't taken recently. It was also taken in my parents garden and I miss them now when we haven't been able to see them for months.

Layers of ink - Rainbow Blocks Scrapbooking Page by Anna-Karin Evaldsson. Whimsy stamps rainbow papers.

Cut nine 3x3 in squares of Rainbow paper and sand the edges slightly to reveal the white core.

Layers of ink - Rainbow Blocks Scrapbooking Page by Anna-Karin Evaldsson. Splatter with Scribble Sticks.

Stitch each square to the background with white thread and stitch a frame around them. I wanted to repeat the splatters on some of the designs and used Scribble Sticks in the same colors as the papers. Dip the tip of a Scribble Stick in water and then flick a paint brush against the tip to create splatters. It is very easy and they dry quickly too. I used colors from Scribble Sticks 1 and Scribble Sticks 2.

Layers of ink - Rainbow Blocks Scrapbooking Page by Anna-Karin Evaldsson. Stitch around the blocks.

Here's a close up of the stitching. Remember to do the stitching before adding embellishments.

Layers of ink - Rainbow Blocks Scrapbooking Page by Anna-Karin Evaldsson. Simon Says Stamp Shimmer Butterfly.

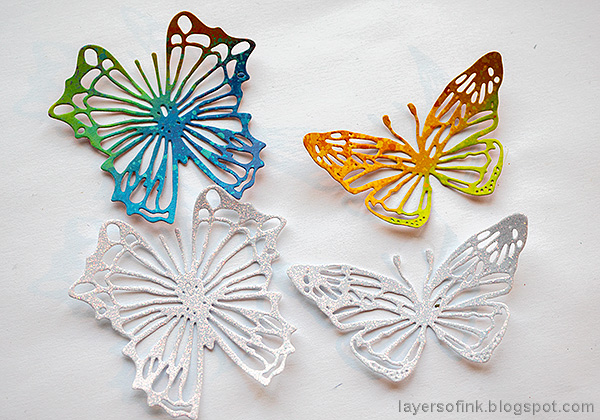
I die cut Simon Says Stamp Shimmer Butterfly from one of the patterned papers in the set and from SSS white glittery paper. I gave the butterflies a trail of pearls.

Layers of ink - Rainbow Blocks Scrapbooking Page by Anna-Karin Evaldsson. Tim Holtz Scribbly Butteflies.

I also die cut two butterflies using Tim Holtz Scribbly Butterflies set. Bright colored patterned papers work so well for die cutting.

Layers of ink - Rainbow Blocks Scrapbooking Page by Anna-Karin Evaldsson.

Here's a look at the Scribble Stick splatters. It is one of my favorite techniques with Scribble Sticks.

Layers of ink - Rainbow Blocks Scrapbooking Page by Anna-Karin Evaldsson. Simon Says Stamp Daisy Stem.

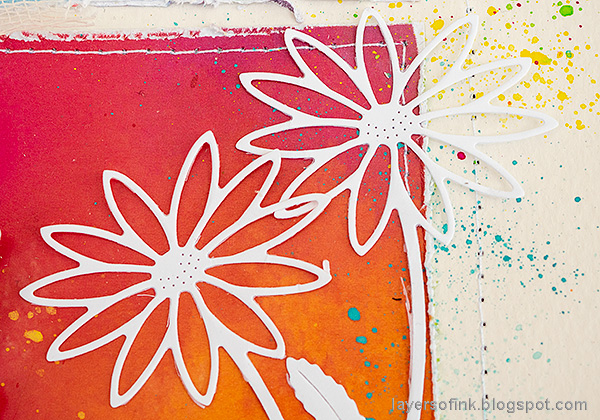
Simple white die cuts look striking against a colorful background. These flowers were die cut with the Simon Says Stamp Daisy Stem.

Layers of ink - Rainbow Blocks Scrapbooking Page by Anna-Karin Evaldsson.

I wanted a little more glittery paper on the page, since I really like the look of this white glittery paper. Flourishes were die cut with Tim's Adorned set. I also added two Prima flowers and a sentiment stamped with the Simon Says Stamp Tabbed Sentiments set. I thought it fit well for the theme.

Layers of ink - Rainbow Blocks Scrapbooking Page by Anna-Karin Evaldsson.

By offsetting the glittery paper a little you get just a hint of glitter under the butterflies. It looks particularly nice when the light hits it.

Layers of ink - Rainbow Blocks Scrapbooking Page by Anna-Karin Evaldsson.

And the blue and green butterfly. Staple the two butterflies together.

Layers of ink - Rainbow Blocks Scrapbooking Page by Anna-Karin Evaldsson.

The title was die cut from white paper using Tim's Alphanumeric Tiny Type Lower.

Layers of ink - Rainbow Blocks Scrapbooking Page by Anna-Karin Evaldsson.

And a second glitter flourish and flower. The glitter paper sheds no glitter at all, which is one of the reasons why I like it very much.


Thank you so much for taking the time to visit my blog today!  

Happy crafting!

Anna-Karin

Supplies:

* Please note: the links are affiliate links, for which I receive a small percentage of sales generated by the link, at no extra cost to you.