Hi friends! I have a sweet foxglove tutorial to share with you today. Foxgloves are such pretty flowers and I always stop to look whenever I see one.
Please note: this post has affiliate links, for which I receive a small percentage of sales generated by the link, at no extra cost to you.

I used products from the Simon Says Stamp STAMPtember® release for this tag. At first I meant to use the foxgloves on a different background, but it was too busy and they disappeared on it. A dry embossed background can add instant interest and texture, while still being neutral.

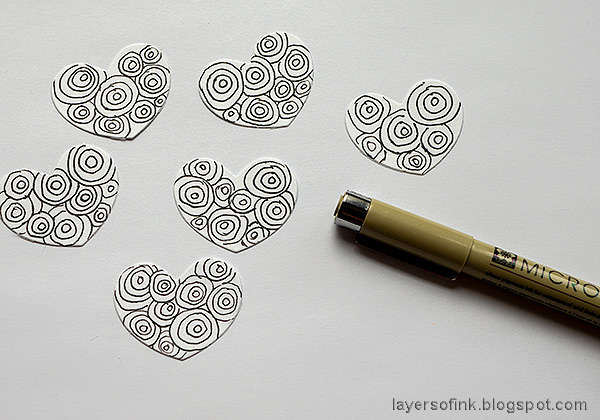
Start by die cutting the Fine Foxglove from watercolor paper. I die cut one batch of extra flowers, you can use even more flowers if you want to.

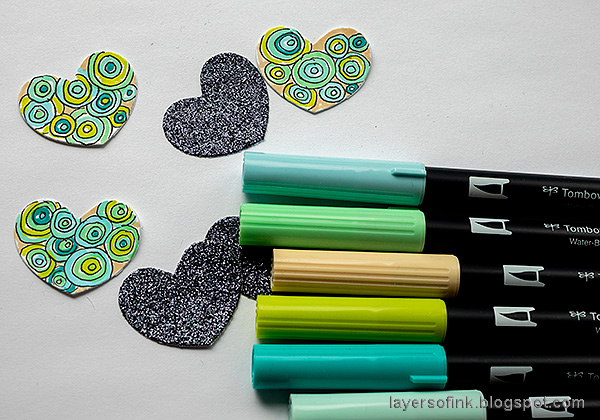
Color the flowers and stems with Tombow markers. I scribbled the markers on a clear acrylic block and picked up with a paint brush. Darker details were added directly with the markers.

Shade the flowers and leaves with ball embosser tools. I used the Tonic Craft Tool set.

Glue the flowers to the stems. I decided to make one of the shorter, which is why there are no flowers at the top of the right-hand flower. I later cut off the green top.

Add highlights with a white gel pen and darker dots and lines with Tombows and a black pen. It is easier to do this step before you shape the flowers, but I forgot.

Apply Distress Ink to a non-stick craft sheet and press a heavystock tag into the ink. Immediately place it in the Triangle Burst 3-D folder and dry emboss. This is such an amazing design.

When dry, ink with Frayed Burlap and Ground Espresso.

Apply a little Sizzix Gold Luster Wax to the tag, with your finger. This step gives a really nice metallic shine.

Tie lace trim to the top. The dry embossed background gave enough interest, while not being too busy for the foxgloves.

I added a little collection of Tim Holtz idea-ology Field Notes ephemera, inking the edges first. Paint was rubbed into the letters on the Thought Token.

Try to think of the shading when coloring the flowers, but aim for a loose look. No need for perfection.

The leaves comes alive with several shades of green, and some white and green lines.

The sentiment comes from the Simon Says Stamp Laugh In Flowers set.


Also, don't miss all the STAMPtember® inspiration, surprises and exclusive products during the month. There has also been a huge Simon Says Stamp release for STAMPtember®, with stamps, dies, stencils, inks and paper products.

Thank you so much for taking the time to stop by here today!
Happy crafting!
Anna-Karin
Supplies:
* Please note: the links are affiliate links, for which I receive a small percentage of sales generated by the link, at no extra cost to you.
* Please note: the links are affiliate links, for which I receive a small percentage of sales generated by the link, at no extra cost to you.