Sunday, February 28, 2021

Stitched Circle Card

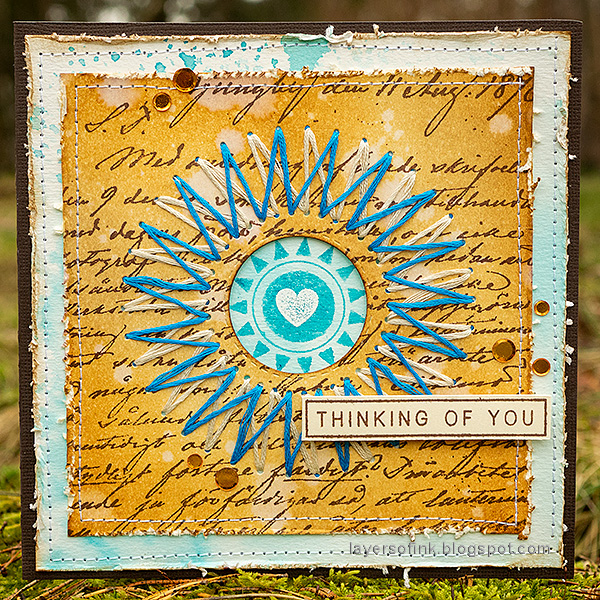
Hello friends! I have a card with stitching to share with you today. There was a time when I used a lot of embroidery floss on my cards, but I haven't done it as much lately. 

Layers of ink - Stitched Circle Card Tutorial by Anna-Karin Evaldsson.

I used to do embroidered designs on my cards often when I started cardmaking, partly since I had a lot of DMC embroidery floss at home. When I saw the Memory Box Stitched Circle die, I thought it would be fun to do a stitched design again. You can do lots of different designs and patterns with the help of this die. 

Layers of ink - Stitched Circle Card Tutorial by Anna-Karin Evaldsson.

Start by inking a heavystock paper with Distress Ink, mist with water and also add some water drops.

Layers of ink - Stitched Circle Card Tutorial by Anna-Karin Evaldsson.

When dry, die cut the Stitched Circle and try to center it on the paper. If it isn't in the center, you can also cut down the paper a bit.

Layers of ink - Stitched Circle Card Tutorial by Anna-Karin Evaldsson. Stamp with Simon Says Stamp Old Letter Background.

Stamp the background with the Simon Says Stamp Old Letter Background stamp and Dark Chocolate ink. If you want more subtle text, use Khaki ink instead.

Layers of ink - Stitched Circle Card Tutorial by Anna-Karin Evaldsson.

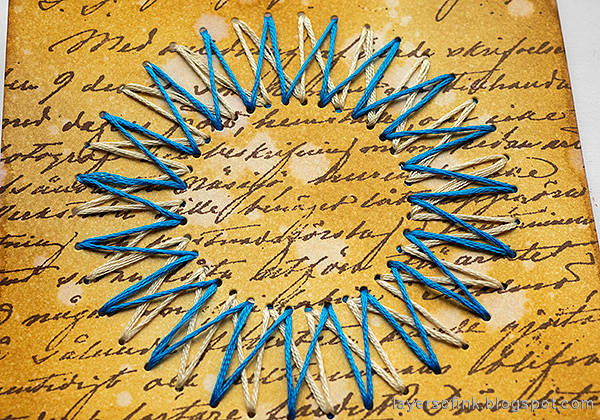
Start with the beige DMC floss. I used a whole strand and every second hole in the design. You will get a different look depending on how much you angle the threads. 

Layers of ink - Stitched Circle Card Tutorial by Anna-Karin Evaldsson.

Continue the same way, but the other way around. 

Layers of ink - Stitched Circle Card Tutorial by Anna-Karin Evaldsson.

Next, take the blue floss and repeat the process, but in the die cut holes that are still empty.

Layers of ink - Stitched Circle Card Tutorial by Anna-Karin Evaldsson.

Finally, repeat the blue thread again, but the other way around. 

Layers of ink - Stitched Circle Card Tutorial by Anna-Karin Evaldsson.

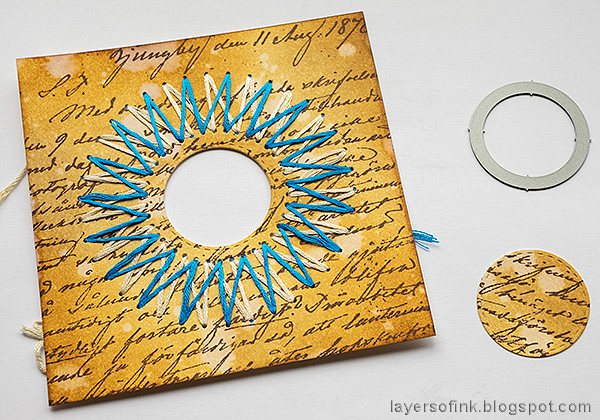
I cut away a circle in the center with a Simon Says Stamp Stitched Circles die.

Layers of ink - Stitched Circle Card Tutorial by Anna-Karin Evaldsson.

As a back drop, I used a piece of watercolor paper which had been inked with Tumbled Glass and Broken China. Apply the inks to a non-stick craft sheet, mist with water and press the paper into the ink. This was a second paper pressed into the ink after another paper had already soaked up most of the ink. That's how I got that light, mottled look.

Layers of ink - Stitched Circle Card Tutorial by Anna-Karin Evaldsson.

Mark the middle of the card with a pencil dot. Stamp the sun from Simon Says Stamp Mix and Match Circles with Mermaid Lagoon ink.

Layers of ink - Stitched Circle Card Tutorial by Anna-Karin Evaldsson.

White emboss a heart from Mix and Match Circles.

Layers of ink - Stitched Circle Card Tutorial by Anna-Karin Evaldsson.

Distress the edges of the panels and stitch to the background with a sewing machine.

Layers of ink - Stitched Circle Card Tutorial by Anna-Karin Evaldsson.

The sentiment comes from Simon Says Stamp Beautiful Butterflies and was stamped with Dark Chocolate ink.

Layers of ink - Stitched Circle Card Tutorial by Anna-Karin Evaldsson.

Experiment to see what designs you can create, by using different colors, thinner threads, and different patterns.


Thank you so much for taking the time to stop by here today! 

Happy crafting!

Anna-Karin

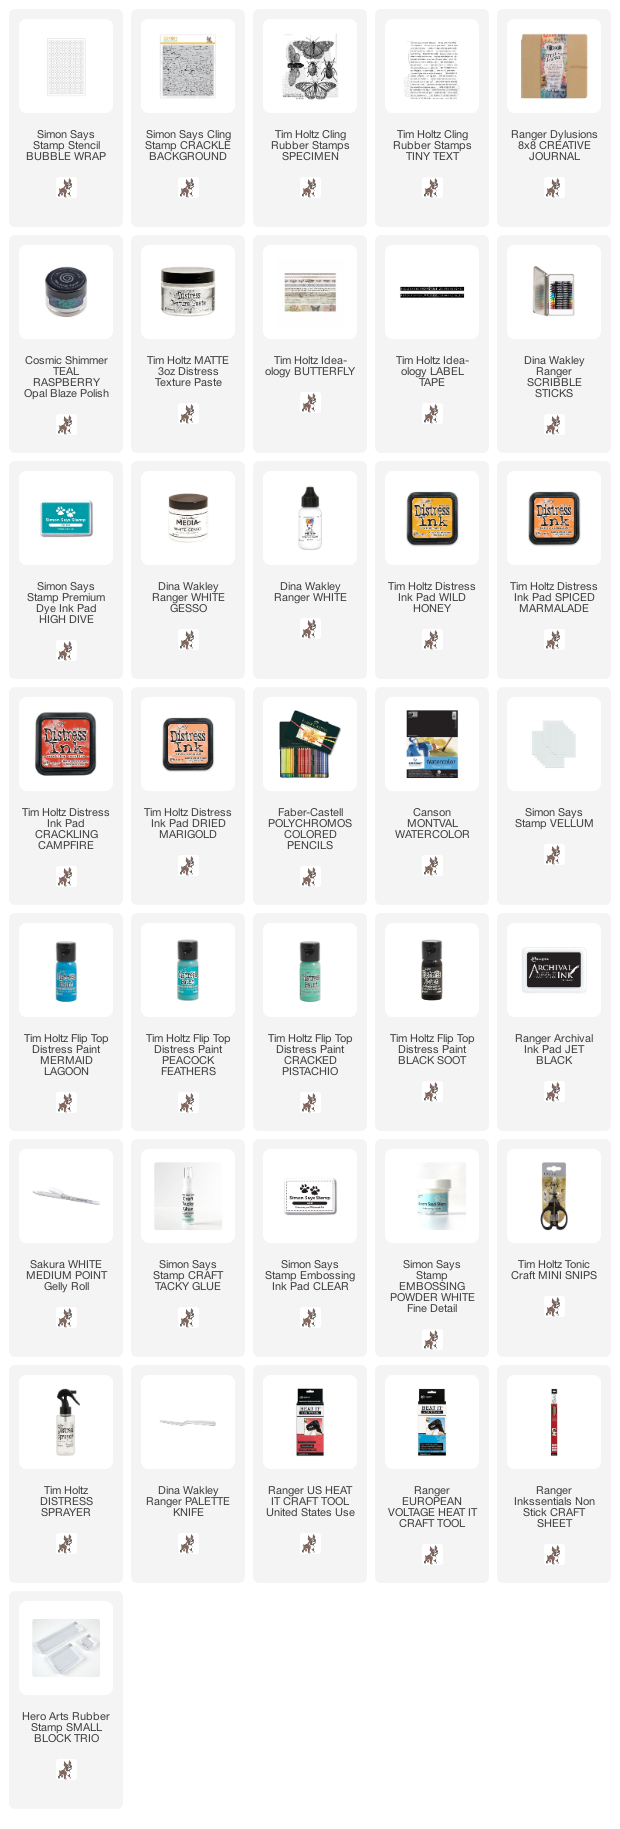
Supplies:

* Please note: the links are affiliate links, for which I receive a small percentage of sales generated by the link, at no extra cost to you.
Friday, February 26, 2021

Shimmering Butterfly Tag

Hello friends! Today I have a tutorial for you with a wax paper resist technique as well as some other fun details. 

Layers of ink - Shimmering Butterfly Tag Tutorial by Anna-Karin Evaldsson.

I was in the mood for a warm yellow-brown project, but you can of course do the techniques with any color. I used the Simon Says Stamp Boho Circle die together with wax paper to get the resist effect in the background. It is pretty subtle and if you want more contrast, work on a lighter background instead. I also used gold foil and Modeling Film on the tag.

Layers of ink - Shimmering Butterfly Tag Tutorial by Anna-Karin Evaldsson.

Ink a tag with Distress Ink.

Layers of ink - Shimmering Butterfly Tag Tutorial by Anna-Karin Evaldsson. Die cut the Simon Says Stamp Boho Circle.

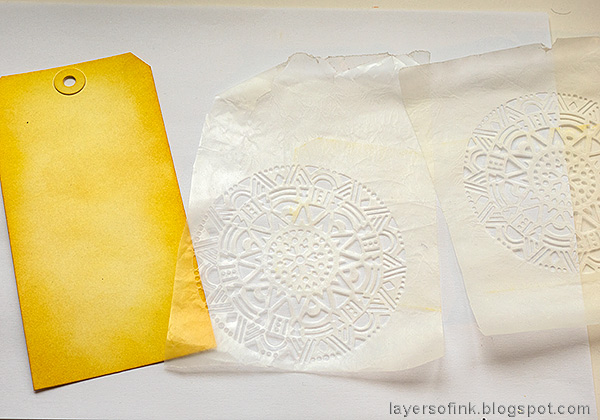
Die cut the Boho Circle. This is an intricate die and it is easier to die cut if you place a piece of wax paper in between the die and the paper. I actually started out planning to use the heavystock die cut to the right, but then decided to use the wax paper instead.

Layers of ink - Shimmering Butterfly Tag Tutorial by Anna-Karin Evaldsson.

Move the wax paper around on the tag until you are happy with the look. Place baking paper above and underneath the tag and then iron on top, without steam. The wax will melt on the paper - but you don't really see it until the next step.

Layers of ink - Shimmering Butterfly Tag Tutorial by Anna-Karin Evaldsson.

Ink the tag with darker shades of Distress Ink. As you can see, the ink is darker on the areas where there were no wax paper, giving you a reversed image of the Boho Circle. 

Layers of ink - Shimmering Butterfly Tag Tutorial by Anna-Karin Evaldsson.

I added texture by dropping a few drops of water on the tag.

Layers of ink - Shimmering Butterfly Tag Tutorial by Anna-Karin Evaldsson. Stamp with Simon Says Stamp Crackle Background.

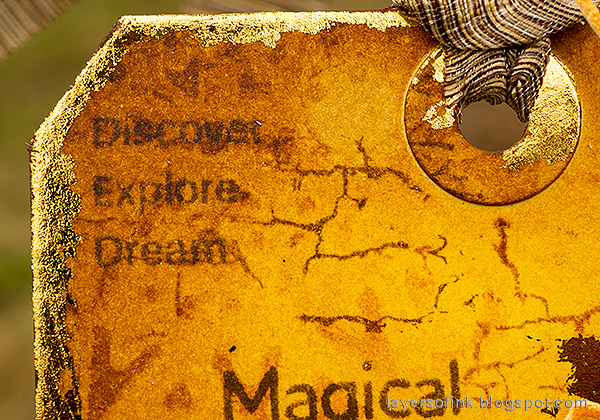
Stamp here and there with the Simon Says Stamp Crackle Background stamp and Vintage Photo ink. 

Layers of ink - Shimmering Butterfly Tag Tutorial by Anna-Karin Evaldsson.

Apply glue around the edges and wait a short while, so that it starts to dry, but is still tacky. Rub gold foil over the glue, with the shiny side up.

Layers of ink - Shimmering Butterfly Tag Tutorial by Anna-Karin Evaldsson.

Stamp butterflies from Simon Says Stamp Beautiful Butterflies on Wendy Vecchi Clearly For Art Modeling Film.

Layers of ink - Shimmering Butterfly Tag Tutorial by Anna-Karin Evaldsson.

Cut them out and turn them around. Apply Valencia and Gold Mixative alcohol ink to the back.

Layers of ink - Shimmering Butterfly Tag Tutorial by Anna-Karin Evaldsson.

Use a heat tool and carefully heat the butterfly, one side at a time. Shape the wings. You can reheat if you are not happy with the look. Modeling Film will hold its shape perfectly when cool. Staple to the background.

Layers of ink - Shimmering Butterfly Tag Tutorial by Anna-Karin Evaldsson.

I stamped words from Simon Says Stamp Forest Scenery and All Seasons Tree on the background with Dark Chocolate ink.

Layers of ink - Shimmering Butterfly Tag Tutorial by Anna-Karin Evaldsson.

Here you can see the resist effect better. I also stitched a little on the background.

Layers of ink - Shimmering Butterfly Tag Tutorial by Anna-Karin Evaldsson.

The Detailed Leaf Cluster was die cut from Memory Box Frosted Glitter paper and I also added some copper sequins.

Layers of ink - Shimmering Butterfly Tag Tutorial by Anna-Karin Evaldsson.

The main sentiment comes from Forest Scenery and was stamped with Dark Chocolate ink.

Layers of ink - Shimmering Butterfly Tag Tutorial by Anna-Karin Evaldsson.

The combination of the very shiny gold foil, glitter paper, metallic alcohol ink under the butterfly and the warm shades makes for an interesting looking tag.


Thank you so much for taking the time to stop by here today! 

Happy crafting!

Anna-Karin

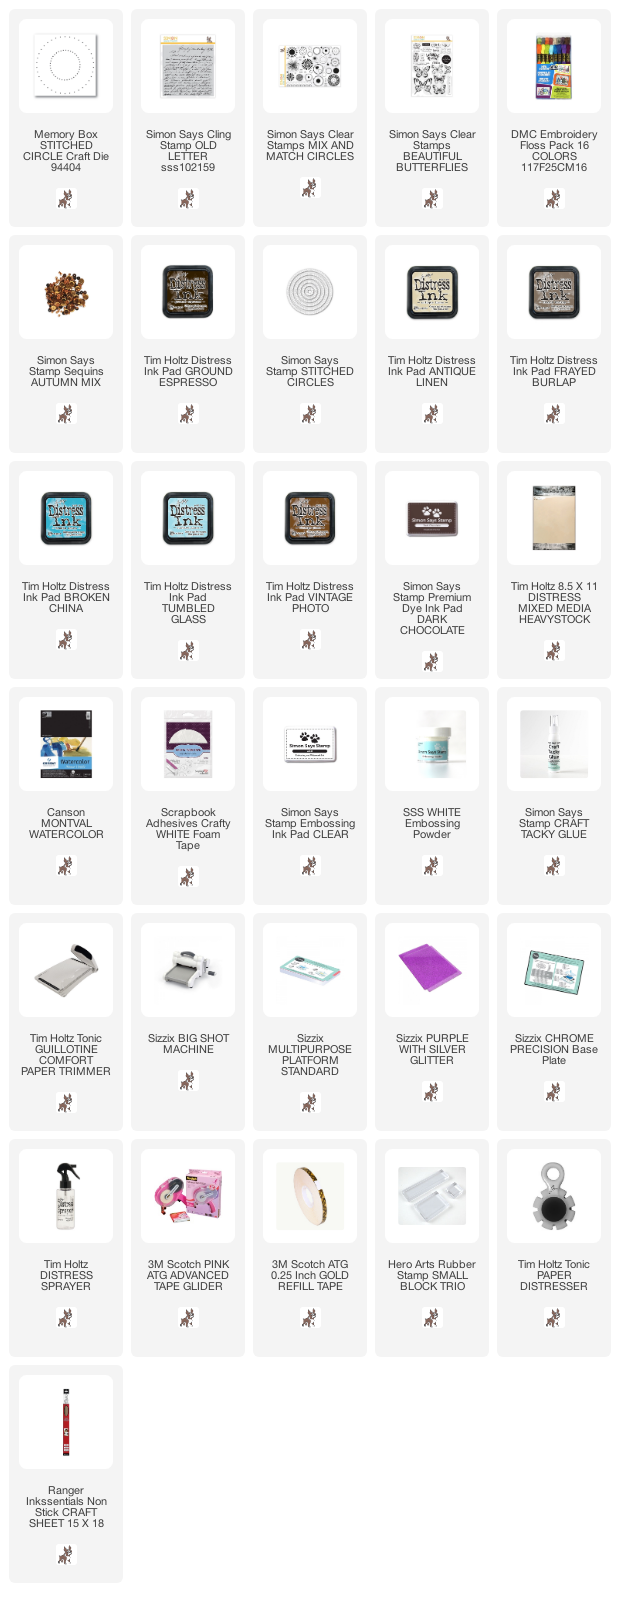
Supplies:

* Please note: the links are affiliate links, for which I receive a small percentage of sales generated by the link, at no extra cost to you.

Wednesday, February 24, 2021

Embossed Vellum Splitcoast Tutorial

 Hi friends! I hope you are well! Today I am happy to have a guest tutorial over at Splitcoaststampers. 


Layers of ink - Embossed Vellum Tutorial by Anna-Karin Evaldsson.

Vellum has been one of my favorite surfaces ever since I started crafting. It's translucent qualities adds a wonderful layered effect to projects and you can do so many different techniques with vellum. In this tutorial, we'll do both heat and dry embossing on vellum, as well as coloring it with colored pencils.


Here is the video showing you the process. You can also watch it directly on YouTube here. You will also find step-by-step photos and instructions over at Splitcoaststampers.


Layers of ink - Embossed Vellum Tutorial by Anna-Karin Evaldsson. Stamp with Simon Says Stamp Circle Pattern Background.

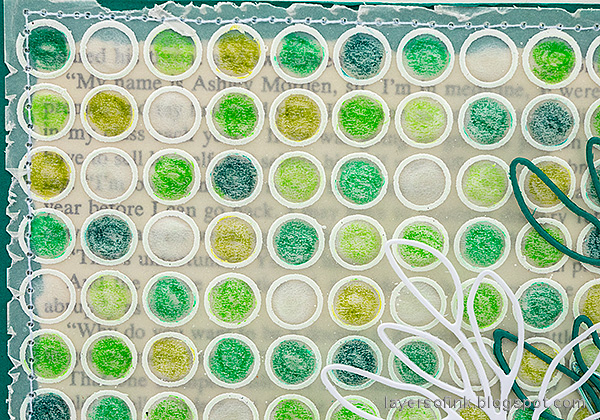
I used the Simon Says Stamp Circle Pattern Background for the card. You can also try other background stamps.

Layers of ink - Embossed Vellum Tutorial by Anna-Karin Evaldsson. Stamp with Simon Says Stamp Circle Pattern Background.

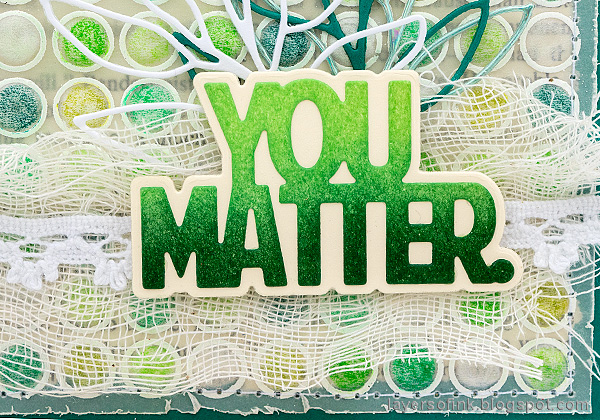
The dry embossing creates a cool texture on the colored pencil dots, with the white from the background showing through. 

Layers of ink - Embossed Vellum Tutorial by Anna-Karin Evaldsson. Stamp with Simon Says Stamp Circle Pattern Background.

It is hard to see, but the dots are embossed in the sense of standing out from the paper. It gives a really nice feel to the card.

Layers of ink - Embossed Vellum Tutorial by Anna-Karin Evaldsson. Stamp with Simon Says Stamp Circle Pattern Background.

The You Matter die by Simon Says Stamp is such a great card sediment. 

Layers of ink - Embossed Vellum Tutorial by Anna-Karin Evaldsson. Stamp with Simon Says Stamp Circle Pattern Background.

As a finishing touch, I die cut the Leafy Branch die from white, Peacock Teal and Holographic Aqua paper.


Thank you so much for stopping by here today! 

Happy crafting!

Anna-Karin

Supplies:

* Please note: the links are affiliate links, for which I receive a small percentage of sales generated by the link, at no extra cost to you.


Monday, February 22, 2021

Brave Wings Art Journal Page

Hello friends! I hope you are well and that you had a good weekend! Today I have an art journal page to share with you.


This week we have an 'Anything but a card' theme at the Simon Says Stamp Monday Challenge blog. Don't miss the last project by our February guest designer Estelle Palumbo.
Layers of ink - Brave Wings Art Journal Page Tutorial by Anna-Karin Evaldsson.

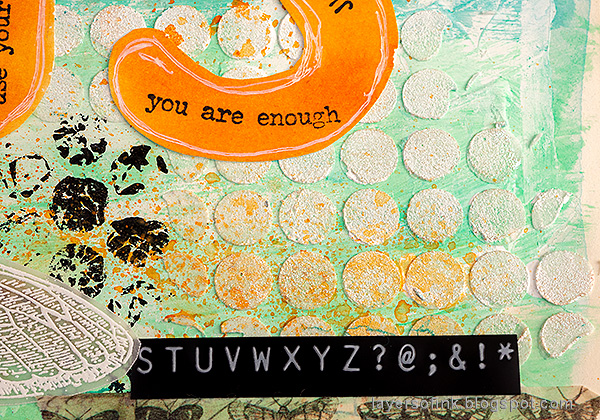
I made an art journal page this week and it is a double page in my 8 x 8 in Dylusions journal. I wanted large lettering on this page to match the large night butterflies. Lots of texture in the background too.

Layers of ink - Brave Wings Art Journal Page Tutorial by Anna-Karin Evaldsson.

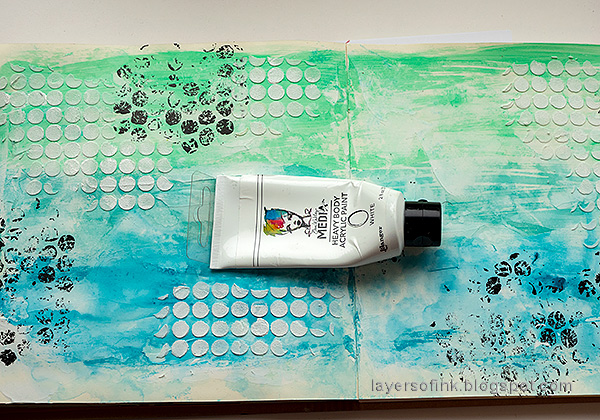
Coat the paper with gesso first and then paint with Distress Paint. This was a page where I had used up left-over paint. Stamp with bubble wrap and black paint.

Layers of ink - Brave Wings Art Journal Page Tutorial by Anna-Karin Evaldsson.


Layers of ink - Brave Wings Art Journal Page Tutorial by Anna-Karin Evaldsson.

Paint the dots with white paint. You can also skip this step or mix a little white paint into the paste before doing the previous step.

Layers of ink - Brave Wings Art Journal Page Tutorial by Anna-Karin Evaldsson.

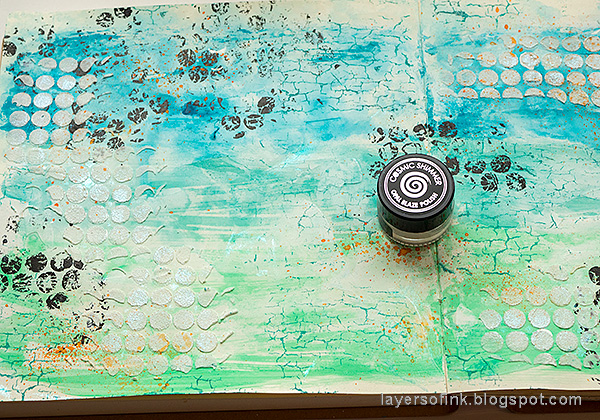
Stamp here and there with the Simon Says Stamp Crackle Background stamp and High Dive ink.

Layers of ink - Brave Wings Art Journal Page Tutorial by Anna-Karin Evaldsson.

For a little bit of orange, I added splatters with an orange Scribble Stick. Dip in water and flick a paint brush against it to create splatters.

Layers of ink - Brave Wings Art Journal Page Tutorial by Anna-Karin Evaldsson.

Finally, I added some Teal Raspberry Opal Blaze Polish to the paste dots.

Layers of ink - Brave Wings Art Journal Page Tutorial by Anna-Karin Evaldsson. Draw the letters.

I didn't have dies large enough for the letters so I decided to draw them. Draw the letters with a pencil on watercolor paper.

Layers of ink - Brave Wings Art Journal Page Tutorial by Anna-Karin Evaldsson. Paint the letters with ink.

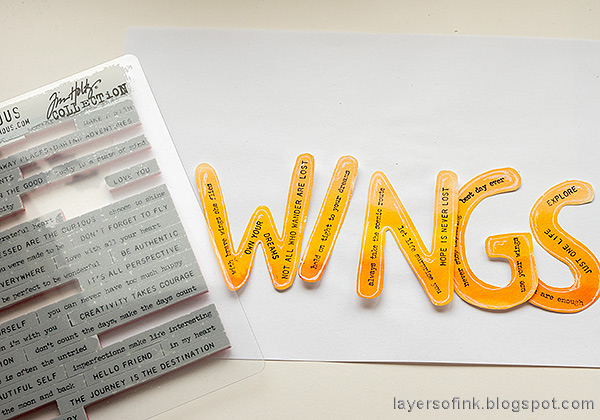
Watercolor them with Distress Ink. Smear the inks on a craft sheet, mist with water and pick up with a paint brush. I worked from light at the top to darker orange at the bottom, for an ombre effect.

Layers of ink - Brave Wings Art Journal Page Tutorial by Anna-Karin Evaldsson.

Cut out and add highlights and some lines with a white gel pen.

Layers of ink - Brave Wings Art Journal Page Tutorial by Anna-Karin Evaldsson.

Stamp the letters with sentiments from Tim Holtz Tiny Text set.

Layers of ink - Brave Wings Art Journal Page Tutorial by Anna-Karin Evaldsson.

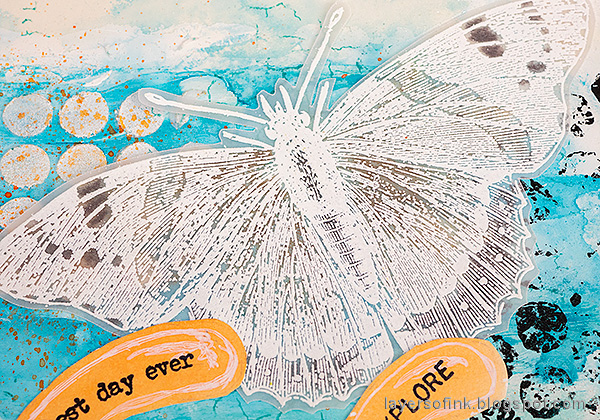
White emboss the night butterflies from Tim's Specimens set on vellum.

Layers of ink - Brave Wings Art Journal Page Tutorial by Anna-Karin Evaldsson.

Color them at the back with colored pencils. I used Faber-Castel Polychromos.

Layers of ink - Brave Wings Art Journal Page Tutorial by Anna-Karin Evaldsson.

When you turn the butterflies around, you'll get a soft coloring showing through the vellum.

Layers of ink - Brave Wings Art Journal Page Tutorial by Anna-Karin Evaldsson.

On the ones with more detail and less open space, not much of the color will show, but it still adds interest.

Layers of ink - Brave Wings Art Journal Page Tutorial by Anna-Karin Evaldsson.

Stamping on the letters was fun and the stamps fit well, even though I had not planned to stamp on the letters initially.

Layers of ink - Brave Wings Art Journal Page Tutorial by Anna-Karin Evaldsson.

I really like the sayings in the Tiny Text set.

Layers of ink - Brave Wings Art Journal Page Tutorial by Anna-Karin Evaldsson.

The Crackle Background stamp looks great with colored ink too and that gives the crackles a softer appearance than if they would be stamped with black ink.

Layers of ink - Brave Wings Art Journal Page Tutorial by Anna-Karin Evaldsson.

I also added a few strips of design tape.

Layers of ink - Brave Wings Art Journal Page Tutorial by Anna-Karin Evaldsson.

I hope you can see the effect of the polish a little better here. It adds a great subtle shine to the dots.

I hope you will join us this week in our Anything But a Card challenge. You have a chance to win a $25 gift voucher to do some fun shopping at Simon Says Stamp. You have until Monday 8am Ohio time. 1pm UK time, 2 pm CET to join in.


Do you use Instagram? If so please add #sssmchallenge so we can see your entries there too.


Thank you so much for taking the time to stop by here today! 

Happy crafting!

Anna-Karin

Supplies:

* Please note: the links are affiliate links, for which I receive a small percentage of sales generated by the link, at no extra cost to you.