Showing posts with label Pop-Up. Show all posts

Monday, November 16, 2020

Winter House Easel Card Tutorial

Hello friends! I hope you had a good weekend! Today I have a winter house easel card to share with you, which also doubles as Christmas decor, even though it folds flat. 


At the Simon Says Stamp Monday Challenge Blog we have a Happy Holidays theme. Perfect for this time of the year. I think I did my last autumn project this weekend and will now move on to more wintery projects. Don't miss our November guest designer's beautiful project, at Laura Cassina aka elaborando on instagram.

Layers of ink - Winter House Easel Card Tutorial by Anna-Karin Evaldsson.

I love interactive and dimensional cards and this winter house easel pop up was so fun to make. Another thing which is a favorite of mine is to create snow in different ways and here I used glitter paper, glitter gel, sequins and texture paste. The base for the house is the wonderful Poppy Stamps Winter House Pop Up Easel set.


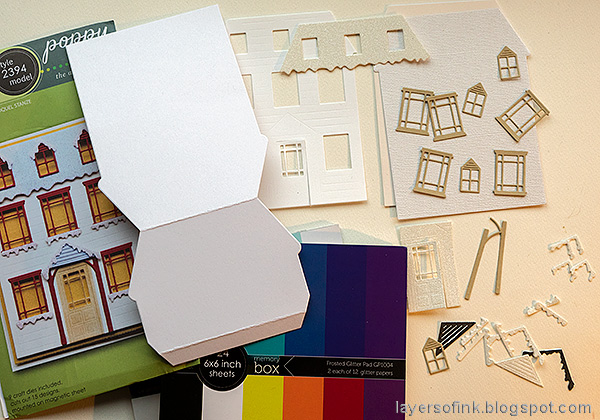
Layers of ink - Winter House Easel Card Tutorial by Anna-Karin Evaldsson. Die cut the Poppy Stamp Winter Easel Pop Up Card.

The Winter House Pop Up Easel die set has 15 designs and the dies come on a magnetic sheet, making them easy to store and keep together. I die cut the base from heavy white paper, the main house from Neenah cardstock and the solid house from SSS glimmery cardstock and cream cardstock. The roof, door and snow was die cut from Memory Box Frosted Glitter pad and the windows from SSS khaki cardstock. If you have a Sizzix Big Shot or Vagabond, you need to use the Extended Multipurpose Platform and Extended Cutting Pad to die the base, since it is slightly taller than the ordinary Multipurpose Platform.

Layers of ink - Winter House Easel Card Tutorial by Anna-Karin Evaldsson. Stamp with SSS Wood Planks background stamp.

The house was stamped with the SSS Wood Planks Background Stamp and Distress Oxide Antique Linen ink.

Layers of ink - Winter House Easel Card Tutorial by Anna-Karin Evaldsson.

I placed the house back into the die and an embossing ball tool to define and increase the dry embossed pattern. I did the same on the larger window. The windows were very lightly inked around the edges.

Layers of ink - Winter House Easel Card Tutorial by Anna-Karin Evaldsson.

I wanted a warm welcoming light in some of the windows and cut a piece of modeling film. It was colored with Butterscotch and Latte alcohol ink.


Layers of ink - Winter House Easel Card Tutorial by Anna-Karin Evaldsson.

Die cut three trees with the Evergreen Trio die, from white Frosted Glitter Paper. Add a tiny bit of Texture Paste to the branches, for more snow.


Layers of ink - Winter House Easel Card Tutorial by Anna-Karin Evaldsson.

Die cut the Snowy Merry Christmas and the three snowmen from the Snowmen Snowglobe from the white Frosted Glitter Paper. Die cut hats for the snowmen from the brown paper. Add a litte texture paste to the word and the hats and Moon Dust Stickles to the hats.

Layers of ink - Winter House Easel Card Tutorial by Anna-Karin Evaldsson.

Add a little Moon Dust Stickles to the window frames and texture paste to the roof and the small roof above the door.

Layers of ink - Winter House Easel Card Tutorial by Anna-Karin Evaldsson.

Glue all the details to the house and then adhere the modeling film to the back. Adhere with foam tape to the glimmery cardstock solid house, which had already been taped to the cream solid house, for stability. The roof was adhered with another layer of foam tape and so were the snowmen and the small roof above the door. The door is left slightly ajar.

Layers of ink - Winter House Easel Card Tutorial by Anna-Karin Evaldsson.

Add double-sided tape (I used Scor-Tape) to the flap of the base piece and then adhere the house to the flap, so that it can fold up as you see here. 

Layers of ink - Winter House Easel Card Tutorial by Anna-Karin Evaldsson.

The sentiment was glued to a piece of the brown cardstock, with glimmery white paper underneath. It functions as a stopper for the easel, to hold it open.

Layers of ink - Winter House Easel Card Tutorial by Anna-Karin Evaldsson.

This is the way the card looks open and there is space for a handwritten message too.

Layers of ink - Winter House Easel Card by Anna-Karin Evaldsson.

The card folds flat and you can make it even flatter if you want too, by skipping the foam tape.

Layers of ink - Winter House Easel Card Tutorial by Anna-Karin Evaldsson. Glittery snow.

The colored dots you see here come from the Moon Dust Stickles. I added some of it to the glitter paper. The combination of glitter paper, Stickles, shiny sequins and the matte texture paste is nice and adds interest. You don't need to stick to one way of creating snow.

Layers of ink - Winter House Easel Card Tutorial by Anna-Karin Evaldsson.

If light comes from the side of the house, the windows look like they shine.


Layers of ink - Winter House Easel Card Tutorial by Anna-Karin Evaldsson.

I thought there was a little too much Latte ink on some of the windows and removed it with Alcohol Blending Solution.


Layers of ink - Winter House Easel Card Tutorial by Anna-Karin Evaldsson.

The Frosted Glitter Paper is beautiful and perfect for winter projects. It die cuts beautiful and doesn't shed any glitter at all. I saw that the snowman's nose fell off while I photographed the card. I will give him a new one.

Layers of ink - Winter House Easel Card Tutorial by Anna-Karin Evaldsson.


The door is left ajar to give a friendly and inviting look to the house.

Layers of ink - Winter House Easel Card Tutorial by Anna-Karin Evaldsson. Glittery snowmen.

I added tiny dots with a pen to the eyes of the snowmen, to make them look like the little pebbles we usually use as eyes. There is a left-over snow piece from the windows at the top of the hat.


Layers of ink - Winter House Easel Card Tutorial by Anna-Karin Evaldsson. Snowy entrance.

I like the little details, like the plank lines on the roof die cut. The number comes from a Clippings Sticker book.


Layers of ink - Winter House Easel Card Tutorial by Anna-Karin Evaldsson.

The little hearts were left-over from die cutting with the SSS Slimline Borders and Edges die.


Layers of ink - Winter House Easel Card Tutorial by Anna-Karin Evaldsson.

I hope you will join us this week in our Happy Holidays challenge. You have a chance to win a $25 gift voucher to do some fun shopping at Simon Says Stamp. You have until next Monday 8am Ohio time. 1pm UK time, 2 pm CET to join in.

Don't forget to follow Simon Says Stamp on Instagram, they post great stuff daily. 


Do you use Instagram? If so please add #sssmchallenge so we can see your entries there too.


Thank you so much for stopping by here today! 

Happy crafting!

Anna-Karin

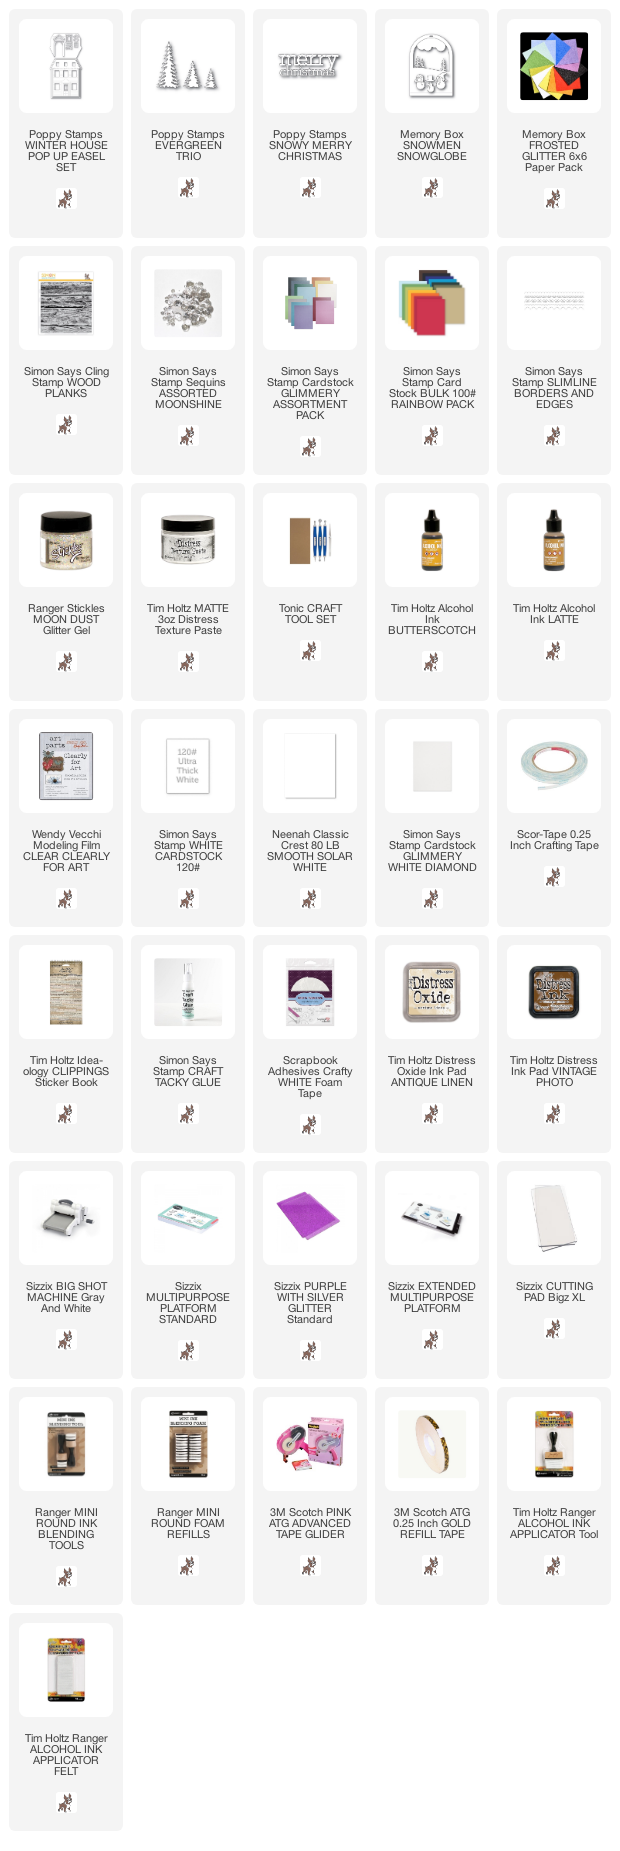
Supplies:

* Please note: the links are affiliate links, for which I receive a small percentage of sales generated by the link, at no extra cost to you.

Thursday, May 21, 2015

Fairy Tale Pop-Up Card

Hello friends! Today I am sharing a sweet fairy tale pop-up card on the Sizzix blog.

I had such fun making this sweet card, using the new Birthday Card Pop-Up set and Happy Birthday stamp/die set by Lori Whitlock. The Birthday Card set contains 16 great dies, pop-up base, a cupcake, a candle, a balloon, stars, a little pocket, the castle, a wand, a crown and more. You can combine them to make a large number of different cards. Children love pop-up cards, but the dies in the set can be used for other types of projects too. Prima’s Bedtime Story paper pad was a perfect fit for my card.

For more photos and info, head over to the Sizzix blog

Thank you for visiting my blog today!

Happy crafting!

Anna-Karin

Supplies:


Wednesday, December 4, 2013

Evergreen Tree Pop-Up Card

Hello everyone! Karen Burniston's December Designer challenge is to use any pop-up die from her Sizzix collection.
 
I used the fun Evergreen Tree pop-up die, which is great for creating a little scene on your card. These cards are so fun to receive, the recipient will always get a fun surprise when opening it.
 
I put a few pools of Distress Stain (Antique Linen, Evergreen Bough, Brushed Pewter) on my craft sheet, misted a piece of manila cardstock with water and pressed into the ink. The tree was die cut from the coloured paper and stamped with a Christmas text background stamp and Archival Watering Can ink. The edges were inked with Gathered Twigs and I added some red pearl baubles.
 
For the background I used the back of one of the papers from Tim Holtz French Industrial pad, which has a nice grey tone and a soft diamond pattern. The grey stamping was done with Watering Can ink and for the red I used Vermillion. Finally, I stamped a music stamp repeatedly with Evergreen Bough ink.
 
For a border, I embossed a piece of kraft-core cardstock in the Swirls folder, sanded and inked it. I also used some Tim Holtz trim.
 
Love this Santa stamp from Tim Holtz, it was stamped with Jet Black ink on Specialty Stamping paper and coloured with Distress Inks and a craft nib.
 
On the front there is a bigger version of the same Santa stamp, but this time stamped with Watering Can on the background paper. The border is the same as on the inside of the card.  

I die cut Noel first from red kraft-core, using the Noel pop-up insert die. Then it was die cut a second time from a left-over piece of inked and stamped manila cardstock, using the coordinating Noel Sizzlits die. The insert die is slightly larger, forming a great mat.

Thank you so much for stopping by!

Happy Christmas Crafting!

Anna-Karin

Supplies:
Surfaces: Tim Holtz Idea-ology French Industrial Paper Stash; Ranger: Manila Cardstock, Specialty Stamping Paper; Tim Holtz Core'dinations Kraft-Core cardstock
Dies: Sizzix: Evergreen Tree 3-D Pop-Up, Noel 3-D Phrase Pop-Up, Noel Set
Embossing folder: Sizzix: Trellis & Swirls set
Stamps: Stampers Anonyous Tim Holtz: Mini Holidays 5, Old Fashioned Christmas, Seasonal Catalog 1, Mini Holidays 4, Mini Holidays
Ink: Ranger Archival Ink: Jet Black, Vermillion, Watering Can; Distress Ink: Gathered Twigs, Evergreen Bough, Antique Linen, Barn Door, Iced Spruce
Stain: Distress Stain: Antique Linen, Evergreen Bough, Brushed Pewter
Embellishments: Tim Holtz Idea-ology: Red & Cream Trimmings, Linen Ribbon; pearls

Tuesday, October 15, 2013

Clear Photo Pop-Up card

Hi everyone! Today I have a fun pop-up to share using Karen Burniston's new Sizzix Snippets dies. This month Karen challenged her group of designers to do projects with clear elements, something that I love.
 
Clear Photo Pop-Up - Layers of ink
I love using cut out photos on pop-ups, it fits so well with the surprise element. My son loves these pop-up cards featuring himself in different scenes and I will probably assemble them all in a mini-book or so some time. You can find more examples here: Reading Chair tutorial, Floating Floor Christmas tutorial, Autumn Pop-Up Tutorial, and Birthday Card. In this card, he is walking around in a bright and happy forest discovering treasures of nature. For more examples of clear pop-ups check out these: Clear Butterfly and A little Birdie.

I used the 3-D Multi-Tier pop 'n cuts insert die for the pop-up, placed it in the horizontal base die and die cut from sturdy acetate. I was first planning to place it the other way around, with the tall part against the back of the card. Then I just happened to place the pop-up this way around and I love how it turned out. This is such a versatile die, love it! With this die, you can place items at different distance to each other. There are two small folds, the larger rectangular panel and two side pieces. So many fun alternatives!

The photo is of my son preparing to step on a water balloon, it looks almost as if he is stepping up on something, so I placed it so that he is stepping up on the first pop-up 'shelf'.

On the first pop-up, I placed a stone cut from Core'dinations paper, a sleeping fox and some branches.

I stamped the acetate background with a swirl stamp and Picket Fence Distress Paint (always clean your stamp immediately after using it with paint). The background is watercolour cardstock coloured with Distress Paints. I smeared bands of Distress Paint on my craft sheet: Salty Ocean, Broken China, Spiced Marmalade, Wild Honey and Mustard Seed, planning them so that the blue covered the top half and the orange and yellows the lower half of the paper. I misted them with water and pressed the paper into the paint. When dry, I stamped the background with Hero Arts stamps, using both Archival Inks and paint, for texture and a tone-on-tone effect.

The trees were die cut from Simon Says Stamp's fabulous Birch Wood Veneer paper, which I had first glued to a scrap piece of cardstock. I planned to ink them green, but changed my mind and left them the colour of the wood, just stamping them with a script stamp.

I grounded the trees with some more Core'dinations rocks.

On the other side of the pop-up, I placed a larger rock, otherwise it looked as if the small tree and the fox were floating in the air. 

This is not a necessary photo, but I like the reflection of the fox in the acetate and the shadow of the fox between the trees.

The foxes and balloon were watercoloured with Distress Inks.

This is the front part of the pop-up. I die cut a tag from the wood paper with the Gift Card Holder set. Love this size tag. I stamped a sentiment on it with Stazon ink. The border was die cut from red Core'dinations kraft-core cardstock with the Chevron Border die. As you can see, the acetate is narrower than the card base and I didn't place it in the centre of the card, this was partly an accident, since I decided on a broader card after having die cut the acetate, so that the large tree would fit.

I placed alphabet stickers and a little piece of tissue tape on the rectangular platform, in front of the fox. The text looks cool floating in the air.
 
The front repeats the techniques and details from the inside. I almost always do the inside first on pop-up cards. The background was done in the same way with Distress Paints and I added a strip of stamped acetate too, as well as the same border. All the tiny staples used to attach the acetate pop-up to the card base are hidden by embellishments on the front.

The sentiment was stamped on a left-over strip of wood paper.

Here's another view from the top, so that you can better see the distance between the three layers of pop-ups.
 
Thank you so much for looking!

Happy crafting!

Anna-Karin

Supplies:
Dies: Sizzix: 3-D Multi-Tier, Horizontal A2 Card Base Die, Gift Card Holder, Chevron Border, Pine Tree, Mini Pine Tree & Holly, Branch Tree
Surfaces: Daler & Rowney Watercolour paper; Tim Holtz Core'dinations Colour-Core cardstock; Simon Says Stamp Birch Wood Veneer paper; acetate
Stamps: Hero Arts: La Lettre K5344, Envelope Pattern S5507, Magical Background CG211, Past Times AC007, Texture and Shape LP283, Paint Print K5788, Painted Circle E5784, Printer's Lowercase LL762, Each Moment F5579, Sleepy Fox E5466, Fox E5465
Ink: Ranger Archival Ink: Jet Black, Venetian Orange, Monarch Orange, French Ultramarine; Distress Ink: Rusty Hinge, Antique Linen, Fired Brick; Stazon Jet Black
Paint: Distress Paint: Salty Ocean, Broken China, Spiced Marmalade, Wild Honey, Mustard Seed, Picket Fence
Embellishments: Tim Holtz Idea-ology: Terminology tissue tape; Studio Calico wood veneer: Birds, Mini Hearts, Arrows; Basic Grey letter stickers